Back in the Apr. '12 issue of R&C we demonstrated a time-tested technique while woodgraining the dash rail and garnish moldings of our friend Sam Strube's '30 Model A coupe. On a hobbyist level, success was achieved in Strube's residential garage, using the latex-gloved hands of his own mother who'd actually done the job once before—back in the '70s. Around that same period, I was doing a fair amount of 'graining myself, and in fact I'd even taught it once as part of a seminar at the old hometown paint store. Strube knew that, so I was invited in to bring his mom back up to speed. Before the refresher course was completed, however, she took off like a fish—in familiar water—without looking back.
Sometimes we've got to go with what we know. Since my own knowledge of woodgraining is limited, that night in Strube's garage was one of those times. For the sake of simplicity, the homegrown 'grain job was done as we did in the '70s, with a special blend of black 'n' brown 1 Shot lettering enamel. The 1 Shot was applied over a lighter shade of brown acrylic lacquer base, using wadded cheesecloth to create the desired effect. While such a simplified approach is inexpensive and easy for the first-time woodgrainer, it's not commonly embraced by the better pros today.
Here in Escondido, California, in the paint department of Hot Rods & Custom Stuff (HR&CS), we have an opportunity to observe a more contemporary type of woodgraining job, step-by-step and start-to-finish in a very professional environment. This time the canvas is comprised of a stock dash, custom sub-dash, and garnish moldings belonging to a wild, under-construction '40 Pontiac woodie. HR&CS painter, Andy, will demonstrate his own technique, utilizing the latest in California-compliant waterborne technology from PPG. As we'll attempt to illustrate in the following pictures, there's more than one way to woodgrain a dash. And this time instead of teaching, I'll be learning—perhaps right along with you.
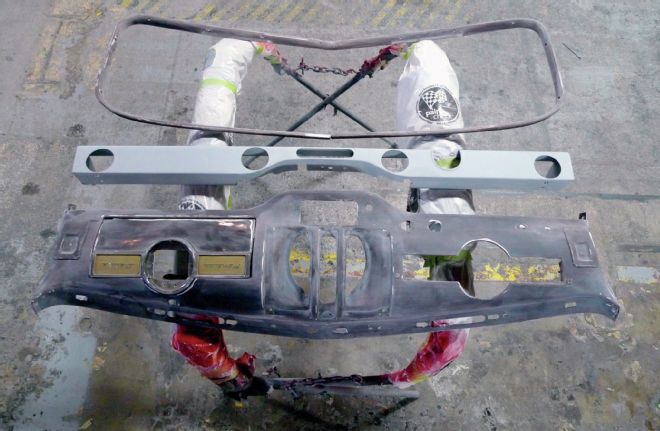
1. So, here are the parts that we'll be woodgraining. Preparation varies from job to job, but the steps are essentially the same as they'd be for the car's outer body panels. At this stage, these parts are ready for spray booth setup and only a chemical cleaning away from being ready for non-sanding sealer.
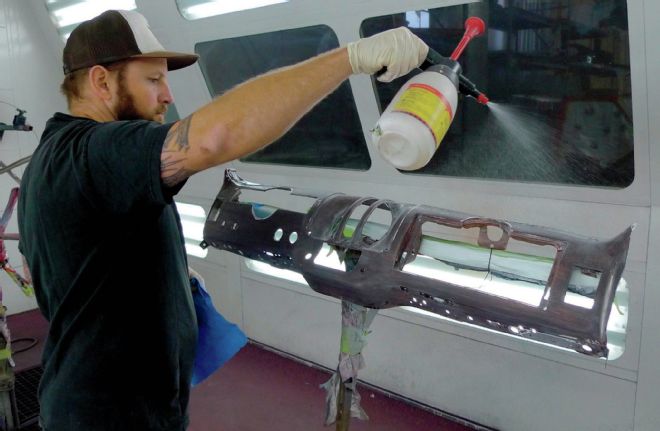
2. With the dash parts and garnish moldings now secured to stands in HR&CS' state-of-the-art Garmat downdraft spray booth, the exhaust fan is running as a California-compliant pump sprayer delivers PPG's DX330 grease and wax remover. Before it can evaporate, it's wiped dry with surgically clean, disposable paper toweling.
3. Next, with clean, dry, compressed air and a fresh tack rag, Andy gives the soon-to-be sealed parts a final once-over before mixing and suiting-up to spray.

4. As we've hinted, this will be different than the previous garage woodgrain job, with no lacquer products and no "glub system" measurements here. Andy is PPG certified. For the job at hand, his sealer of choice is PPG's Envirobase ECS21, mixing is in exact accordance with its manufacturer's recommendations.
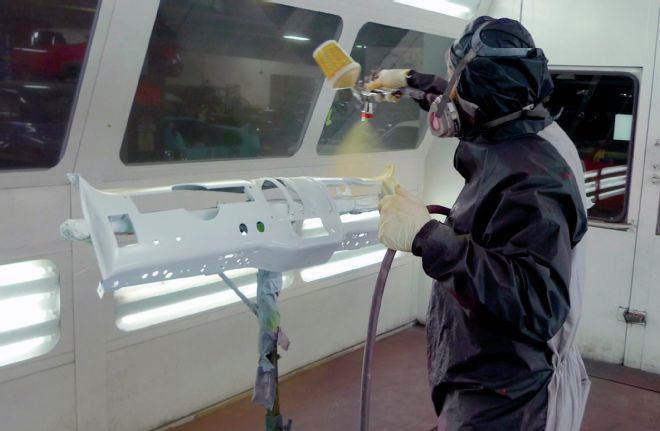
5. This type of sealer comes in different colors. Andy has chosen white for easy coverage by the upcoming light brown base. As we know from previous R&C tech, waterborne materials call for a somewhat different method of spray application, and here two coats are applied. As a serious professional, Andy favors Iwata spray equipment.
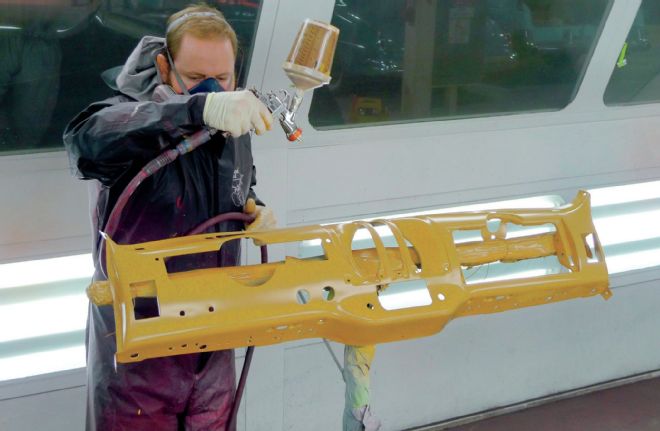
6. Next, while allowing sufficient flash time for the freshly applied sealer, it's time to mix a light brown basecoat. Using the woodie's tailgate as a guide, Andy plans to match the lightest tone.
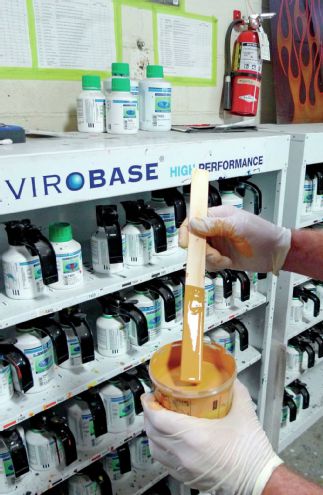
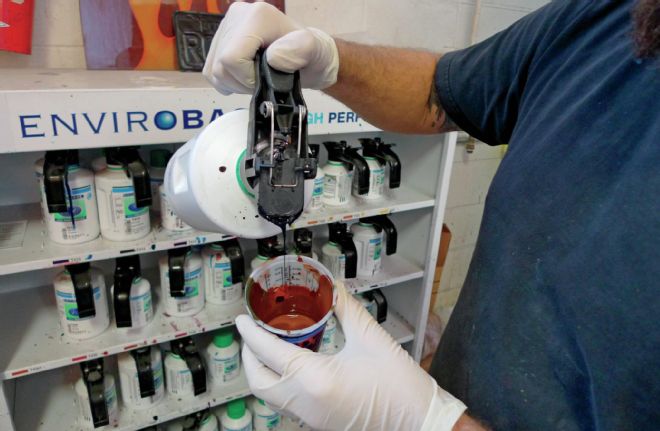
7. Here at the mixing bank, we have access to the entire range of PPG's waterborne Envirobase toners. Even so, an eye for color is required for a quick color match without waste—and Andy's got it.
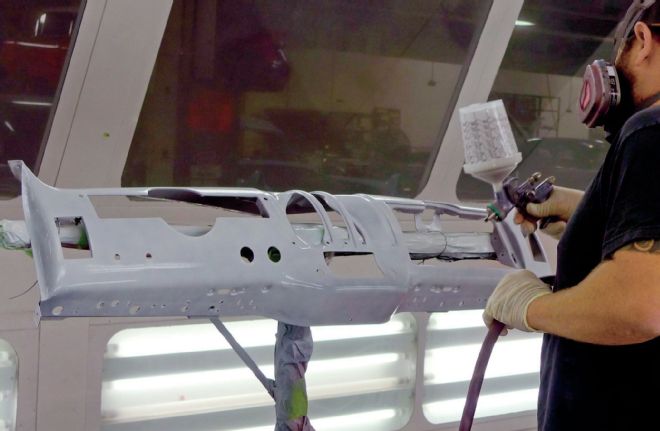
8. My, what a big pattern you have, Andy. As the first of four coats of base is applied, the painter in me is impressed with the width of the Iwata's fan. Although this adjustment may be overkill for small parts, it makes a nice option for larger panels and/or complete paintjobs. I might have to test-drive an Iwata one day.
9. After this last color coat is applied, Andy takes a second time out for routine 'gun maintenance. Waterborne basecoats require adequate airflow, and oven baking also helps to speed the flash time along.
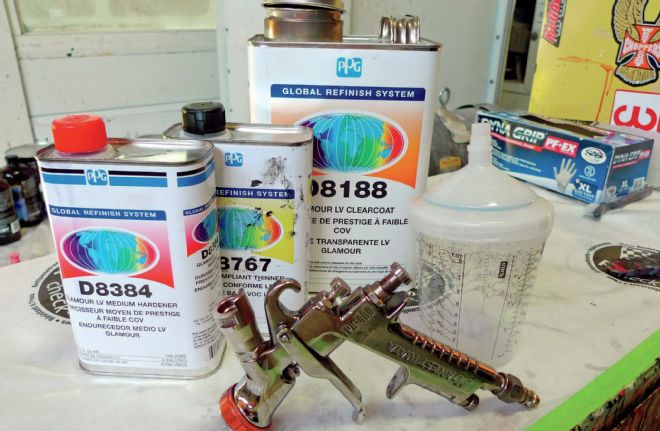
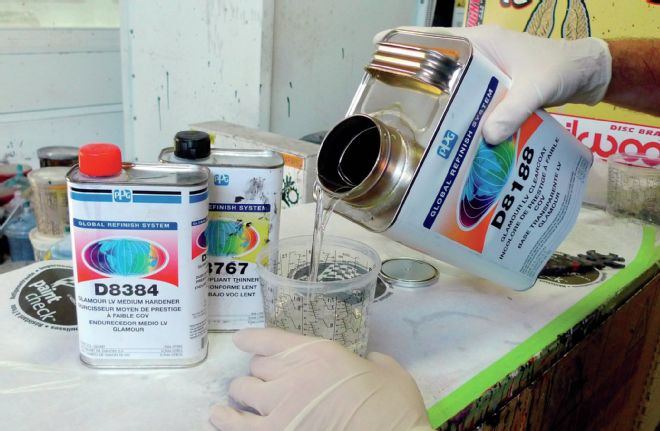
10. Here's our chance, so let's take a good look at this factory hot rod. This is an Iwata LPH400 gravity-feed HVLP. Just behind it we see the materials that will be used next. For this particular job, Andy has opted for PPG's D8188 Glamour LV clearcoat, with thinner and hardener chosen to match this day's weather conditions.
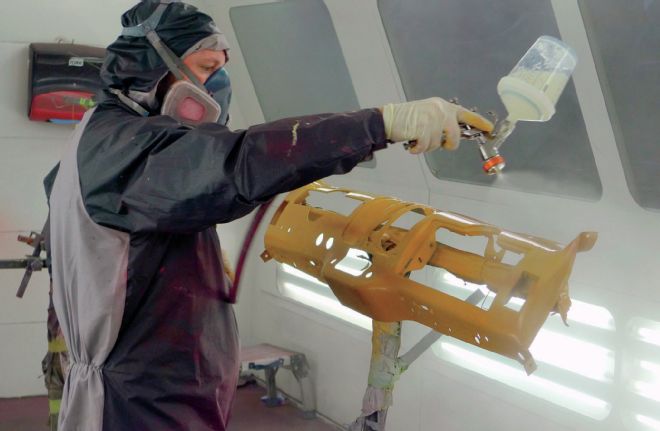
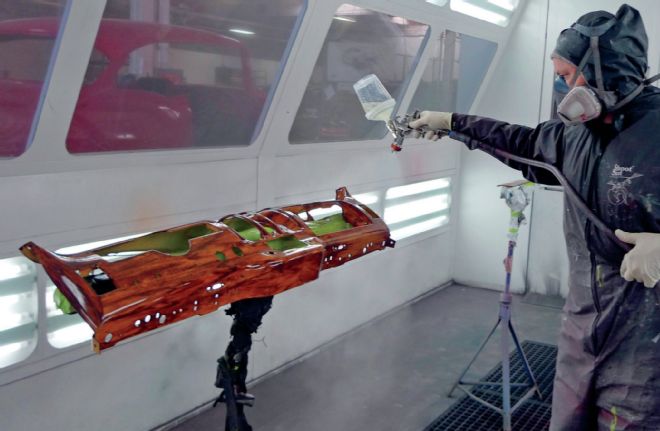
11. Compared to the previously applied sealer and basecoat, this clear is particularly sticky, so a hooded Shoot Suit is a must—and I still can't get over the evenness and width of that pattern! That's a nice 'gun right there.
12. To this point there's been no sanding between sealer, basecoat, and clear, as these PPG products make up a chemical-bond system. The catalyzed clearcoat will protect the waterborne base from reflowing during the woodgraining process, but before 'graining, that clear must be sanded. For the odd shapes here, 3M Scotch-Brite pads are helpful. The 3M Scotch-Brite pads used are PN 07447 and PN 02602, which are equivalent to 320- and 500-grit.
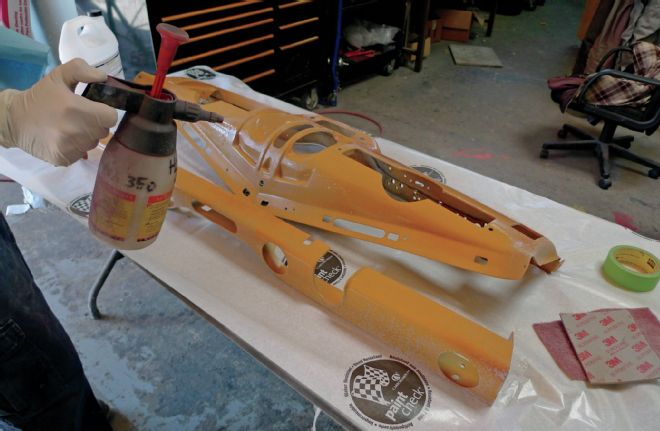
13. With sanding now completed, Andy chooses PPG's SWX350 waterborne pre-cleaner for the final cleanup before 'graining. Wiping dry before evaporation, the steps are the same as those we witnessed earlier in the paintbooth with DX330.
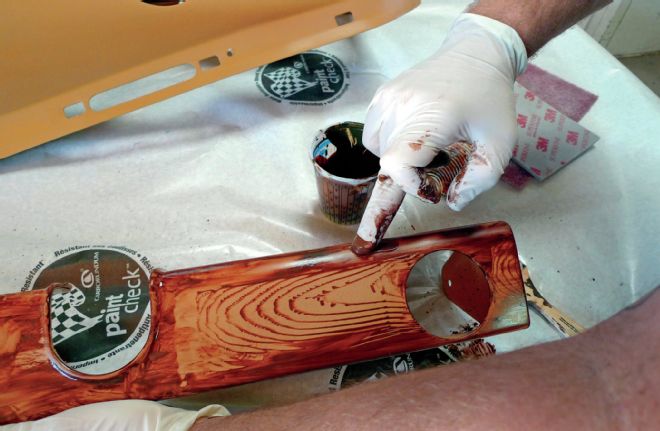
14. Back at the Envirobase mixing bank, Andy begins matching the darkest tone of the old woodie's tailgate. This darker shade of brown basecoat will be used to create the ‘grain.
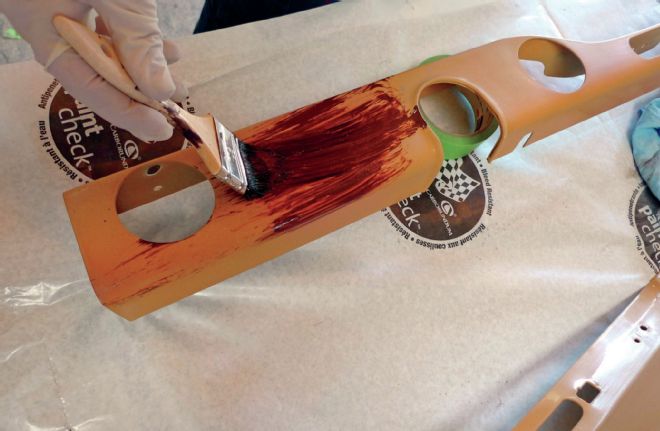
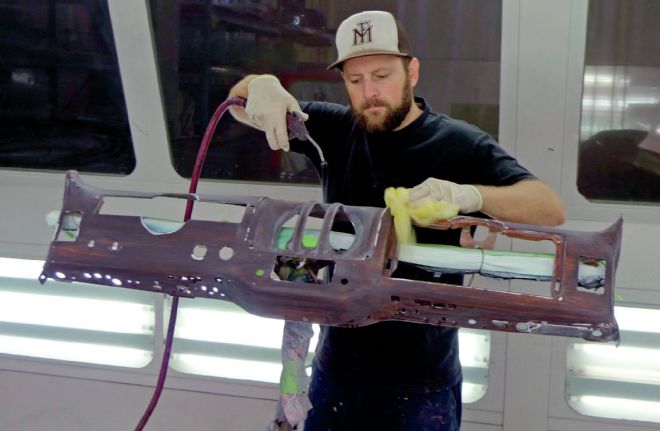
15. To begin, the dark Envirobase basecoat is mixed in the same proportions as it would be for a typical paintjob. The hardware store brush could be used as a 'graining tool, but in this instance it's only the delivery vehicle.
16. With a spiral-like rubber footprint, this "rocker" is a commonly used tool for woodgraining, but I personally have always believed that it's only effective on large enough, flat enough surfaces. Here on this narrow flat spot, it could be used to produce the beginnings of a heart-grain effect.
17. Woodgraining tools can be fashioned from items such as cheesecloth, sponges, brushes, cotton swabs, feathers, and so on. In order to continue his heart-grain through this rounded area, Andy's latex-gloved index finger now doubles as a woodgraining tool.
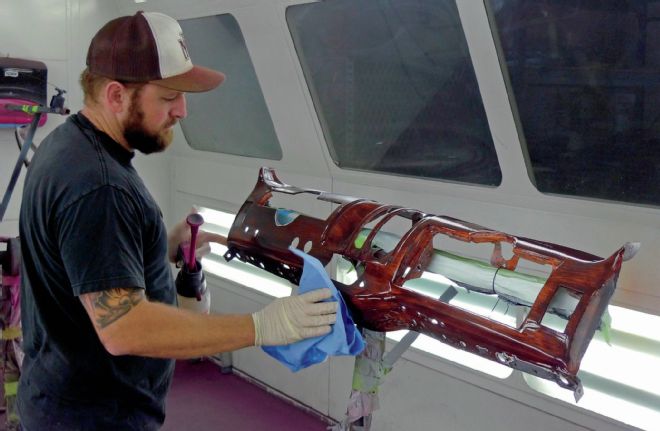
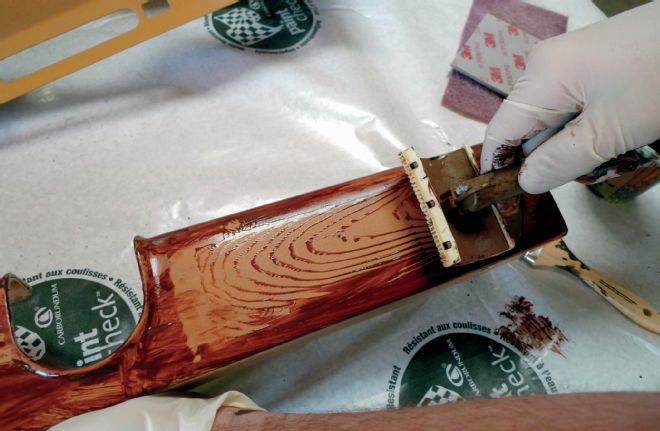
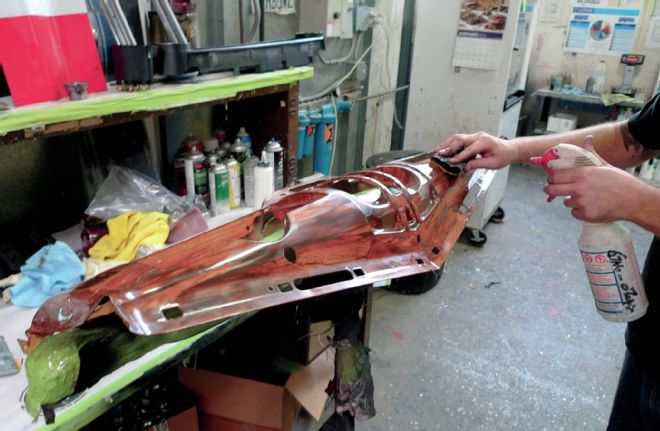
18. Since the '40 Pontiac's wooden body has many visible joints, Andy intends to roll with the theme. These strips of 3M masking tape will help him create the appearance of wooden joints. Once again, the brush is only an applicator.

19. In still air, Envirobase flash-time is long enough to make it a natural for woodgraining. Even as it dries, it will willingly reflow with T595 high-temp waterborne thinner so working time can be extended—and if you're not happy with your woodgrain, it can be easily wiped away for a second try.

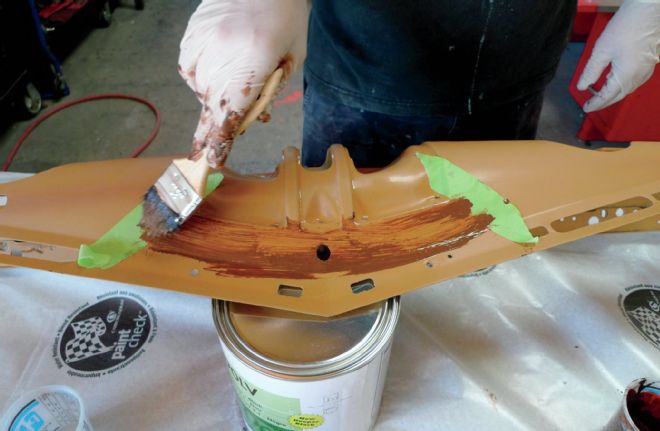
20. Back in the spray booth and ready for a final application of clear, here's an up-close look at the finished woodgrain. Andy has successfully used the rocker tool in places I thought it wouldn't work at all, and aside from fingers and the palm of his hand, it was the only tool used to create this 'grain.
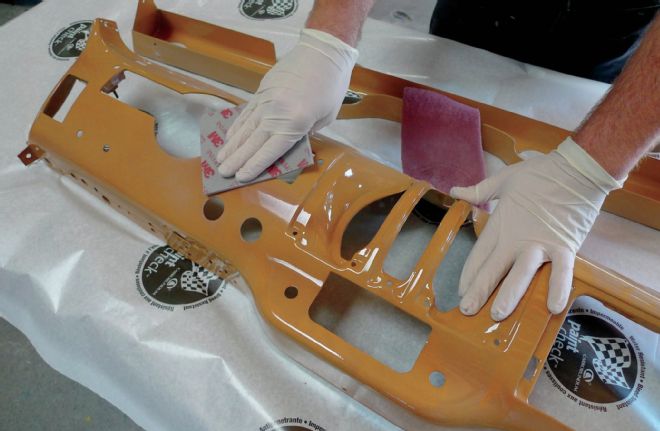
21. Andy will be using the exact same PPG clear as before. His goal is to build just enough film thickness to color-sand away any dirt and all texture before buffing, polishing, and so on.
22. According to Andy, three coats of clear should do the trick, and I for one am wowed by Iwata. Back when I used to paint on a near-daily basis, nobody had 'guns like that. Today Eastwood carries them; so does Summit—and right about now, I'm tempted.
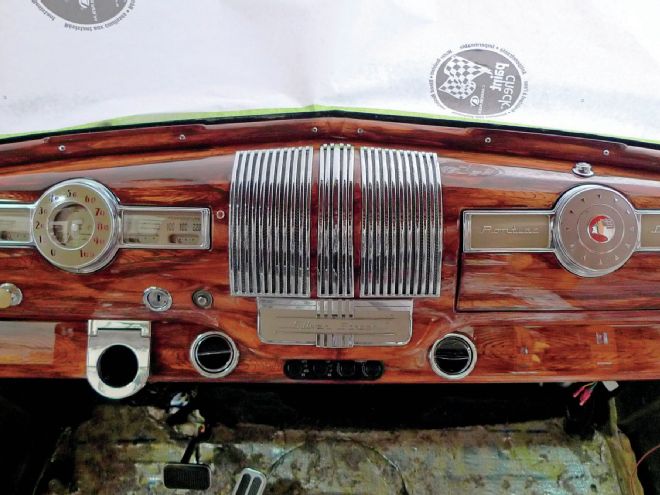
23. Using a soft, flexible hand pad wrapped first in 1,000-, followed by 1,500-grit wet 'n' dry sandpaper with a bit of clean water as a lubricant, Andy begins color-sanding the freshly cured clear. When texture is uniformly leveled, he'll move on to buff and polish as necessary.
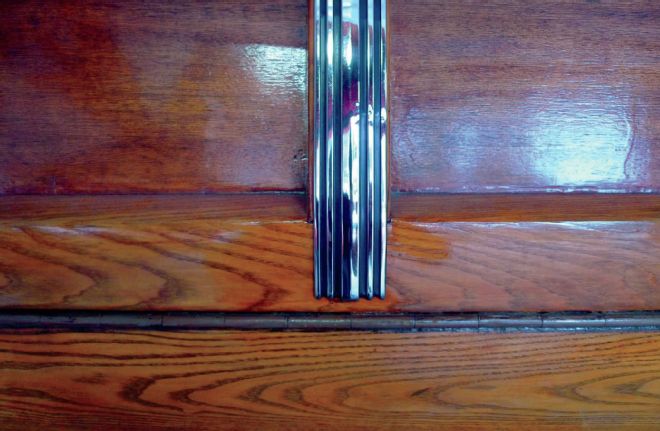
24. We've covered buffing and polishing in detail in fairly recent R&C tech. Since this story is more about woodgraining than buffing and polishing anyway, we'll not expound these steps. Just know that standard procedures were followed here, just as they'd be for any top-quality complete paintjob.
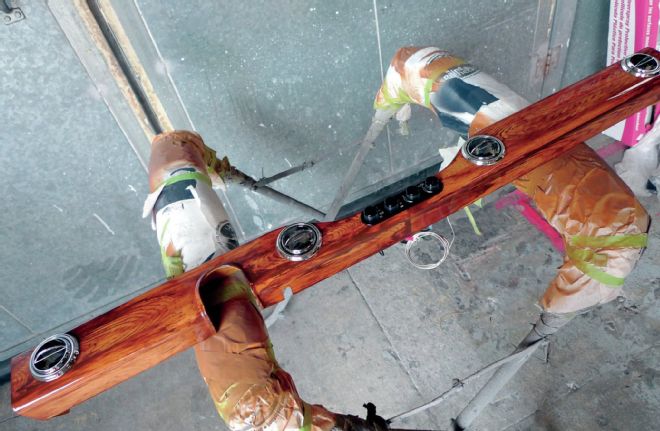
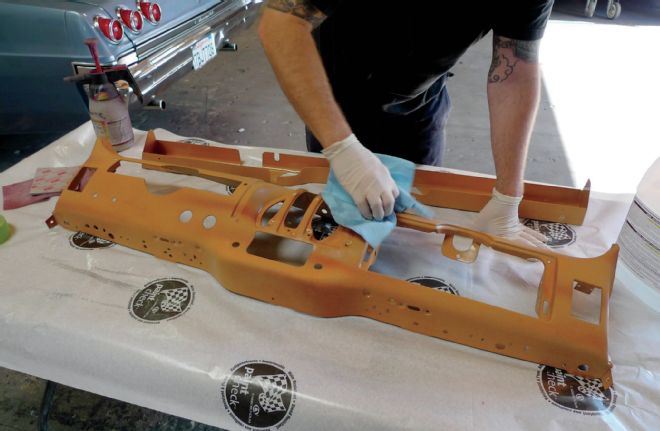
25. It's amazing what a little assembly work will do for contrast. As shiny bits from Vintage Air assume their positions on the old woodie's custom sub-dash, Andy's woodgrain is indeed waking up.
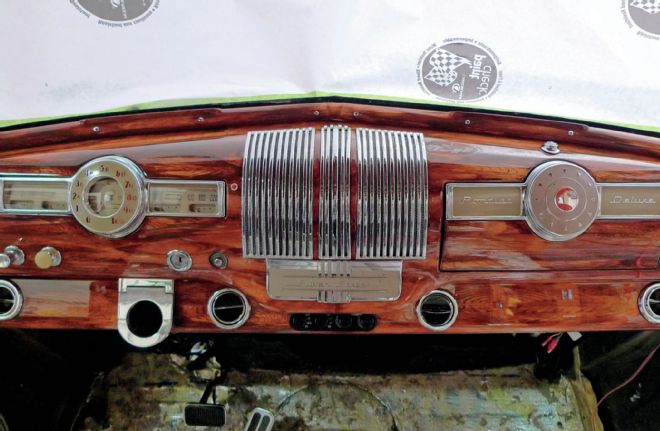
26. New glass and interior trim will contribute to complete this picture, but we can kind of get the idea—that's some wild woodgrain! Let's keep in mind that we've just observed the professional approach, and the home-grown woodgrain method from April 2012 still has its place. With those things said; there's more than one way to woodgrain a dash.