We love drivers—cars that are nice but not so nice that their owners are afraid to use them. Drivers are cars that are enjoyed as they were meant to be, going down the road under their own power, not riding in a trailer. It's not unusual for drivers to be works in progress and receive improvements that don't take them off the road for an extended length of time.
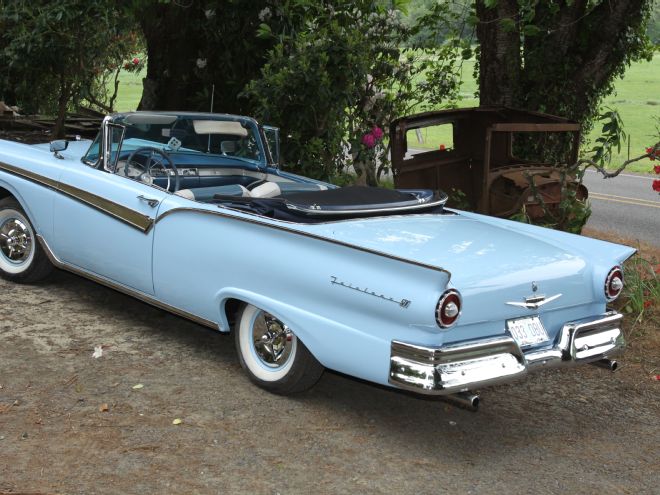
The '57 Ford Fairlane 500 convertible shown here, owned by John Machi, is a prime example of a good, solid driver undergoing a facelift. Like many cars of the era some of the repairs made to previously damaged areas of the body were sketchy at best, and there was rust peaking out in a few places, so John took the ragtop to Jake Brazille of Jake's Place for the necessary corrective action.
After assessing its needs, Brazille turned to Alexander Erdy's Engineering & Manufacturing Services (EMS) for help. EMS produces a variety of replacement and patch panels for GM and Ford cars. (They also offer universal parts like braces, brackets, floors, spare tirewells, transmissions, and driveshaft tunnels.) All EMS sheetmetal components are designed and produced in the United States so they fit like they should and are made out of quality steel the proper thickness. After fighting with poor-fitting patch panels made out of thin material that was thin and difficult to weld, Brazille had nothing but positive things to say about the EMS parts he installed.
The first step in making the needed repairs to the '57 was the removal and replacement of the rusted tailpan. This was done so the new quarter-panels would have something to attach to. A ring of spot welds around the gas filler were removed with an Eastwood spot weld cutter, as were those holding the tailpan to the quarter-panels. The welds securing the tailpan to the driprail around the trunklid were cut, and then the new panel was set in place for a test-fit. Satisfied with its fit and alignment, Brazille tack-welded it to the driprail and the gas filler flange and put the striker reinforcement plate in place and tack-welded it.
Using the new parts for templates both quarter-panels were marked and the lower portions cut away. The next step was a test-fit of the replacement panels and that led to an interesting discover. At some point in the Fairlane's past the right rear quarter-panel had been damaged and repaired—nothing surprising with a car this age. However, when the fender was fixed the wrong replacement parts were used and the rear of the opening was too short. We had looked at the car several times and never noticed. As an old bodyman once remarked about such things, "It's no big deal 'cause you can't look at both sides of the car at the same time."
With the lower rear portions of the body removed Brazille replaced the rear inner quarter-panels as the originals were in rough shape; the new trunk floor braces were also installed. Next all the joints that would be subjected to the elements were treated to a layer of Eastwood seam sealer to make them weather tight.
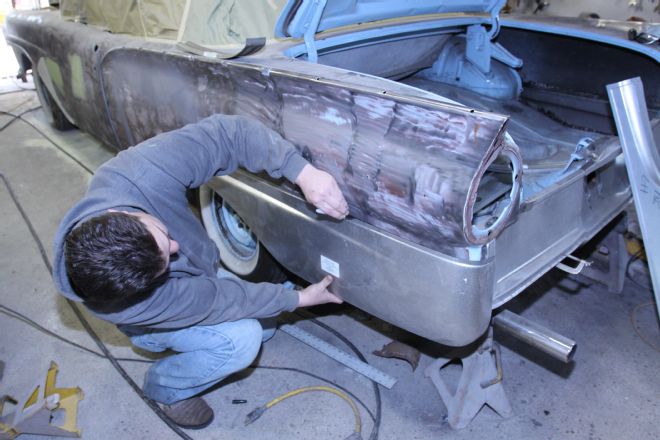
Starting with the rear sections first, the replacement quarter-panels were installed. The upper lips were slipped behind the remaining upper sections of the body and the lower flanges were clamped to the factory flange on the rockers. With the front sections positioned both sides were measured to ensure they were the same (even though they can't be seen at the same time, Brazille takes pride in his work). Happy with the fit Brazille began the process of welding all the pieces in place.
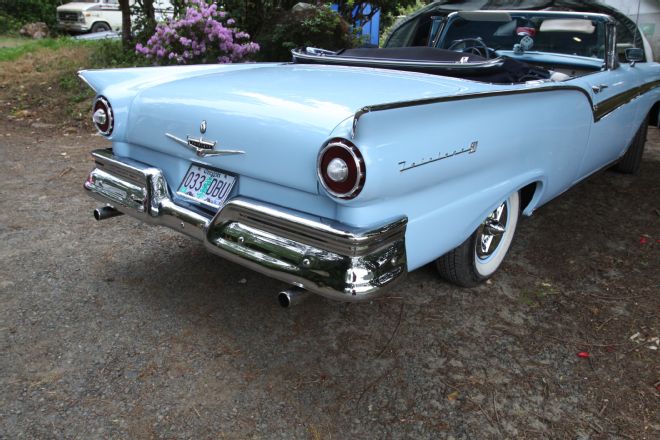
Once all the welding and grinding was finished Brazille turned his attention to completing what bodywork remained and spraying a fresh coat of paint. With a couple of poorly done repairs corrected, new sheetmetal in place where needed, and a fresh coat of blue pain, the Fairlane was finished. Now it's ready to drive.

With new lower quarter-panels and a tailpan from EMS, and fresh paint by Jake Brazille of Jake's Place in Florence, OR, this '57 Ford looks good as new.
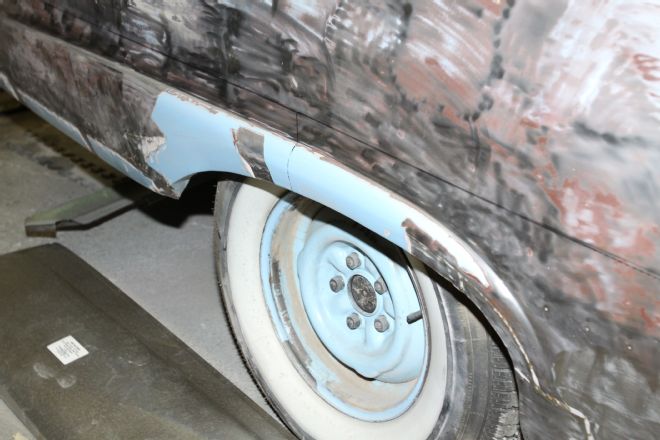
At some point in the Ford's past the quarter-panels were bashed in, beat back to roughly the right shape, and then treated to a hefty dose of plastic filler.
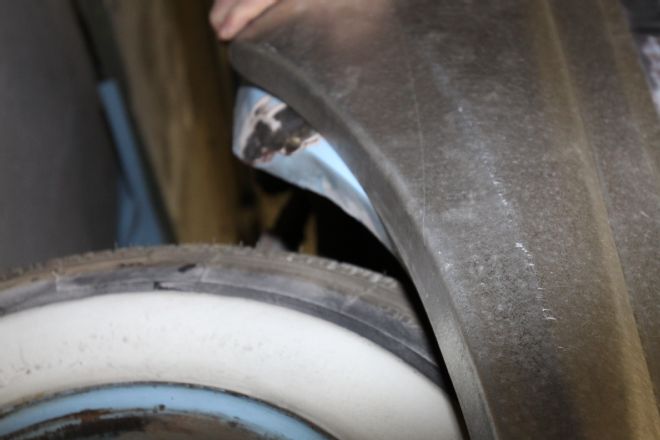
A test-fit of the new EMS lower rear quarter-panel revealed that the previous repair had been made with incorrect parts—the rear of the opening was the wrong shape.
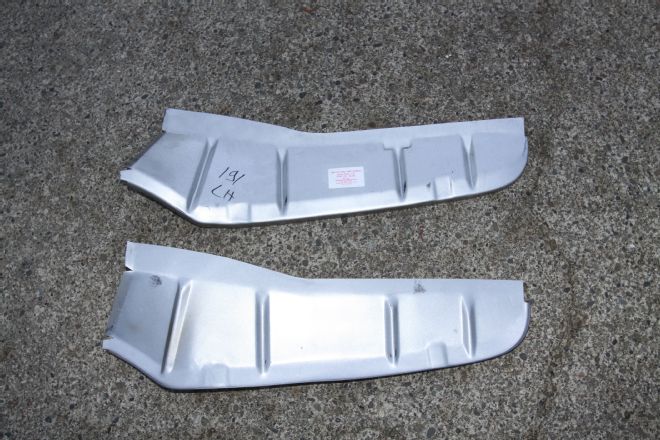
EMS supplied front and rear lower quarter-panels for both sides of the Ford. They are die-stamped from 18-gauge steel and have all the proper contours and body lines.
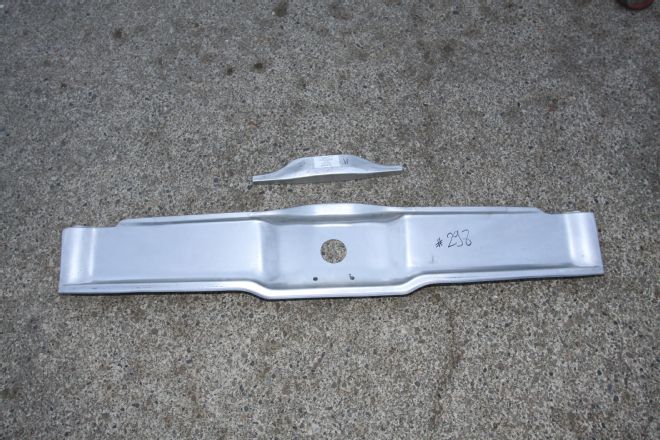
To solve the common problem of rust-ravaged tailpans, EMS offers this perfectly formed stamped steel replacement. The upper latch reinforcement plate is also available.
Real problem solvers from EMS are these '57-58 Ford trunk floor replacement sections. They fit between the inner quarter-panel and trunk floor and extend from the wheelwell to the taillight panel.
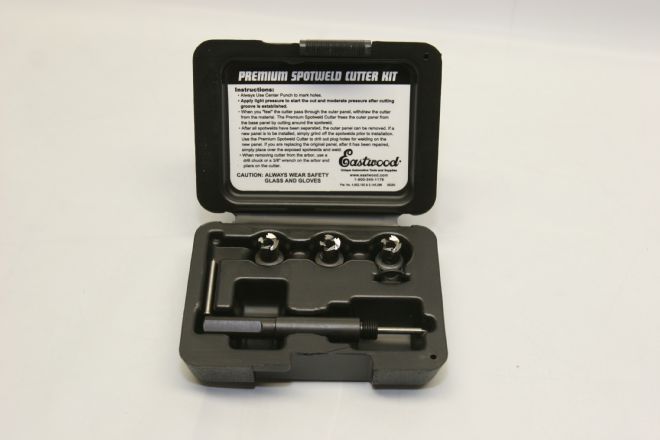
When replacing body panels there will be many spot-welds to remove—the easiest way to do that is with an Eastwood spot-weld cutter kit.
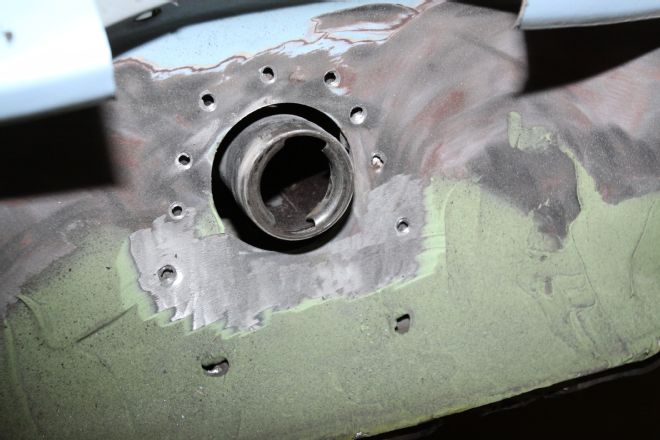
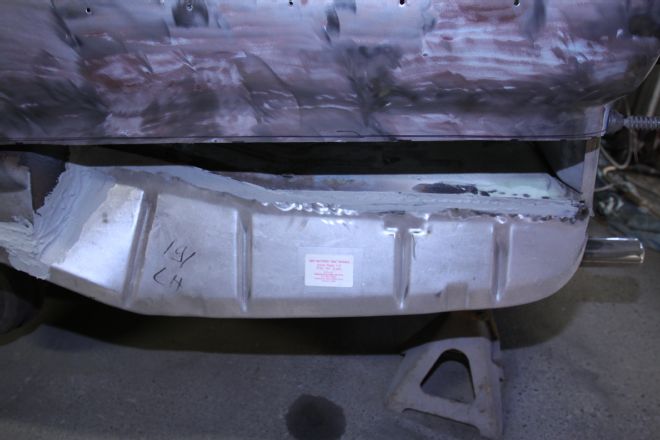
Removing the tailpan required cutting the spot-welds around the fuel filler. There were more welds to deal with at the edge of the trunk opening and at the quarter-panel flanges.
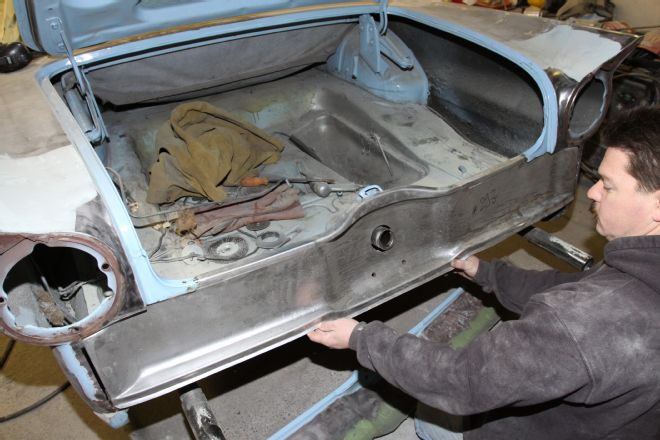
A test-fit confirmed the tailpan fit properly. Holes were drilled for new spot-welds around the fuel filler and solid welds were made at the trunk opening joints. Once in place the new quarters will be welded to the tailpan.

With the tailpan secured, the latch reinforcement plate was installed.
Parts List
Tailpan, PN 298
This fits all '57-58 Fords (except wagons, retractables, and Rancheros). It goes below the trunklid and between the taillights and includes the weatherstrip channel.
Upper Striker Cap Reinforcement, PN 304
Welded to the tailpan to provide strength to the striker area of the tailpan, it also holds the license plate light. Hard to salvage so EMS made a new one. It fits 300, Custom 300, and 500 series, except wagons, retractables, and Rancheros.
Trunk Floor Brace, PN 329
This fits behind the rear wheeltubs on the far left and right side of the trunk floor.
Die-stamped from 16-gauge steel it fits both '57 and '58 Custom, Custom 300, and 500 series.
Lower Front Quarter-Panel, PN 186 (specify left or right)
These lower front quarter-panels fit '57 and '58 Ford 500s. They extend from the rear door post to the center of the rear wheel opening, include all the steps into the rear door post area, and roll under the body to the original weld seam. At the top they are flanged to slide under the existing upper panels. Custom and Custom 300 series use PN 179.
Lower Rear
Quarter-Panel, PN 185 (specify left or right)
Extending from the center of the wheel opening to the original seam below the taillight, these panels roll under the body to the factory weld seam and are stepped to fit under the upper portion of the quarter-panel. These panels fit all 500s (retractables need minor modification; call the factory for details). Custom and Custom 300 use PN 178.
Inner Rear Quarter-Panel, PN 190 and 192 (specify left or right)
These fit behind the outer rear quarter-panel and extend from the wheeltub to the taillight panel on 500 series '57 and '58 Fords. The inner panels attach to the bottom edge of the rear quarter-panel and the trunk floor. These rear inner quarters are stamped from heavy 18-gauge steel and include the properly formed strengthening ribs for durability. For 300 and Custom 300 series, PNs 190 and 192 are used.
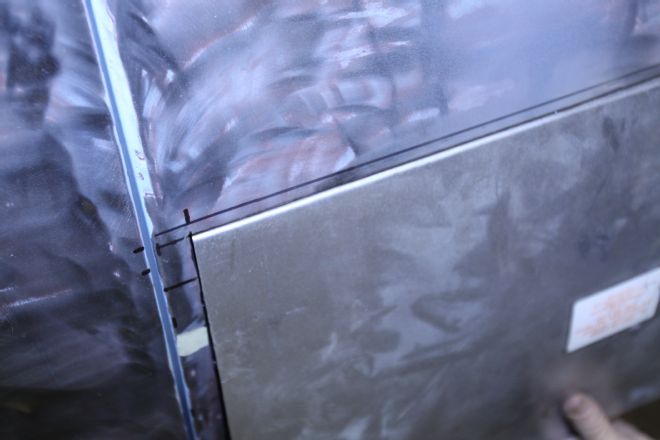
The replacement quarter-panels were held in place to mark the body for cutting.
To accommodate the width of the flanges, the cut lines were moved down the width of the step in the replacement panels. The sections to be removed were then severed with a cut-off wheel.
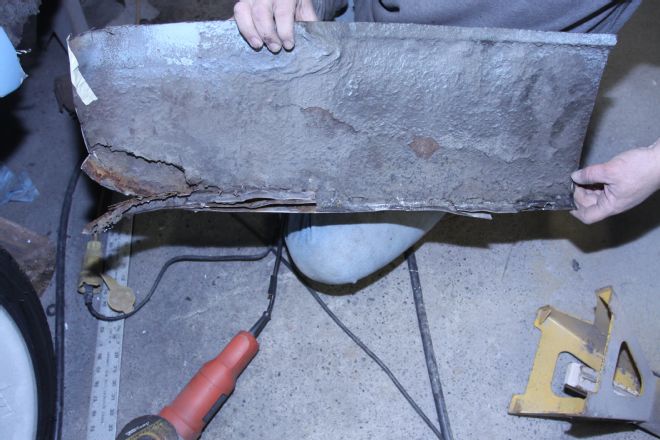
Previous repairs had been made to rust in the left quarter-panel by laying a patch over the top of the rotted section and then covering the backside with undercoating. Not the textbook method.
New inner quarter-panels were installed. They connect the outer quarter-panels to the trunk floor. All the joints subjected to weather were given a liberal dose of Eastwood's seam sealer.
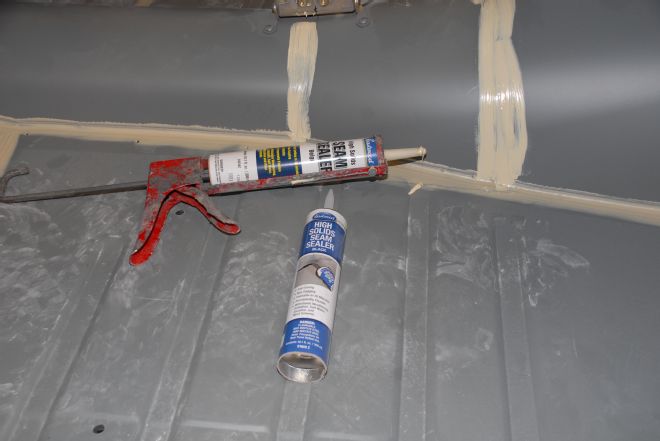
Eastwood's seam sealer cures quickly, can be painted, and will prevent moisture from finding its way inside the body.
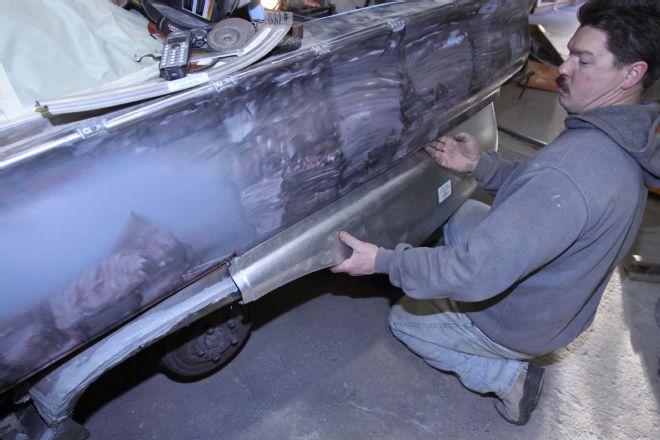
Brazille slips the EMS rear quarter-panel in place—the flange at the top slips behind the original upper portion. Thanks to the stiffness of both pieces alignment is automatic.
Here the flange on the EMS replacement panel can be seen.
With the panel slipped up into place there is a perfect gap for welding.
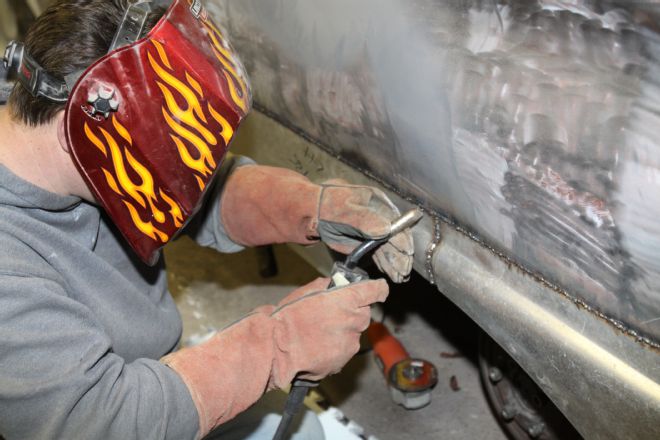
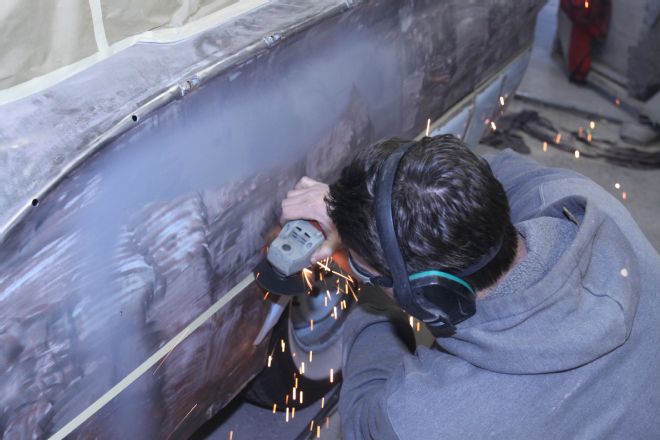
Welding began with widely spaced tacks. Brazille skipped around the panels to prevent warping the quarters.

Once the welding was completed the beads were ground flat. Again, Brazille worked slowly to prevent any distortion.
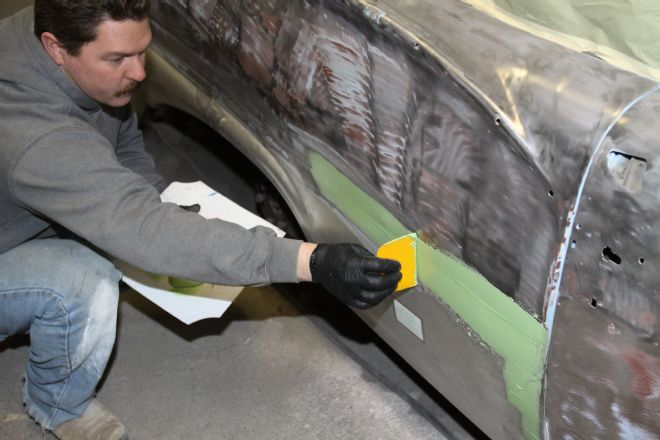
Brazille applied a thin coat of filler to the weld joint and the surrounding area.
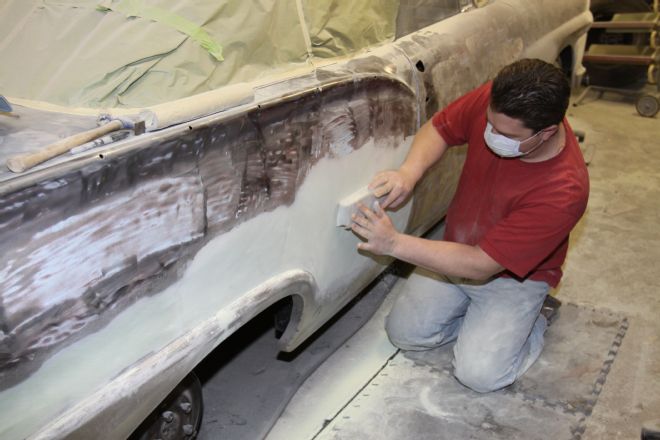
Once the filler is set the quarter-panels were block-sanded perfectly smooth.
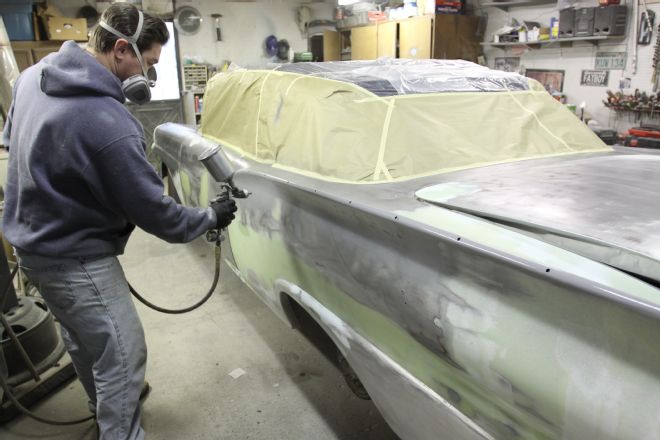
The repaired areas were coated with primer surfacer and blocked repeatedly. With the rest of the bodywork completed the entire car was given the same treatment.
Here's the '57, repaired, repainted, and ready for more roadwork.