We all know how much fun it can be laying on our backs working under a dash, and if you've ever had a car with a full rollcage, you know that same job can be almost impossible. Being over 6 feet tall, just being in my 1929 roadster pickup race car is claustrophobic, and as for working under the dash? Forget about it!
It was for that reason that I made the dashboard removable, using 1/4-turn fasteners, but as the engine management system will mount behind the dash, and the fuse panel is behind there too, I got to thinking that some easier way of access might be beneficial, especially if I should need to get to either with limited time between runs.
The simplest answer would be to make the top of the cowl removable, but that's easier said than done. I've seen 'em hinged before too, but again, a lot of work. So I elected to make a section of the Brookville-sourced cowl top removable, using those same 1/4-turn fasteners that hold the dash and bed tonneau in place. Speedway Motors sells the fasteners, springs, and rivets, while everything else would just be my labor.
Speaking to Jeb Scolman of Jeb's Metal & Speed, he advised against trying to put the cowl top in a bead roller to form the "step" I required, as it would warp the panel to the point it would need excessive straightening, and advised me to cut the section out, then weld a flange under the remaining sheetmetal, to allow the cover to sit flush with the cowl top. Taking this idea one step farther, I decided to form stepped panels and butt weld them to the cowl top.
So that's what I did, using the bead roller at Circle City Hot Rods to form the step in 3-inch-wide strips of 18-gauge steel. Unfortunately the step wasn't deep enough to accommodate a gasket, so I elected to add a wider flange to the stepped panel and lap weld it under the edges of my access hole. Welding close to the step meant after grinding the welds, all that should be visible would be the step itself.
Some further shaping to the flanges where the cover would mount, and I had a neat "cowl vent," albeit several times larger than Henry Ford could ever have imagined! Similar access panels could be useful in any project, from floorboards to access a master cylinder, to hidden compartments in rear quarters from inside the trunk. However, the compound curved nature of this panel shows it's possible to make such an access panel without using special tools, bead roller not withstanding.
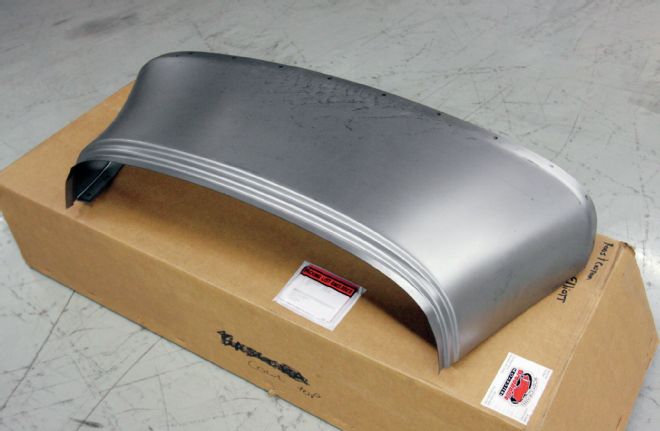
1. Here's what we started with, a cowl top section from Brookville Roadster. They may be known for their complete bodies, but Brookville has been making replacement 1928-32 panels for over 30 years. This panel replaces an original gas tank and has no filler neck.
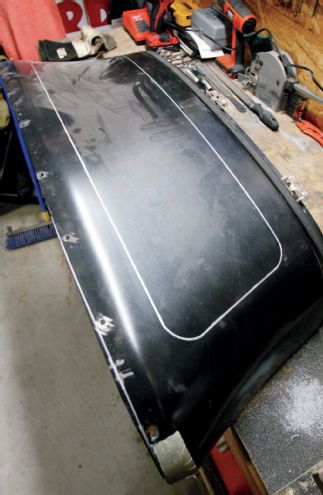
2. Here's the section we intended to make removable. The front and side locations were determined by the underlying rollcage structure. The panel is painted, as by now the car had been built and raced.
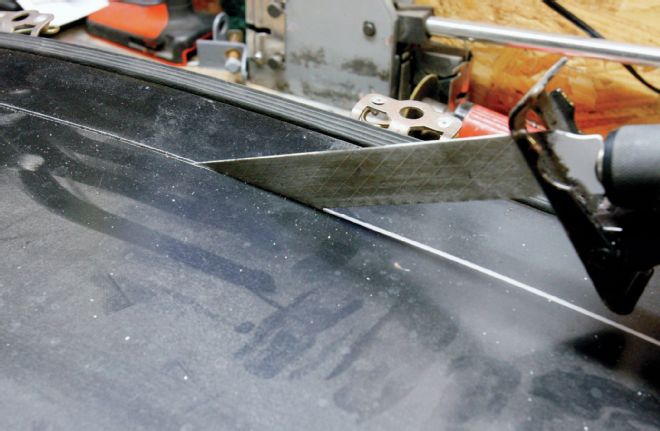
3. Once we'd started the cuts with a cut-off wheel, we used a reciprocating saw to make the long cuts, as it's easiest to keep the cuts straight with a big blade.
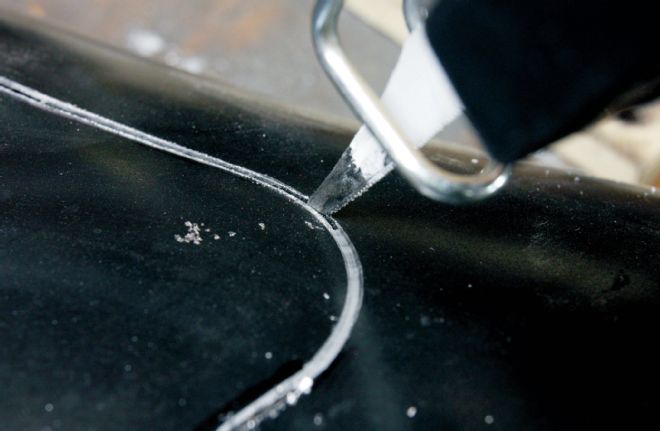
4. You gotta love taking a saw to an almost brand-new panel! We used a small reciprocating air saw to make the corner cuts. Special cut-down blades are available, but we just trim regular hacksaw blades down using tin-snips.
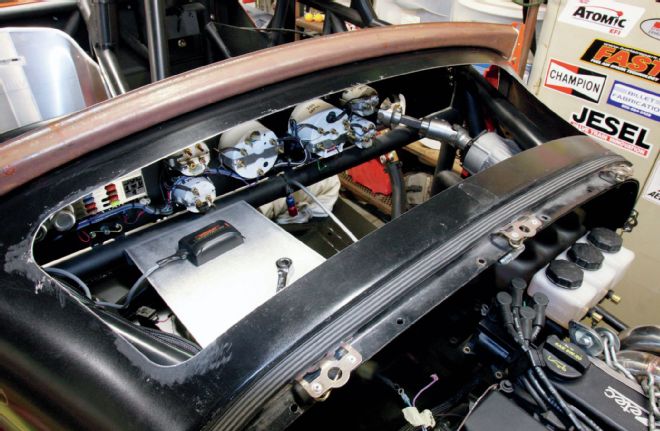
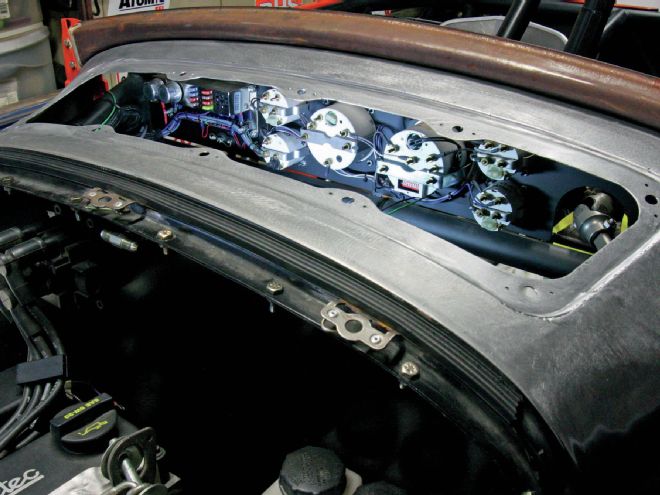
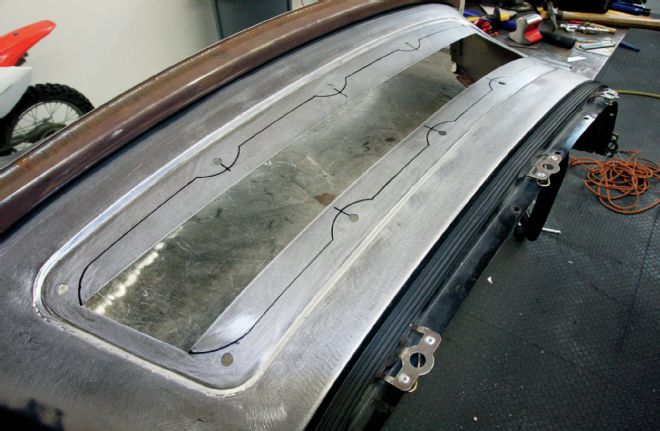
5. Here's what we were aiming for. As you can see, there are a lot of electrical components behind the (albeit removable) dash, and the engine management system will live here too, this access panel making it easy to reach fuses, connect the laptop for tuning, and even to reach the various body panel bolts.
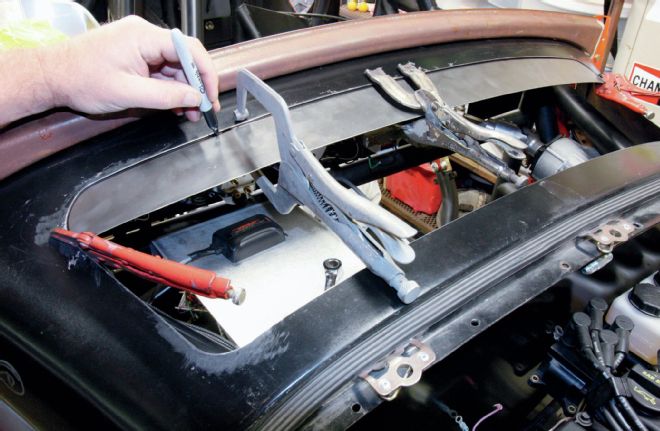
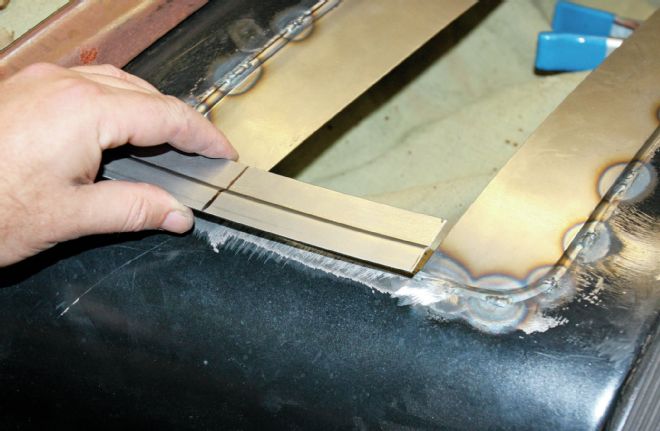
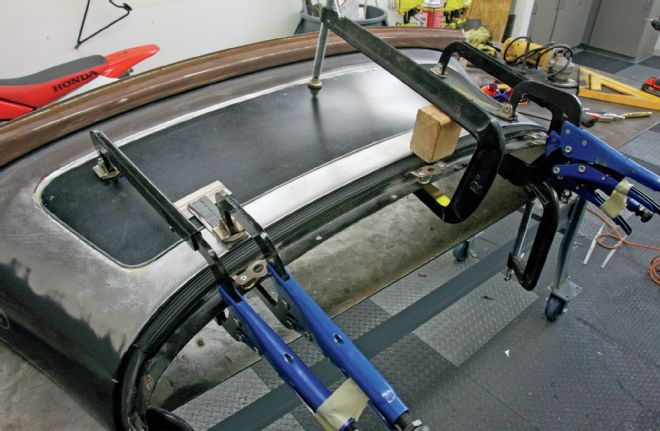
6. We cut some 18-gauge steel into 3-inch-wide strips then clamped them under the cowl as shown, and marked the edge of the hole we'd cut out. While the edges appear straight, they're on a curved panel, and when the strips were laid out flat, the marked lines are curved.
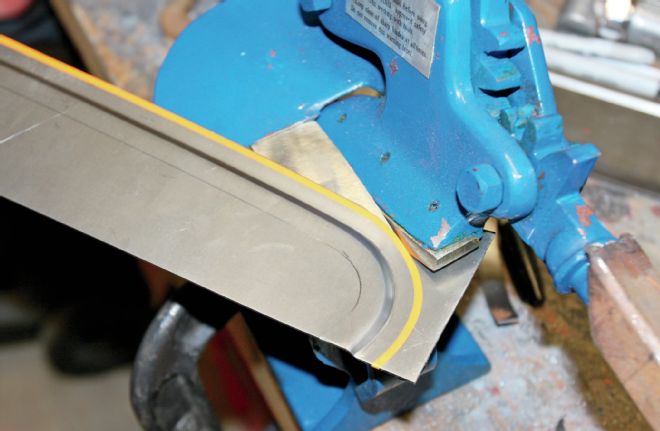
7. We marked another line 1/4-inch inboard of the original, and used that as a guide to run the panels through the bead roller at Circle City Hot Rods. We used fine line masking tape to denote another line 1/2-inch outside the "step", and cut along this line using an Eastwood throat-less shear.
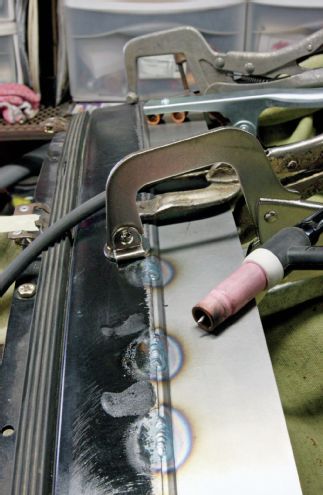
8. The resulting 1/4-inch larger panels meant we could overlap them, then weld along the edge of the "step." Originally we planned to butt-weld the panels, but the bead roller didn't give enough depth to the "step" to allow for a gasket under the access cover. Overlapping the panels gave enough depth.
9. Two smaller panels were rolled and curved to fit on each side of the cowl, already trimmed to leave a 3/4-inch lip for a gasket to sit on.
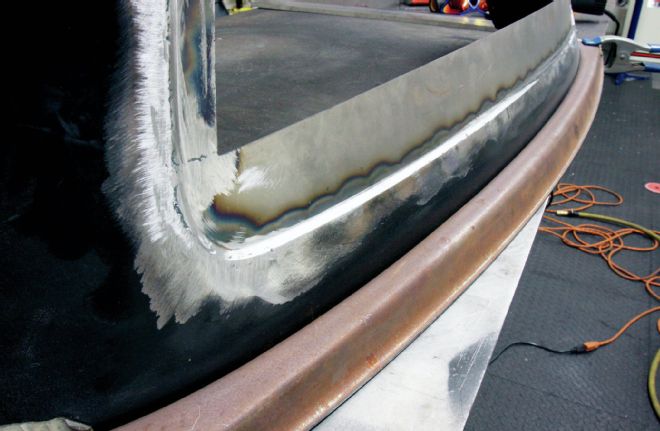
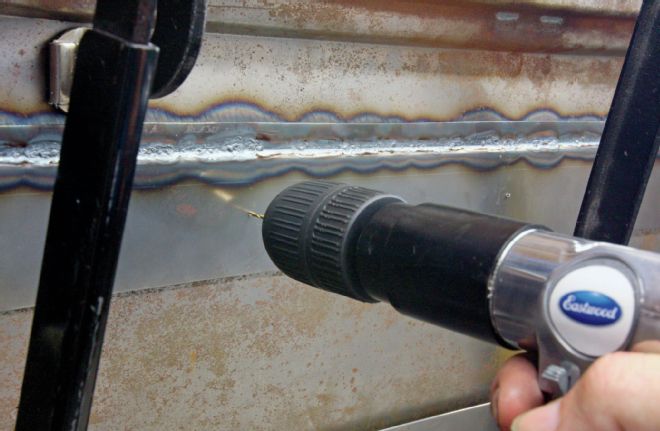
10. No the picture's not sideways, the cowl is merely stood on its end on the bench. Here we're grinding the welds down, leaving the "step."

11. The cowl was now clamped to the bench while the welds were finish-dressed and sanded with 220-grit on a DA palm sander.
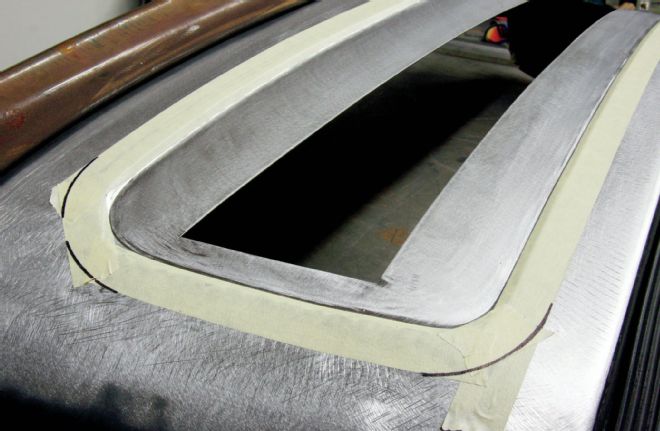
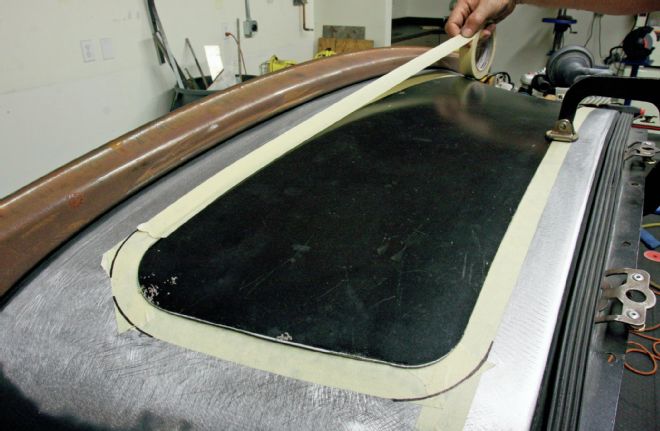
12. With the recess made, now we had to trim the cover to fit. We started by laying 1-inch masking tape around the perimeter, its inside edge aligned with the bottom edge of the "step."
13. With the cover laid in place, more tape was laid on top of the first, their outside edges aligned. This now told us that cutting along the inside edge of the tape on the cover would mean it'd fit perfectly in the recess.
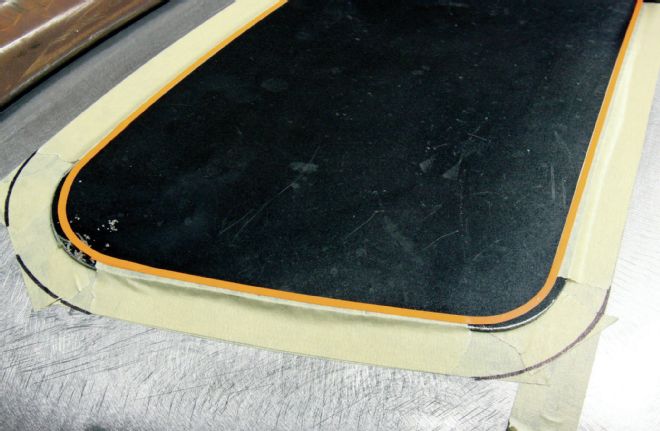
14. One-inch tape won't bend around tight radii without bunching up on the inside edge, so more fine line tape was used before the edges were trimmed and filed to fit.
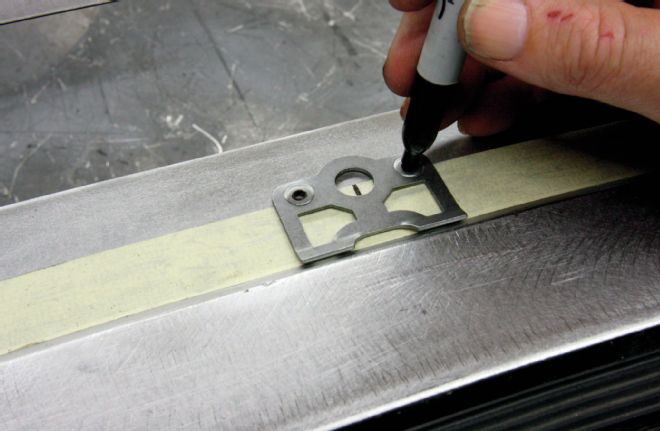
15. Now to mount the cover: we used Dzus-style 1/4-turn fasteners available from Speedway Motors. Again, 1-inch tape was used to mark a consistent 1-inch distance inboard of the "step," then we cheated and used a mounting tab to mark the locations of the mounting holes on our panel.
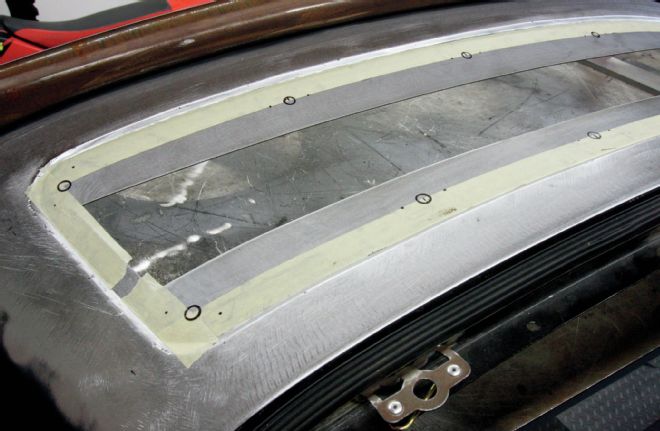
16. All the fastener locations were marked equidistant from each other, before each hole's location was marked with an automatic center punch. The centers of the large holes were then drilled with a 1/16-inch drill.
17. The cover was then clamped in place, ensuring it was perfectly centered in the recess...
18. ...prior to being flipped over and the 1/16-inch drill being used through the pilot holes we'd just drilled in the cowl to denote the centers of the mounting holes on the cover.
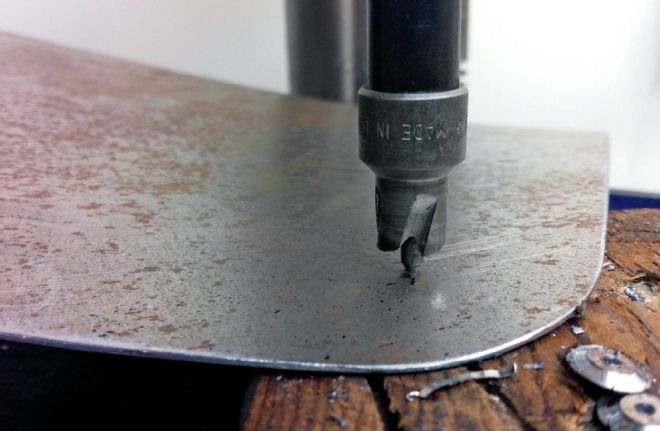
19. Why did we use a 1/16-inch drill? Because it's small enough that the locating point on the 3/8-inch Rotobroach used to drill the fastener holes will locate in it without falling through. Note the edges of the panel were beveled with a file.

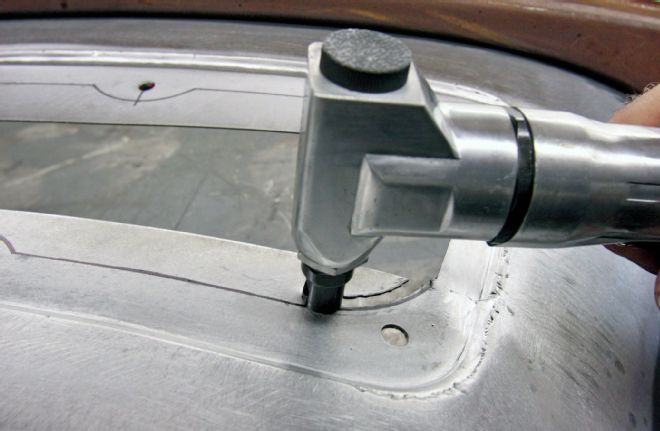
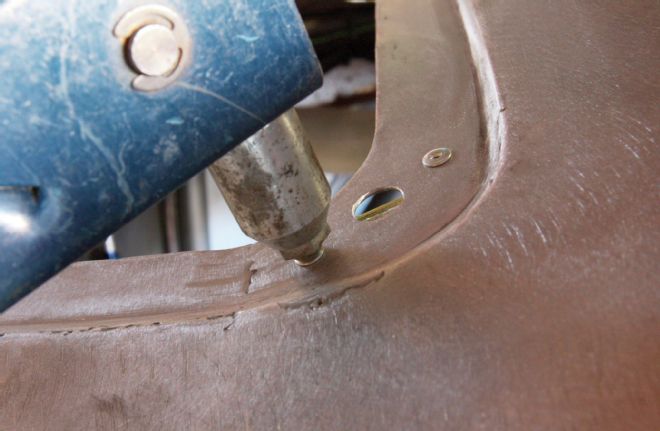
20. A dimpling tool was used on the cover for each fastener hole. Simply tightening the center bolt will close the tool and put a dimple in the panel.
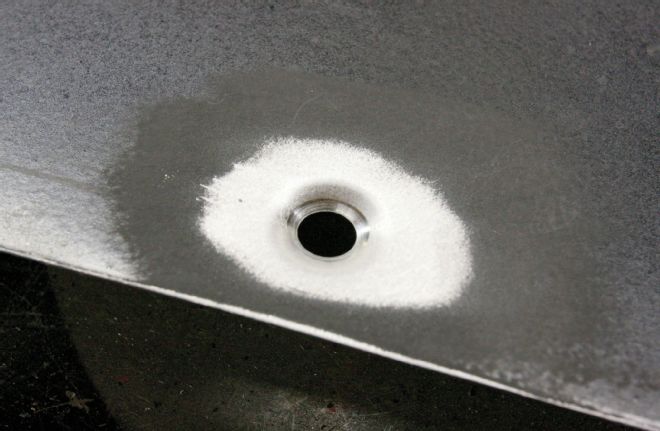
21. The fastener locates and sits in this dimple, meaning it is flush with the top surface.
22. We now marked the cowl for trimming around the fastener mounts, using nothing more complex than a couple of old cutting discs of different diameters for the curves!
23. An Eastwood air nibbler tool was used to make light work of the complicated shape we had to cut out, prior to a hand file being used to dress the edges.
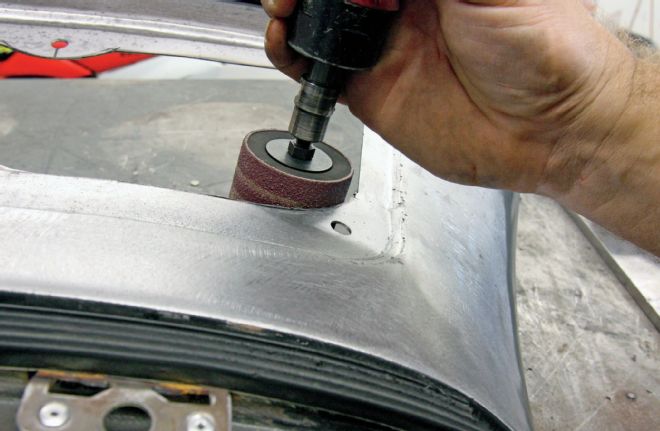
24. A drum sander was used on all radii.
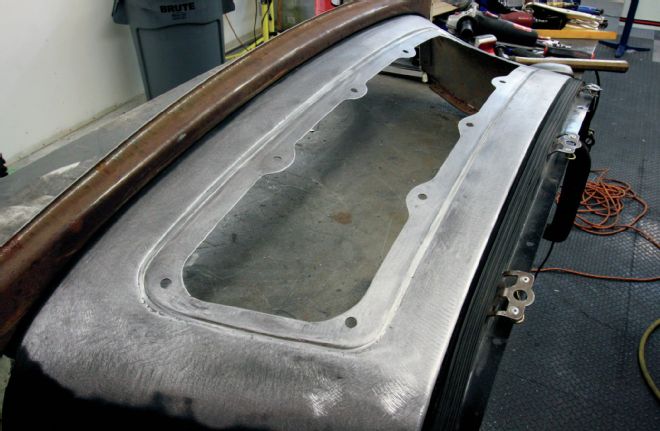
25. The finished recess. Note we bolted the cowl top to the cowl rail throughout the process, in an effort to ensure it remained as close to its original shape as possible, through all the cutting, welding, and drilling.
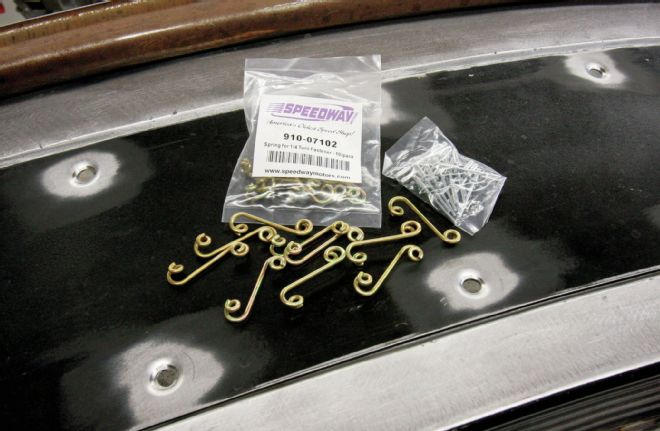
26. Here's the cowl top in place, offering a better view of the dimples. We sourced the springs for the fasteners from Speedway Motors, as well as correct-length rivets.
27. With 1/8-inch holes drilled where we'd previously center-punched their locations, we broke out our trusty decades-old manual rivet gun to attach the springs.
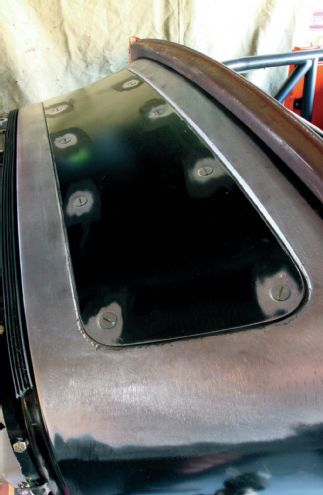
28. The cowl cover fastened in place. A little filler around the edges of the step at each end will have this ready for primer in no time.
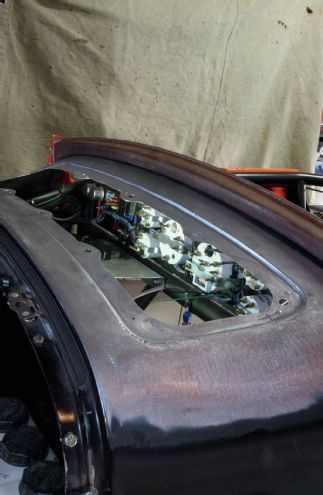
29. Accessing our electrics and future electronics is now as easy as removing 10 fasteners. A definite bonus when it comes to maintenance and tuning down the road.