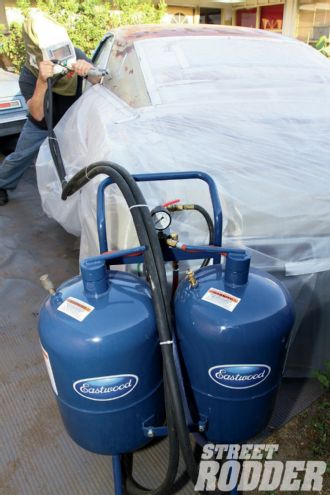
The Eastwood Master-Blaster is a dual-blaster uniquely capable of switching over from soda to another form of specialized media merely by turning valves. Not only switch completely, but utilizes both valves to regulate a combined mix of abrasive media. For example, adding roughly a 20 percent mix of aluminum oxide to soda creates a coarser, more aggressive result. Although it's still referred to as sandblasting because it's a good catch-all term, you could use sand as an abrasive in the Master-Blaster, but it's highly recommended that you don't. Eastwood affirms this to the point of stating it is dangerous to use ordinary sand in its blasters.
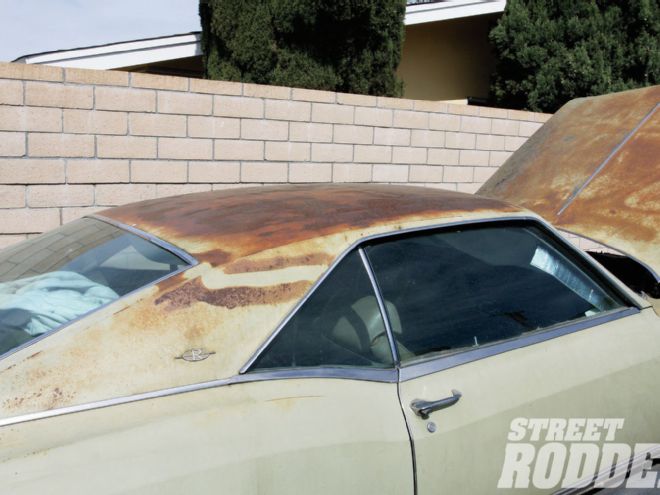
My first project for the Master-Blaster was to get started prepping my 1969 Buick Riviera for a repaint. The car still has its original acrylic lacquer finish and if it wasn't for a factory-installed vinyl top causing severe rust damage we'd only be talking about sandpaper right now. I chose to begin work on the roof, the Riviera's worst area, first for several reasons.
First, I wanted to get a handle on the rust situation before the car rusted itself into a convertible; second, I wanted the Buick to look more presentable. The presentable part explains why I elected not to remove the stainless steel vinyl top, and window moldings before I started blasting, grinding, and spraying primer.
This story could have been about how to take your car to a professional sandblaster, but I prefer the hands-on approach. That said, readers will have to decide for themselves what their DIY threshold is. For example if you don't like the hassle associated with spray painting a car, you're really not going to like the fun that goes along with sandblasting. Of course, a lot of the hassle can be minimalized with the right equipment. For instance, the Master-Blaster comes standard with a pullover head sock with a clear screen that works well; I tried it first. Another option is to buy a face shield, but leaving the top of one's head exposed means a gritty scalp. The Eastwood deluxe sandblasting hood worked best for me. No matter what one chooses for eye and face protection wearing an effective particle mask, or respirator underneath is an absolute must. I didn't wear gloves, so I can say it's a bad idea not to. Of course if you don't mind your hands and arms feeling like a dartboard you'll be OK without gloves.
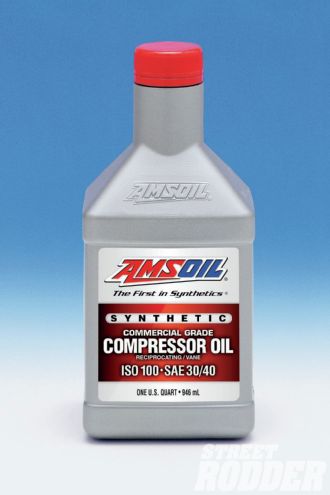 1. The extreme demands of sandblasting will destroy a poorly serviced air compressor. To avoid problems I refilled with AMSOIL Inc., a commercial grade synthetic oil specified for air compressors. Don’t overfill, as it causes oil contamination in the air supply.
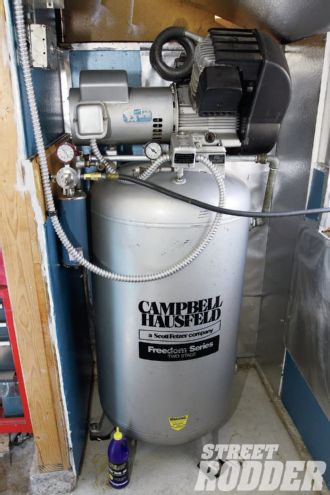 2. This 5-horse, 80-gallon, two-stage compressor easily exceeds the Master-Blaster minimum requirement of 10 cfm at 80-90 psi.
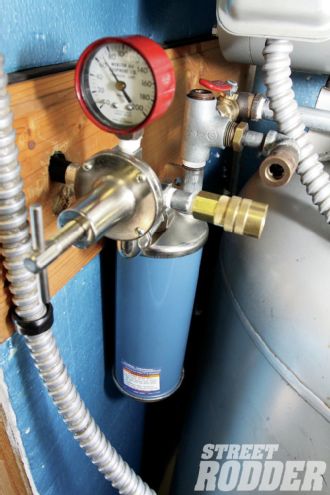 3. The number one concern is to keep the air supply absolutely moisture free. This Harbor Freight moisture trap with regulator is rated to 160 psi, and must be drained before every job.
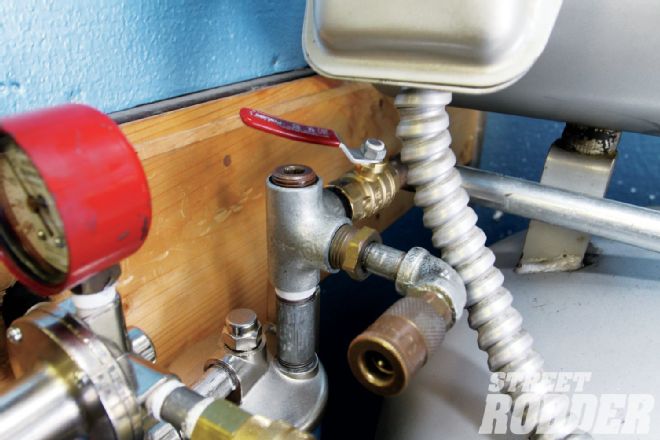 4. For diaphragm longevity, a gate valve should be installed to shut the air supply off from the air compressor to the regulator when not in use.
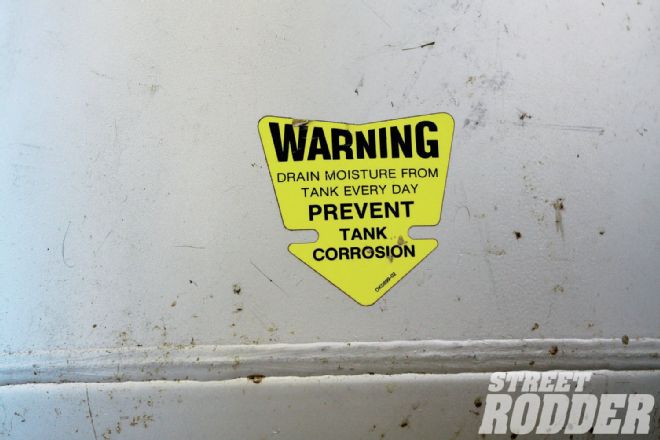 5. Draining the receiver (tank) daily prevents tank corrosion, and more importantly for sandblasting helps immensely to control moisture in the air supply.
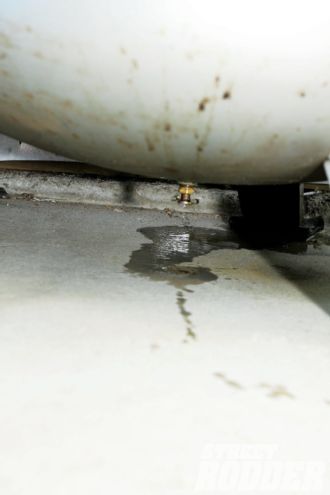 6. Even in California’s humidity-free climate I drained water after a short day’s use. Inspect drained water checking for oil contamination. If oily, check pump for too high of an oil level.
 7. Drain-back: Routing air lines immediately upward from the air compressor helps to alleviate water in the air supply. The Eastwood retractable hose reel works great.
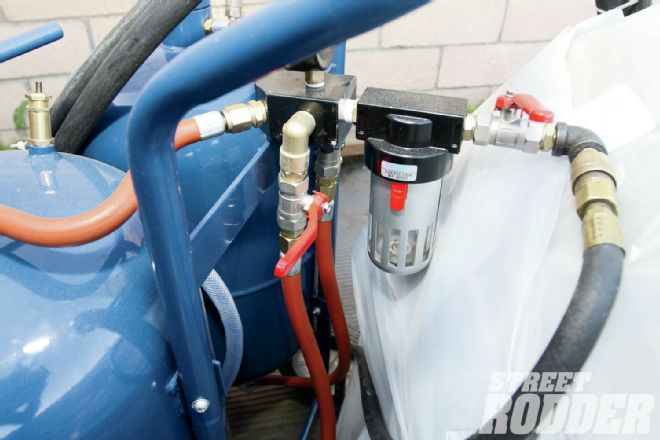 8. Included standard with the Master-Blaster a unit-mounted visible moisture filter is the final water trap. A 90-degree bend shortens Master-Blaster depth for storage.
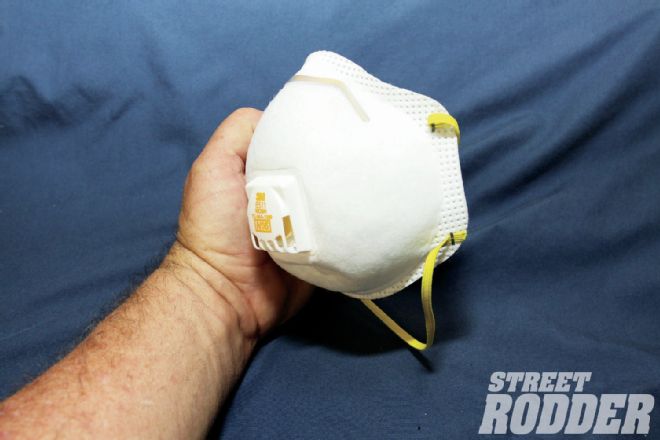 9. A thin mask isn’t good enough, use a good 3M mask with layered filtering and one-way breather; better yet, a respirator.
The next thing to consider is, where are you going to sandblast the car? Remember this is a total-loss system, so unless you want to create a sandy beachfront on your property you'll have to devise a way to recycle the media. The best way to gather expended media is to park on top of a large plastic tarp, and then roll it up. Eastwood sells a media sieve that worked well for filtering out unwanted ingredients. I would have liked to utilize my driveway for blasting, but the code enforcement spy wouldn't have liked that. I had the Buick masked off in the driveway, but fear of getting caught had me cutting away some of the Visqueen, and driving the Buick semi-blind into my entryway courtyard. I made kind of a bad mistake by lowering the driver side window, and not making absolutely sure there wasn't any aluminum oxide present in the channel. (Loyal SR readers might look forward to an upcoming article on how to use Eastwood's glass polishing kit to remove scratches from side windows and windshields.) This brings us to discussing unlike conventional abrasives, soda blasting is safe to use on glass, chrome, or rubber. The larger the soda crystal the more aggressive the soda media will be. In addition to basic soda, Eastwood offers Flow Formula soda with waterproof crystals that are immune to humidity.
The heart and soul of sandblasting is air supply and air quality. Perhaps the most voracious of all pneumatic endeavors, sandblasting requires a vast reserve of moisture-free compressed air. The harder an air-compressor has to work to keep up, the hotter it will get. Heat produces water in the receiver (air tank) that exits into the sandblaster if not trapped (filtered) first. Moisture in the media creates lumps that will plug the blaster. Eastwood specifies the Master-Blaster dual-blaster's air supply should be a minimum of 10 cfm at 80-90 psi. The Master-Blaster comes with three sizes of nozzle. For minimum cfm-rated compressors use the smallest size nozzle for best results.
The alternative to relying solely on sandblasting is a hybrid method. To strip paint and remove rust down to bare metal use one of Eastwood's cleaning/stripping disc systems first. Afterward, the Master-Blaster can be utilized to access the unreachable areas, and dig deeper into heavily pitted areas. A quick blast across the entire area with the Master-Blaster will leave the perfect surface for applying an etching primer. Don't allow the bare metal to remain unprotected; stop reading this and go shoot some primer.
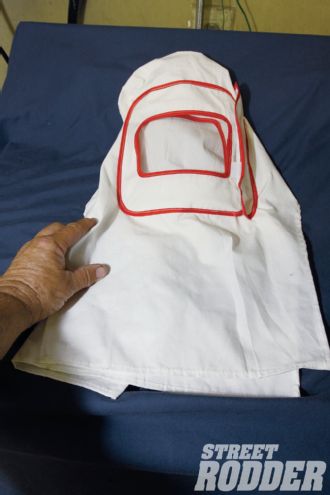 10. This Eastwood hood is included standard with the Master-Blaster, and works pretty darn good.
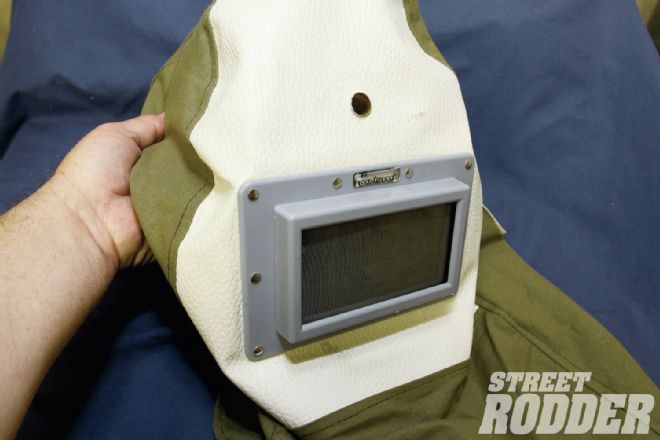 11. An available option, the Eastwood Deluxe sandblasting hood worked best for media blasting.
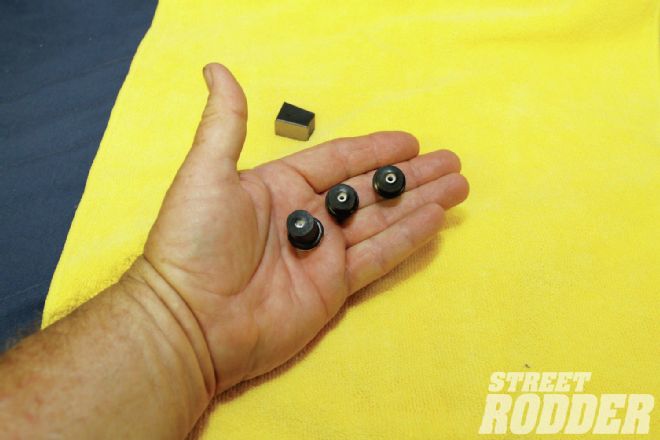 12. The Master-Blaster comes standard with an extra stop and three different sized nozzle tips.
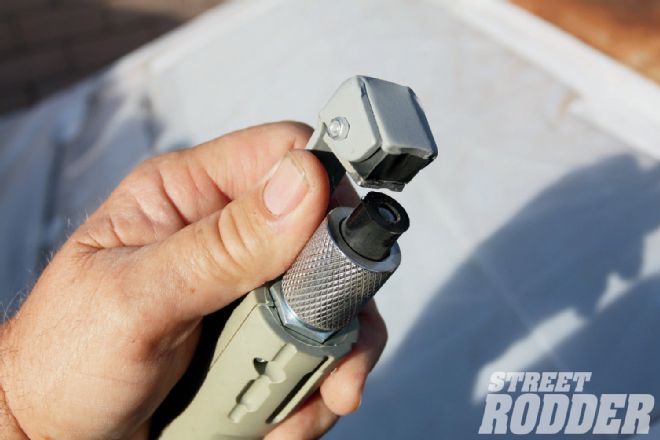 13. A knurled righthand threaded retainer is unscrewed to change nozzle tip size. Smallest tip requires less cfm to operate.
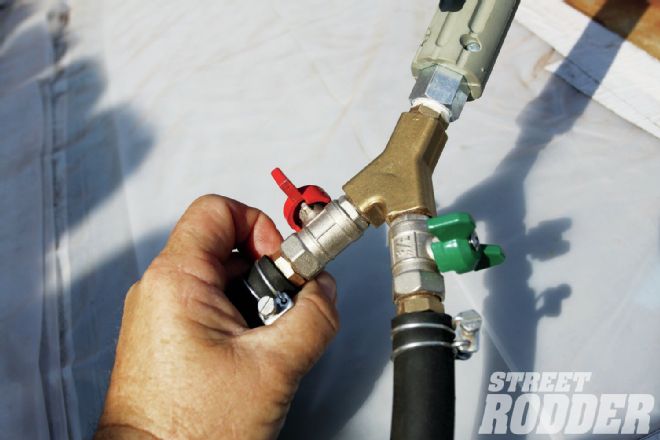 14. The red valve controls abrasive media, and the green valve controls soda. Varying the open position on each determines mix, closing stops flow.
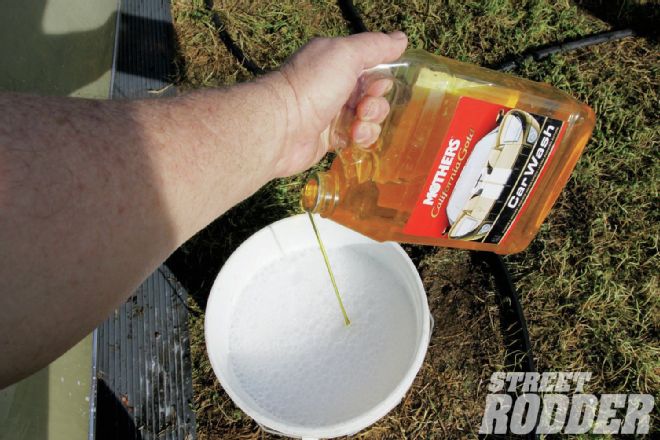 15. I used good car wash soap as the first step to remove oils and prepare for the roof for blasting.
 16. Water, with its ability to dissolve dirt worked great to flush out rust flakes, and tiny clods lodged underneath stainless steel moldings. Follow with compressed air to dry.
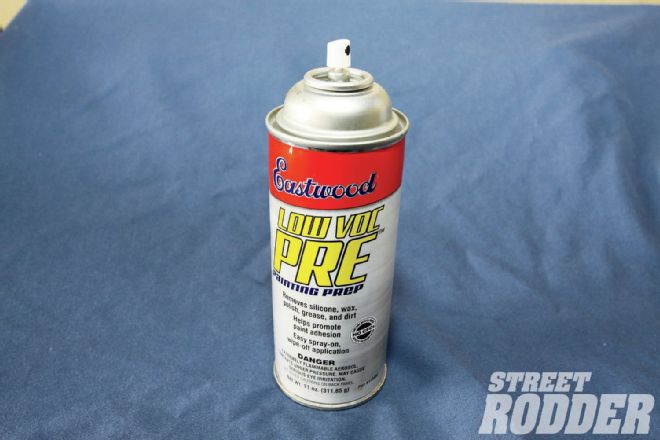 17. Eastwood’s PRE is necessary to ensure the surface is oil free. Oil contamination must be addressed at every step. Air supply contamination, and contamination in general, leads to early paint failure.
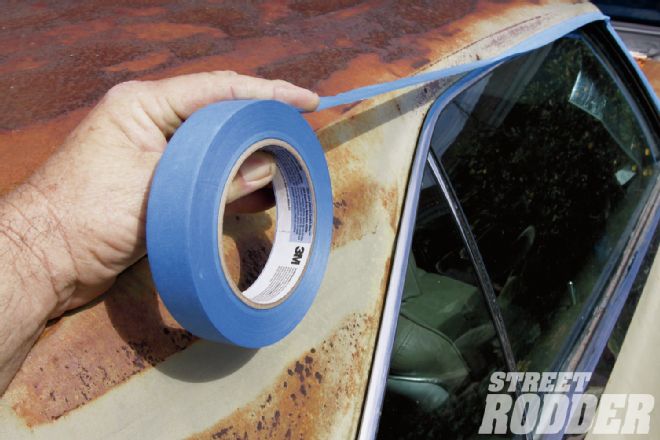 18. I prefer the first layer of masking to be done with blue 3M painter’s tape. It follows corners better than duct tape, ensuring damage-free results.
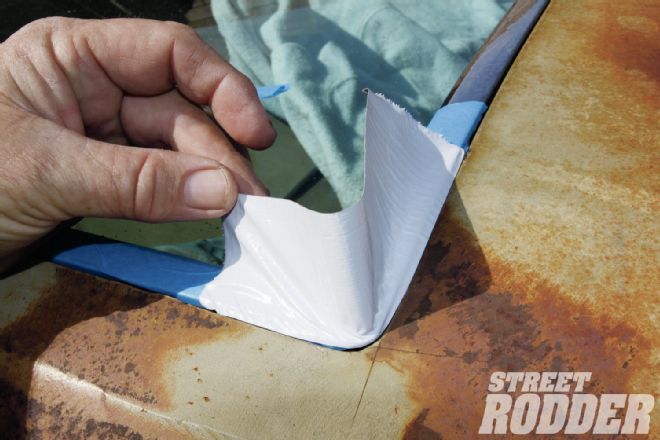 19. Heavy-bodied duct tape must be used to protect chrome-plated and stainless steel embellished areas from abrasive media.
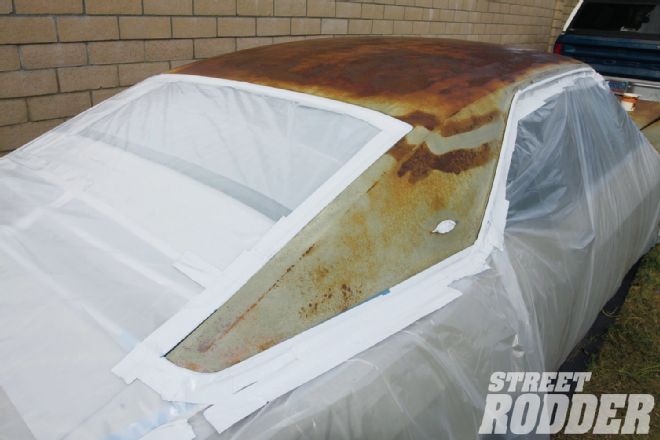 20. There’s no such thing when it comes to too-thick Visqueen for protecting the glass. Wrap the entire car as abrasive media in any amount will scratch glass, chrome, and paint.
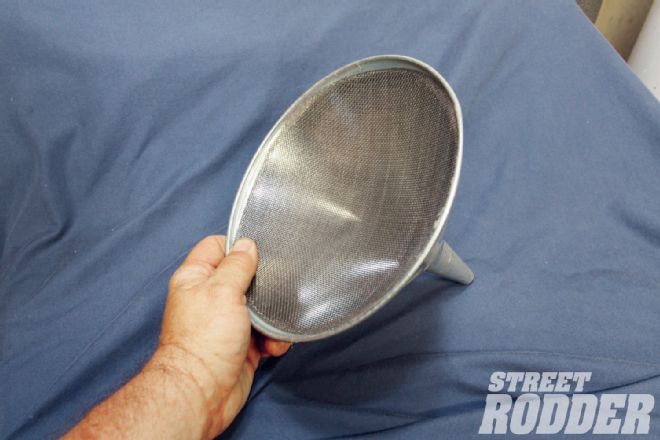 21. This funnel is used for pouring all types of media into the Master-Blaster. Do not leave unused media in the Master-Blaster, plugging lumps will form.
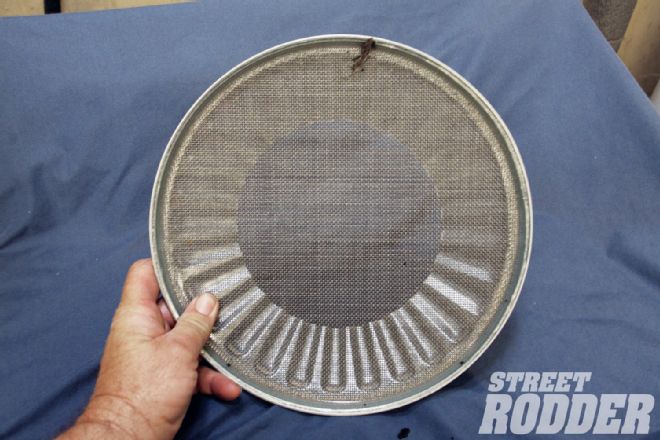 22. This funnel is used to strain foreign objects from reclaimed media. Place on top of a 5-gallon bucket and pour.
 23. Discharged media will land everywhere after blasting. Use compressed air and a brush to gather for recycling.
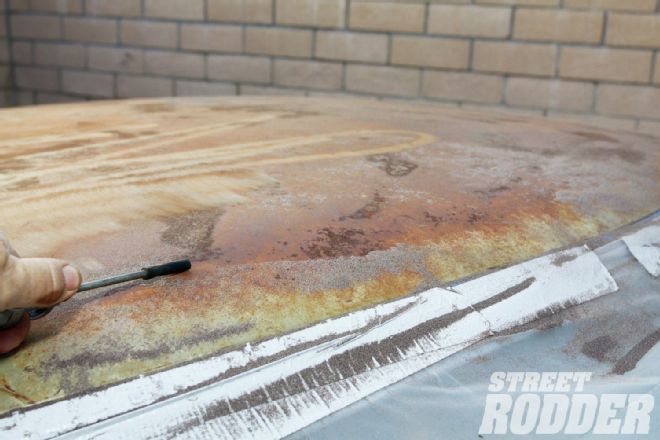
 24. Notice media blasting reaches deeper into heavy pitting better than an abrasive stripping disc.
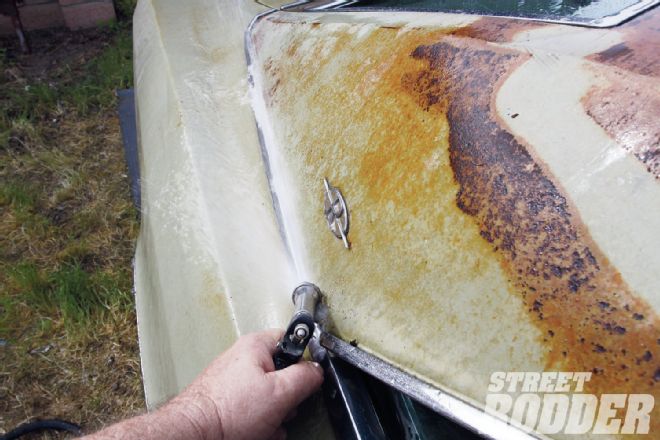
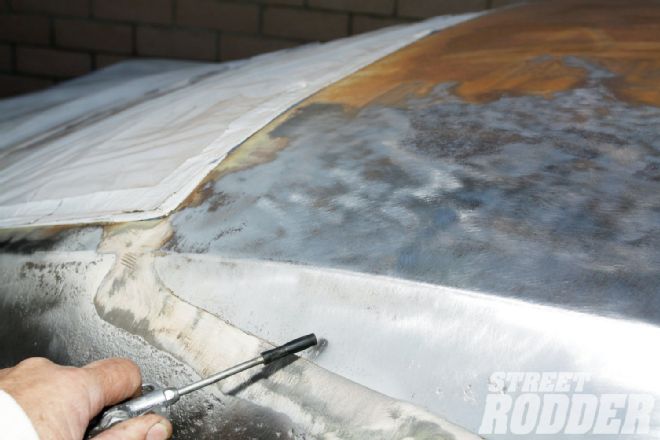
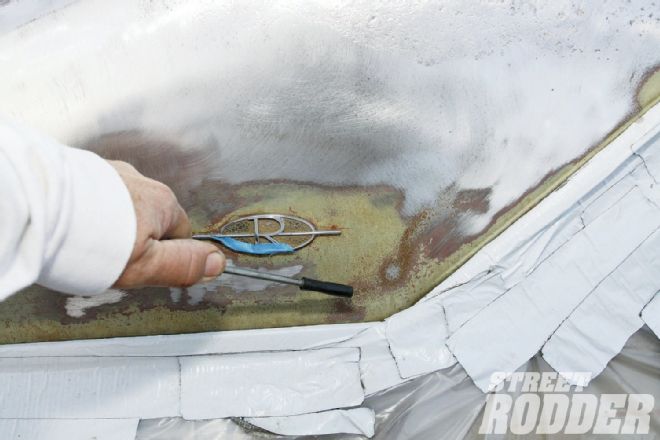 25. A level area desired: To achieve the best results remove emblems that cover areas to receive fresh primer and paint. Block sanding around emblems is tedious.
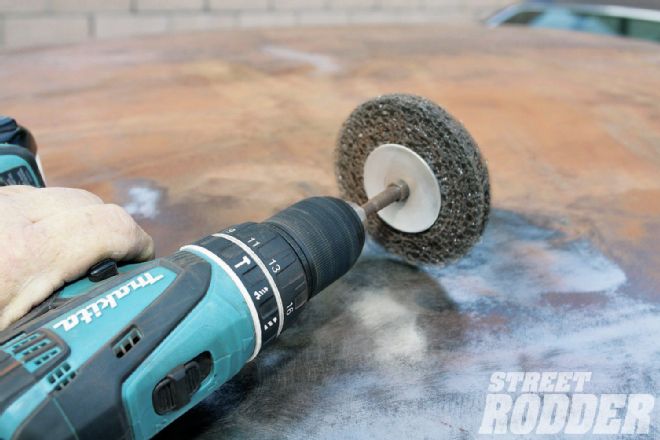 26. It’s a slower way to go, and not quite as effective, but abrasive stripping discs create less mess.
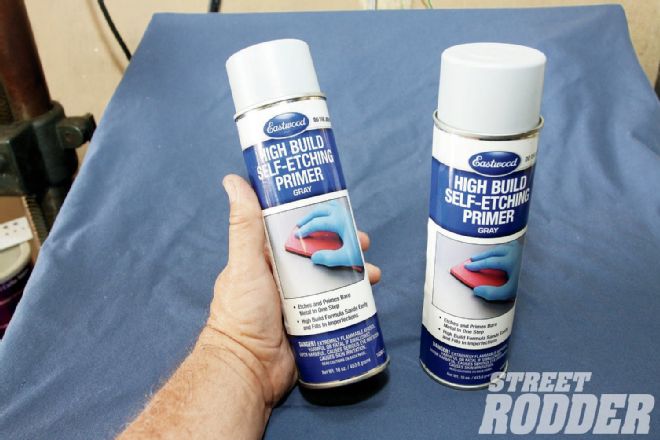 27. Bare metal should be protected ASAP. Eastwood High Build Self-Etching Primer is available in all states, and offers greater convenience over spray guns. Eastwood 2K Aerospray is a two-part epoxy spray can dispensed, and California legal.
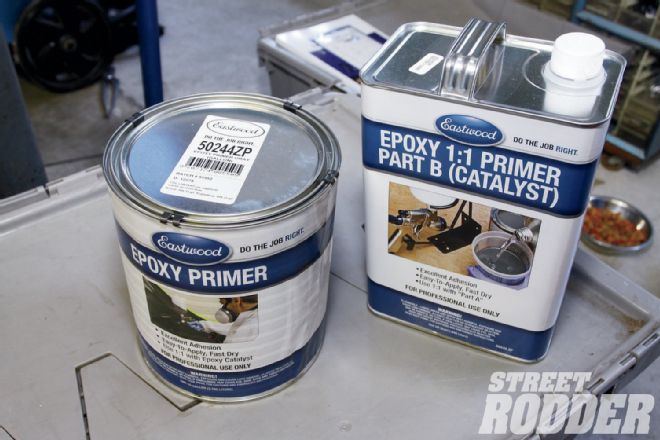 28. Eastwood 1:1 ratio epoxy primer is the most economical way to get the absolute best results. Not available in California.