A time or two recently, I've had opportunities to revisit my primitive painterly roots by using the types of tools and materials we used to use—the kind I learned my licks with. The new stuff is indeed better in many ways, but some rare jobs still demand lacquer primers and topcoats. If it's a repair of an existing lacquer finish, then lacquer is the way to go.
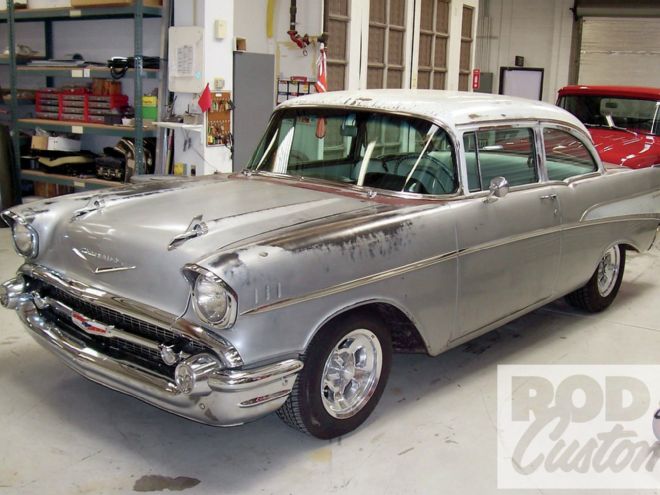
Our friend, John Fleming of Boulder City, Nevada, has a collection of nice old cars. Since friends shouldn't let friends throw their hard-earned savings away needlessly by erasing a poor old car's personality with a Resale Red paintjob, I had no choice but to thwart Fleming's twisted plan for his honest, original '57 Chevrolet 210 two-door sedan. Instead I offered a proposal to extend the life of the old Chevy's factory-original India Ivory over Inca Silver lacquer. We'll deal with the rust, hail damage, and body damage, but we'll spot repair the original lacquer finish—just like we used to in the olden daze.
 1. Now at first I thought this might be fun. A proper spot repair requires the proper materials from the proper period, and folks in Nevada can still get the stuff. To my teachers back in the ’70s, this one’s for you guys.
 2. Before we get to spot repairing, the rust will have to go.
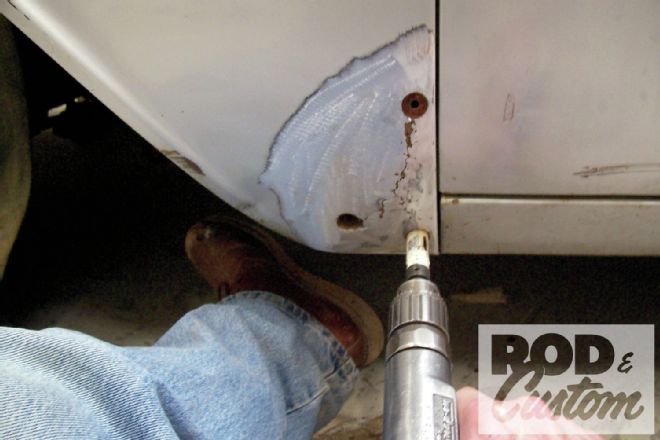
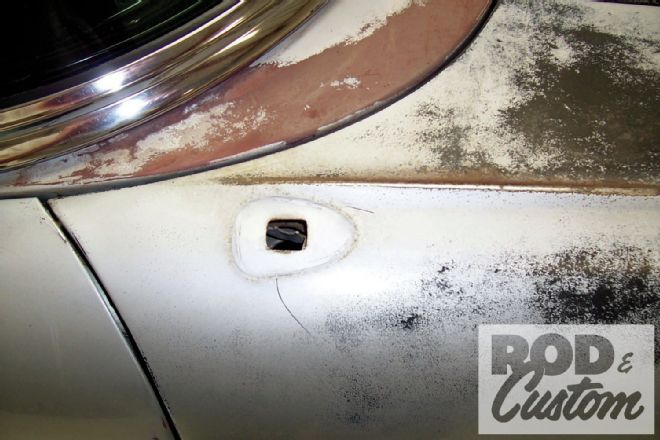 3. And because this plain-Jane sedan will be a “radio-delete” model this time around, so must go the antenna hole.
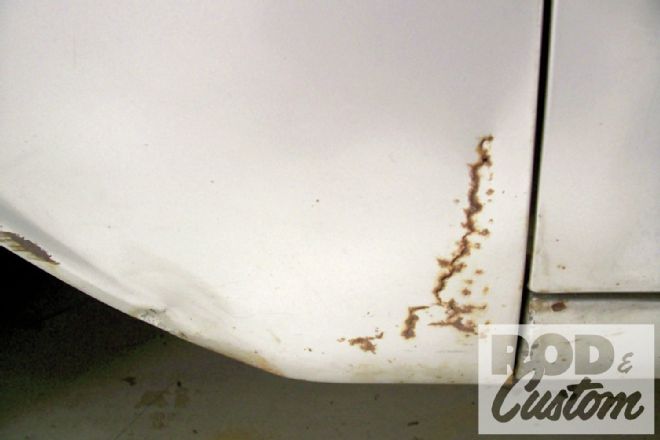
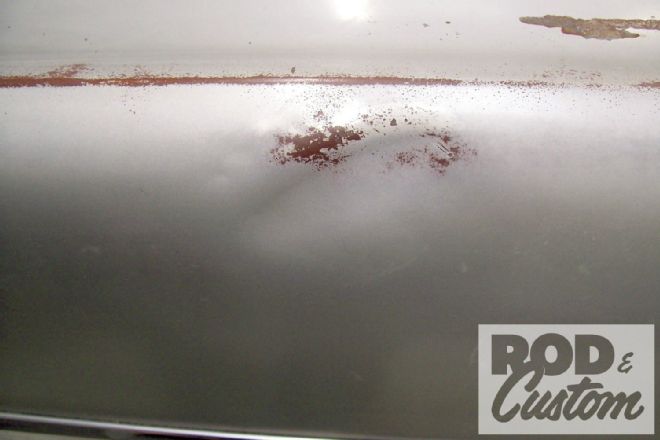 4. John Fleming’s old Chevy has accumulated its share of lumps ’n’ bumps over the years...
 5. ...but the bumper sticker that once disgraced the deck was the thing that bothered him the most.
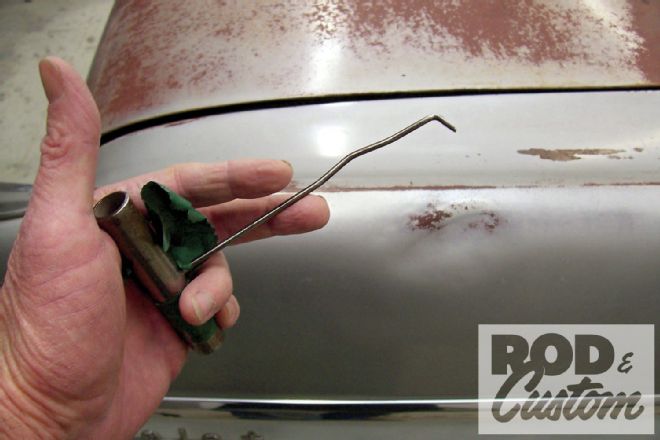
6. Now the whole idea here is to perform some traditional repairs. With due respect for tradition, it should also be done with traditional tools, but only to a point. We won’t be drilling holes in this perfectly good automobile, so we’ll draw the line right here. This pull rod will not be used.
5. ...but the bumper sticker that once disgraced the deck was the thing that bothered him the most.
6. Now the whole idea here is to perform some traditional repairs. With due respect for tradition, it should also be done with traditional tools, but only to a point. We won’t be drilling holes in this perfectly good automobile, so we’ll draw the line right here. This pull rod will not be used.
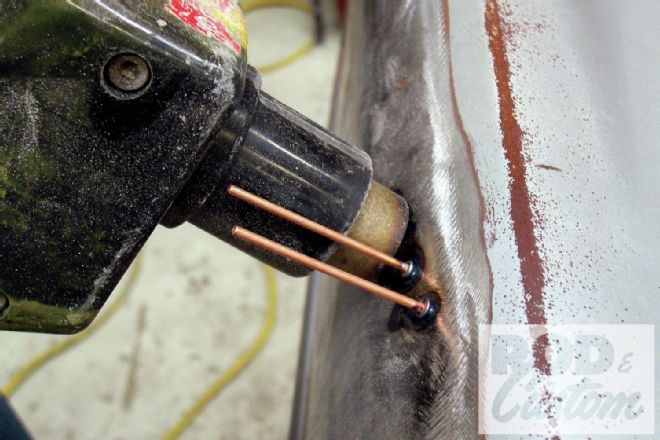 7. For areas where backside access is denied, there’s the electric stud gun. This one came with a modern version of the pull rod as well as a twist-grip slide hammer for deeper damage. When the damage is worked out to our satisfaction, the studs can be clipped and/or ground free. Putting on the studs while knocking down the high spots with a body hammer made quick work of this repair.
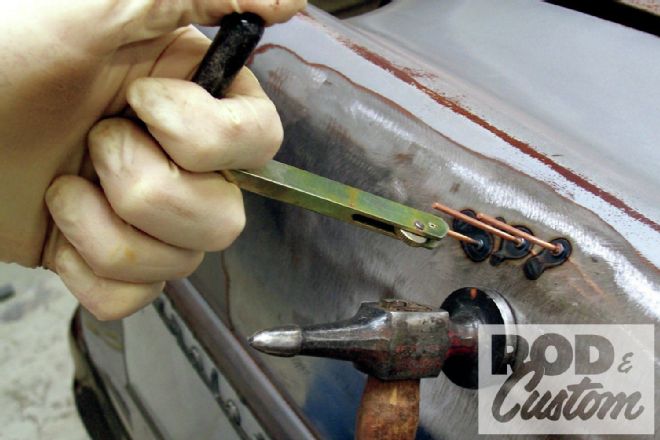 8. For areas where backside access is denied, there’s the electric stud gun. This one came with a modern version of the pull rod as well as a twist-grip slide hammer for deeper damage. When the damage is worked out to our satisfaction, the studs can be clipped and/or ground free. Putting on the studs while knocking down the high spots with a body hammer made quick work of this repair.
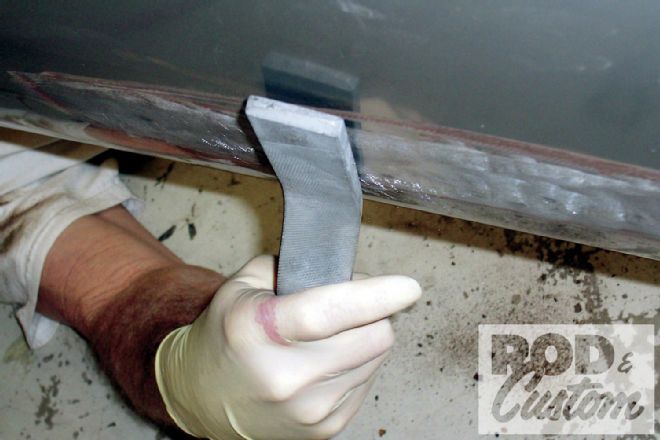 9. This deep crease has already been dollied out and shrunken some. Here my stunt double (on his back) has his dolly hand inside the door, while he’s operating an Eastwood slapping file with the other hand—and it takes longer to get up off the floor than it used to.
 10. Ever since our friend Jimmy White convinced us that round corners work best for patch panels, that’s the way we do them. Here a dull hole saw cuts the corners before a 3M cutoff wheel-equipped Central Pneumatic die grinder will zip the straight lines in between.
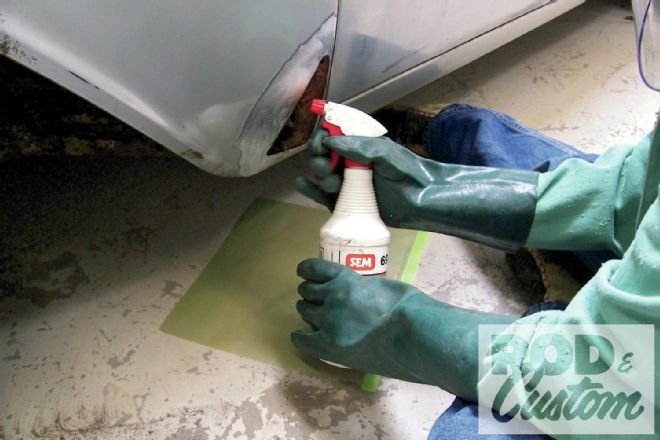 11. Before we proceed with the patching, something must be done to stop this cancer from spreading further. SEM Rust Mort will chemically convert hard-to-reach rust into a paintable primer. The common household sprayer is not stock, but it fits the container and helps us achieve deeper penetration.
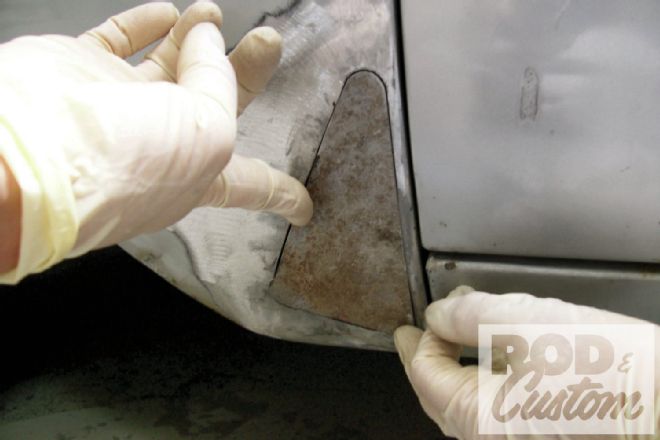 12. Now after all that, it appears as though Mrs. Rotten has selected an old rusty hunk of metal from which to fashion her patch. Not to worry; the backside will be attended to after welding. We’ll find a way to direct some epoxy primer back there.
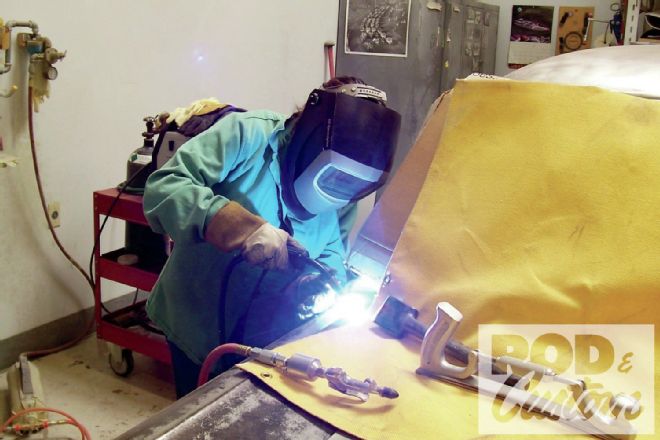 13. Here Mrs. Rotten makes quick work of patching the unnecessary antenna hole. It wasn’t common for body shops to use wire welders until about the early ’80s, as I recall. To ensure a quality patch job, we went ahead and used one. To ensure a quality retro-tech article, we’ll put it away now and return to our primitive roots.
 14. Black Magic body filler is history and so is White Star. With our filler work finished in Evercoat Rage Gold, the soon-to-be-primed areas are thoughtfully masked with good old fashioned rolled masking paper—and it’s prime time!
 15. The feathered edges are sanded well beyond where old paint meets bare steel.
 16. This will help to ensure a strong mechanical bond for coatings to follow. So that all areas in need of primer can be sprayed in one session, the paper’s edges have been rolled to deflect overspray without creating a “postage stamp” effect.
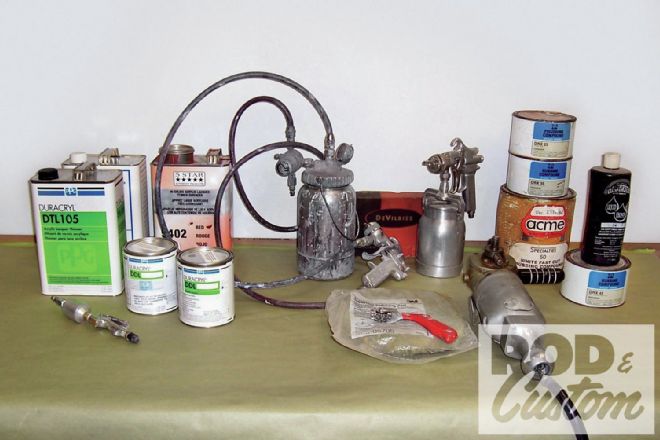
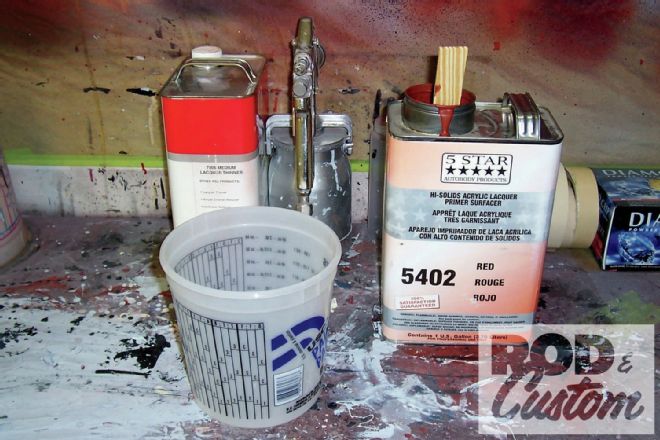 17. Except for the mixing cups and latex gloves, the bench is set as it would have been years ago when lacquer was the premium primer—because it was what we had. Mixing wasn’t rocket science back then and the “glub system” was accurate enough. When primer sprays without cobwebbing, it’s mixed correctly.
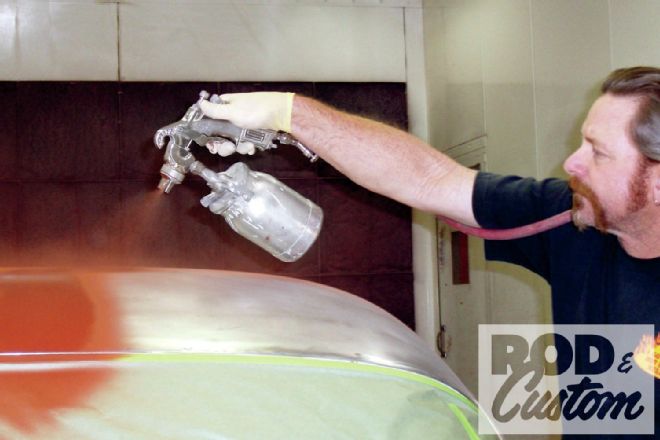 18. While striving for period authenticity, my stunt double is taking an unnecessary hit for the cause. First one coat is applied to the bodyworked areas of the roof, which will then receive two additional coats over its entirety along with the other areas that need primer.
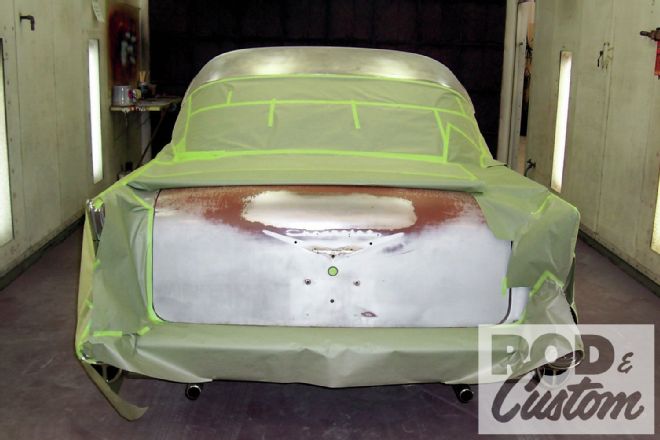
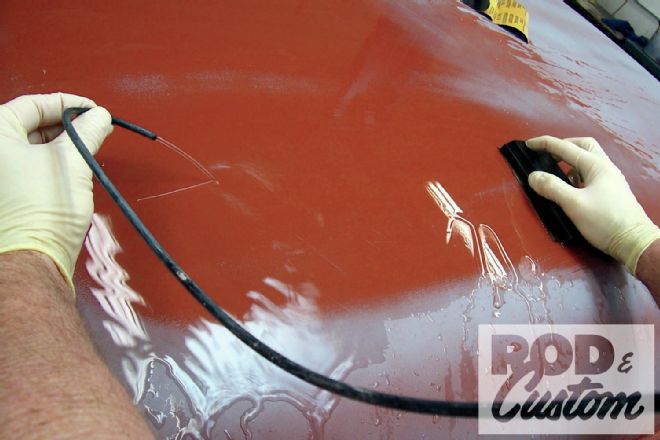 19. After allowing a weekend for dry time, we can begin wet prep for paint. The gray fuzz is an over-thinned mixture of gray lacquer primer known as “guidecoat” and it’s nothing new.
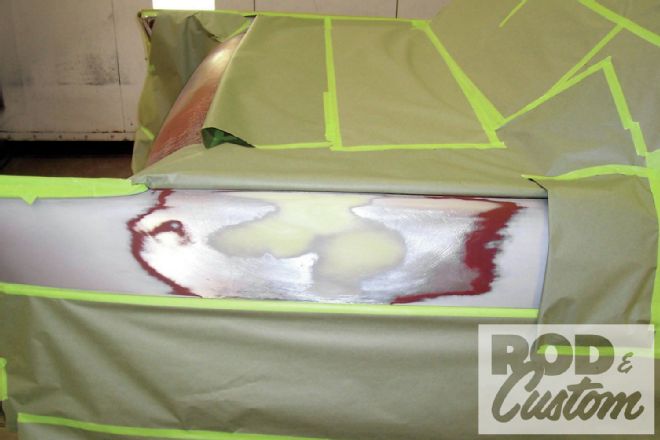
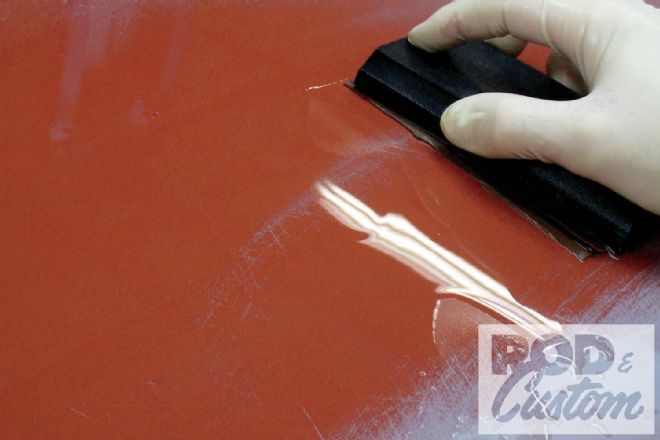 20. Here’s a closer look at our guidecoat in action. In this instance, sand scratches, pinholes, and other surface imperfections will show up gray. When the gray is gone, you might be done. I like to keep blocking until I’m certain that the primer is thin enough to be flexible for durability down the road.
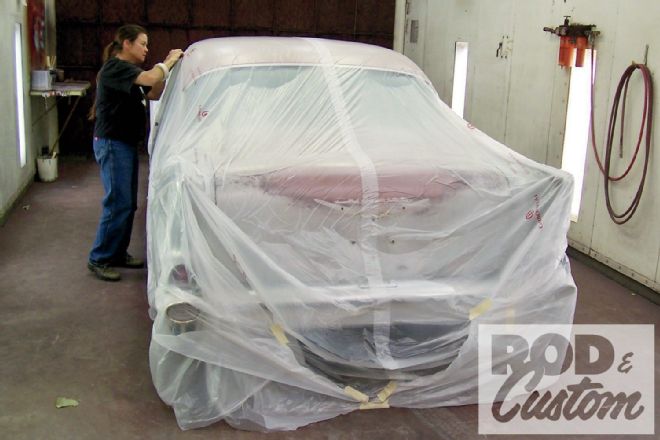 21. With wet prep chores out of the way, Fleming’s old Chevy is back in the booth for topcoats. Granted, the modern static-cling masking material is non-traditional, but sometimes Mrs. Rotten insists on coloring outside the lines. In our next installment we’ll not only put this car back in color—we’ll match the patina too.