While most 1932 Fords came equipped with a V-8 in the engine compartment, the venerable Flathead isn't the largest V-8 ever produced, necessitating some firewall massaging should you wish to install a somewhat larger engine in your Deuce. So when Bobby Walden at Walden Speed Shop told us he was building a chassis for a customer using a 401 Nailhead Buick mated to a Tremec five-speed, and that he'd be modifying the stock firewall to suit, we figured you'd like to see how he did it.
Now please don't email us saying it's sacrilege to cut up an original 1932 firewall. For one, think of it as recycling; and second, the customer already had the firewall, so why spend good money on a repop? With that out of the way, let's continue. Walden has modified numerous 1932 firewalls to clear a small-block Chevy, and in fact keeps patterns for just such a task, but the Nailhead is longer, requiring a deeper recess, so he had to start from scratch.
He also took the opportunity to use a new Walden Speed Shop product (two in fact, as the Buick-to-Chevy motor mounts are also brand new to the company's catalog, but we'll bring you details on them next month) when he added floorboard risers to the completed firewall. These offer the benefit of increased usable foot room in the car, as the transmission tunnel becomes much smaller, with the angled foot riser section becoming flat across the entire width of the cabin.
There's no reason you couldn't replicate this job at home and although Walden has access to a Pullmax and an air-powered stretcher, the same results could be obtained, albeit more slowly, using hand tools and wooden formers. Meanwhile, this is how a pro gets the job done.
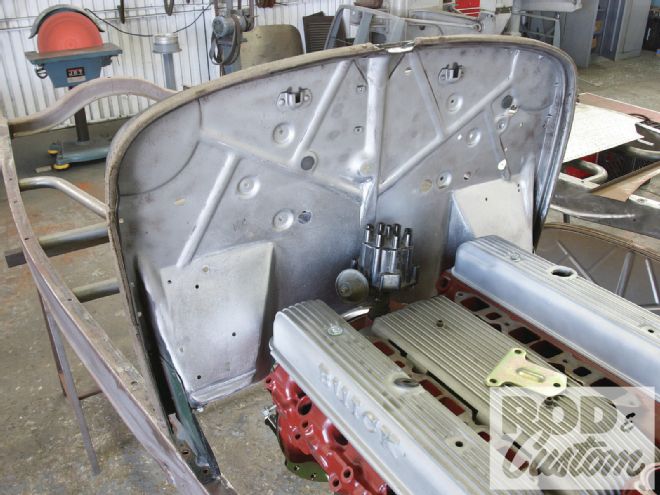
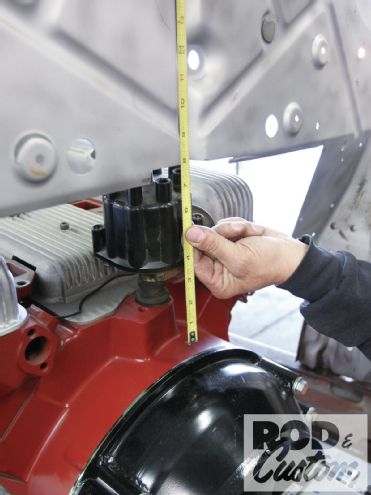
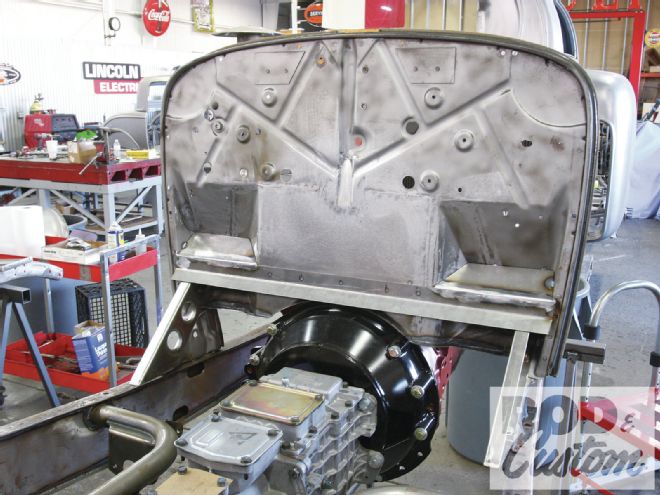
 1. Here’s why the firewall required recessing: the engine was mounted as close to the radiator as possible, yet even if the firewall were trimmed to clear the bellhousing, once moved forward 4-or-so inches to its stock location, it would still interfere with the distributor, and be very close to the left side head.
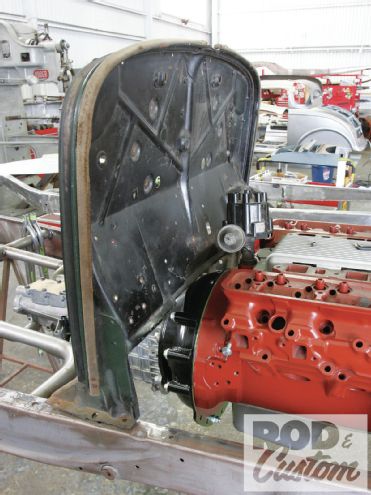
 2. Walden trimmed the firewall in line with the outer edges of the valve covers for a trial fit. It’s now in the correct location on the chassis.
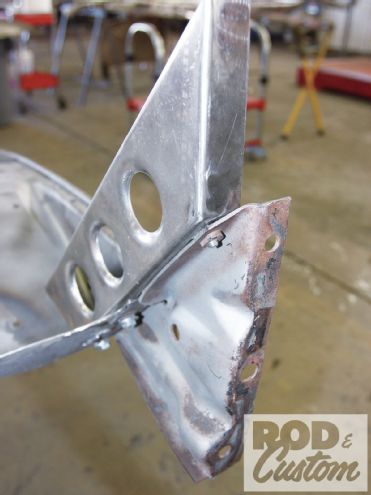
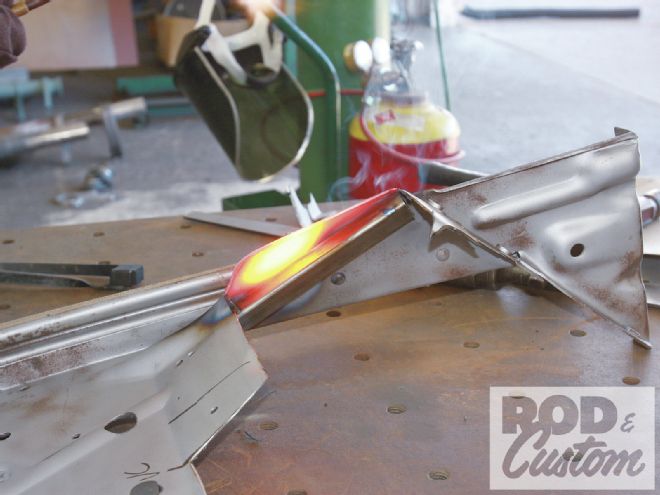 3. The driver side of the firewall has a box that was removed, leaving just the outer edge in place. A length of 1-inch box section steel was tack-welded in place, then the edge heated with a gas torch …
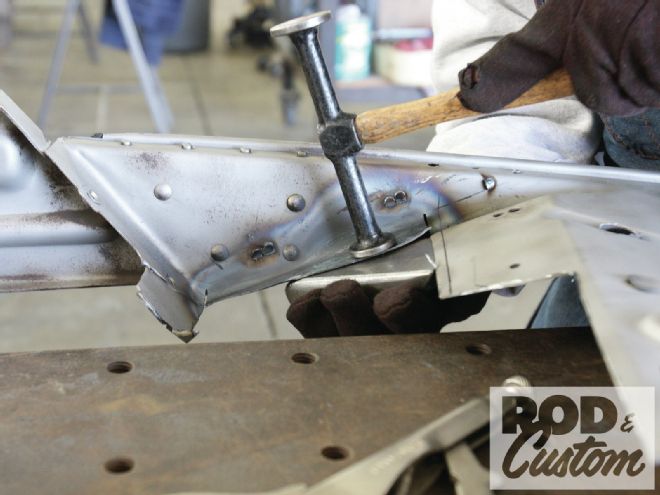 4. ...before the firewall was flipped over and the edge folded over using a hammer and dolly to match the passenger side.
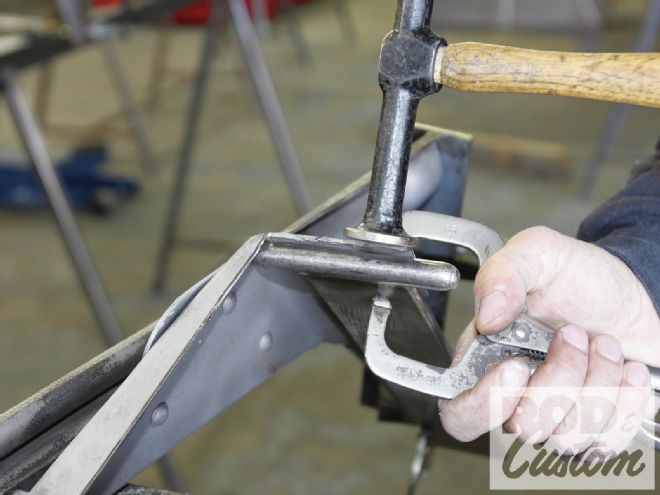 5. A T dolly was clamped to the lower edge of the firewall, allowing it to be folded with a radius.
 6. With the lower edge formed with a step to match the passenger side, a section of the removed part of the firewall was tack-welded in place at this stage.
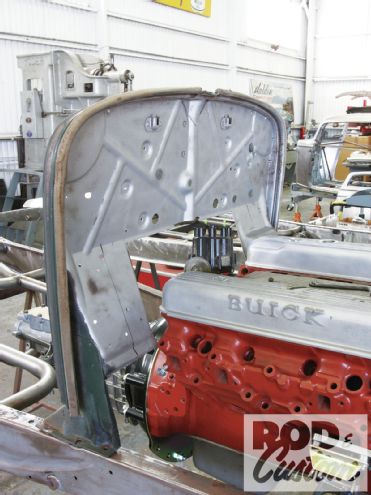
 7. Here’s the passenger side showing how the firewall was trimmed in line with the outer edge of the valve cover.
 8. Prior to any further work being done, this brace was made to bolt across the feet of the firewall, ensuring they would align with the mounting holes in the chassis upon completion.
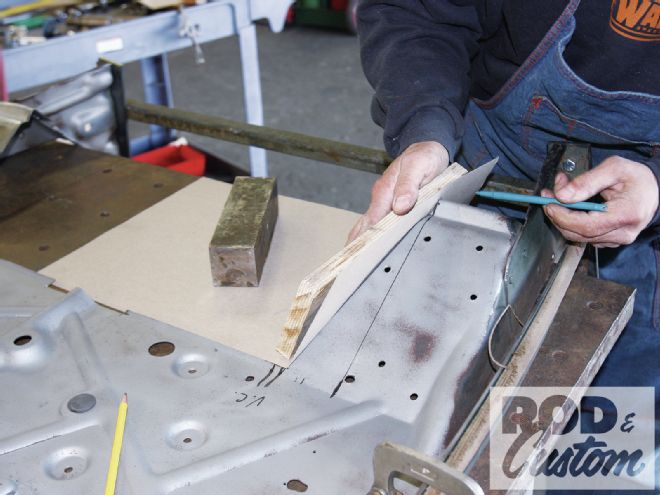
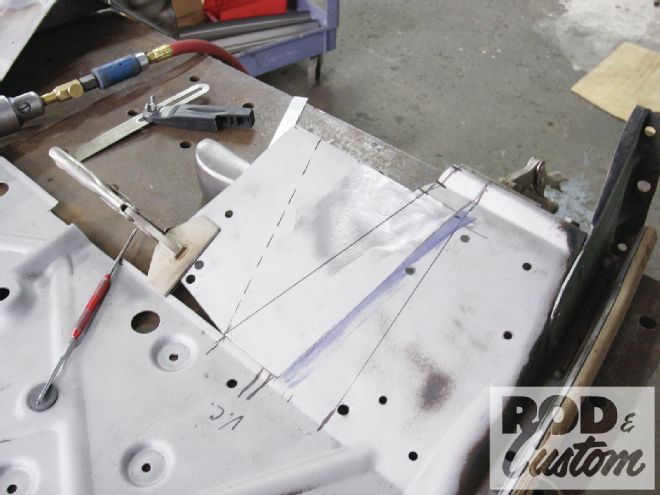
9. Walden trimmed the passenger side to allow for the planned recess to have angled sides, then marked and cut a cardboard pattern from which to form the required panel.
8. Prior to any further work being done, this brace was made to bolt across the feet of the firewall, ensuring they would align with the mounting holes in the chassis upon completion.
9. Walden trimmed the passenger side to allow for the planned recess to have angled sides, then marked and cut a cardboard pattern from which to form the required panel.
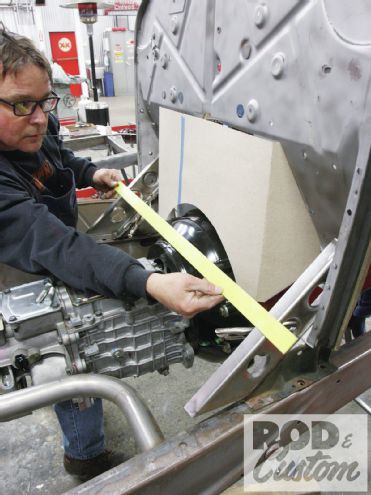
 10. Measurements were taken in order to establish where the cutout for the bellhousing would be required on the new panel.
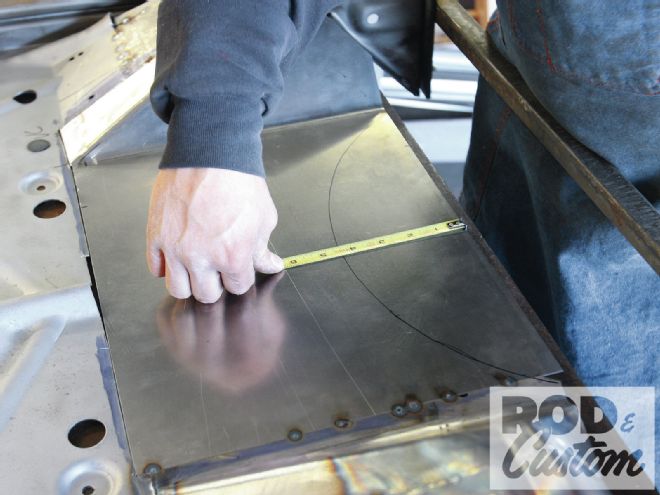
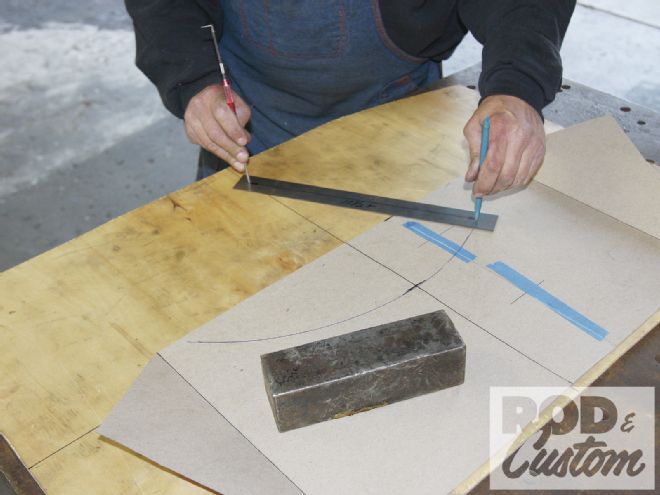 11. Using these measurements, as well as the radius of the bellhousing, the pattern could be marked for cutting.
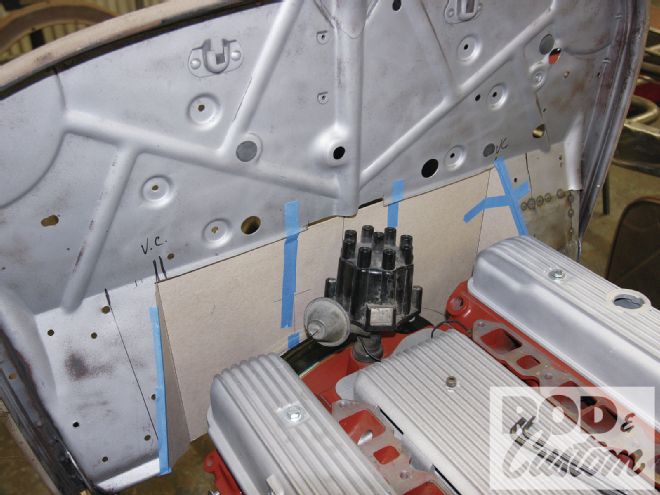 12. With the pattern taped in place, after much deliberation, Walden decided he wasn’t happy with the width of the recess.
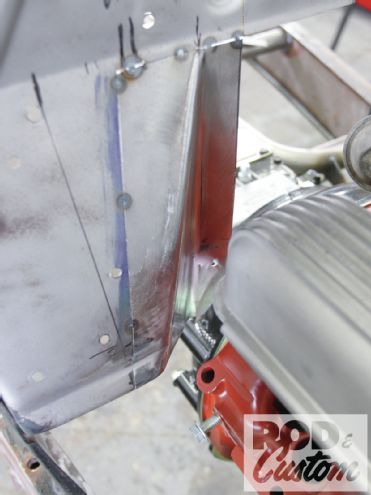
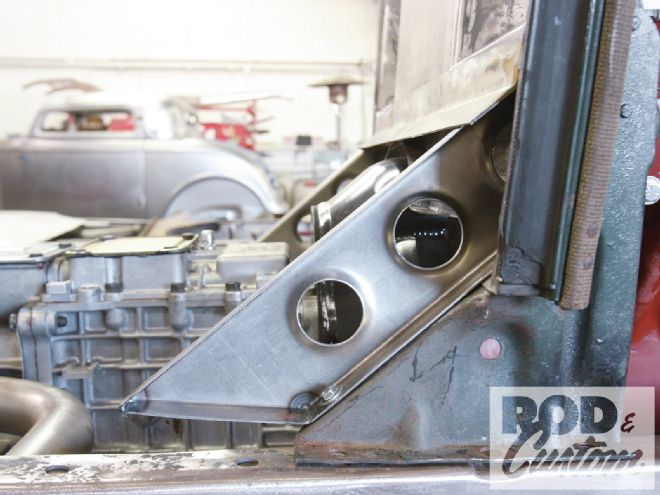
 13. However, before taking it back to the bench, he wanted to check his new product (floorboard risers) would allow the floor to clear the bellhousing, yet put the top of the trans cutout in the firewall below said floorboards. Mission accomplished, this ’32 will have only a very small trans tunnel hump and much wider foot riser section than a stock ’32, providing increased foot room.
 14. Back on the bench and another section of the original firewall was reused to narrow the recess area. It will be folded along the marked lines …
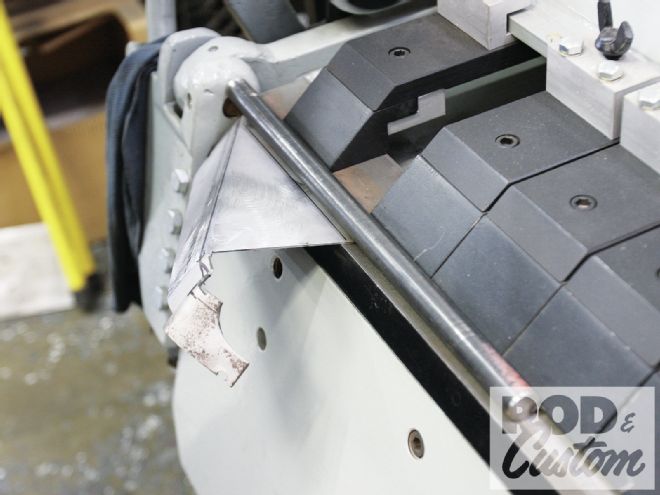 15. ...like so, using a specially made former in the brake to provide a neat radius to the bends.
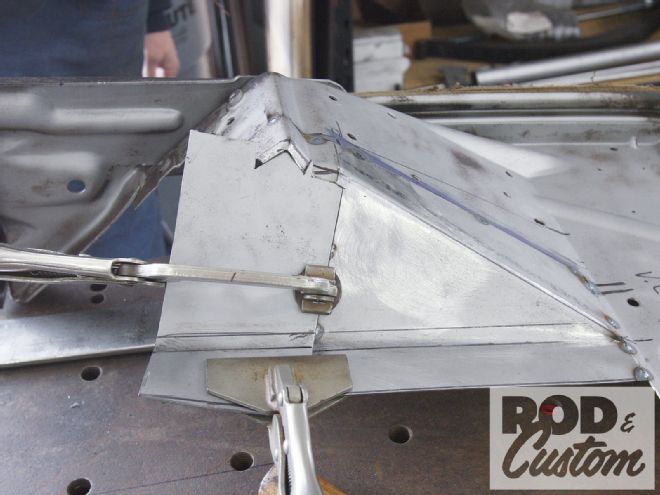 16. With the edges of the lower section rolled over using a hammer and dollies, another section of ’32 steel was trimmed to fill in the gap.
 17. With the filler pieces finished and tacked in place, you can clearly see how the recess will now be narrower, and more aesthetically pleasing.
 18. The remainder of the recess was formed from a single sheet of new steel, matching the gauge of the original. Bent and trimmed to fit, Walden now marks it for cutting the lower section.
 19. Now that the recess was completely hammer-welded in place, and ground smooth, the lower section was trimmed, leaving enough material for a return lip.
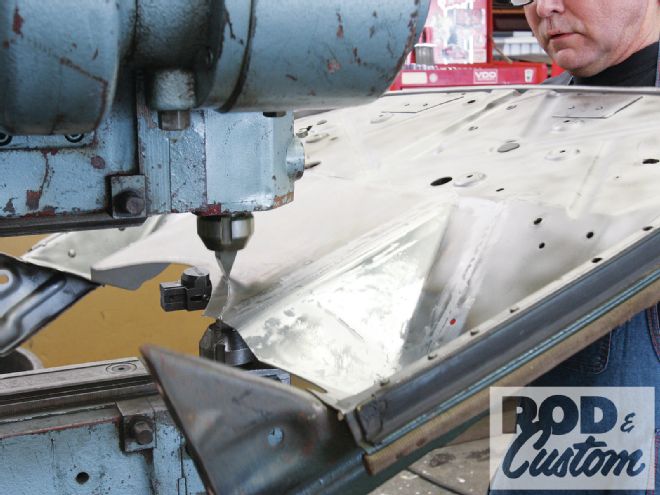 20. Here’s probably the one thing a homebuilder wouldn’t be able to do: Walden used a tipping die in his Pullmax to form the return lip, though a wooden hammerform could be fabricated to achieve the same result.
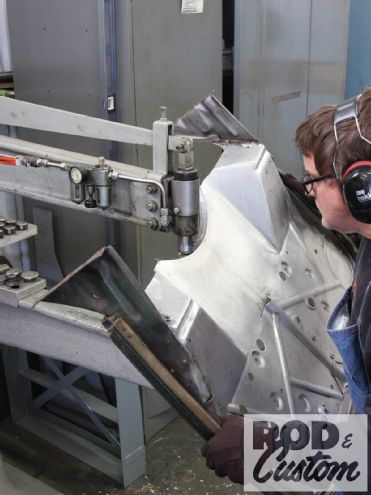 21. The lip required a little stretching in order to straighten the lower firewall, which Walden performed using a linear stretch die, though a hand- or foot-operated stretcher could also have been employed.
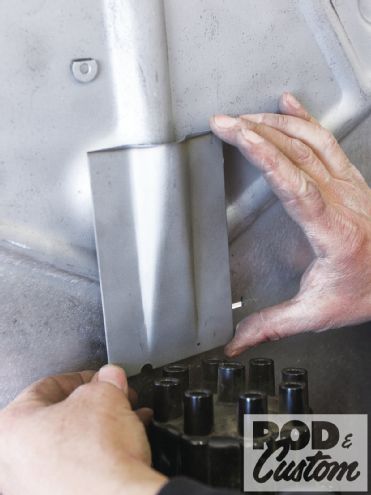 22. The observant amongst you may have wondered how Walden was going to finish off the large vertical bead he’d cut through in the center of the firewall. Here’s how: The original section was cut out and mocked in position, paying attention to clearance for the plug leads.
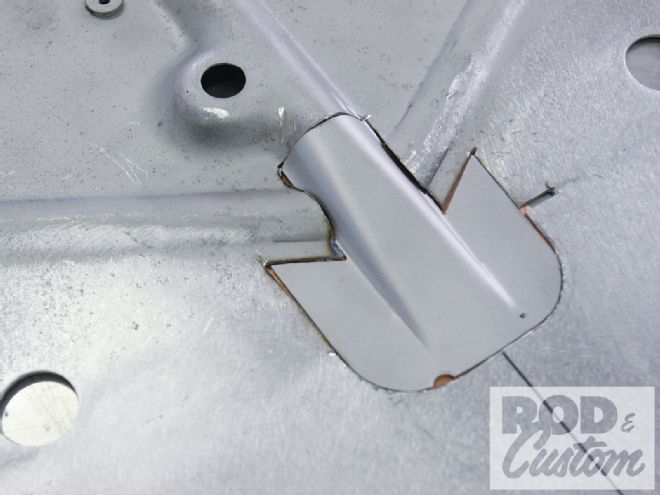 23. In order to allow as much clearance as possible for the leads, the section was let in as high as possible. Walden’s solution was to carefully cut around the beads as shown before TIG welding the section in place.
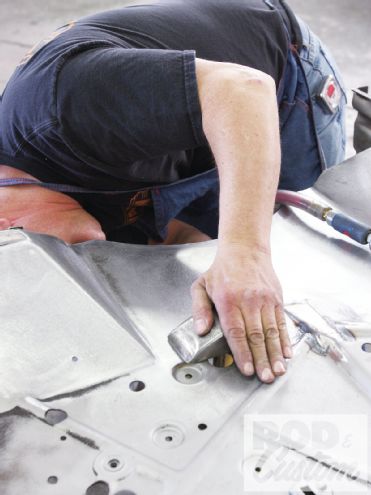 24. After it was welded, more hammer and dolly work saw the firewall straight once again.
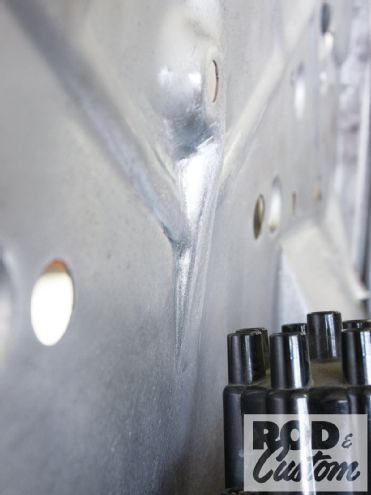 25. You’d never know, would you? This illustrates why the clearance was needed.
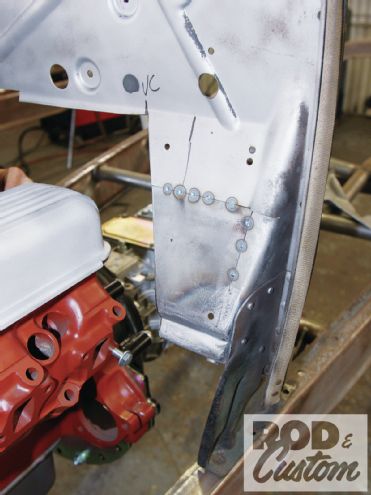
 26. The final job remaining was to finish off the passenger side where the box once resided, with a taper to match the passenger side (arrow). Well, that and to fill the numerous unwanted holes!
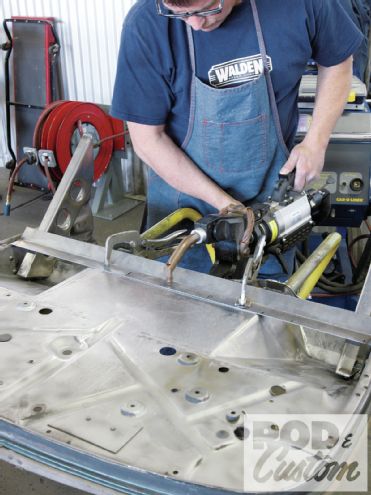
 27. The floorboard risers were now fitted. They use three stock holes for location.
 28. This panel was spot-welded across the rear of the firewall, though not to the risers.
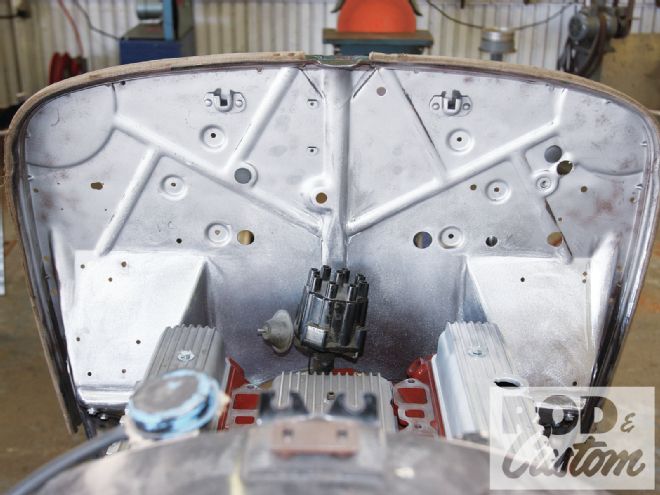
 29. The bottom of the risers sit on the subrails (not fitted). Looking across the chassis, you can see how the floorboards will clear the bellhousing, leaving just a small tunnel over the transmission itself.
 30. The final welding is to fit two closing panels on either side of the recess.
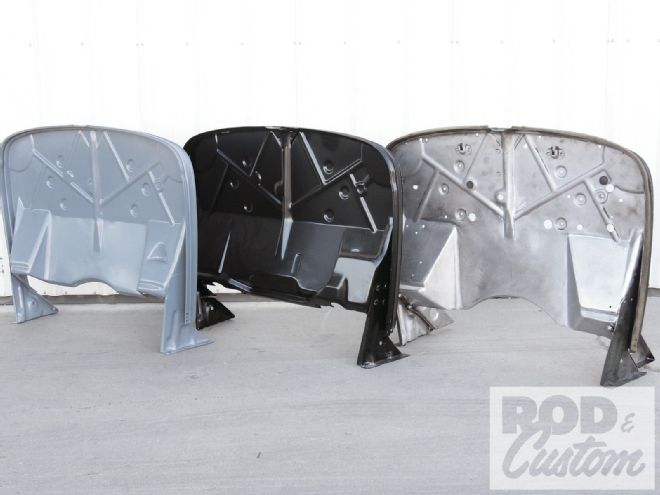 31. In the interests of comparison, here’s our Buick Nailhead firewall on the right, a reproduction stock version in the center, and a Walden-modified one to clear a small-block Chevy on the left. Note how ours is recessed so much more than the Chevy version, to clear the longer Buick engine. The stock version also illustrates the box on the driver side that we had to remove.