The owners of Inline Tube restore a muscle car every year. While each project serves as a rolling advertisement for the company’s line of restoration parts, John and James Kryta also use these cars to illustrate a point: With a little hard work, the right information—and correct replacement parts, of course—just about anyone can build an award-winning car. Admittedly, the level of workmanship on an Inline Tube restoration is generally higher than what the average shade-tree mechanic can readily accomplish. John and James pride themselves in pushing the resto bar higher with each car. But lessons they learn can be applied to anyone’s project.
This story is a good example of that thought process. We approached the Krytas to help us with a story about executing a top-tier, award-winning paint job, but John came back to us with a different spin. “Most of us will not do the metal patching, bodywork, and sanding that it takes to get the car ready for paint,” he explained. “All that work is performed at the body shop, and any good shop should be able to get an exterior panel flat and painted. Where most body shops fall short is with anything past the flat panel.”
For their projects, the Krytas take what they call an “assembly line process” approach to the car’s paint. Instead of painting the car in ways that are convenient for today’s restorer, they mimic the procedures that would have been done as the car traveled down its original assembly line.
“The rule of thumb for GM cars was not to use more paint than you had to,” John tells us. “GM did not waste body-color paint by painting the underside, cowl, or the interior of the car. The paint color was an outer body application only.”
Fisher Body had a few different processes to prep the car for paint, he says. In many cases the bodies were dipped in liquid primer to get the base level of protection. Others were sprayed in gray or red primer. Hints of that primer are all over the car when the carpet is taken out. “The big body plugs in the floor, all the holes and channels in the metal, are there to drain the excess paint after the body was dipped,” says John. “This is why you see heavy paint runs in the bottoms of GM cars.”
As concerned as GM was with wasting paint, it also wasted no labor time masking any part of the car. John says, “You will find overspray in just about every area of the car, and you won’t find any tape lines. In some special cases a plastic formed mask could be placed in an area to protect it from being painted, but this was not very common. Many of the parts were painted right on the body.”
For instance, the trunk lid was on the body at the time of paint, as were the doors, so the bolts that attach them should be painted over to replicate the assembly line process, says John. The interior and underside would catch the fine spray left over from the body spray. John says, “The final paint was sprayed on the car by hand quickly and with many runs. There was no sanding, buffing, and polishing. After the spray dried it was finished paint.”
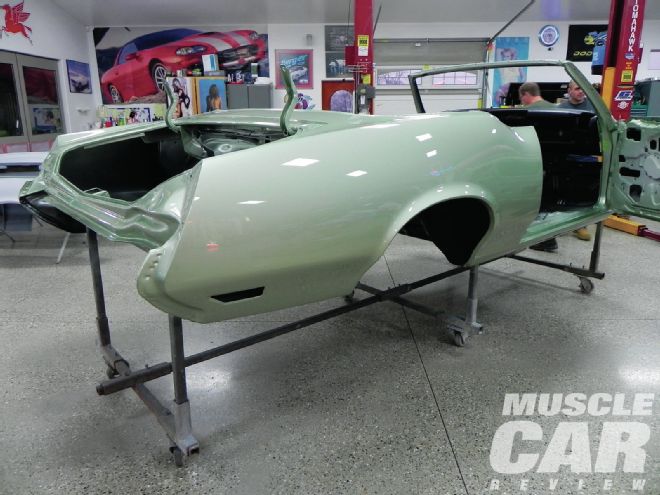 This is the finished body with base and clearcoat applied. All the large panels have been wet color sanded and polished, while the jambs and small areas were left as painted.
 The trunk area is masked off and painted black first, then the body is masked and the overspray is lightly applied. The drain plugs do not get painted and are installed after all painting is complete but before adding the trunk splatter paint.
 The body’s interior is painted black, and the overspray is applied over the black. The dash is painted a flatter black, which is applied after the body paint and overspray. It is the last color applied.
John points out that it’s much easier for a painter to replicate these processes during the restoration than to go back and add factory-correct details after the car is finished. So it’s important that the painter is familiar with them going in.
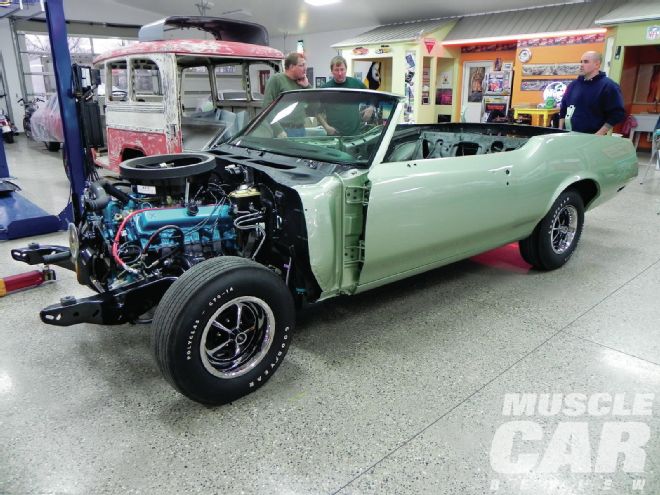
To illustrate the process, they photographed some of the key painted details on their latest project, a ’70 Olds 4-4-2 W-30 convertible. The 4-4-2 was a member of GM’s A-Body family, which also included the Pontiac GTO, Buick GS, and Chevy Chevelle. “While the A-Body assembly plants were scattered all over the country, the paint processes were very similar to all of them,” says John.
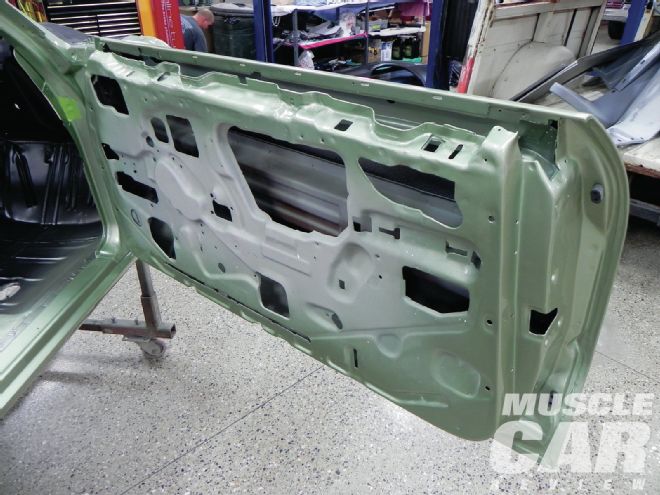 The inside edges of the doors have been painted, but not the centers. Just enough paint was used to cover the edges, and the rest is overspray.
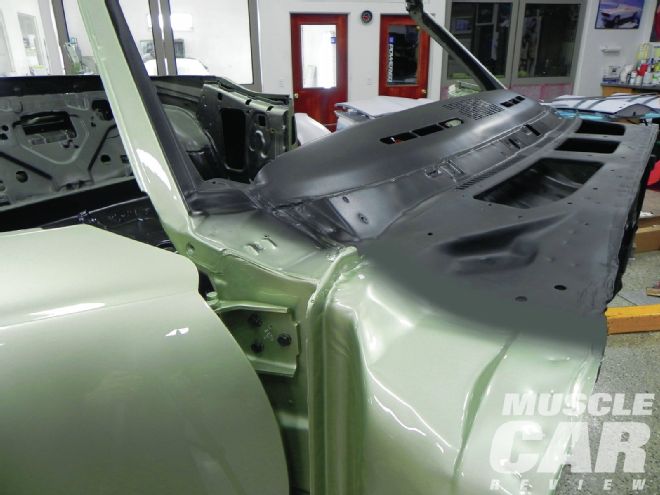 The cowl is painted flat black, and the body color comes right up to it. The final layer, the dash color, is applied over the top of both of them. Be sure to black out the windshield pillar on the edge and inside since you don’t want to see body color on this area when the car is finished.
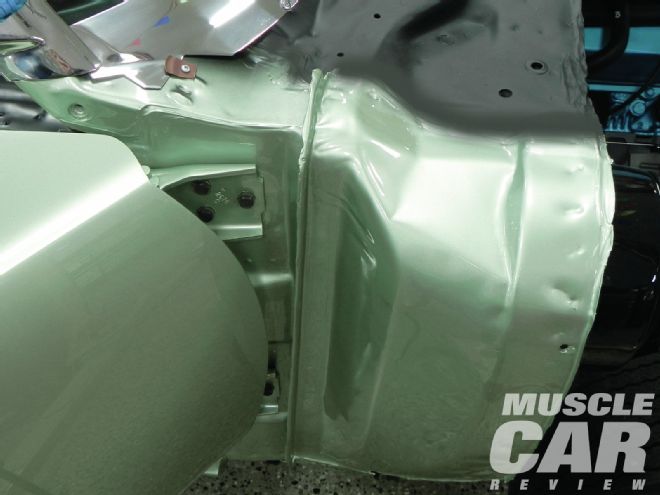
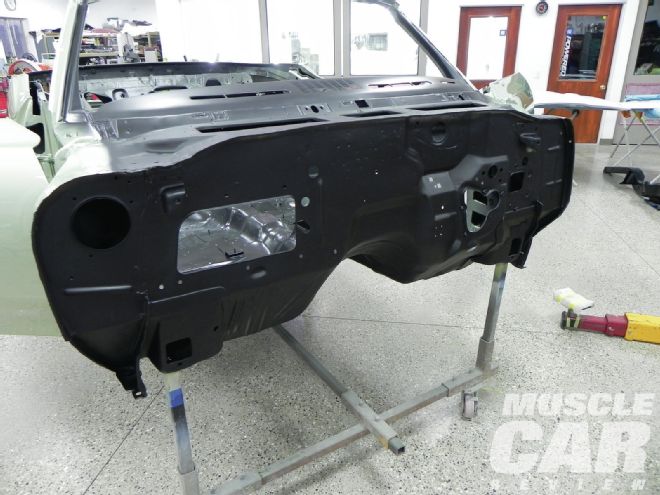 The firewall is also flat black. Since it was sprayed with the gun pointing down, the Krytas first shot some bare steel color at the lip and then sprayed the black over it—hard to see, but an important detail.
To duplicate the assembly line process, the car’s body was stripped, patched, skim-coated, primed, sanded, and then sealed. Once those steps were done, they painted the entire body one color—semigloss black for this car—“and then we started to layer the other details over the black base,” John explains. The car must be masked several different times. “We do all the overspray next,” says John. “We mask the entire car to dust the paint on the bottom. Then mask the entire car and do the interior, then again for the firewall, then again for the dash, then again for the final paint.” Yes, there is a lot of masking.
John believes the best way to determine how your particular car was finished at the factory is to find a low-mile (under 5,000) example and examine the details. “The problem is that there are very few of these cars anymore, and many have been spruced up with a spray can over the years, losing these important details.” Here, some of those details are brought back to life.
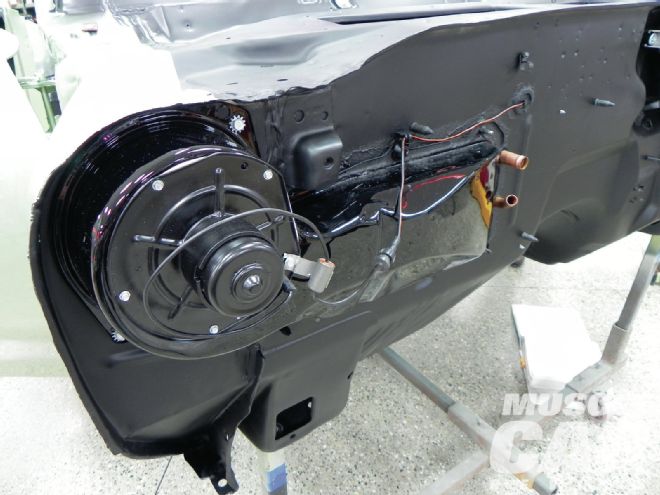 Since the components used to assemble these cars were made by many manufacturers, they were all different shades of black. Replicating this in the restoration gives a greater sense of detail. Here, the heater box is gloss, the motor is semigloss, and the firewall is flat.
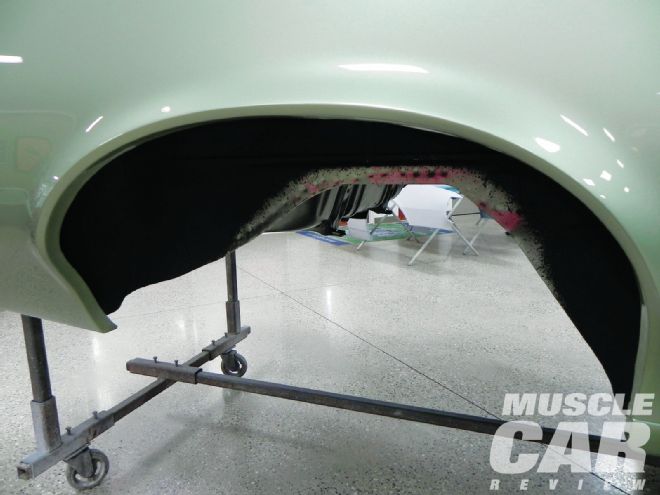
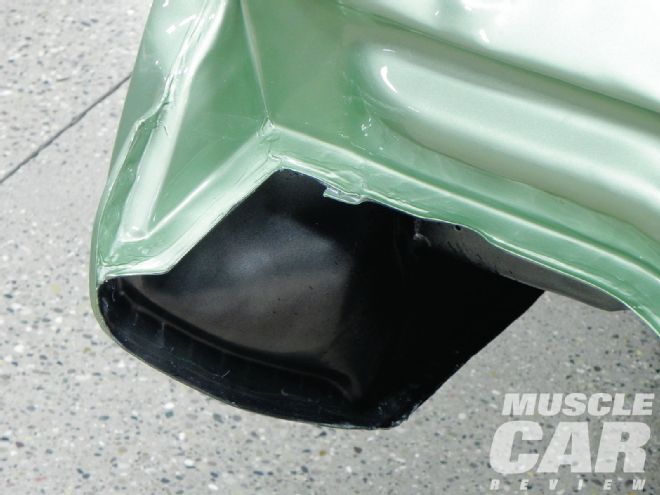
The bottom of the wheelwells is painted black, then some green body color overspray is added and the area is finished with an undercoating. “We left the green edge to show the process of the assembly line,” John says. “Sometimes the undercoating is only in the path of the tire. It seemed to be up to the worker how much material was used.”
Since the components used to assemble these cars were made by many manufacturers, they were all different shades of black. Replicating this in the restoration gives a greater sense of detail. Here, the heater box is gloss, the motor is semigloss, and the firewall is flat.
The bottom of the wheelwells is painted black, then some green body color overspray is added and the area is finished with an undercoating. “We left the green edge to show the process of the assembly line,” John says. “Sometimes the undercoating is only in the path of the tire. It seemed to be up to the worker how much material was used.”
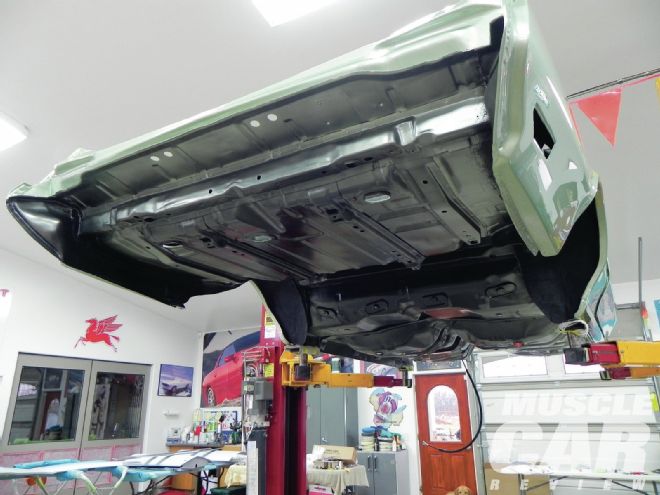 The bottom is blacked out, and anywhere the body color touched the black gets a fade of green body color. Tape the body off, hold the spray gun as if you were painting the panel, and mist over the edge.
 This is where the flat firewall color overlays the floorpan’s semigloss black, and the body overspray is down along the bottom edges.
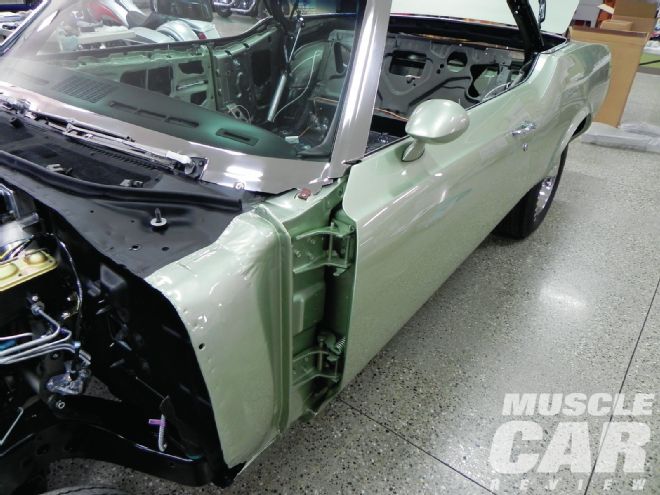
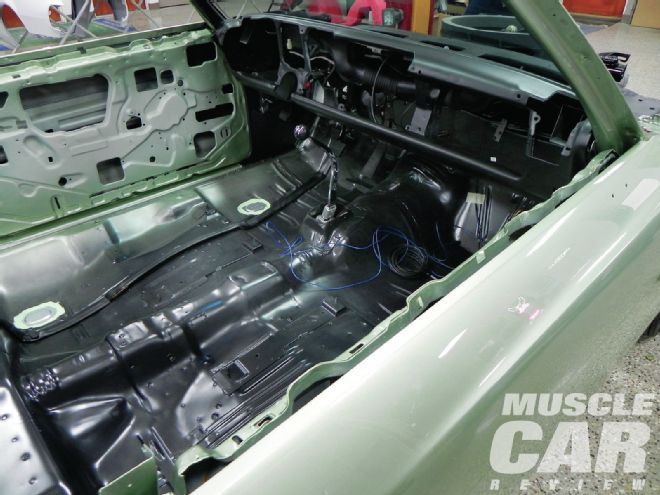 Now you can see all the materials coming together. The entire body was painted black, the doors were shot in gray primer, and the body-color overspray was applied before the final dash color. Also note the steel-color body plugs installed. The body sealer was usually black, and the body color covers it, but the body drain plugs were put in later with sealer that was usually white, cream, light green, or in some cases orange. This car was done with light green sealer custom made for it.
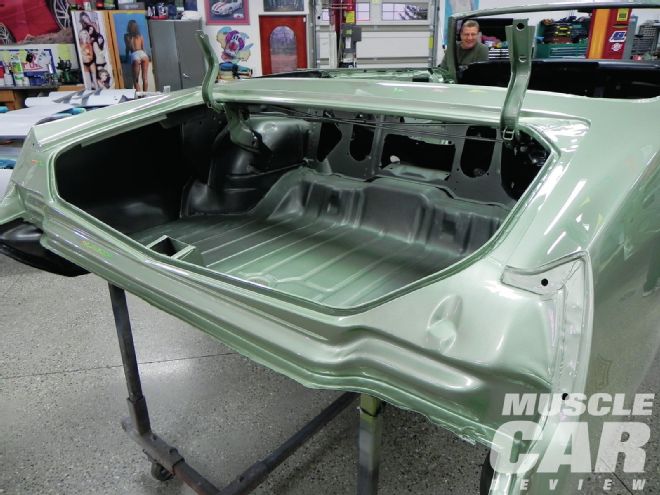
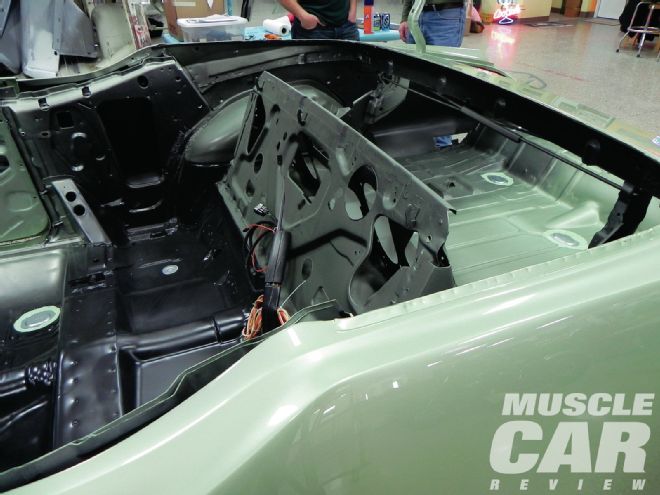 Since this is a convertible, there is lots of overspray on the back package tray area and on the tops of the wheelwells. This will make a nice fade once the trunk splatter paint is applied.
 At the factory the doors were painted on the car, so the bolts should be painted body color also. These will be painted using a touch-up brush or an airbrush before the fenders go on.
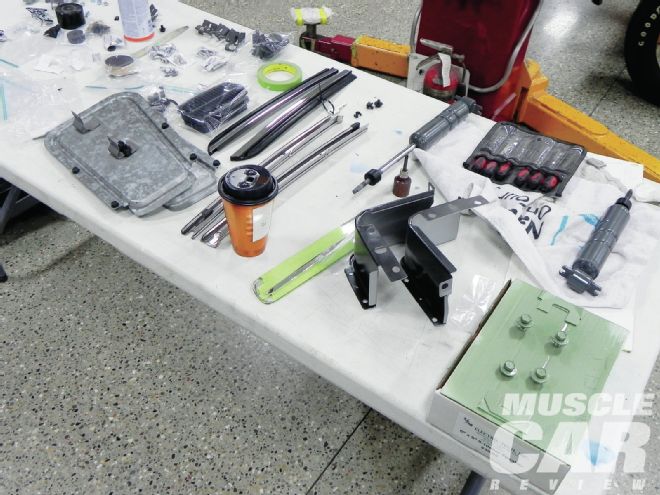 Small pieces, like trunk shims and bolts, can be painted and put in later, although the parts would have been together when the car was painted at the factory.
 In the corner of the tail panel you can see the sealant was brushed on and painted over, and the body color drifted onto the black of the car’s bottom. The area also has a stripe of undercoating, used to reduce the noise of stones coming off the rear wheels and hitting the metal.
 The front fenders also have overspray on the back side. Note the “W-30” written on the fender, done so the emblems wouldn’t be forgotten. Though these kinds of details won’t be seen unless you look closely in the dark crevices, they’re neat to discover.
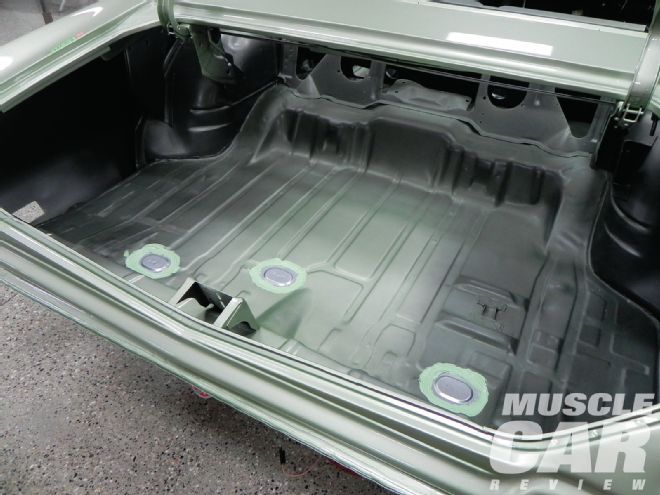 The trunk has been painted black and the body overspray applied so the floor plugs can be glued in. These plugs have little feet—they’re dots—to keep them from being pushed in too far. The sealer is brushed on after the plugs are installed to give them the factory-fresh look. The splatter trunk paint will go over most of this, but the edges will show the layers of the process.
 Once the car goes back together and you start to see all the paint fades against the contrast of the solid colors, all the details start to pop.