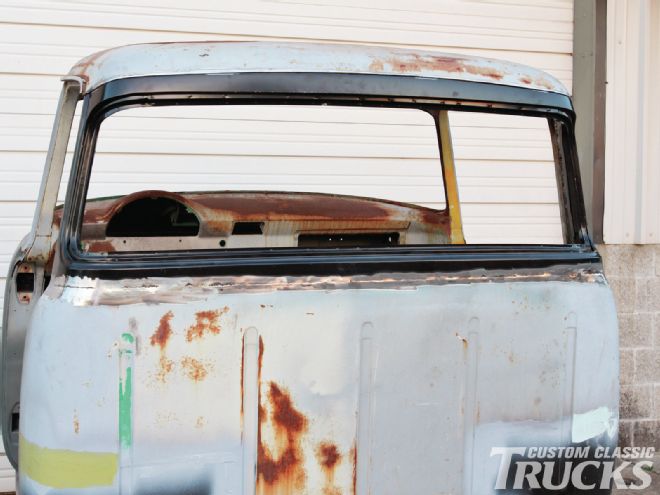
In the opinion of many enthusiasts, the 1956 Ford pickup was one of the best-looking trucks to ever roll out of the Ford factory—and the most desirable of those were equipped with the optional big back window.
While big-window ’56 Fords are highly prized today, they weren’t all that popular when these trucks were new. Just 6,200 buyers of the 137,581 pickups produced that year chose to spend the additional $16 on the option. That makes the odds of finding one today pretty slim, but just because you can’t find an original one doesn’t mean you can’t have one. Thanks to LMC and their big back window conversion kit, where there’s a will there’s a way.
Sitting behind Jake Brazille’s shop, Jake’s Place in Florence, Oregon, was a ’56 small-window pickup. To be charitable the cab was rough, to be honest it was one step up from scrap, but being someone who likes a challenge the decision was made to save it. After installing cab corners, sills, and just about every patch panel in LMC’s catalog the next step was to convert it to a big window.
To make the big window conversion we ordered the following parts from LMC:
49-9330-TSteel rear window frame 49-9258Rear window rubber 49-9754Rear window-tinted 49-6189Rear window molding- chrome 40-1691Rear window molding clips
While this swap looked to be a challenge at first, the entire procedure was done in a day. The LMC window frame fits extremely well, and thanks to inner and outer flanges that fit around the doorposts, positioning the frame properly is easy. The only real challenge in the entire procedure is trimming the cab below the window frame precisely for a tight fit. This takes time, patience, and the frame may have to be put in place and removed a number of times, but the results will be worth it.
One of the reasons given for the poor sales of the big back window option in ’56 was that it wasn’t cool. That is to say buyers feared the expansive rear glass would make the interior too hot in the summer. Given when new these trucks were for work, not play, that argument made some sense. On the other hand, today these trucks have a vastly different role and being cool takes on a new meaning. With the new big window appearance is improved dramatically, visibility better, and the cool factor is way up.
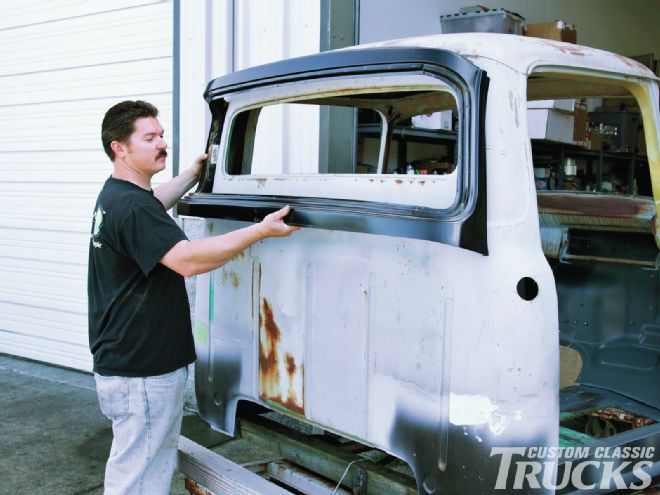
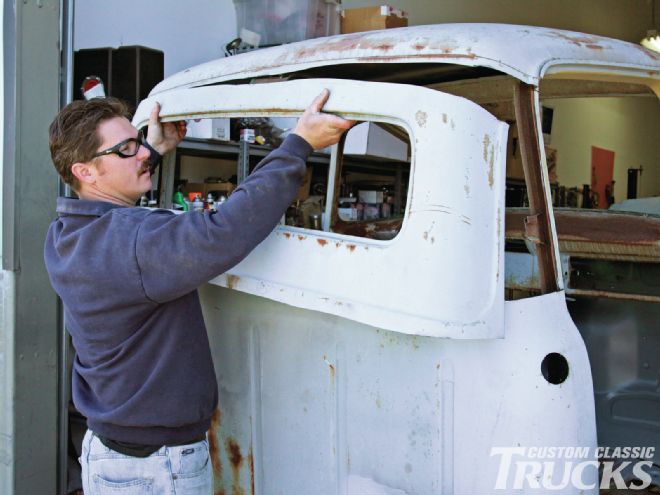
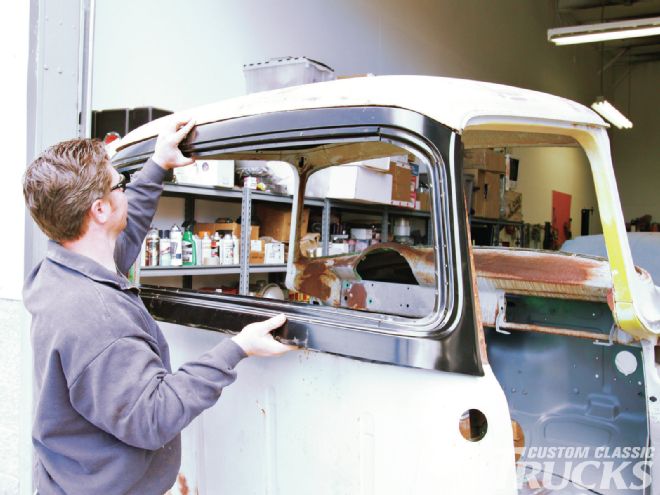
1. To compare what is to what will be, Jake Brazille holds the new LMC F-100 big window frame up against our small-window cab.
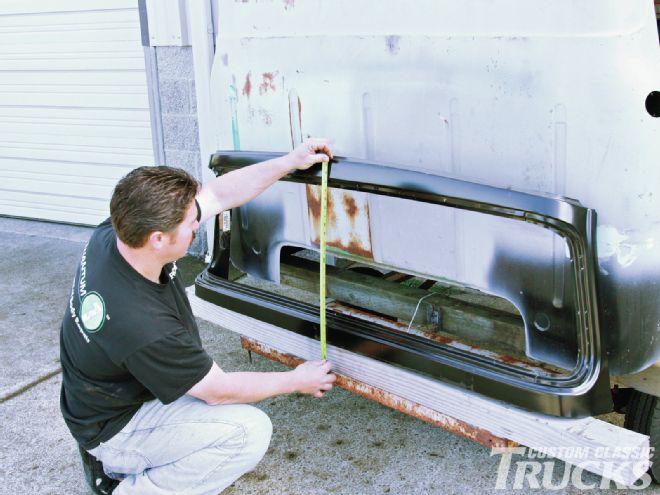
2. The first step was to measure the new frame from top to bottom to determine where the cab will be cut.
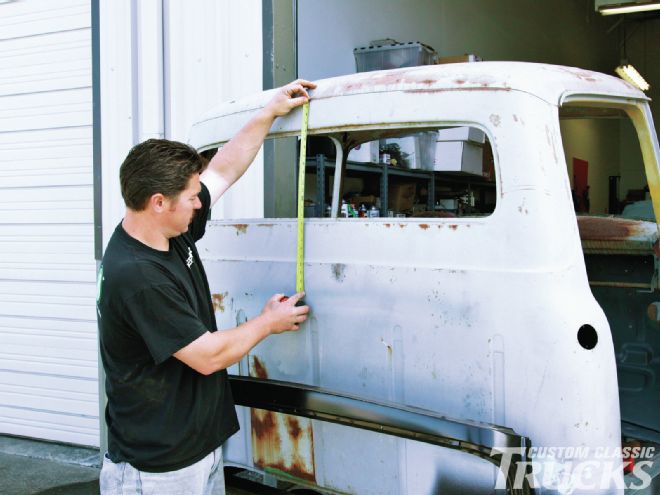
3. Jake transferred the measurement from the frame to the cab. The first cut was made short to leave plenty of material to trim for a precise fit.
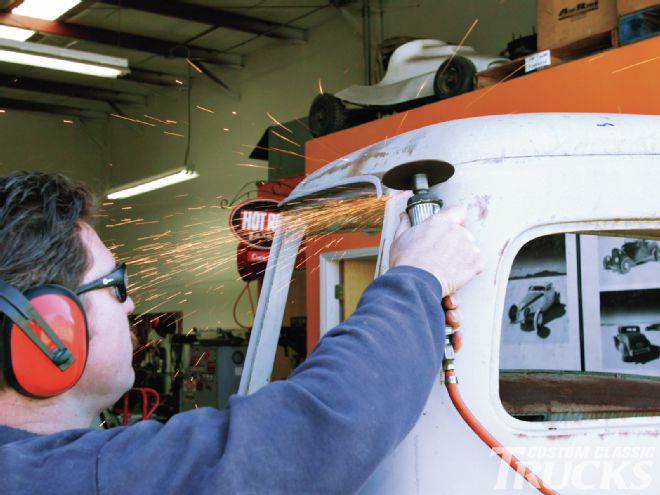
4. A “whiz wheel” was used to start the cuts at the lower corners; these cuts would extend around the sides to the doorpost.

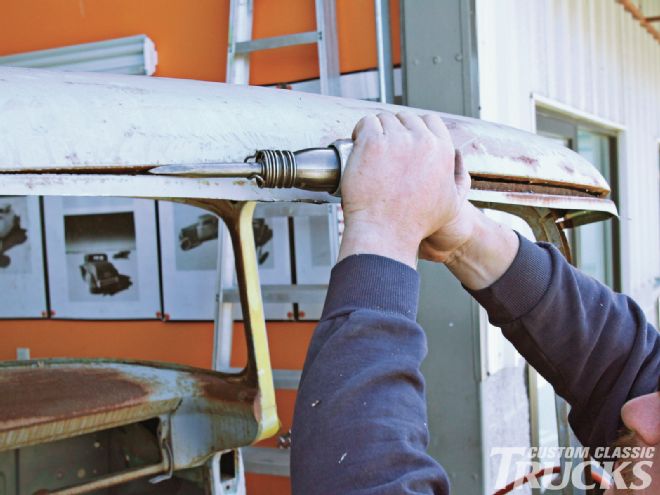
5. To continue the cut below the window from one side to the other, Jake got out the reciprocating saw—noisy, but effective.
6. A cut across the back panel was made just below the seam where it is joined to the roof. The panel was also cut vertically behind the latch posts on both sides.
7. With all the rough cuts made, the rear panel was removed in one piece.
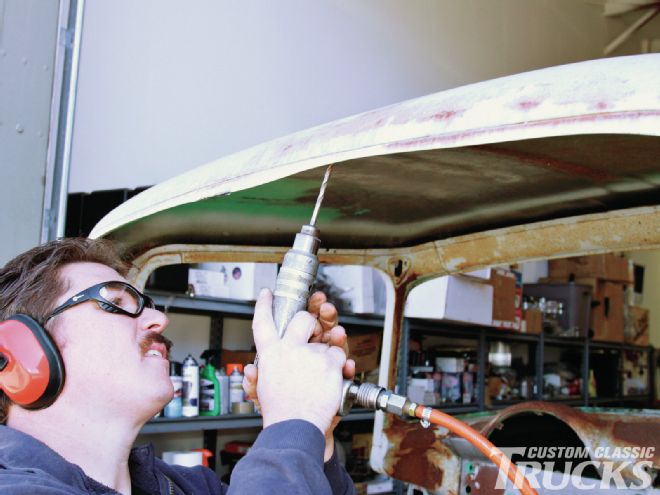
8. To remove the remaining portion of the back panel that was still attached to the roof all the factory spot-welds were cut with a drill.
9. Even with the welds drilled, a little light encouragement from an air chisel was needed to separate the remnant of the back panel from the roof.
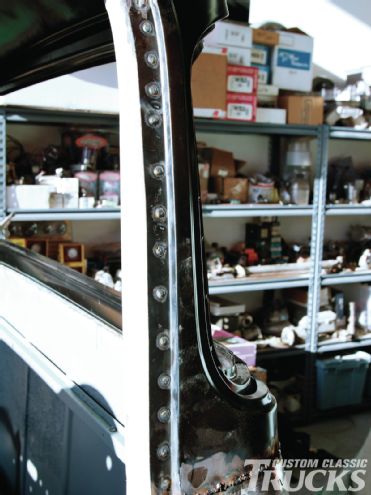
10. The same procedure was used to remove the skin from the upper portion of the doorposts; the spot welds were drilled and the remaining skin was removed.
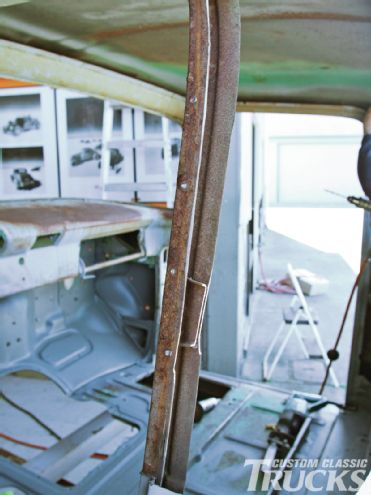
11. A hammer and dolly were used to make the flange on the top perfectly straight.
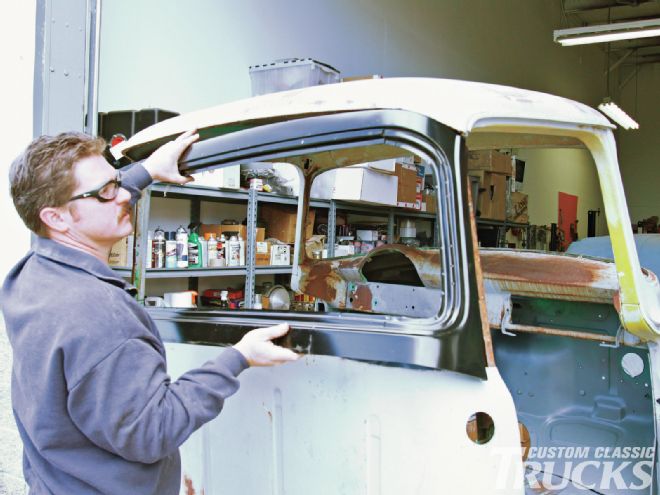
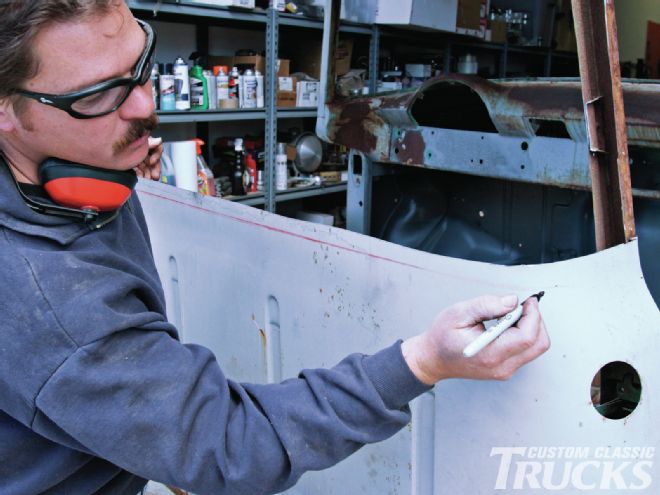
12. With the back panel completely removed a test fit was made. It fit against the back of the cab tightly enough for a new trim line to be drawn on the body.
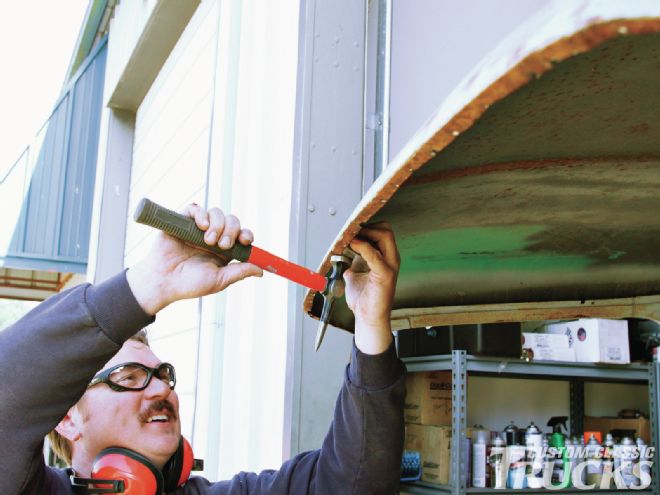
13. Jake filled in gaps on the trim line with a felt tip pen. Note how much has to be trimmed; it’s much better to remove a little at a time than to take off too much on the first cut.
14. Before the new back panel was installed the portions of the cab we would no longer have access to were coated with Eastwood’s Rust Encapsulator.

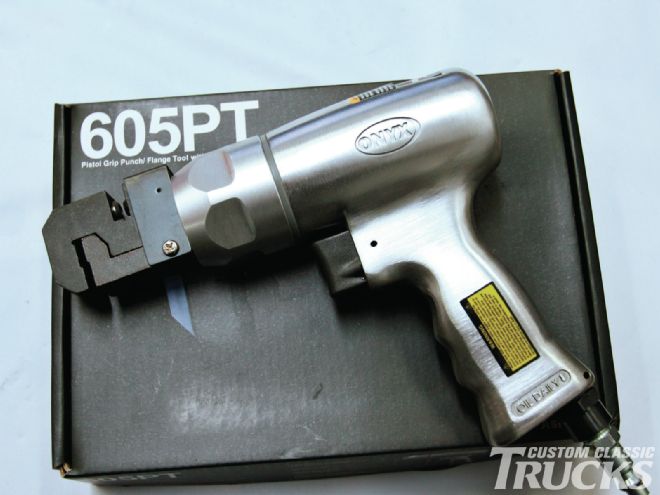
15. As there were sections of the new window frame that would be spot welded, we ordered a combination flanging tool and punch from Eastwood.
16. The inner and outer flanges of the window frame that wrap around the rear door posts were punched with holes for spot welds.

17. One last test fit revealed only minor trimming on the corners of the cab was required.
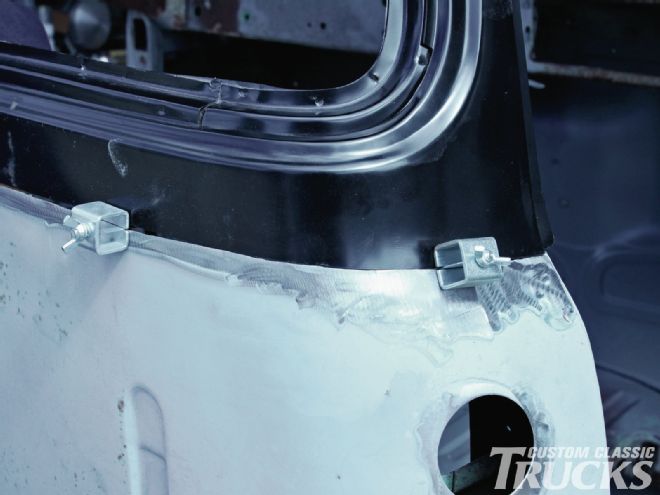
18. Satisfied with the fit, the new panel was held in perfect alignment with Eastwood’s welding clamps. These little gadgets are a big help when butt welding panels.
19. With the window frame in place we fired up the Miller wire feed and tack welds were made at the corners.
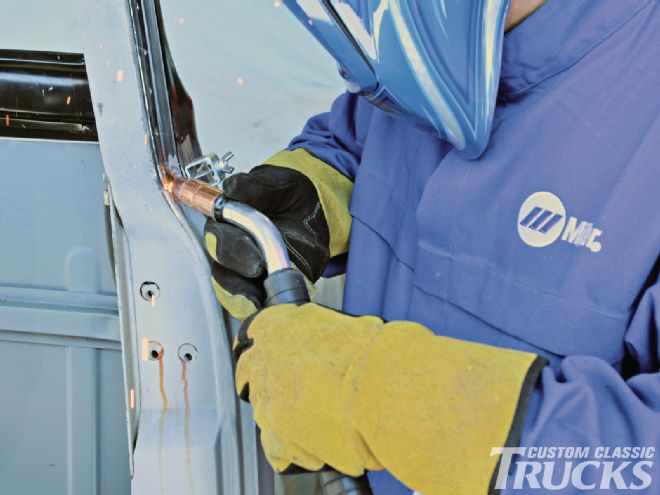
20. The flanges of the frame were secured to the doorposts with spot welds in the holes that had been punched earlier.
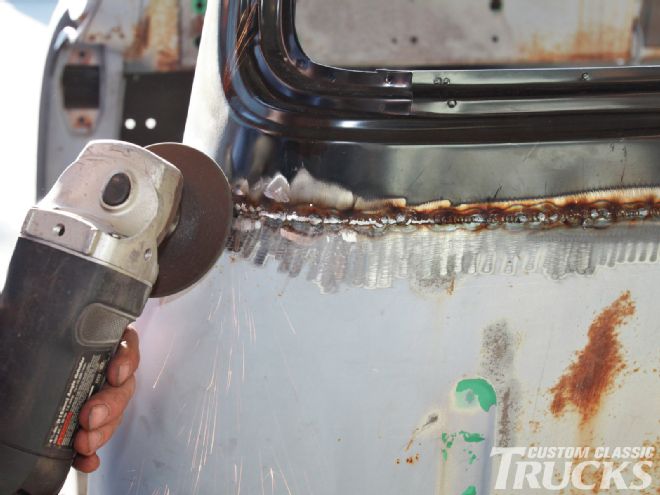
21. The frame was carefully tacked every few inches, then the spaces between the tacks were filled in with more tacks. Jake skipped around to keep from concentrating the heat in one area then ground the welds smooth.
22. The finished installation makes a dramatic difference. The joint above the window was tacked on the inside for now while Jake decides if the seam will be welded and smoothed.