
Paint your own car. That scared you, huh? But why not? If you can build a car from the ground up it’s a safe bet you already mastered techniques like welding and fabrication. You probably already have a compressor in your home shop too. One of the most common questions regarding spraying a car at home is the legality. Sure some paints are illegal in some states, notably California, but it can be done. It’s also complicated isn’t it? Well, it doesn’t have to be. Especially not with Summit Racing’s Paint and Auto Refinish System. They’ve taken all the mystery out of the process. No longer do you have to go into your local paint supply house, if you even have one in your town, and wonder what it all means.
 1 Summit Racing supplied all the consumables to tackle the bodywork: Evercoat Rage Gold filler, DA discs in 40-, 80-, and 150-grit, and a roll of longboard sandpaper in 80-grit.
The Summit system is easy to follow, has a variety of reducers to work at different temperatures, and is available in basecoat/clearcoat or single-stage versions (meaning no clear is required). There’s also a range of primers and sealers, and Summit Racing doesn’t just sell paint, they sell everything required to tackle bodywork. We ordered body filler, polyester putty, a paint starter kit (comprising masking paper and tape, mixing cups, paint sticks, gun filters, tack rags, and strainer) as well as a new spray mask and suit. Check out the range at www.summitracing.com.
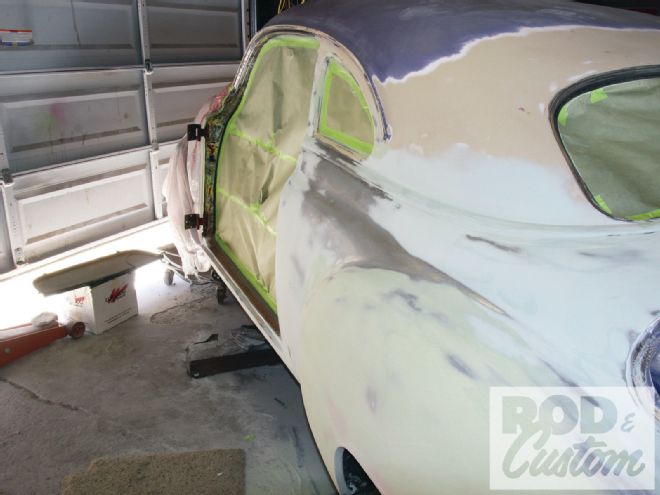
Project Purple Pig is finally ready for body and paint, so we turned to Summit for everything we needed. It was sure nice to have everything arrive in a couple of boxes rather than make repeated trips to the supply house. We’ll not be painting the Chevy just yet, as we want to drive it a while to iron out any bugs, but we’ll show you how to apply filler, sand it, and lay on high build primer. Any paintjob is only as good as the prep beneath it.
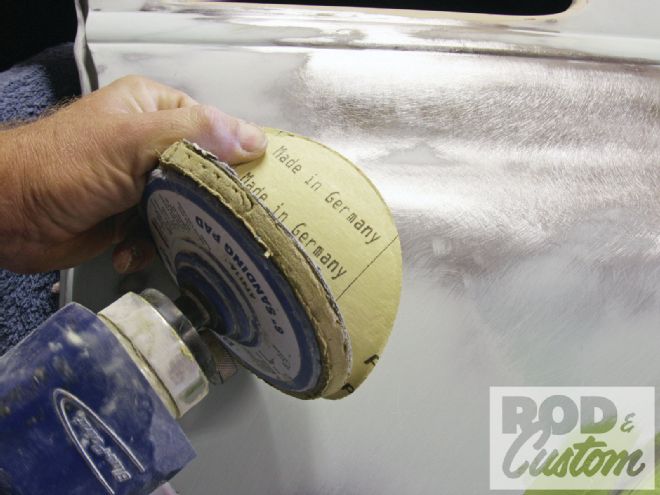 2 DA discs are available in two styles depending on your backing pad. A hook-and-loop Velcro-style is available, but I prefer to use the self-adhesive type. Generally more cost-effective, their only disadvantage is that they are not reusable.
Speaking of what’s beneath the paint, I prefer to apply filler over bare metal. With the cars we mess with, any paint is probably several decades old, and if I’m going to spend good money on materials, I want them to stay on the car, so I start with fresh steel, or ’glass. Applying filler over old paint not only relies on the paint’s adhesion but may cause shrinkage marks in your final topcoat later on. I should mention that I used to be a bodyman, and modern techniques have probably changed since
I switched professions, plus everyone has their own techniques, so the following is just “my” way of doing things. It’s the way I’ve always done it, and it works for me. Modern primers can have filler applied over them, and in fact you’ll see I have done just this over some old primer on the roof of the ’49, but I sprayed that primer, I know what it is, and I know what’s under it! I prefer to use a DA (dual action) air sander with 40-grit discs to prep the metal, though 80-grit could be used.
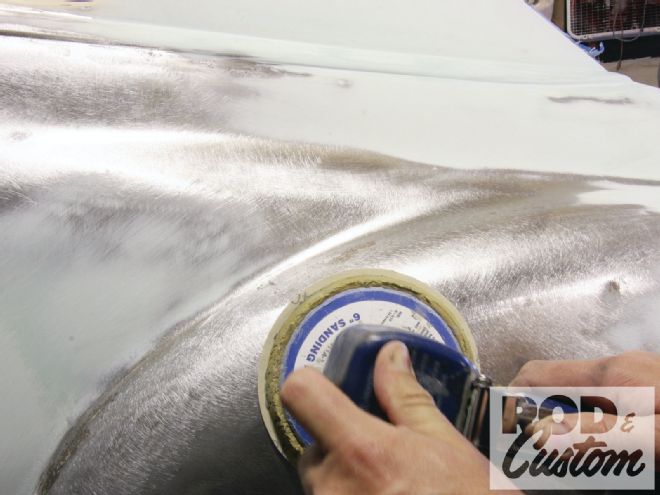 3 My personal preference is to apply body filler over bare steel, and to prep the surface with 40-grit pads. Ensure you wear a quality particle mask while sanding filler, paint, or bare metal.
It should be stressed that body filler is not intended as a cure for deep dents or rust, but as a skim coat over well-repaired body panels. If your filler is more than 1/8-inch thick, it’s too thick! Once the panels are sanded and blown clean using an air gun, it’s time for that skim coat. On opening the tin of filler, you’ll probably see a honey-like resin layer on top. This just means the components have separated during storage, so stir the filler with a paint mixing stick until it achieves consistency throughout. You may also find the filler is thicker at the bottom of the tin at first. While cardboard is often used for mixing filler on, it absorbs some of the resin, so use a plastic or glass mixing board.
The accompanying captions explain how to mix and apply filler, but try to spread it smoothly and over the entire area to be repaired. If you find you need to add filler in some areas after sanding, re-apply a spread over the whole area, not just the low section, as it’ll make it way easier to block it flat than trying to block an area of fresh filler in the middle of already-sanded filler, as you’ll always end up sanding the new and the old. Oh, and while it may look like there’s a lot of filler on the Chevy, the gallon can was enough to cover all the repairs seen on both sides of the car. A thin skim can go a long way!
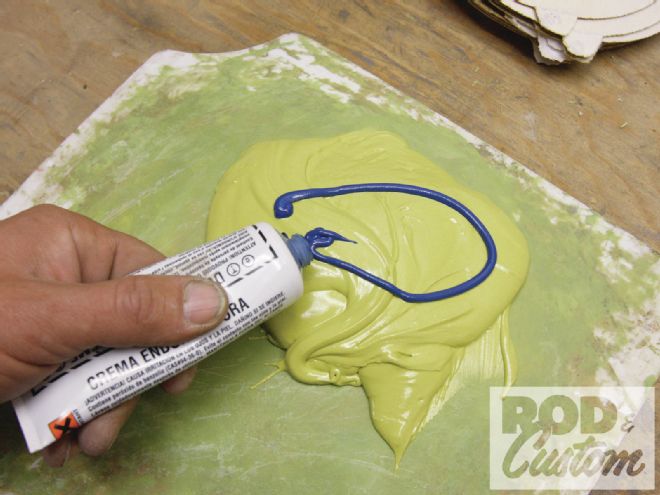 4 Experience will tell you how much filler to mix at one time, but try to mix no more than you’ll need, adding the appropriate amount of hardener. Too much and it’ll harden too quickly, not enough and it’ll never harden. It’ll also harden quicker at higher temperatures.