

There are many things that separate an average muscle machine from the standout car that makes people turn their head and take notice. The overall paint finish ranks right up at the top of what counts when it comes to the visual statement that speaks loudest. No matter how worthy your machine might be in other qualities, it is the paintwork that makes the first impression, whether rolling down the boulevard, or under scrutiny at the show field. In fact, often the key feature a car is judged by is the appearance of the paint. How often is a car described disparagingly as a 20-footer, meaning that it might look good from 20 feet away, but fails under close scrutiny?
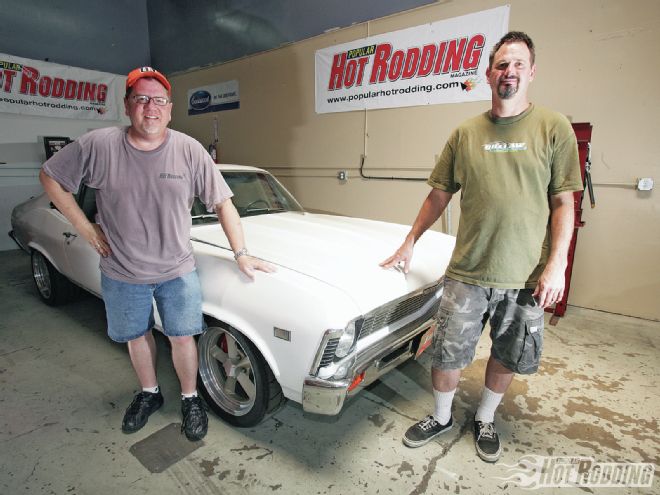 When PHR editor Johnny Hunkins (left) brought his ’68 Nova project to Ron Aschtgen of Outlaw Motorsports for a full paint and body makeover, neither man knew what evils might lay below the cheap refrigerator white paint covering the car.
A fine paintjob shows outstanding craftsmanship as it is approached for a closer look. By contrast, the 20-footer might be a disappointment as you see the flaws, blemishes, and shoddiness of the paint. A great paintjob will only draw admirers in. It takes a dedication to quality and an uncompromising eye for detail to achieve a fantastic show-quality paintjob, and that starts from step one—the body.
Pro or DIY?
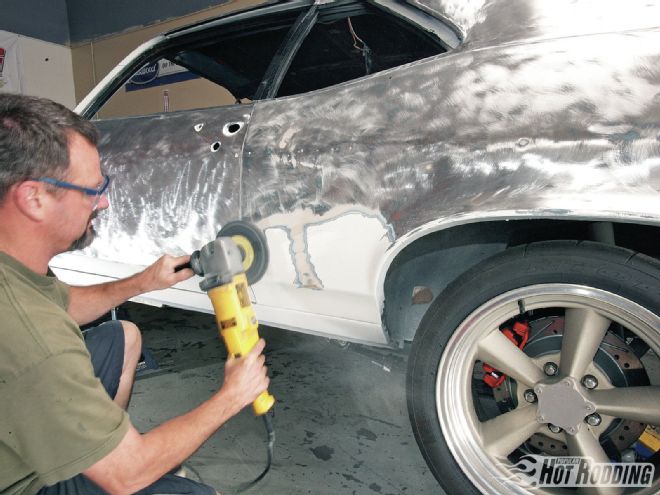 Stripping the exterior paint revealed a multitude of sins hiding under thick layers of plastic filler. After stripping down to the bare metal the ugly truth became clear. An assessment by Ron suggested replacing the passenger-side doorskin and quarter with new panels from YearOne, while the driver-side panels were rough but repairable.
One of the first things to contemplate when staring at your project and dreaming about perfect paint is what—if anything—you will tackle yourself. Here it is important to take into account your previous experience and level of skill, the equipment at hand, and perhaps most importantly your own level of perseverance. Make no mistake, body restoration and paint is one of the most labor-intensive endeavors you’ll encounter, and messy work at that. Expert paint and bodywork is very expensive, and it is tempting to save some of that costly work with a little (or a lot) of sweat equity. Nevertheless, it is also all too easy to get in over your head, or end up with results that fall far short of your dream of that fantastic paintjob.
We’ve known do-it-yourself auto hobbyists who have succeeded in major body panel replacement and repair, and taken the project to completion with stunning paintwork, all in their own garage. We’ve also seen enthusiastic but botched attempts at the same that resulted in perpetually unfinished projects, and more work for the professionals who finally took over. What is important here is to be realistic in qualifying your own skill level, commitment, and time when deciding whether to tackle different aspects of your paint project, or just turn it over to the pros.
Our ’68 Nova was driven to Outlaw Motorsports in Riverside, California, where Ron Aschtgen and crew handled the full body build and repaint. While Outlaw is known for its outstanding work in restoring, modifying, and rebuilding muscle cars, the shop is not a dedicated paint and body facility. Most of the operations involved were performed using tools and techniques that can be handled by the DIY enthusiast, while the actual paintwork was accomplished in a makeshift shelter within an open warehouse space, not unlike the kind of place a hobbyist would fashion in his own garage.
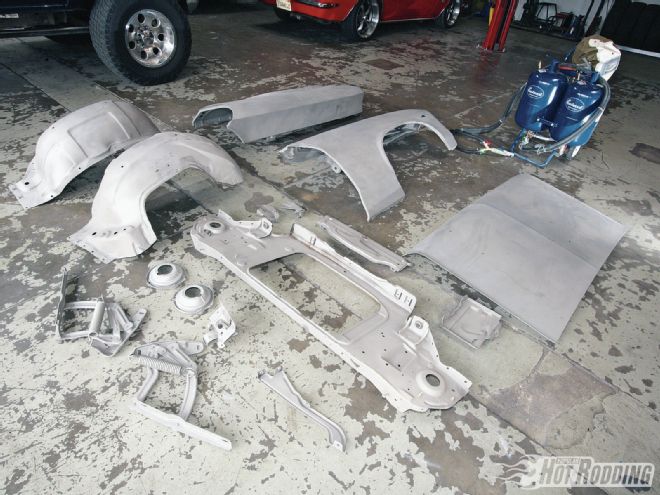 The loose panels were unbolted and stripped by mediablasting using the Eastwood Master Blaster dual media blast system. The front fenders proved uneconomical to repair versus replacing with new panels from YearOne. Blasting is especially useful in tight and recessed areas, such as the gutter areas and glass channels.
Ron says: “It is the detail work that sets a job off, and the quick production shops will not put that kind of time into it. If you are going that route, you can get a better job by taking some of the car apart and putting in some of the prep. If you are paying top dollar at a custom paint shop, you naturally will expect perfection from the shop. How much an individual wants to handle depends on the approach, and the skill level of the individual.” Whether you plan on taking on the whole task of bodywork and paint yourself, or place it in the experienced hands of an expert, it is worthwhile to understand exactly what is involved in getting the job done.
We’ll go through all of the major steps in taking a car through the body and paint process, from beginning to end. We will show you how it’s done, and what’s involved, and leave you with the decision on whether you should tackle the work as a whole, or attempt some portion of the job. Nothing done on this project is beyond the realm of a capable do-it-yourselfer.
Disassembly, Stripping, and Assessment
 Only after stripping and inspection can a thorough assessment of the project be made. Weighing the time and cost of repair versus the cost of new metal, we determined that replacement panels were the best option for the front fenders, right doorskin, right quarter, and valance panels. All the reproduction panels for this project were from YearOne.
Any paintjob involves decisions, and one of the most important decisions you will make is just how far you want to go. Here, there are extreme ends of the spectrum. There are plenty of quickie paint shops that will scuff the existing exterior paint, bust out the tape, and spray away. That barely rates as a minimum approach. On the other hand, perfection means pulling the car apart and down to a bare shell, stripping off the last nut and bolt, and kicking off the paintwork from there. Most of us will end up somewhere in the middle. The condition of the car plays an important role in the decision-making process. Indeed, if the car is otherwise mint, and is being re-sprayed in the stock color, a scuff and exterior re-spray may be quite acceptable.
For our project Nova, several factors set the direction. Overall, the vehicle was in questionable condition, with layers of old cheap paint and previous bodywork, meaning that the paint would have to be stripped completely off. Another factor that helped define the direction of the effort is the fact that we will be changing colors to a metallic orange from Eastwood. Since we do not want any trace of the previous paintjobs peeking through, the color change reinforced the need for substantial disassembly of the body. We removed every bit of exterior trim and components from the exterior body, along with the removable body panels.
We presented the stripping process in detail in the Dec. ’11 issue of PHR (see “Life’s a Blast”). The existing paint and filler was stripped using a combination of 4.5-inch Eastwood stripping discs (PN 31086) on an angle grinder for the accessible sheetmetal surfaces, and Eastwood’s Master Blaster dual media blaster in the tighter, recessed areas. When we started there was no way to know what ills resided beneath the cheap white topcoat of our Nova. Ron explains: “You find out pretty much everything once you strip the paint off. The Nova looked pretty good, but once we got down to metal we found the passenger side was buried in filler and plastic. Once you start stripping, you’ll usually discover what’s under all those years of cover-ups.” When it was all said and done, an assessment of the stripped sheetmetal revealed we would be ahead by replacing the front fenders, valance, and support, as well as the passenger-side doorskin and right rear quarter-panel. We ordered all of the replacement metal from the Nova experts at YearOne. Without a doubt, this is a point in our project that really takes some faith and perseverance, since our once-acceptable Nova was now looking like a torn-down wreck!
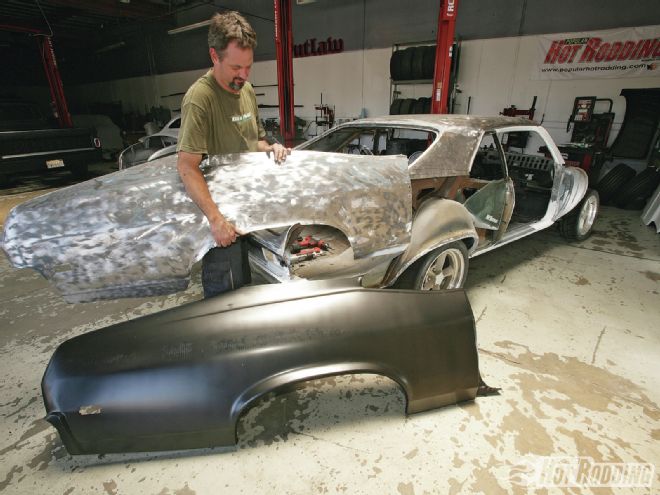
 Bolt-on panels are the easiest to replace, while items like the doorskin require cutting out the old and careful fitting of the new. In the case of our passenger door, the work involved was less time consuming than attempting to repair the original.
Body Building
 Quarter-panel replacement is even more involved, as the panel is entirely welded into position. Fortunately, the availability of replacement aftermarket metal for popular muscle cars has made major body restoration more practical than ever before.
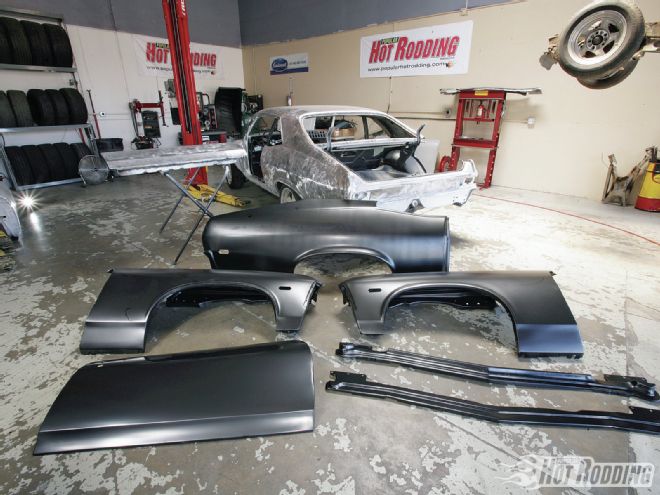
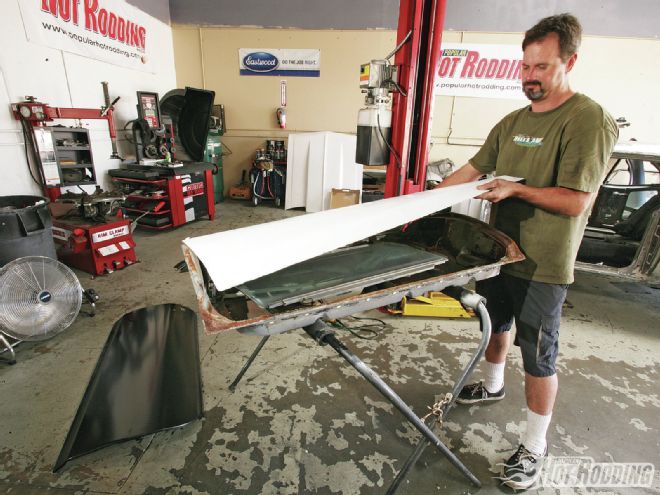
After stripping the car to bare metal, the body build will progress to sheetmetal repair. In the process of a major body restoration such as ours, you will be looking at two basic choices: repair or replace. In the case of bolt-on body panels for which replacements are readily available, it doesn’t take long for the cost of new metal to make economic sense versus the option of repairing the existing panel. Essentially, this was the case regarding the sheetmetal from the firewall forward, as well as the hood on our Nova. With replacement panels available at a reasonable cost, repairing the old bolt-on panels would have consumed far more time and money.
The remaining panels are typically not direct bolt-on pieces. Regarding the doors, replacing a damaged doorskin is more involved than simply bolting on a new panel, since the skin needs to be fitted to the door’s inner structure. Our driver’s door was deemed satisfactory, requiring minor repairs, while the passenger-side panel was damaged enough to warrant replacement. We covered this operation in detail in the Jan. ’12 issue of PHR (see “Door Prize”). Rear quarter-panels are even higher in difficulty, as they are an integral, welded part of the body tub structure. Replacement here means laborious cutting out of the original, and welding in of the new panel. Our driver-side panel was good enough to save (see “Cutting Out the Cancer” in the Feb. ’12 issue), while the passenger-side panel was rough enough to warrant replacement (see “Confined to Quarters” Mar. ’12).
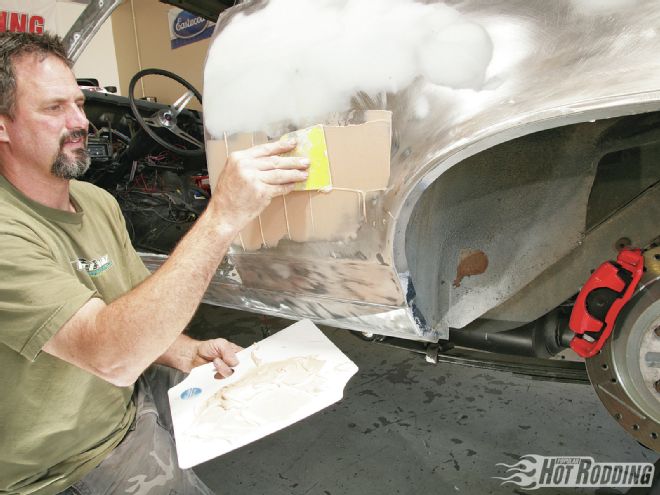 Plastic filler is an acceptable way to finish the metal once it is worked to as near perfection as possible. Mix the filler with the recommended amount of hardener, and then work it onto the panels with long strokes using an autobody spreader.
While replacing individual panels might seem simple enough, the real measure of a quality job is the fit and alignment. Ron says: “Getting the panels right is really one of the toughest parts of the job. Replacement panels will typically need custom work in this area for a perfect result. You will usually need to do some welding and dolly work to get the lines and gaps perfect. On the Nova, we reworked the door edge at the replaced quarter-panel and door edge gap to make it look uniform. It required grinding and welding to stitch it back up, for a nice, even, and tight gap.” Ron at Outlaw delivered by custom-fitting the minor obtuse areas at the door-to-quarter and decklid-to-quarter gaps. Never try to build up a panel edge with filler!
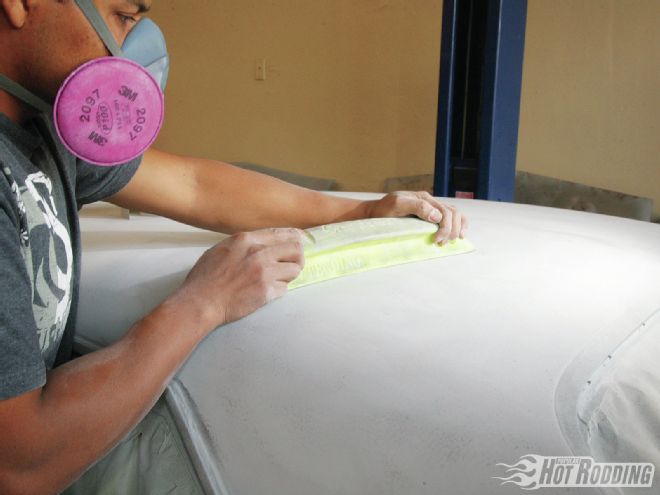
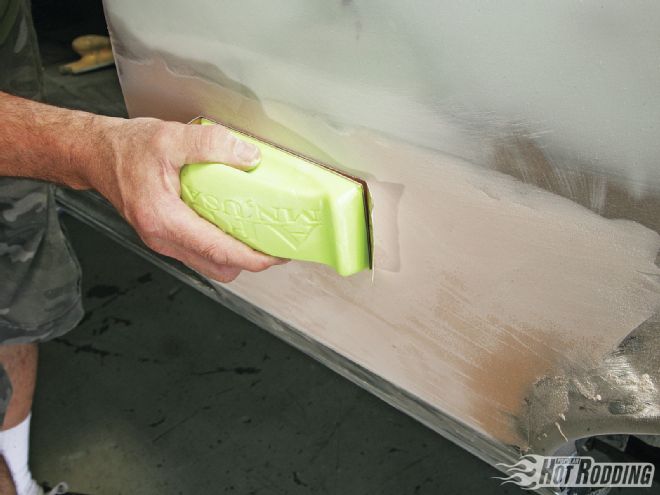 An assortment of flat, flexible sanding blocks is a must for leveling the body filler. Start with a rough cut using 40-grit abrasive to aggressively cut the filler to match the body contour. The filler should feather smoothly into the adjacent metal.
The rule with panel alignment is that you start with the fixed portions of the car and add the bolt-on parts, shimming and adjusting for alignment. Naturally, the edges of the rockers and quarters are fixed, so the first step is to align the doors to these parts. Run the doors parallel to the rockers, and with the body lines aligning at the quarter with an even gap. Next, the front fenders are aligned to the front of the doors, setting the fore-and-aft and height adjustment of the fenders. The hood is laid in place and the gap at the fenders is adjusted for an even and parallel spacing at each side. The leading edge of the doors and trailing edge of the fenders can be adjusted inward or outward to meet by adjustment.
Prep and Primer
 After the initial rough block sanding, the filler should be sanded progressively finer with 80- and 220-grit paper, otherwise the primer and topcoat can eventually shrink back showing the coarse sanding scratches of the repair. Minor flaws and pinholes in the filler can be corrected with finer-texture filler, referred to as glazing putty.
With the major panel replacement handled, it was on to minor metal massaging and repair. The right tools are a big aid here, including a selection of body hammers and a variety of dollies, which we obtained from Eastwood. Especially handy is a stud welding set, which allows a pull point to be temporarily welded to the sheetmetal for pulling. We used an Eastwood Uni-Spotter for a variety of metal-pulling repairs. (For the complete story on using the Uni-Spotter, see “Smooth Move,” in the Apr. ’12 issue.) Years worth of dings can be coaxed back to smooth metal with a combination of hammers, dollies, and stud welder. Our Nova required plenty of attention. As Ron says: “There were pretty much repairs required everywhere, but the heavier damage was at the door and front section of the quarter-panel, but it was fixable. There were plenty of old slide hammer holes to weld up. We used the hammer and dolly where we could get to it, and the stud welder where access was limited.” Only once the metal is worked to the smoothest condition possible should the filling begin.
After the expert metalwork performed by Outlaw Motorsports, the body panel repairs required just a very thin skim of polyester body filler to achieve perfection. Our supply of filler, all ordered with the rest of our paint supplies from Eastwood, consisted of USC Feather-Rite lightweight body filler used for the bulk of the filling, and USC All-Metal and Finishing Putty to spot and glaze the repairs as needed in order to fill minor imperfections. The initial filler was worked starting with a sanding block and 40-grit paper, reapplying filler as needed. Once the repair was satisfactorily leveled and feathered in with the surrounding metal, it was sanded progressively finer with 80- and 220-grit sandpaper in preparation for the primer-surfacer coat. These repair areas can be sealed to prevent corrosion prior to the overall primer-surfacer application with Eastwood’s Self-Etching Primer, available in convenient aerosol cans.
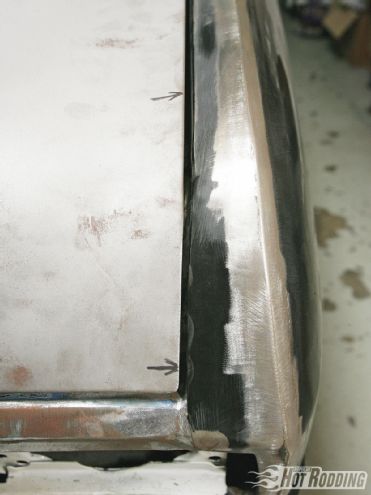 At this stage the panel fit is checked, and all of the panel gaps optimized. Often when major panel replacement has been done, the gaps will need additional reworking for a show quality assembly. Note the uneven gap (arrows) along this trunk-to-quarter join.
Applying the overall primer-surfacer is a major milestone in any major paint project. All of the heavy metalwork and panel massaging should be behind you, and the surfacer coat will transform the patchwork quilt of bare metal, filler, primer, and putty into something that once again resembles the unified look of a car. The main function of the surfacer coat is to build a layer of material onto the surface of the bodywork that can be sanded into a perfectly smooth surface in preparation for the paint to follow. As Ron says: “The primer work is really important, since it is the base of the paint. The work here translates to straight panels.” Block sanding ensures that the surface imperfections will be leveled out of the panels, cutting from the primer layer at the high points, while allowing primer to remain in the lower areas to provide the fill.
For the initial primer coat, our Nova was partially assembled, including the front fenders and doors. The decklid, hood, cowl, and other loose panels were off the car to allow full coverage of the panels and the recessed margins in the body where they install. Outlaw applied the Evercoat Ultra High Build Polyester Primer Surfacer using an Eastwood Concours spray gun kit, fitting it with a 2.2mm air cap kit to easily handle the heavy-bodied primer. (Check out the video “Eastwood Paint Gun” on PopularHotRodding.com.) Once cured, the surfacer was sprayed with Eastwood’s black aerosol Guidecoat to give a visual reference for the sanding process to come. Block sanding the primer began with dry sanding, using an assortment of sanding blocks from Eastwood, and relatively coarse 180-grit paper. This aggressive first cut provides quick and effective leveling of the surface, and the guidecoat will quickly call out any remaining flaws needing attention.
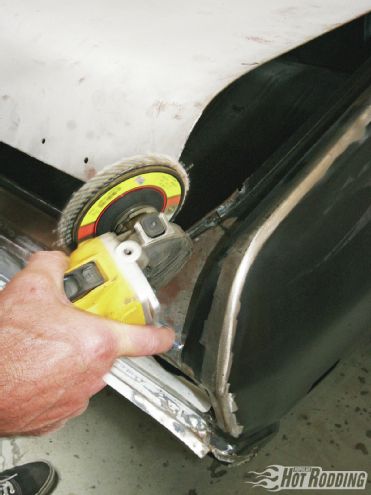 To perfect the gaps, grinding and welding on the edge of the panel is often required. To open the gap, the panel is ground on the edge, and then welded. Alternately, a gap can be reduced by building material on the edge, and then grinding it smooth and even.
After the initial primer and blocking work, the small remaining imperfections were filled and repaired with polyester finishing putty, and the car was once again given an overall coat of primer surfacer, this time using Eastwood’s 2K Urethane Primer. Once cured, the 2K was sprayed with guidecoat black, and sanded using a wet-sanding process, finishing with 400-grit for a virtually perfect surface. At the conclusion of the primer-surfacer stage, the body should be perfectly smooth and free of ripples and flaws, i.e. ready for paint.
Squirting Paint
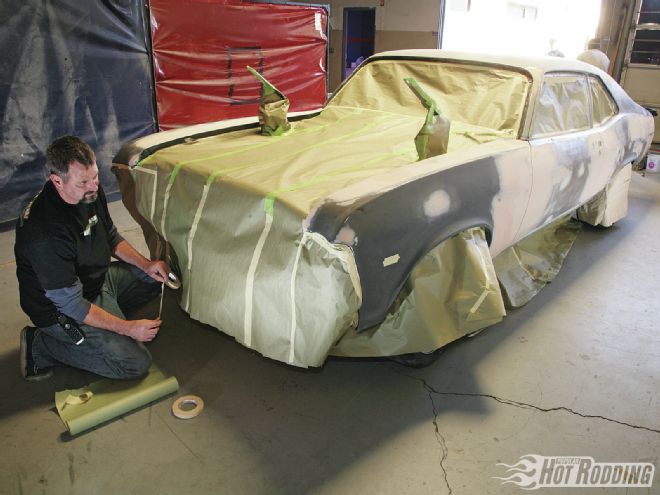 With the bodywork complete, the car was moved to an empty warehouse space cordoned off with a plastic drop cloth for protection against dust particles. The Nova was then prepped for the overall primer application with careful masking. The surface was thoroughly cleaned with compressed air, Eastwood’s Pre Paint Prep solvent, and given a final wipe with the tack cloths.
While there is no doubt that the primer stage is a satisfying step in the paint process, things take another giant leap forward as color begins to be applied. Naturally, a course of action has to be planned out in advance of the paintwork, especially with a complete repaint. Plenty of blind areas and jambs need full coverage for a detailed look, and it is important to consider how those areas will be addressed. Ron at Outlaw decided the best approach would be to complete the inside portions of the hood and decklid, while painting the doorjambs with the doors already hung, but the fenders removed for full access of the hinge area while spraying. With these inside areas completed, they could later be masked, and the outside of the loose panels, and the front fenders could be shot off the car, while body and outer doors are shot as an assembly.
For the inner surfaces of the panels and jambs, Eastwood’s Malibu Sunset Metallic basecoat was sprayed directly over the smoothly sanded primer surfacer. These areas were prepped for paint by first blowing down with compressed air, then wiping with Eastwood’s Pre Painting Prep aerosol solvent, and finishing with a thorough wipe down with Eastwood’s Crystal tack cloths. Before painting, it is important that the surfaces are totally free of debris and contaminants. Eastwood’s HVLP Concours gun was refitted with a 1.4mm tip, and three medium coats were plenty to achieve even coverage. Once the base color coat was sufficiently flashed dry, Eastwood’s urethane clear followed. Right off the gun, the flow out and gloss were excellent.
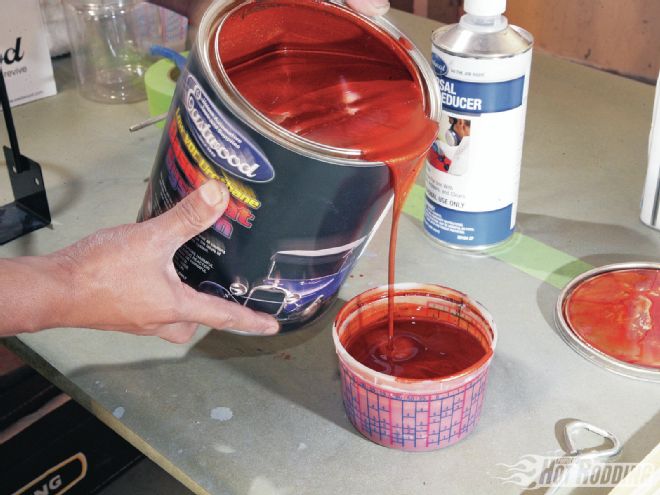 With the tedious block sanding done, the exterior of the car was virtually perfectly smooth. Moving on to color, the jamb areas would be sprayed first. We selected Eastwood’s Malibu Sunset Metallic, a stock color in Eastwood’s own basecoat/clearcoat product line.
Once the jamb areas were completely cured, attention turned once again to the exterior of the car. The previously painted areas were carefully masked, and the loose panels racked in the makeshift painting area of the garage-sized working area. As was the case with the previous jamb painting session, the surfaces were thoroughly cleaned. For the exterior body panels, Outlaw elected to start with a white epoxy sealer coat as the initial step in the paint regime. The sealer improves the quality of the surface for the basecoat color application, achieves better color holdout, and enhances the “pop” of the finished hue. Ron says: “This metallic base is pretty translucent, and you would see the effects of the gray below. The white base gives the metallic a chance to really stand out.” PCL 2K Epoxy Primer-N-Seal was applied in a double coat, followed by the five basecoat color coats once it flashed dry. The Nova paint project was now coming together.
Rather than follow immediately with the clear as would be the case in a high-volume shop, we elected to allow the base to cure, much like a DIY guy working in his own garage on the weekends. This was followed by a light wet sanding with 600-grit paper. This achieves a very smooth surface for the clearcoat application, substantially reducing the surface texture of the final off-the-gun finish. Ron discloses: “We sanded the basecoat color before we shot the clear to knock it down.” For the final money shot, the surfaces were once again cleaned, and then shot with four medium coats of Eastwood’s Urethane clear.
 Once the primer surfacer had fully cured, it was fogged with Eastwood’s block aerosol guidecoat and dry block sanded using an aggressive 180-grit paper. The relatively coarse cut will level quickly and effectively, while the guidecoat reveals the progress. After the initial sanding, the remaining flaws were filled with glazing putty, and the car was re-shot with Eastwood’s 2K urethane primer-surfacer. The second primer coat was then wet-blocked to a fine 400-grit finish.
Cutting and Buffing
While the paint results as shot were more than satisfactory, for a true show car look the process of cutting and polishing the paint takes it to the next level. For the average paintjob, the work is done once the paint guns are put away in the booth and the masking tape is pulled off. In the world of custom or show-quality paint, there is still work to do if the goal is to approach perfection. No matter how clean the paint might be, and no matter how skillfully the paint is sprayed, there will be flaws and surface texture—especially in a poorly ventilated makeshift garage environment. If everything was done to top standards, the texture will be minimal, and the paint surface will have very little contamination, but a glass-smooth surface with a mirror finish demands a little bit more. Ron tells us: “The final cut and buff is do or die: It is very important. The sanding part is critical, since a mistake here can be a disaster if you cut through or cut too coarse. The final finish relies on a skilled job with the cut and polish.”
The technique is really not new; in fact, it is a form of burnishing and polishing, which has been around for centuries. What it consists of is fine-sanding the surface until it is perfectly smooth, and then using buffing techniques to polish the paint to a brilliant luster. In the world of automotive refinishing, special tools, techniques, and materials are designed just for this purpose. The sanding is normally a wet sanding process, using water to clean and lubricate. Wet sanding is done with very fine sandpaper, with the goal of flattening the surface while removing a minimum of material. Proper wet sanding requires skill, but most of all patience and a light touch.
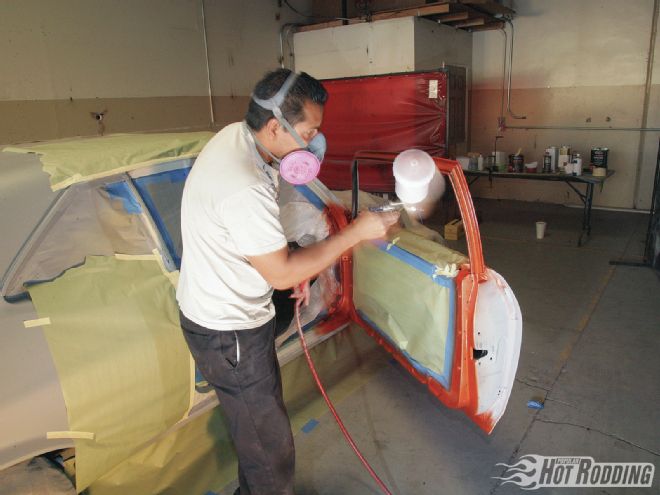 For the basecoat, the Eastwood Concours gravity-feed HVLP gun was fitted with a 1.4mm tip. After a complete cleaning with compressed air, pre-solvent, and tack cloths, the doorjambs were shot with the basecoat color until full and uniform coverage was achieved.
Once the sanding process is complete, the clear is polished to bring the surface to a beautiful shine. Usually this is done in two steps, with a coarser “cutting” step to remove the sanding scratches, and quickly bring the surface to a shine, followed by a polishing step to take the surface to perfection. Outlaw Motorsports began by wet sanding the surface smooth with 1,000-grit, following with a wet-sanded 2,000-grit to reduce the depth of the sanding scratches and make the buffing more effective. The polishing began with a wool cutting pad using 3M Super Duty Rubbing Compound, followed by a foam pad and 3M Perfect It Ultrafine Machine Polish. The final result was nothing short of brilliant.