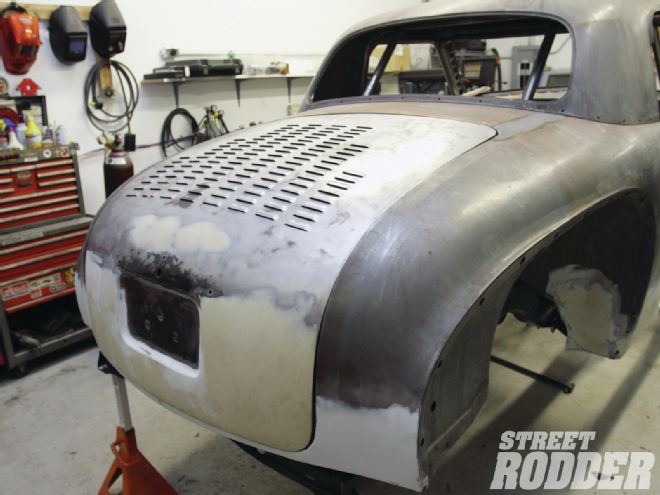
 RamRodder’s trunklid has been louvered, partially decked, and the lumps and bumps have been removed. The gaps still need a little work, but we’ll do that when we fit the doors.
When the body of our ’50 Plymouth came back from the strippers there was some good news and some bad news. The good news was the 61-year-old body shell didn’t have a dent to be found. The bad news was it didn’t have a floor either and there was some rust in the quarters and below the trunklid. The fabrication of the new floor was shown some time ago and the repairs to the back of the body were documented last month.

With what was done so far we were feeling pretty good about the overall condition of the body—at least until we took a closer look at the trunklid, which hadn’t been stripped. When we went to reinstall and check the fit nothing lined up like we remembered. We knew the handle and latch had some issues and suspected the lid had some surprises hidden under the poorly applied filler and dull beige paint. Upon closer inspection our suspicions were confirmed, we found our coupe had been clobbered right in the trunk handle.
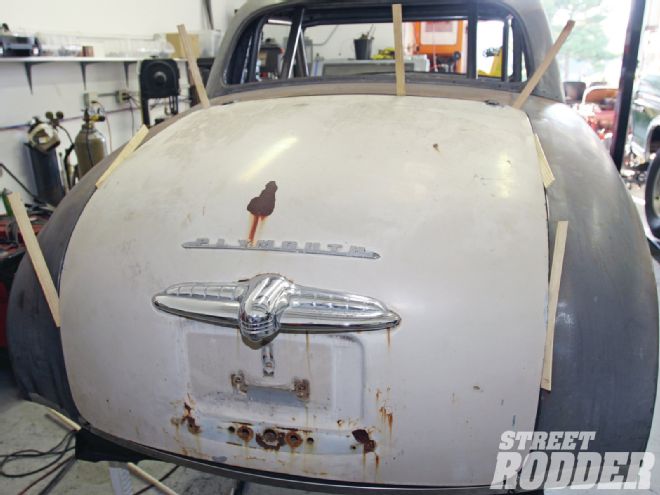 Our first test-fit of the trunklid showed some problems we weren’t aware of. We used paint sticks to position the lid in the opening. Then, since there is no trunk floor, went in from underneath to install the hinges.
It was obvious the trunklid was going to need some work, but that was OK. Plans called for punching some louvers in the lid and straightening the sheetmetal around the handle and license plate indentation wasn’t a big deal. While we were at it we were going to lose the Plymouth nameplate (it was broken) and the original trunk handle (also broken) so the holes would have to be filled. All that could be handled, but what had us stumped was why the trunk fit so poorly now when it wasn’t too bad originally. It now sat too low in the opening, well below the edge of the body.
The root of our fitment issue became clear when we used some paint sticks to establish a standardized gap all around the edge of the lid before tightening the screws holding it to the hinges. The assist springs had been removed from the hinges when the body was dipped and we left them out while fitting the lid. What we found was even with the attachment screws tight the lid moved up and down in the opening. Take a look at the following photos and you’ll see the problem and how we fixed it.