
It’s a common car. Ford’s first all-new car after World War II proved to be a popular and well-built automobile. Many were produced, and happily, many survive today. The production numbers were impressive, with 317,869 Custom DeLuxe Tudor sedans (model number 1A-70B) rolling off the assembly line in 1951 alone. It was the last year of a three-year body style, and many would argue it was the best of the bunch. But sedans, by their very nature take on a utilitarian look in comparison to a hardtop or convertible. Hot rodders and customizers found the cure for such mundane appearances; it’s called a top chop.
The vertical B-pillar, and what seems like an excessive amount of glass by today’s standards, contributes to the old sedan appearance. However by reducing the height of the roof several inches that sedate sedan takes on a sleek new profile. Now that ’51 Ford looks like it’s slicing through the wind with ease. Of course getting from sedate sedan to sinister hot rod takes some work—a lot of work.
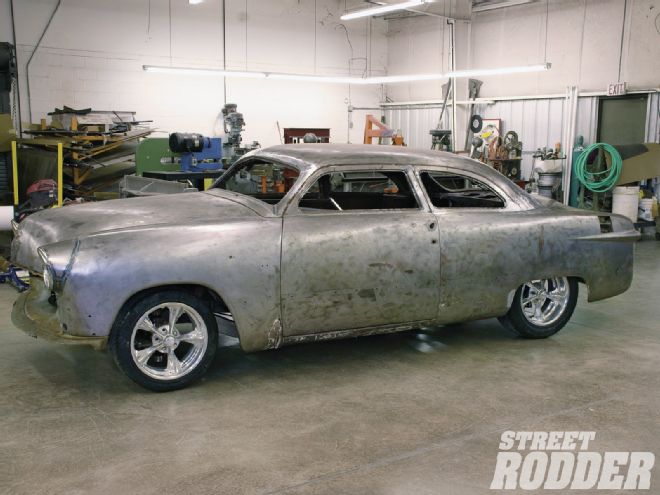
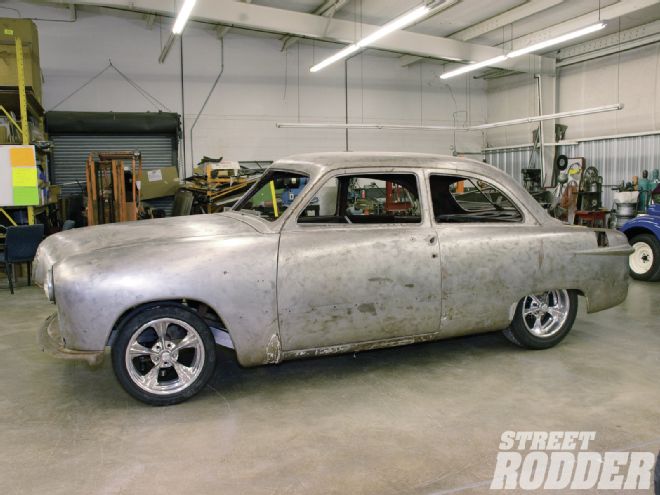 Chopping the shoebox Ford 5 inches takes time and talent, but with the canted B-pillar and raised windshield opening, the sedate sedan takes on a whole new attitude. The roof has been moved forward to visually extend the quarter-panels.
John Kocsis had a vision for his ’51 Ford, and it included dropping the top some 5 inches. Larry Shoaf and his team at Rodcrafters in Welcome, North Carolina, have lowered a lot of lids in their time, so the Kocsis shoebox rolled into the shop for some major surgery.
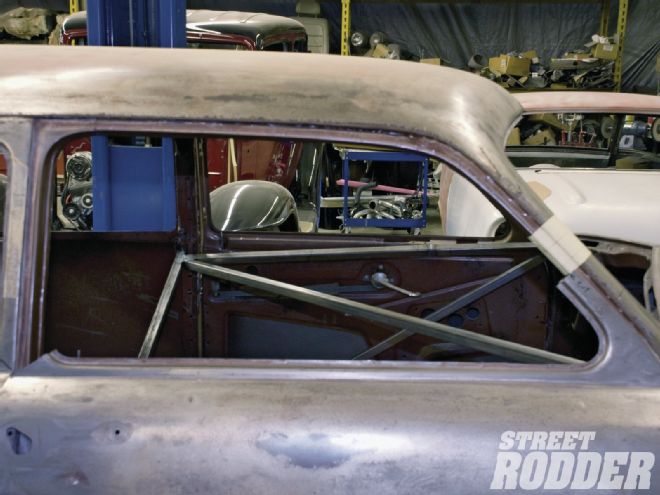
The first step in any top chop is to be certain all the panels fit perfectly on the car before any cuts are made. Satisfied with the fit of the doors Larry went inside the car and welded bracing across the door openings, front to rear, and side to side. It is imperative that the lower portion of the body hold its shape when the roof is removed. The bracing was installed, allowing room to enter the car. With the car properly braced it was time to design the chop. There are any number of ways to lower the roof on any given car and the process must be thought through before any cutting is done.
As the roof is lowered on a 1951 Ford sedan (and most other cars) two things happen. The roof area becomes longer and wider. The more you chop the top, the more dramatic the change in both width and length will be, so consider that before cutting. Often a little restraint will save a lot of work.
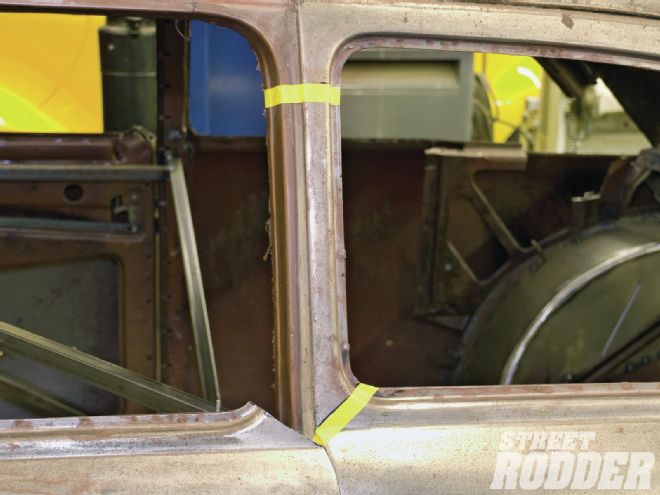
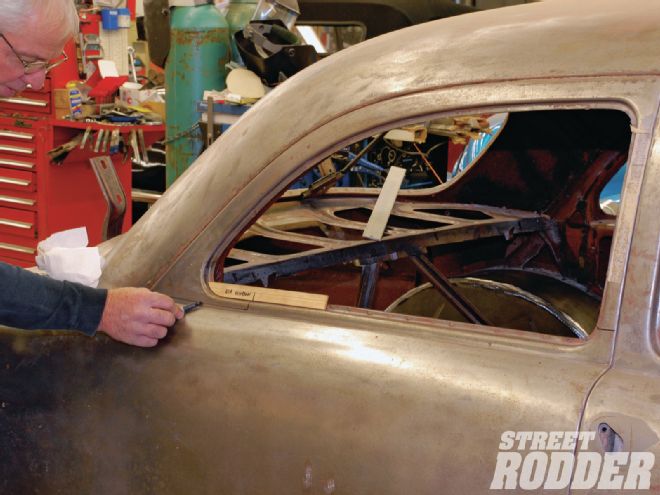 Larry Shoaf prefers to make each cut exactly the same on both sides of the car. This ensures the window openings will be the exact same shape. Since it’s difficult to measure from a radius, he makes these simple marker sticks.
The challenge is to design a roof that looks appropriate for the car. To overcome the widening of the roof the windshield posts, B-pillars, and rear window areas are generally tapered in a bit on the bottom and out on the top portion. By splitting the movement, the roof posts moving out and the body attachments moving in, the overall movement of each piece is effectively cut in half. In some drastic chops the roof panel itself must be widened with a strip added through the center of the roof from front to back; generally avoiding this major surgery is good thing. This chop would be accomplished by just leaning the posts.
To compensate for the extended length of the roof you have two options. Leave the roof turret intact and angle the windshield posts back while moving the rear window forward until the roof is united with the body again. The B-pillar is then moved to align with the back of the door. Or, you can cut the roof in two pieces and add a strip of new metal through the center of the roof from side to side.
The determining factor in which method is used is simply a matter of style. If you want a longer roof then add the strip, if, however, you think the car would benefit from proportions that visually lengthen the quarter-panels and shorten the roof, plan on leaning the windshield posts back and moving and leaning the rear window forward.
In the case of the ’51 Ford sedan the trunk and quarter-panels tend to look short and in our opinion add to that old-fogey sedan look. By moving the rear window forward several inches and also leaning the rear window forward, we can visually make the quarter-panels appear longer and the decklid will benefit from the same look. Lower roofs, longer quarter-panels and a leaned back windshield all give a car a more powerful, expensive look.
 Shoaf used a combination of a cut-off wheel and a Sawzall to make the cut. First the outer skin was cut with a cut-off wheel, and then the Sawzall cut through the inner panels.
And so it was decided this chop would involve moving and leaning the rear window and to that end Larry Shoaf began to lay out the all-important cut lines. We also decided the B-pillar would be canted forward in the process, yet another trick to make a sedate sedan look fast. Since the B-pillar would be canted the only real critical cut lines were at the A-pillar (windshield post) and around the rear window.
The windshield post was marked for a 5-inch chop. Since the rear window would remain on the car for now, two pieces of 1-inch flat stock were welded vertically through the window area to help hold the shape of the rear window. This is critical since the rear glass is curved and any distortion of the roof shape will make fitting the glass a real problem.
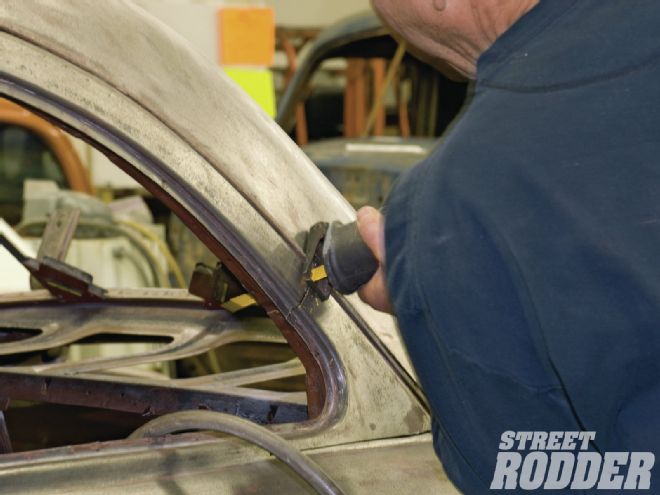
 The first cut will be the rear corner of the quarter window. This piece will be re-contoured later to fit the new lower opening.
The first cut was in the lower corner of each quarter window. All cuts are made in the exact same location from side to side. This helps ensure the top will come down squarely and also helps with measurements and fabricating filler panels. Since it is difficult to measure from a curve Shoaf makes a simple template from a paint stick. This template fits the curve of the window opening and then he marks the cuts on the template. Those marks are then transferred to both sides of the car, ensuring each piece is cut in the exact same location. This will guarantee the rear radius of each quarter window is the same after the chop.
The rear corner of the quarter windows were removed first and then the A-pillars were cut and the door tops were cut off the door. Moving to the rear, the roof was cut free from around the rear window. Finally the B-pillar was removed and the roof was lifted off. Since the B-pillars will be canted, they actually become longer, so the entire pillar is removed in one piece. Shoaf opted to make an angle cut at the very base of the B-pillar and a straight cut at the top of the post. Few things are more intimidating than looking at a car after you have removed the top.
 The rear corner is removed. Neat, clean cuts make it easier to replace pieces later.
The second cut was made on the windshield posts still attached to the body and the roof section was lifted into position to see how much movement would be required to align the front posts. As it turns out, even with a radical 5-inch chop the posts were not that far off. A diagonal cut at the base of the windshield allowed the lower post to be pulled in to almost align with the post on the top section. In most top chops you would pull the A-pillar posts on the roof section out the remaining distance to meet the lower posts, but this chop would be a bit different.
 The next cut was removing the upper door frames. Since the B-pillar will be canted the rear of the door was cut off on an angle at the bottom of the glass opening. The front of the door frame was cut at the same place as the A-pillar is marked.
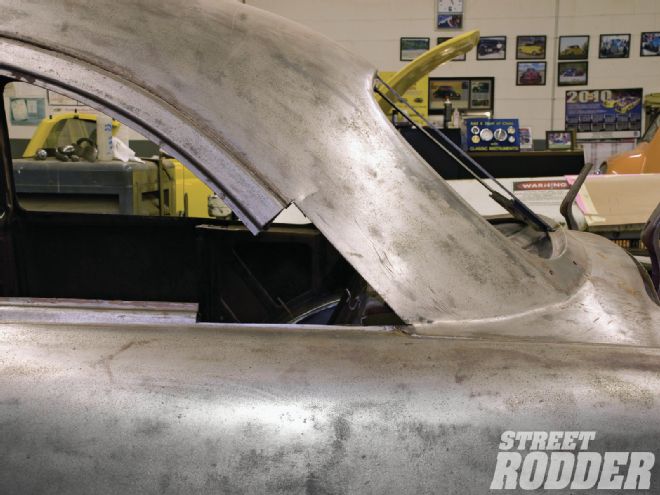
The 5-inch chop provided the desired look on the side profile, but the windshield area had a crushed-car look and the roof of the ’51 appeared to curve over into the glass area. To remedy this, the brow of the roof was cut free, and moved up 1 inch. The removed piece was simply overlapped on the roof and held in place with sheetmetal screws for now. This made a world of difference in the look of the windshield. Not only did it help in forward vision, it also aligned the top of the windshield opening with the top of the door glass. After relocating the roof brow, the windshield posts were formed and aligned and tack welded in place.
Careful measurements were taken to ensure the centerline of the roof was perfect and that the windshield opening was symmetrical. And of course there is always something to be said for good old eyeball engineering. It was time to take a long hard look at the profile. The side silhouette was looking very good, so now work could proceed.
 The B-pillar is marked for cutting. The entire pillar will be cut out as it will become longer as it is canted forward. These two cuts will be the final cuts to remove the top.
But alas we are out of both time and space, so you’ll have to wait until next issue to see the finished product. In the September issue we will finish the rear quarter windows, form the canted B-pillar, and make the transition pieces in front of the decklid up to the relocated rear window. Stay tuned, this is one very good looking top chop.