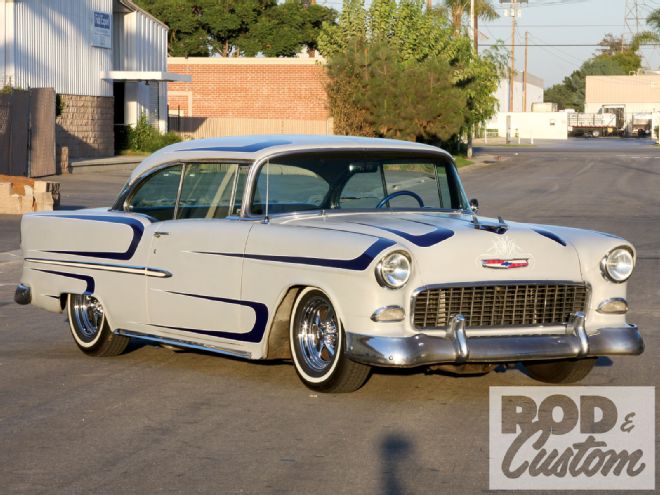
It can get pretty boring driving the same dull car for years on end. Shows come 'round and you're just not that interested in taking out the old ride like you used to be. Sure it's cool and fun to drive, but the motivation to go out and clean her up and take her out just isn't there anymore. That's where I was about a year ago with my 1955 Chevy Bel Air. I'd had it for about 10 years and had changed the style of it around a handful of times until it ended up with its most recent whitewall-and-steelie wearin' gray-primer guise. And while this was perfectly fine for the time being, it was painfully obvious that it was time for a change.
Fast forward about a year and I've made nearly a dozen upgrades to get it closer to my vision of what I want it to be. A total package, four-corner RideTech setup got it sitting nice and low and handling more like a sports car than a lead sled, while a Tremec five-speed trans and Borgeson power steering conversion made the driving duties a lot more fun than the automatic trans and original manual steering box. I also went through the engine and installed some dress-up items that better suited the '60s style I was going for, along with a Tri-power setup, courtesy of Edelbrock and Speedway Motors. With all these upgrades, it seemed that my idea of building a '60s-style custom out of my '55 was starting to look the part. Skinny whitewall tires from Coker and a set of chrome five-spoke Rocket Racing wheels finished off the aesthetic perfectly. But there was still one thing lacking: it needed some color. More specifically, it needed color in a scheme that would set the whole car off and give off a truly kustom vibe. That's when I decided to leave the primer intact and tape off a simple scallop design.
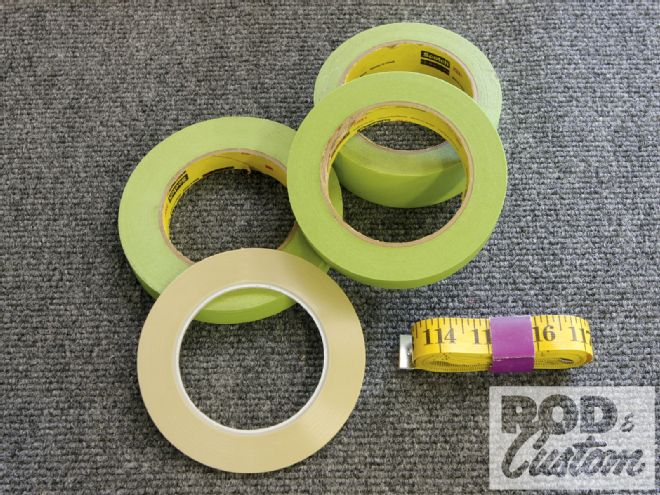 Here's what I'll be working with to tape off the initial design. Masking tape ranging from 1/2 to 3/4 inch as well as 1/8-inch fine-line tape, all 3M products. A measuring tape from the local art supply store also comes in handy to ensure the layout is symmetrical from side to side.
I called Summit Racing, who recently launched an entire paint line for DIY guys like myself, complete with all the accessories and equipment you need to paint your car yourself, at home. If you haven't seen what Summit has to offer these days, check out their website (www.summitracing.com); you'll be surprised how much they've branched out over the last couple of years.
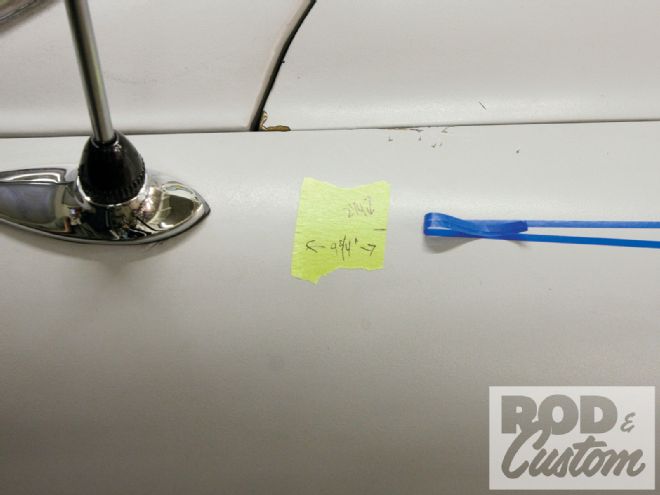 Once I roughed out a design, I marked the end points with measurements made from similar points on the sheetmetal, then transferred them to the opposite side.
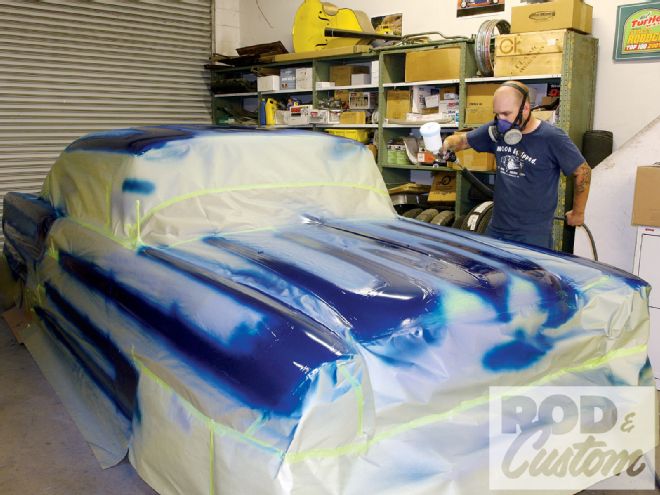
Since I wanted to add some color and panache to the ol' Bel Air, I went with their Bomber Blue Metallic to contrast with the light gray primer. Summit hooked me up with all the essentials that I'd need to get the paintjob finished, from primer to color, as well as one of their "starter kits" that comes with measuring cups, stirring sticks, a tack cloth, strainers, and an air line filter to keep any moisture in the air line out of the gun and paint.
But before I shot a drop of paint, I'd need to design, lay out, and tape the entire scheme that I'd be spraying. This step was probably the hardest and took the longest of the entire process, as I was essentially "winging it". But once I got going, laying out one fender or side of the hood, it was pretty easy to mark it up and lay out the other side to match using reference points and measurements illustrated in the photos. I used the natural bodylines of the car to base my patterns off of and from there it was simply a matter of using my eye to decide what looked the best. I started at the front of the car and worked my way back, using the hood bird as a template up front and mimicking this design on the roof and trunk. After three days of taping up bad designs, peeling off the tape, and trying again, I was ready to shoot the layout. To say that it was a learning experience is putting it lightly!
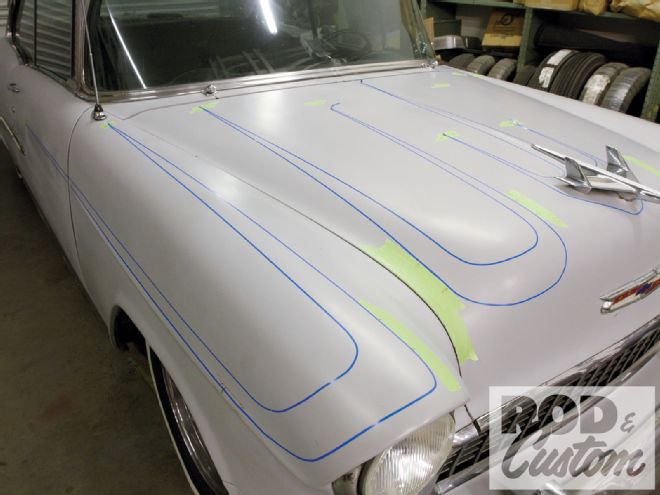 I had some 1/8-inch blue fine-line tape lying around that I used to rough out the initial design, but it didn't want to stick to the primer very well. Here, you can see a few of the green masking tape reference points I made.
Once the entire car was taped off, I scuffed the surface that would be painted, then applied two coats of Summit primer to ensure the color coat would stick to the surface as I didn't know anything about the primer that was already on the car. From there, it received four coats of color, dried overnight, and then I pulled off the tape to reveal my masterpiece. An afternoon with pinstriper Jeff Styles put the finishing touches on my automotive Mona Lisa.
Actually, if I said that the finished result is anything near to a work of art, I would be lying to myself as there are a few imperfections here and there. But the overall scheme is exactly what I was looking for and the job turned out just as I had imagined. It succeeded in adding a vivid, contrasting design to the overall drabness of the gray primer and really gave the car a '60s Bellflower Boulevard vibe, exactly what I wanted. And while it took the better part of a week from prep to completion to paint a basecoat design over primer, I figured that it will last a year or two and by then I'll be sick of it and want to update it again anyway. So by no means is this an end-all finished job. No, think of it as more like a temporary solution to a lackluster problem; but one that I'm pretty happy with for the time being.