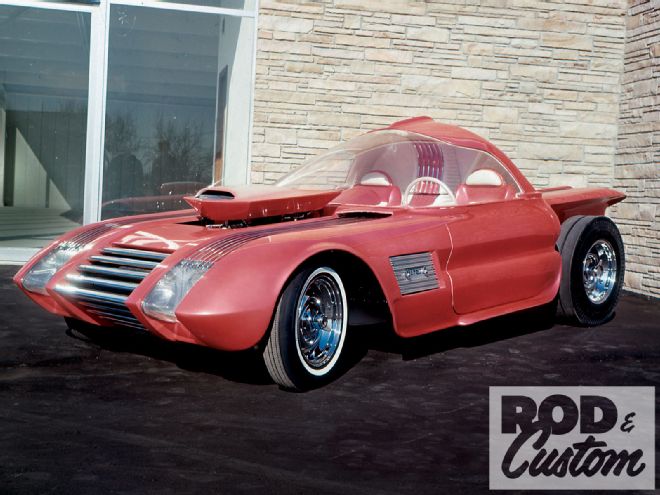
In 1960 Darryl Starbird unleashed a whole new kind of custom upon the world, the futuristic dream custom. His exemplary creation, dubbed "Predicta", was like nothing seen before. It was innovative, outlandish, and, quite frankly, out of this world. Inspired by the aerospace movements buzzing around Starbird's hometown of Wichita, Kansas, Predicta featured such advancements as dual controls, stick steering, cockpit-styled interior, and a television. Granted, all of these features mesmerized bystanders and onlookers, but what really overwhelmed audiences was the clear Lucite bubbletop. It was the kind of forward thinking only seen in comic books and the vivid minds of science fiction. Yep, this fresh idea of a bubbletop spiraled the hot rod world into a bubble frenzy.

Here we are 50 years later and bubbletops still create the same shock and awe reaction in the rod and custom world. (On a side note, a big part of that is because the jet packs, laser guns, and flying cars predicted years ago have fallen ... let's just say shorter than Britney Spear's skirt!) Their uniqueness and creativity still captivate and draw in audiences, yet what intrigues viewers even more than the clear domes themselves is the mystique of, "How'd they do that?"
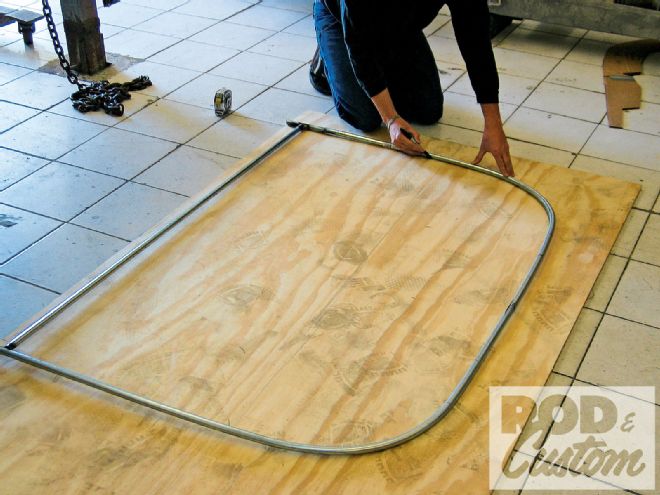
 Using 1/2-inch electrical conduit, Darryl Starbird begins forming the perimeter of the bubble to the contour of the body. For this build it's a simple semi-rounded D shape. (Full bubbles require conduit around the entire opening.) Remember, the bubble will take the form of the inner diameter of the conduit, so design accordingly.
For starters, bubbletops are one-off creations designed for each vehicle. The process begins by creating a tool based around the perimeter of the bubble. Once the perimeter of the bubble is determined, the height is designed into the tool. Next, a piece of Lucite plastic is baked in an oven and placed under the tool. (By the way, urban myths about bubbletops and pizza ovens are exactly that, myths. Lucite tops require large sheets, beginning at 6x6 feet and counting; therefore Luigi's Pizzeria oven is outta the question.) Once heated, the Lucite and tool are clamped together, and air pressure is used to free-blow the Lucite sheet into its bubble form.
Contrary to what some may think, vacuum forming isn't the way to go. Vacuum-forming Lucite will give one the desired shape, but that's the extent of it. In order to take shape the Lucite must be pulled down into a mold, and once the Lucite hits the buck its impressionable state will take the form of the surface and produce all kinds of wrinkles, waviness, and distortion. (Imagine looking through a square block glass wall at a '60s diner.) Basically, the optics of the bubble are ruined during the vacuum-forming process. For that reason free-blowing is the only way to go. It not only blows the desired shape, it also maintains the optics.
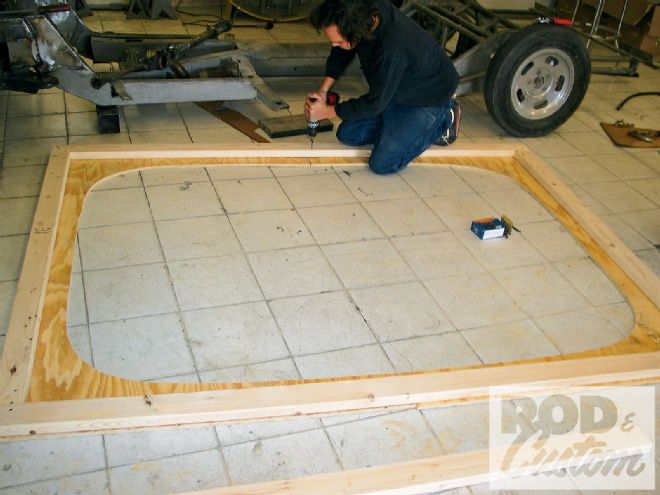
 Once the perimeter was set, we transferred the pattern of the ring to 3/4-inch plywood. Using a jigsaw, the plywood was cut accordingly. Even though the "Ultra Truck" isn't a full bubble, an entire bubble needs to be blown to keep the shape of the bubble consistent; therefore a duplicate plywood pattern was cut.
The last step of creating a bubbletop is trimming the bubble and creating a ring. When it's all said and done it's not exactly rocket science, or is it? You be the judge!
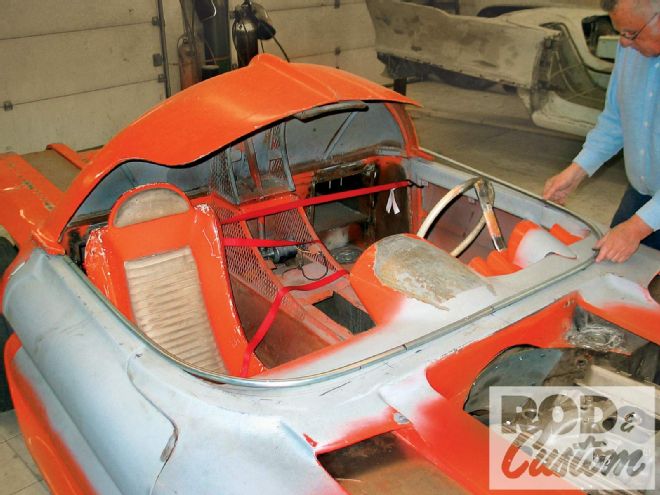
Shedding some light in the form of a Kodak moment is Star Kustom Shop and the innovator himself, Darryl Starbird. One of Starbird's creations from the '60s, the "Ultra Truck", is in the Star Kustom Shop for a new bubble. On the ensuing pages we'll dig into the bubble process-which is the same process Starbird designed and engineered clear back in 1959-by creating a new bubble for the Ultra. The process will be revealed from start to finish; including creating the form, building a tool, blowing the bubble, and trimming and fitting the bubble. Yep, the method of mayhem behind the bubble will be uncovered Perry Mason style!
 The next step in creating the tool is to butt the ring patterns together and secure them with 2x4s.