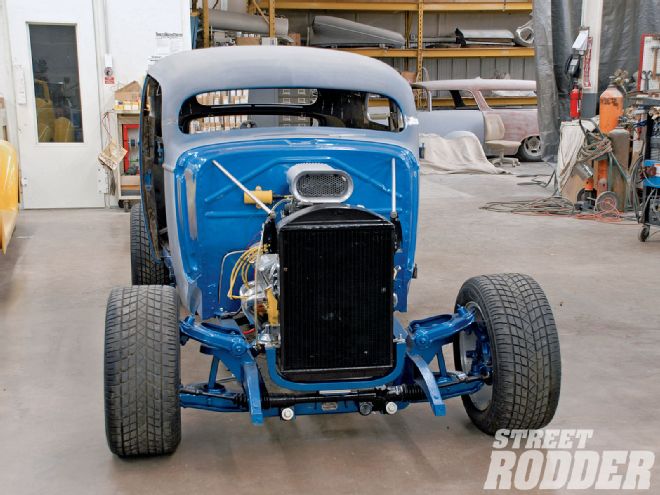
In the last issue we followed along as Larry Shoaf lowered the lid on Dan Webb's '36 Chevrolet at the Rodcrafters shop in Welcome, North Carolina. While it was by no means a simple top chop, the alignment and metal moving operation was better than anticipated and in the end the sedan had a much more aggressive profile and looked remarkably smaller.
 In the last issue we dropped the top on Dan Webb's '36 Chevrolet 3-3/4 inches, producing a wicked profile in the process. Now it's time to cut the doors and interior moldings.
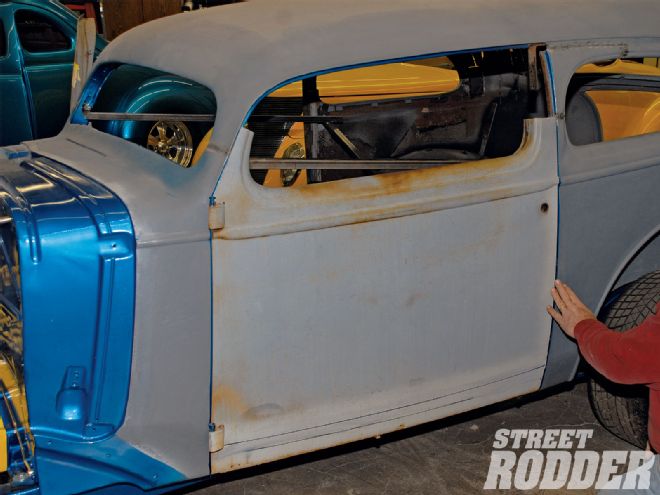
Of course lowering the lid is only part of the story, we still had to chop the doors and the inside garnish moldings, and that's where we'll begin this final chapter on chopping the '36 Chevrolet.
Cutting the doors will closely mimic cutting the A- and B-pillars during the chopping of the top. Shoaf cut the front of the door a bit higher than the A-pillar where the door tapers the least. The B-pillar had been moved back 2 inches during the chopping process. It was obvious the doorjamb post would have to come down 3-3/4 inches and that the top of the door would have to be cut and top rear corner moved back 2 inches. This proved to be very straight forward with a portion of the vertical cut being used to splice in the 2-inch horizontal extension.
First we removed the screws for the vent window divider strip and let it drop down inside the door. After carefully considering things like screw holes for the interior garnish moldings and any rubber bumpers in the doors we marked the cut lines on the door and then made our initial cuts with a reciprocating saw.
We used pieces of paint stirring sticks wrapped in tape to act as simulated weatherstripping shims. The doors must be spaced out of the doorjamb to allow for later installation of the factory-style rubber weatherstripping.
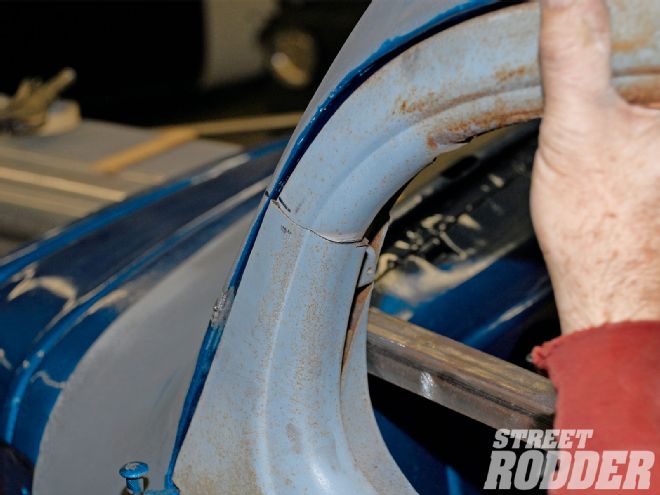
 Of course the door top still matches the contour of the roof, but since the B-pillar was moved back during the chopping process, this piece must be lengthened too.
After cutting the top off the door, we cut the top section of the door into two pieces. Reattaching the pieces began with the upper rear corner of the door. To position this corner rearward and downward we used a piece of 1x1/4-inch flat stock about 4 inches long and slipped it into the top of the door pieces. Two clamps held this connector piece in place while Shoaf made careful adjustments to align the vertical portion of the post. Satisfied with the vertical alignment he tack-welded it to the door, then after checking for alignment again he tack-welded the piece of flat steel in the door. This left us with a gap to fill where the post had been moved rearward 2 inches
Since the window area contains body reveals that must be matched, we used the piece we removed from the vertical portion of the door as filler material. After cutting just the outer skin free, we fit a piece in place. The body lines did not line up perfectly, but with a bit of hammer and dolly work the lines meet each other quite nicely. Using a combination of "leftover" metal from the door cut and new sheetmetal, the inside of the doorjamb was reconstructed. After finish-welding all the seams the door chopping was complete.
 The edge of the door will require minimal changes to blend the body lines. One small opening with the cut-off wheel will align things.
A successful top chop is all about proportions and when you reduce the vertical window area in a car you sometimes come up with odd-shaped windows. After standing back and viewing our work it was apparent the car had taken on a whole new-and-improved personality. However, the relationship between the door glass and the quarter glass is particularly important with two-door sedans. By lowering the lid on this sedan the door glass was larger than the quarter window. Without the vent window divider in place the door glass appeared long and frankly, odd-shaped. The trend today is to eliminate the vent window, but in this case leaving the vent window in place visually shortened the window and made the shape of the door glass look like a vintage Chevy door again.
And so with the door fitted and opening and closing properly, it was time to turn our attention to the final details. Fitting glass to a chopped car is a major consideration so the first thing Shoaf did was go to the inside edges of all the window openings and be certain the alignment was perfect, not high spots. As it turns out a small cut and a tap of a hammer aligned the glass area on the quarter windows perfectly. If these high points, which were only about 1/4-inch wide, were left in place the chance of leaks and even glass breakage is a real possibility as high spots become pressure points. Satisfied that all the rubber and glass would seal properly it was time for the final step: cutting the interior garnish moldings.
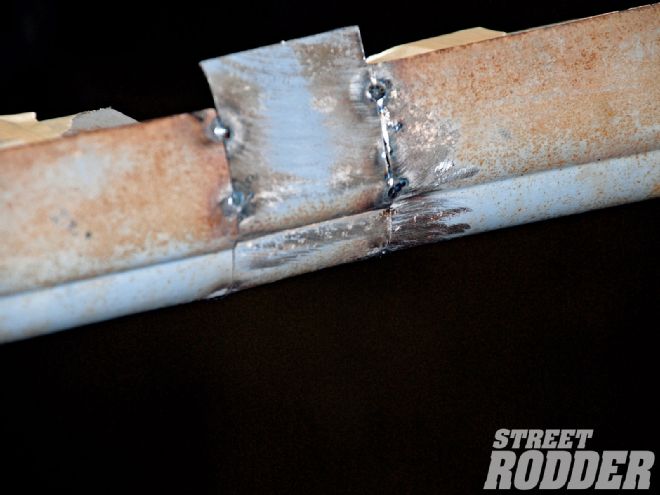 After cutting the piece down to just the outer skin, we tack-welded it in place. A little hammer and dolly work will "adjust" the lines for a smooth transition.
Once again the cut lines were done in the same area as the roof and door openings were cut. The window molding was a simple cut and alignment process. Since the rear quarter window required a new contour in the lower rear corner, the inside molding would have to be bent to match this new radius. This contour change was handled by carefully and slowly bending the corner of the molding around a piece of 1-3/4-inch bar stock. Bend a little, check the radius, and then bend a bit more until you have the perfect fit. Tack-welding, test-fit, and final welding completed the interior moldings.
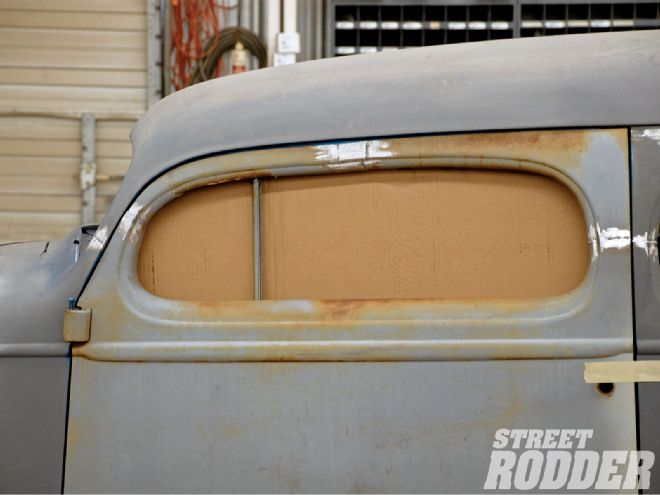 Shoaf decided to try installing the vent window divider bar, which gave the window a much better look. Suddenly the window looks shorter and for that reason a fixed vent window will be used on the car.
And that completes the lid lowering ceremonies on this particular '36 Chevrolet sedan. The top chop was a success because the metal was moved slowly and carefully and ample thinking time was built into each step of the process. Remembering these things will help you achieve similar results when you decide to drop the top on your next project.
Shoaf is no stranger to chopping tops and even with his experience and talents dropping a top is a weeklong project, and that doesn't include the finish bodywork. So if you think you and your buddies are going to order a couple of pizzas and drop the top on your car in a weekend you might be disappointed, but if you allow enough time and prepare the cuts properly you can lower the lid on your latest project too.