
Nothing against the vinyl wraps that race teams put on their cars nowadays; they serve their purpose, but to me a nice slick paint scheme will always stand out when compared to a wrap. The color is so much deeper and the shine looks so good under the lights of a speedway. Problem is, painting is always viewed as a hassle, and it can very well be if it isn't done correctly. In reality, painting can be broken down into three steps: preparation, painting/clearcoat, and sit time.
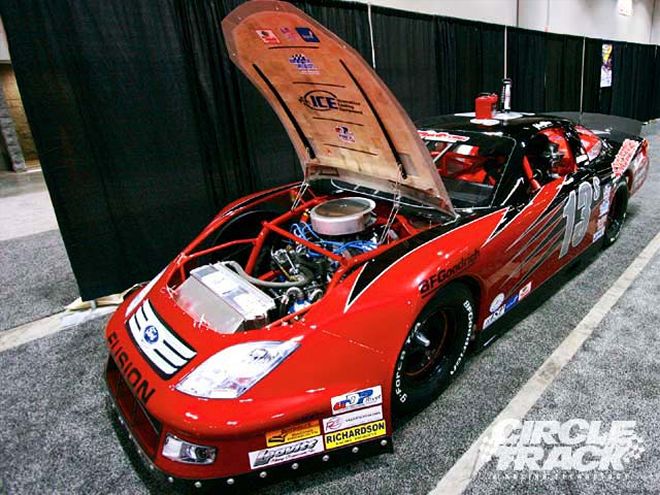
Our asphalt project car was going to be showcased at the Performance Racing Industry trade show in Orlando this past December, where literally thousands of people were going to be viewing it. We had to have the car looking good. So we headed over to our friends at Automotion in Mooresville, NC, to accomplish just that. Here's how they did it.
Preparation One of the biggest pitfalls you can encounter when painting your car is to rush it. Make sure you give yourself enough time so you can do it right. Getting a great paintjob all starts with the preparation, not just with the car but also with your work area. Of course, a lot of us don't have the money to have a paint booth as shown in these pictures. So that leaves most teams painting either in their shop or a garage of some sort. When painting in your shop or garage, you'll need to put the body on some type of paper to keep the paint from sticking to the floor. The paper will also keep the dust and debris from being kicked up, creating that one speck on an otherwise perfect paintjob. Another trick to help the dust from being kicked up is to sprinkle the floor with some water. Get it wet, but not so much that you have puddles, and the dust won't be flying around.
Next will always be safety. Before you go any further, make sure you have some type of respirator that will filter out the airborne debris from entering your lungs, and a pair of goggles for your eyes as well. You are going to be sanding, painting, and clearcoating, each of which can damage your lungs and eyes.
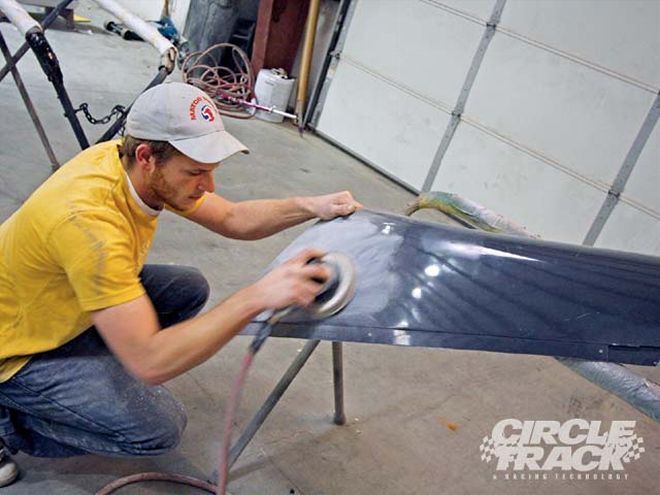 I jumped on the phone and called Automotion in Mooresville, NC. It specializes in custom paintjobs. I knew that the company would show us how to get a great paintjob. Here, Automotion's Reed Russell is starting on the sanding/preparation part of the painting process.
Now it's time to prepare the body you'll be painting. Whether it is fiberglass, plastic, or sheetmetal the steps are pretty much the same. First, you need to take some sandpaper and scuff up your painting area. Don't use anything coarser than 200-grit paper. I'd suggest using 320-grit and dry sand it evenly across the entire painting surface. If you sand it with anything coarser you run the risk of cutting too deep and leaving swirl marks on the surface, which will show through on the finished panel. The idea is to just take the shine off of the surface.
After you've sanded down everything evenly, take some water and wash off the body quickly to get all of the larger debris off of it. Don't worry about really cleaning it because you're going to do that with an industrial cleaner next. Take a clean towel and dry off the area you're going to paint and let it sit for about 10-15 minutes, until you know for sure it's completely dry. You need to get an in-depth cleaner onto the surface and really lift out any type of grease or wax to make sure that the primer/sealer coat has nothing to keep it from sticking to the surface. I suggest using Mason's Silcone Wax Remover (PN 441-05). This will ensure the body is as clean as possible. After the grease and wax remover has dried, it's time to wipe the body down one more time with a tack cloth. A tack cloth has tree sap in the towel which captures any small dust particles that you have left on the body.
Painting Once you've wiped the body down for the final time, it's time to put the primer or sealer on the surface. Why do you need the sealer? The sealer acts as a foundation for the paint and it will provide you with not only better, deeper color but also a better surface for the paint to which to adhere. Apply one to two coats of sealer evenly across the surface of the car. When holding the paint gun, keep it about 6-8 inches away from the body and spread the primer evenly across the surface.
 The sealer will provide the paint with a solid place to stick and also make the color look much deeper.
This is where a lot of teams will skip a step and then wonder why their paintjob doesn't look up to par. Check for any cracks or holes in the applied sealer. If there are any small holes you'll need to do a little bondo work.
Shockin' Yall Media gave us a great rendering of what the Circle Track car was going to look like. Now all we had to do was tape the design on to the body panels. This can get tricky with the body off the car, but we took our time and placed the panels together and mapped out the design using 1/4-inch design tape. With the design mapped out, we decided to paint the black first, which meant we had to tape off the entire red area. I found out this is where most of your time will be spent. Which leads me to my next point: Make a template out of carboard to cover large areas of one color. It will save you a lot of time.
Next, you'll need to mix your paint. You have to mix a reducer with the paint so that the paint gun can spray it evenly across the car. Check the back of the paint can you're using for the correct reducer-to-paint ratio. Don't assume it's 3:1. It can vary with different colors. If you use the wrong ratio, it can easily cause runs in your paintjob.
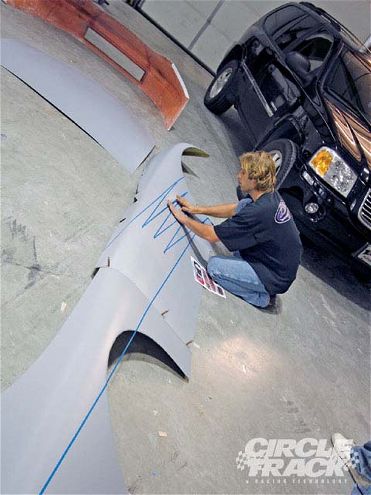 Ryan Colin, the owner of Automotion, tapes off the design on the body using 1/4-inch design tape.
Before you start to paint remember that the best temperature for a great paintjob is in the 70-80 degree range.
Now that the paint is mixed and you've had a chance to make sure the surface is as clean as it can be, you can start to paint. Just as with the sealer, make sure that you're spraying it evenly across the surface. It's going to take two to three coats to get the color that you're expecting. Let it sit for 5 to 10 minutes between each coat.
ClearCoat/Sit Time After the paint has dried, it's time to make it pop! A few layers of clearcoat will do the trick.
Before you shoot your clearcoat, make sure that you take a new tack cloth and wipe the car down again just to make sure there isn't any dust that might have landed on the car overnight. The clearcoat will provide protection for your paintjob and it will accentuate the colors you've chosen for your car. It will also give it the glossy finish that makes the fans go wow. The clearcoat will take at least one more coat than the number of paint coats you applied. The guys at Automotion say that usually somewhere between three and four will do the trick.
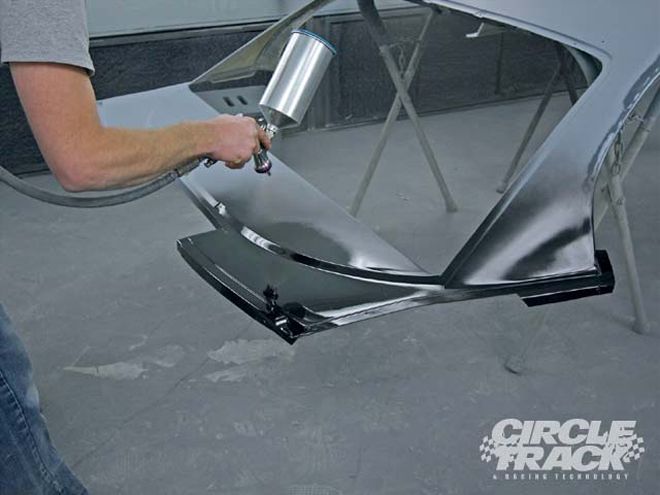 Hold the nozzle about 6 inches away from whatever you're painting and spray it evenly across the body.
There you have it; the intimidating task of painting your car is finished, and you have a sleek new paintjob. It all comes back to how much time you set aside to do this job. If you give yourself ample time and really make sure that your surface is clean before you paint, then you'll have no trouble at all. This way when you unload your car at the first race of the year, your competitors can stare at your car and say, wow, what did he do to get his car looking like that?
A special thanks goes out to the guys at Automotion. We started the painting process at 9 p.m. Friday evening. But we finally finished up around 5 Saturday morning. So we got it completed in what would amount to a normal work day. Ryan and Reed, thanks for all of your hard work. The car looked fantastic down at PRI.