Hunkins didn't have to ponder too long when searching for a direction in building the '75 Chevrolet Laguna S3 project car known as Project Talladega. After all, these popular "Colonnade" coupes of the mid-'70s became iconic in the heated NASCAR competition of the period, and the slant-nosed S3 that debuted for 1975 was styled with enhanced aerodynamics specifically for a competitive edge in that racing venue. The stock car heritage runs deep to the core of these cars, so it seemed prudent to tap that cachet as a theme. Rather than create a street clone of the specific livery of one of the many team's individual race cars, Project Talladega would be built with its own identity, with NASCAR cues-and a nod to Chevy legend Neil Bonnett-as a tribute to the Laguna's deep racing legacy.
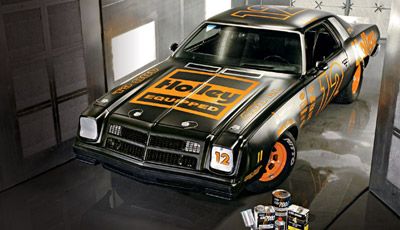
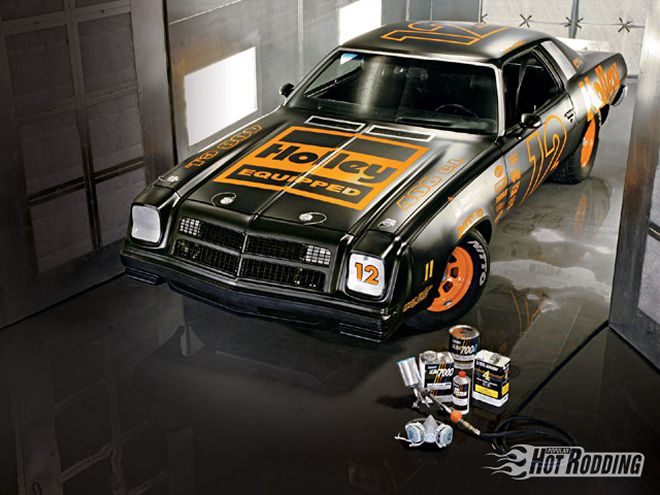
As the focus began to narrow on the details of the build, the approach to the body and paint emerged as a major aspect of the car's character. The major objective was to create a sinister and menacing look, while reigning in the costs. What materialized as the final plan is a low-sheen black finish, accented with a NASCAR-inspired graphics package that was rendered for us by artist Chris Gray. While semi-flat black isn't exactly traditional in terms of vintage competition colors, it carries with it the no-nonsense meanness that tells the world this car is all business. Think aero testing at Daytona during the off-season.
Low-sheen, satin, flat, suede and the like have become popular finishes, especially in recent years. All of these terms refer to a finish that spurns the notion of high gloss in favor of low luster. The origins of these finishes have their roots in the practicality, low cost, and functionality of bucks-down hot rod primer jobs. Simply put, when the bucks weren't there for the glitz and glamour of a paintjob, a quick hose-down with primer, preferably in hot rod black, was the easy, fast, and cheap solution. This primer look has definitely taken on a trend status of its own, mainly for the same reasons of utility, typically lower costs, and of course the fact that flat looks pretty damned tough. But there is also a NASCAR tie-in that relates specifically to our Laguna. Pre-season testing is often undertaken before final sponsorship agreements are inked, and that's the way many race cars are tested-in primer. (Car numbers, driver designation, and some sponsors are represented in vinyl graphics during testing, and these are applied temporarily over primer.)
Though the traditional suede is nothing but lacquer primer, primer isn't paint, and therein lies a problem when looking to go this route as a permanent finish. Primers are not embodied with the resistance of topcoats, and will fade, chalk, and fail to protect the sheetmetal from surface rust in the long run, especially when exposed to the weather. There are several routes to achieving a low-gloss look with a true topcoat, and getting that done properly to last the long haul begins to look more like a real paintjob than a hack primer job. Ricky Jackson of Ricky's Customs and Restorations in Apache Junction, Arizona, handled the bodywork and refinishing of Project Talladega, providing us with a detailed look at what is involved in creating a sound and long-lasting "suede" job.
Talladega Hose-Down
When our project car was purchased, it had multiple previous paintjobs covering its reasonably straight sheetmetal. As with any refinishing project, the effort begins with achieving a smooth and straight surface. Decision one is whether or not to begin by stripping the entire car down to the bare metal. Weighing the cost constraints and time involved, Ricky suggested that stripping the car would be unnecessary. "The paint on the car was very solid, and that base gives us something to work with. We could carefully block-out the car using the material that was already built up as though it is a primer, saving time, material and cost."
 Here's what Project Talladega started life as: a well-worn, but nicely maintained '75 Laguna S-3. The prior owner had performed much of the work and upkeep himself, including the red paintjob. The body was straight, and mostly rust free. How much does a Laguna in good shape cost? (Keep in mind that just over 7,700 were built that year.) We paid $5K to start out this nice. It saved us a bundle when it came time to do the bodywork.
To create detailed paintwork, at least partial disassembly is required. This is a major decision point, and one that can quickly escalate the scope of the project and the costs to completion. The further a car is disassembled, the higher the quality of the completed job, with the costs and time involved increasing rapidly. We were not looking to do a full rotisserie restoration on a '75 Chevy-which would be a gross waste of cash-but we were looking for the sweet spot that would provide the best balance of cost effectiveness versus quality. Here experience counts, and a judgment call must be made. Ricky decided upon a partial disassembly of the car, removing the doors, hood, rear bumper, trunk lid, and minor trim before the sanding process would begin. This would give good access to the jamb areas for a clean and seamless finish without going overboard.
Next, the sanding of the existing finish began. While a pneumatic D/A sander makes quick work of scuffing old paint, it does little to help level the body panels. As Ricky explains: "You just can't get the control with an air sander. We were going to use the material already on the car to our advantage, almost like a primer coat to cut the panels flat and level." To accomplish this, the car was hand-blocked and sanded dry with 80-grit paper, which leveled the existing material on the car. The 80-grit is coarse enough to level aggressively, and as the blocking progressed, any flaws in the car became apparent. Ricky continued: "You can see the flaws show up as shiny spots as the car is hand-blocked, and there were plenty of spots to fix on this car."
After the first blocking, the flawed areas were repaired. Most of what was found consisted of the typical minor dings common to a long life on the street. These dings were bumped as required using common bodyman's hand tools, and filled with Evercoat Metal Glaze. The Metal Glaze is a premium catalyzed finishing and glazing putty, a fine-grained filler for minor surface defects that adheres very well, even over sanded paint. Amazingly, only one area of localized rust was discovered as the prepping stage continued. This was along the bottom edge of the passenger-side door. These rust spots were repaired with patches cut from sheet stock, and then MIG-welded in place. As with the small dings, the patched areas were given a wipe of filler, and blocked level by hand with 80-grit, followed by 180-grit. The door jamb areas were thoroughly sanded smooth, as were the trunk and hood channel areas, and the entire car was given a detail sanding with 180-grit in preparation for primer.
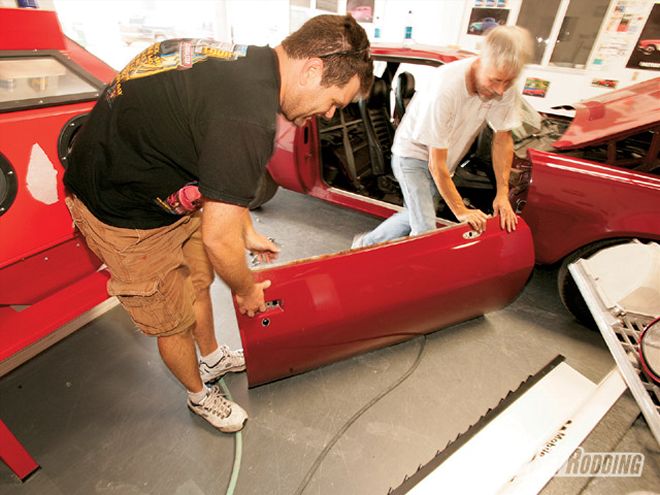 Step one after cleaning the car as well as possible is to start disassembly. Keep the scope of the project in mind when getting started taking a car apart, since they come apart a lot more quickly than they go together. We limited the sheetmetal disassembly to the doors, hood, and decklid. This is far enough to allow a nice level of detail in the jamb areas.
The primer coat builds material to seamlessly bridge the remaining minor flaws and previously repaired and filled spots for a smooth surface suitable for paint. Jackson selected Sherwin-Williams Spectraprime as the right product for the job. Ricky told us: "The Spectraprime went on smoothly, flashed off evenly, and dried quick. It sands easily and doesn't clog the paper, making it easy to work with." The car was sprayed in the booth with the previously removed loose panels off, allowing complete coverage in the various jamb areas, while the loose panels were shot separately, thus eliminating tape line. After the primer cured, the car received another round of hand block sanding, using 180 grit. What resulted is the perfectly smooth and straight surface that distinguishes a quality job.
One of the unique features of the Sherwin-Williams Spectraprime is that the same primer product can be modified to work as a sealer. SpectraSeal is made by mixing the Spectraprime P30 with Sherwin-Williams S41 Converter. While a primer-surfacer is used to build the surface and is intended as a filler, a sealer coat is normally applied after the filling and blocking with surfacer, for a finer finish. Sealers are typically just sprayed, allowed to flash, and then followed by the application of the base or color coats.
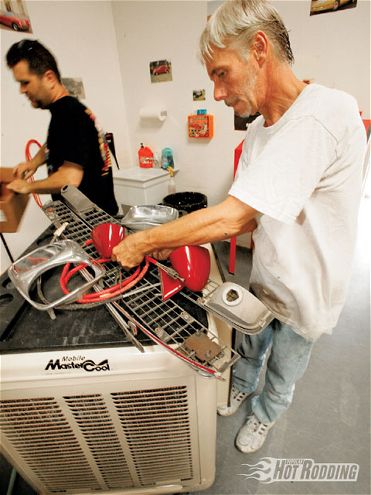 Exterior trim items like the mirrors, grille, moldings, and handles are removed. Even in the most basic paintjob these items are better removed than masked. Make sure to organize the pieces that come off to make reassembly easier later.
Jackson went an extra step by using the sealer mix to improve the surface to a higher quality by employing an additional sanding step. The sealer was sprayed over the previously sanded surfacer (done at 180 grit), allowed to cure, and then wet block-sanded to a 400-grit finish. Using the sealer in this manner gives a very stable, smooth, and fine-textured surface for the finish coats. As Ricky puts it: "You are never going to be smoother out of the booth than you were going in to start with, so putting a really fine cut on the sealer gives us the ideal base."
With the finely sanded sealer on the Laguna going into the booth for the final finish, it was easy to see under the lights that the car was straight as a pin. What remained was the application of the semi-flat black topcoats. Creating various levels of suede finish can be accomplished by a variety of techniques. A single-stage (non-clearcoated) paint can be brought to various levels of "flat" by adding a flattening agent to the paint mix in various proportions. Most paint systems have a flattening agent available, and the result is a catalyzed flat topcoat that is much more durable than a typical primer. The same technique can be applied to a basecoat/clearcoat system, but the flattening agent is added to the clear. This is the old-fashioned way of doing the job.
Suede Job
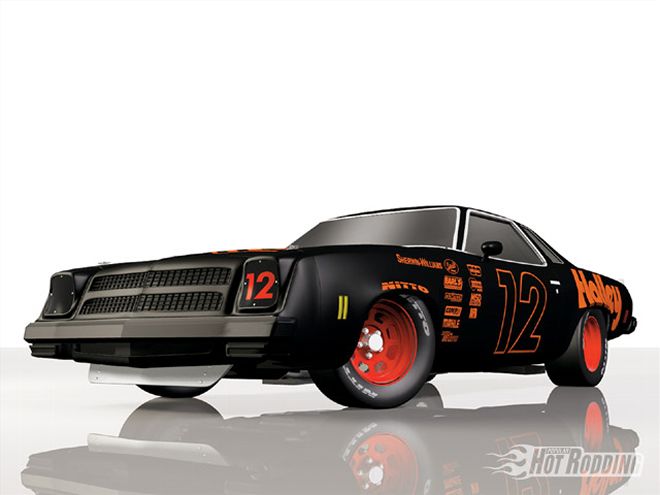
The favored technique today in a basecoat-clearcoat application is to spray the base color, Sherwin William Ultra 7000 in WA8555 black for our Laguna, followed by a pre-mixed low-sheen clear. This clear is created in various levels of sheen by mixing the Sherwin-Williams No. 947 Matte Clear, which is very flat, with the normal overall clear, Sherwin-Williams No. 950 in this case. Jackson used a mix ratio of four parts 947 to one part 950, giving it just the right amount of the gloss clear to bring up a low-level sheen.
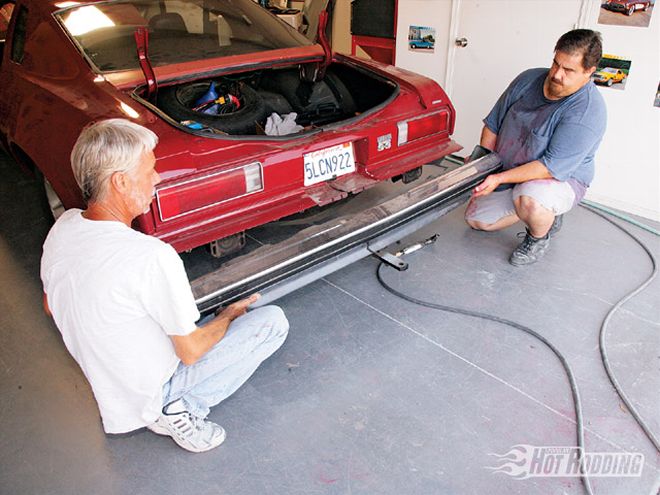 Some subtle custom touches will be done to the Laguna in the process of our paintwork. One of the most ungainly features of the car is the impact-absorbing rear bumper that stands off the rear and sides of the car by several inches.
The spraying technique is just like a normal repaint as far as the base, but hitting the clear perfectly for the right gloss involves just the right mix. Ricky explains: "It's a little tricky, since you have to have the mix exactly right, and you need to be aware of the conditions in the booth, like the temperature. You want to mix the products really carefully, like exactly to the line, and then it is a good idea to do some testing. You won't know exactly what you have until it flashes and dries, and what you see is what you get. The exact effect can vary some depending on application and the reducer, and you can adjust the level of gloss by varying the reducer, even if the mix of clears is the same. With a non-gloss finish, you are not going to go back and sand, or buff, or fix it. When the solvents went off on the Laguna, I knew we nailed it."
Stay Tuned!
Next month, we're going to follow up with all the custom stuff we did after the paint dried, like spoilers, powdercoated trim, custom (and cheap!) steel wheels, hood vents, quarter-window block-offs, rear window straps, removable headlight block-offs, hood pins, trunk pins, vinyl graphics, custom tire lettering, a narrowed rear bumper, and more. Most of it was homegrown, and inexpensive.
 To bring the rear bumper in closer harmony with the surrounding metal, the bumper was sectioned, allowing it to hug the corners of the car more closely. The mounting will also be revised to bring the modified unit in tighter to the rear of the car.
Stick It!
A prominent feature of Project Talladega is the extensive use of vinyl graphics, which define the stock car look of the finished machine. Most of us have seen some of these appliqus used on a variety of custom cars, but are mystified by what is involved in the process. We had Heath Elmer of Heath Elmer Restorations (aka Arizona Auto Trim) handle the creation of the graphics package for our Laguna, and the final result was nothing short of eye-popping. Heath tells us that the technology for doing these graphics is readily available: "Any sign shop is going to have a plotter; it is a basic piece of equipment." The plotter cuts the material to a design made in a CAD program, which can be simply scanned in, and that drives the plotter to cut the desired pattern. You can start from scratch by having the design drawn up in the computer, or choose from a virtually unlimited selection of fonts for numbers or lettering. Once the design is finalized, the vinyl material is fed into the plotter and out come the decals.
Compared to laying out graphics the old-fashioned way, by tedious reverse masking or hand-lettering, the vinyl graphics are cheap, easy, and quick, offering new possibilities for customizing a car. In contrast to painted graphics, a vinyl appliqu can be removed if you decide it's time for a change. Heath tells us to select a high-performance exterior grade vinyl in a 2mm thickness for automotive use, and that the material has a life from five to seven years in outdoor use. If you prefer paint rather than vinyl, this process still has significant usefulness, since the same technique that creates vinyl graphics can be used to cut complex masking templates. For this purpose, Heath uses a special material that can be sprayed over, and is easy to remove, creating a positive or reverse template of the paint design you are after.
By The Numbers
Paint Price List
So how much did the materials for our suede paintjob cost? To be sure, a properly done "hot rod" coat isn't cheap, but the results are stunning, and the durability and upkeep are hard to beat when compared to a standard two-stage high-gloss finish. Below are the Sherwin-Williams products we used to paint Project Talladega. The costs shown are at "Scheduled Refinisher Pricing" level. It's also worth noting that the personal service we received from the Sherwin-Williams Tempe, Arizona, branch was outstanding, in particular, the on-the-spot help from SW rep Brian Downen (480-894-8388).