After 12 years of driving our 1957 Ford Ranch Wagon au naturel we became weary of arriving at rod runs feeling like (and we fear smelling like) a ranch hand just in from a weeklong round up. Yes, the factory vents provide a nice flow of fresh air and '50s cars can be driven with the windows down with a minimal amount of wind noise (something new cars can no longer do). However those "fresh air vents" were delivering "fresh" 95-degree air, so after our last six-hour drive in the summer heat we made a command decision. This would be the year of climate change in our Ranch Wagon.
Our wagon is still powered by the venerable 312 Y-block that was special ordered by the original owner. Behind that an AOD gives us modern cruising range. The motor runs cool with no overheating issues. If you're having heating problems with your car now would be the time to upgrade your cooling system too.
We contacted Vintage Air to see what they recommended for our rather large car. Cooling a station wagon is akin to cooling a lawn shed, so we knew it would take some serious A/C power to keep us comfy.
As it turns out the Vintage Air Gen IV Magnum would be up to the challenge and after spending a little time on the phone we placed the order with everything required for the installation. We were pleasantly surprised to find that Vintage Air offers bolt-on brackets and pulleys for the Ford Y-block, making everything a bolt-on affair. Now that may be minimizing things a little bit, there is some fabrication and hole cutting required since this installation is based on the Vintage Air universal kit. At first glance it may look like a pretty daunting task, but like most hot rodding installations, if you break the job down into segments it all goes smoothly. It should be mentioned that Vintage Air also has a series of direct-fit A/C kits that are designed to bolt in to some of the more popular cars.
The Vintage Air instructions are thorough and well illustrated and we decided to begin the project inside the Ranch Wagon. The first thing we did was remove the front seat. Unless you are some kind of a Yoga guru you may find removing the front seat to be the best advice in this entire story. This enabled us to lay down under the dash in relative comfort.
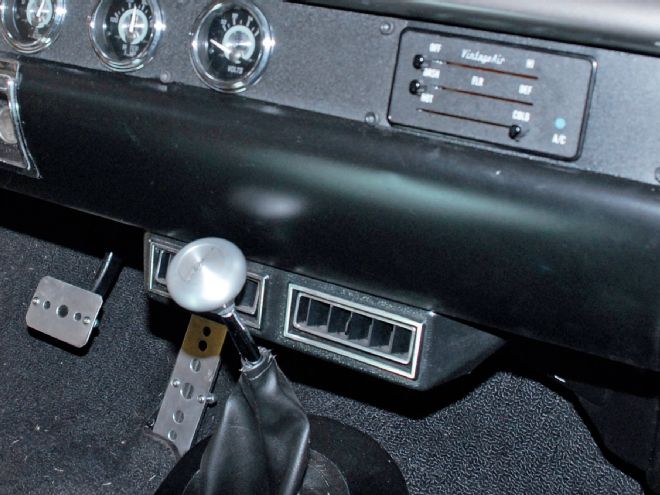
First we located the A/C ducts in the dashboard. The goal was to make the A/C look both factory and inconspicuous. Using a hole saw we cut a hole in each corner of the dash for the two round A/C outlets. This is a tight fit but the outlets actually look factory installed. We also opted to use the standard black and chrome units as we liked the simple styling. It was tempting to upgrade to a pair of the Vintage Air billet outlets and these may fit better in some applications. With an A/C duct in each corner of the dash we mounted a double louver outlet in the center of the dashboard directly in front of our Lokar shifter. Once again the outlet blends in with the surroundings. The key to positioning the outlet louvers is to place them so air can be directed on the occupants.
If your car still has the stock heater in place now is the time to drain and contain the coolant and remove the entire factory heating system. We had removed the heater years earlier, which gave us the ability to both fry and freeze in the car, so the Vintage Air heater would also be a welcomed addition.
The final piece of directing the air comes from the all-important defroster duct. Just think, no more leaving a paper towel on the seat to wipe the inside of the windshield. The Vintage Air kit comes with two ABS ducts that would work well, but after looking at the factory sheetmetal duct we opted to modify the existing unit. After removing the inside windshield molding, four-speed nuts released the defroster duct. We took the duct to the welding table to block off the factory entry and add two hose inlets. The duct was then reinstalled using the factory hardware. The final in-dash installation was mounting the controller in the dash. We opted for the black face unit and it blends in perfectly with our wrinkle-finished dash insert. The backlit LED lighting makes adjustments easy at night and we couldn't be more pleased with the final appearance.
Pumping cold air into your car can only keep you comfortable if you do everything in your power to keep the hot air out. To that end now is the time to patch any holes and thoroughly insulate the firewall and the entire car. Sealing the car up ensures the cold air will stay in the car. We completely insulated the car, including the inside of the large roof area.
Next up was mounting the underdash heater and evaporator fan unit. In order to fit the unit up high we removed the inner glovebox, in the '57 Ford this is a flimsy cardboard thing held in by a half-dozen little sheetmetal screws. We'll build a smaller sheetmetal replacement later.
After attaching the heater hose fittings to the Gen IV unit we installed the front and rear mounting bracket as per the instructions. Then, using scrap wood we blocked the unit into place and spent some time figuring out the best way to attach the unit to the car. When I design brackets I try to fabricate them in such a fashion that only one wrench is required to install or remove the A/C unit. This involves welding a nut behind the bracket on the rear, while the front bracket we welded a 1/4-20 bolt to act as a mounting stud. After fabricating the front (firewall) mount with the aforementioned stud we were able to hang the A/C unit on that stud. Then we carefully leveled the unit and set about fabricating the mount from the A/C unit to the dashboard. When it was all completed the A/C unit can be installed or removed with a single 7/16 wrench. This would prove to be handy as the unit was installed and removed several times while routing the hoses and wiring.
With the A/C unit installed we turned our attention to mounting the electric heater control valve and deciding where the A/C and heater hoses should be routed into the engine compartment. In the end we opted for the side kick panel for the hoses. This brought the hoses into the passenger side above the inner fender area and made routing the hoses to the engine a natural. We cut the holes using a drill and a hole saw, then deburred the holes and used the Vintage Air supplied grommets to protect the hose. One final hole was cut for the wiring harness and associated grommet.
And that ends phase one of our installation. Next month we'll mount the A/C compressor to our Y-block with Vintage Air brackets and pulleys, mount the condenser, dryer, and associated wiring. We can tell you this much, the results are well worth the effort.
1. We began our project inside the car mounting the center A/C louvers. The Vintage Air ducts blend well with the dashboard. During the install process we changed the dash color from gray to semi-flat black.
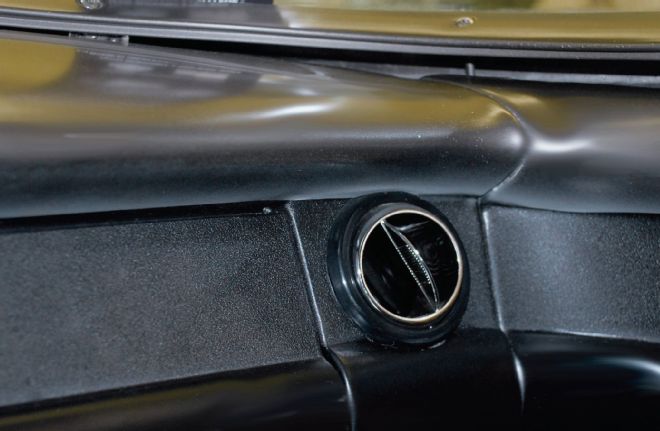
2. After using a hole saw and drill to cut holes in each corner of the dash we were able to mount these round A/C ducts. They fit perfectly and take on a real factory appearance.
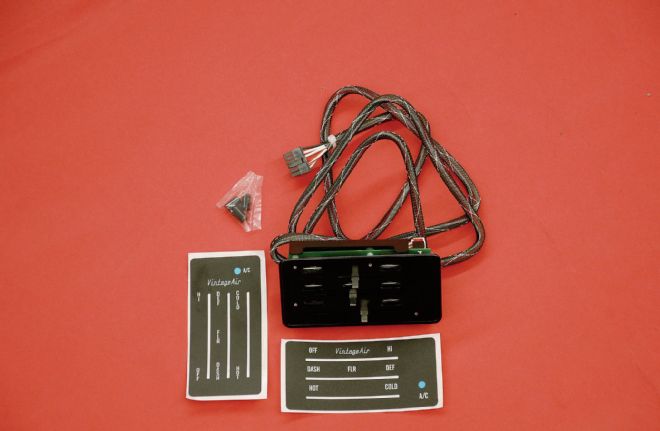
3. The Vintage Air three-lever panel is available in several finishes. We opted for semi-flat black to blend with the dash. The panel comes with two face decals allowing the piece to be mounted horizontal or vertical.
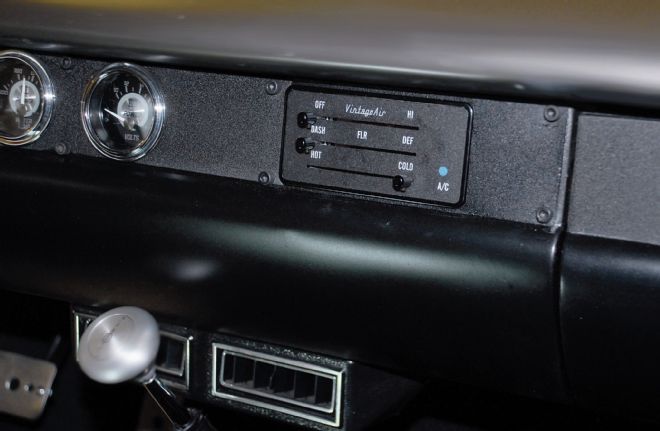
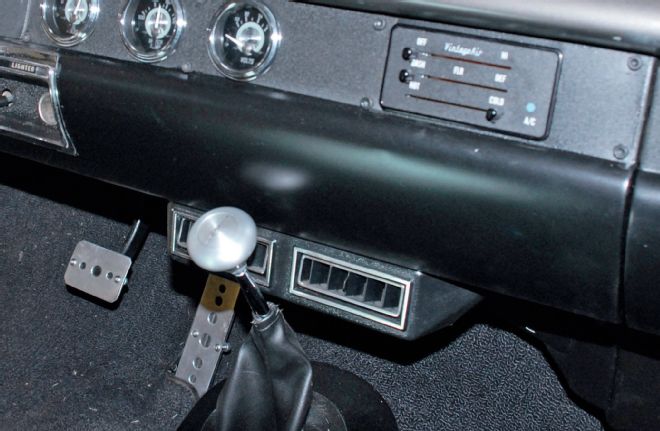
4. Once again the Vintage Air panel looks like a factory installed piece in our '57 Ford dashboard. The panel allows blending of air for perfect heating and cooling control, while the LED backlights look very cool at night.
5. To make room for the new Gen IV Magnum unit we removed the passenger side fresh air duct. The driver side fresh air vent remains in service.
6. The Gen IV kit includes a pair of black ABS defroster ducts that would work fine, but we opted to modify the existing duct work.
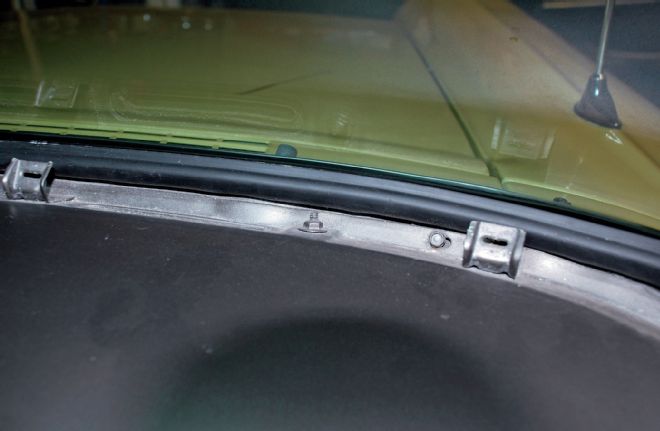
7. After removing the lower windshield trim we were able to remove the four-speed nuts that hold the defroster ductwork in place.
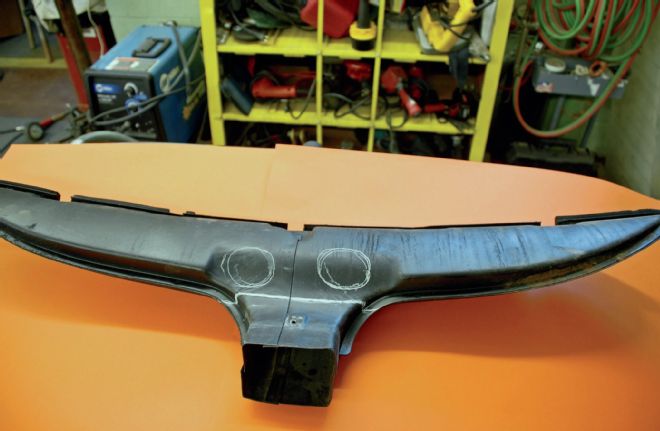
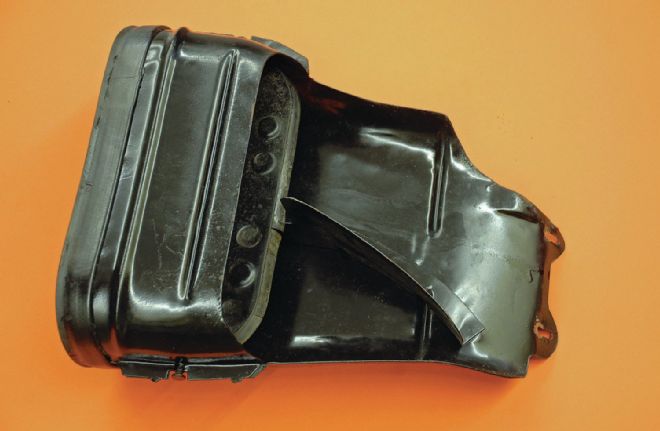
8. This is the '57 Ford sheetmetal duct for the defroster. We have already marked the location for two hose inlets.
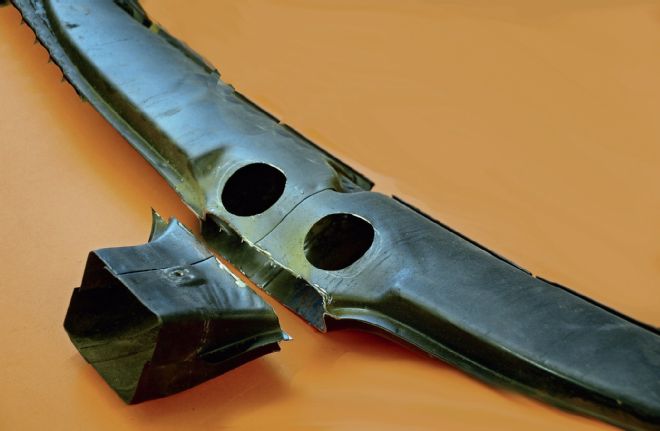
9. Cutting off the lower portion of the ducts and blocking it off provided more room under the dash, while a holesaw made quick work of placing two inlet holes in the duct.
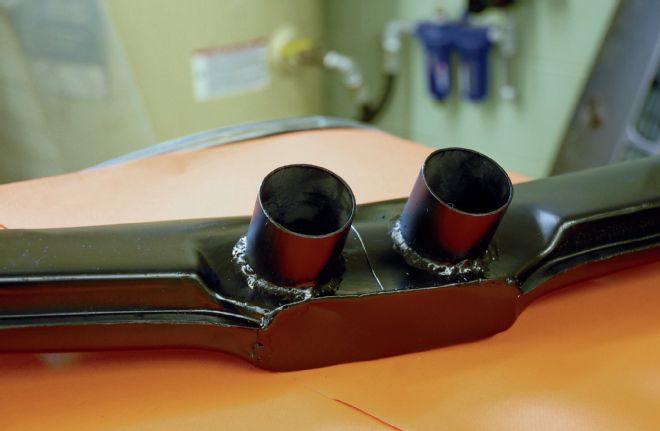
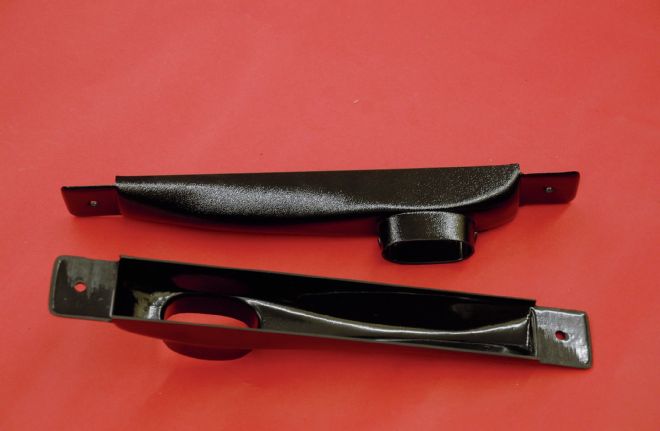
10. Two pieces of exhaust tubing were cut and welded into the duct. The Vintage Air hoses will simply slip over these tubes and we'll enjoy having real defrosters!
11. We cut the flap out of the passenger side factory fresh air duct and used it to plug the hole in the cowl. Seam sealer holds it in place and after this photo a piece of insulation was also cut to fit the opening.
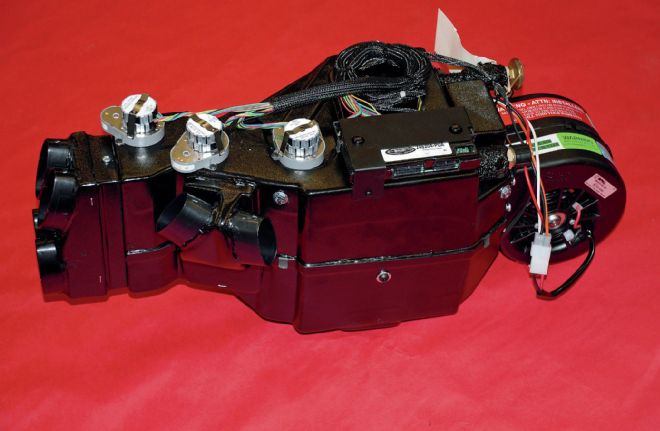
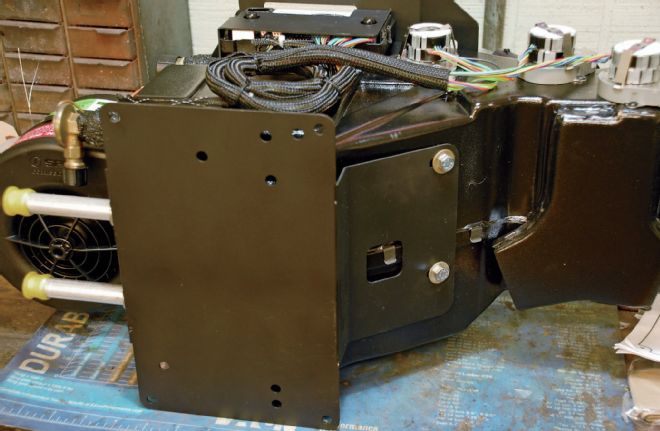
12. The Gen IV Magnum packs a lot of cooling in a compact case. The A/C is also very "smart," with the ability to blend hot and cool air and to blend airflow from the footwell to windshield.
13. The front and rear mounting brackets provide ample mounting points for the unit to be fitted under virtually any dashboard.
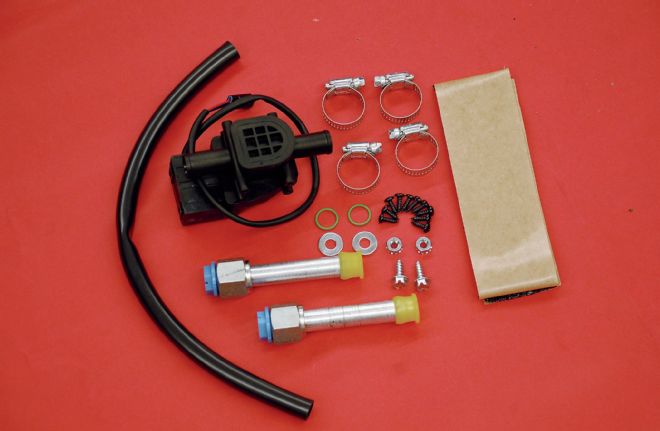
14. The electric heater valve will be mounted to the kick panel. The two straight fittings for the heater core are installed prior to the mounting plate.
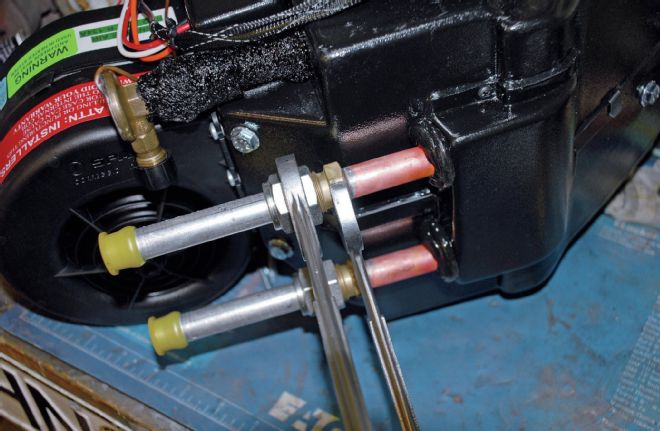
15. When mounting the straight fittings to the heater core use two wrenches and take care not to damage the heater core while you are tightening the fittings.
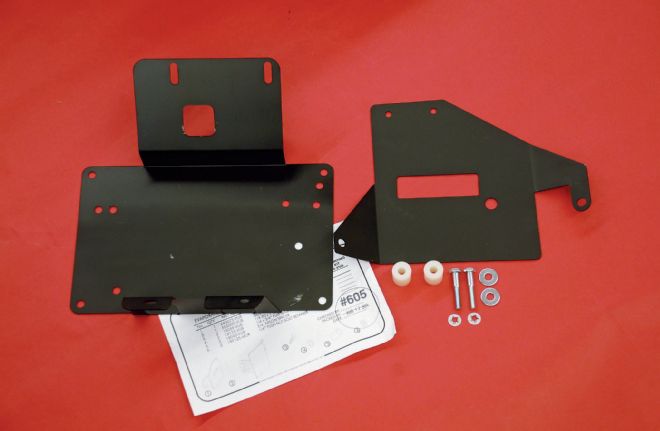
16. With the heater fittings attached we can now install the forward mounting plate, this side of the unit faces the firewall.

17. The other mounting bracket faces the front seat and has the access opening for the plug 'n' play wiring harness.
18. We used an assortment of scrap wood to block the Vintage Air Gen IV unit in place. Once we were satisfied with the location we began designing the mounting brackets.
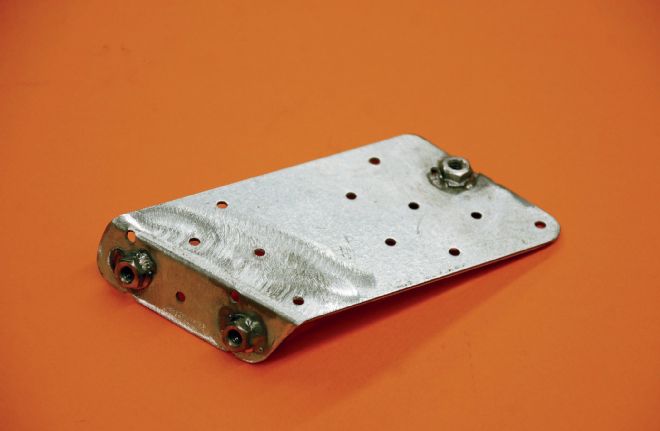
19. This is the bracket we came up with for the firewall side. The single stud will hang the A/C unit while one end of the bracket is bolted to the firewall and the top is sheetmetal screwed in place.
20. Here's that same bracket installed on the firewall; the welded in stud allows us to thread a nut on the stud and tighten it with a single wrench.
21. With the unit hanging from the forward bracket we leveled the Gen IV and fabricated this bracket with nuts welded to the back side of the bracket.
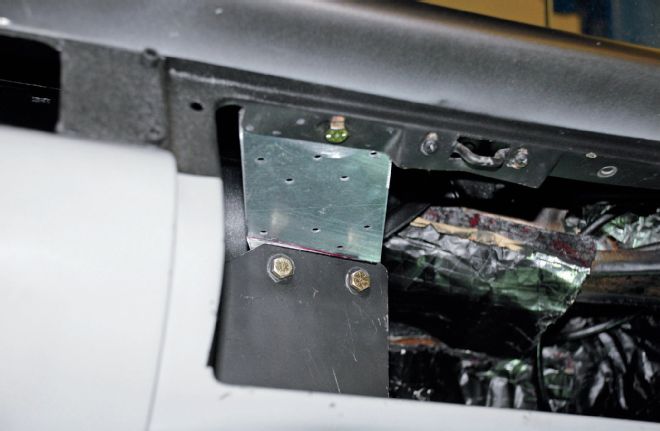
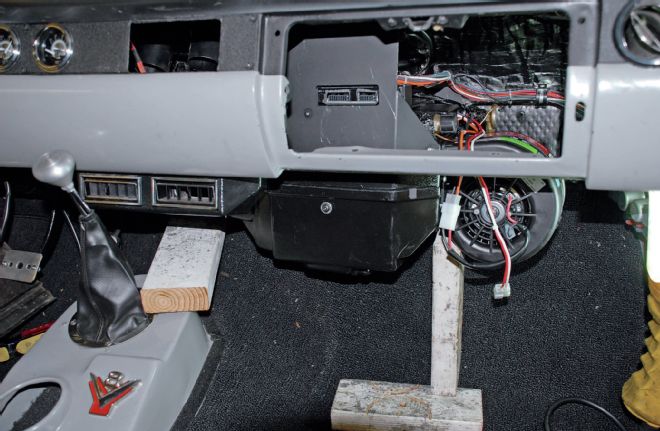
22. Once again the bracket is bolted in place by simply threading a bolt into the bracket, no need for a second wrench. The Gen IV is now solidly mounted.
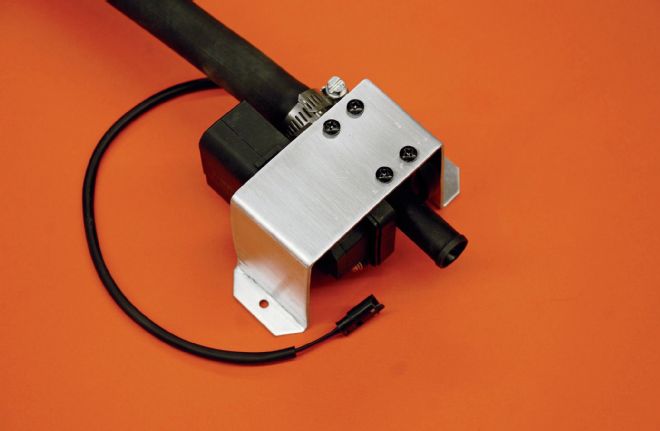
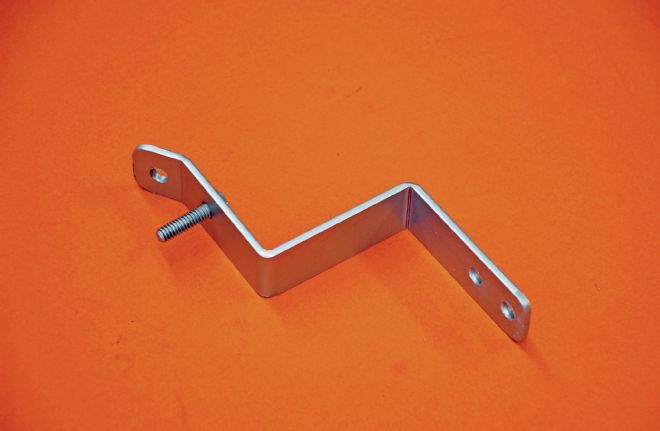
23. We fabricated this simple aluminum bracket to attach the electric heater valve to the upper, inner kick panel.
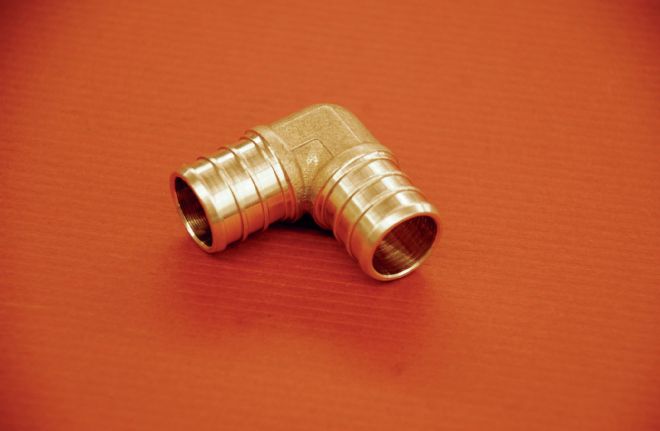
24. The way we mounted the electric heater valve required a 90-degree turn on the kick panel. We found this neat brass fitting at a box store, it is designed for PEX tubing but fit our heater hose perfectly.
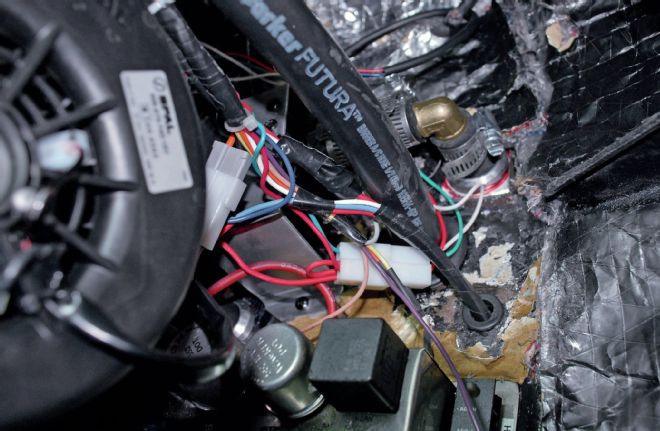
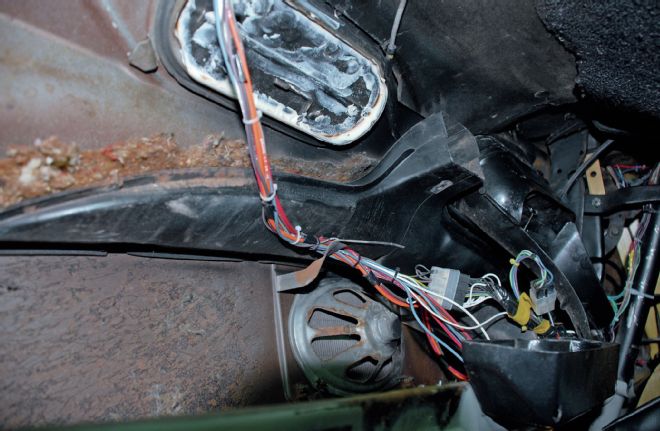
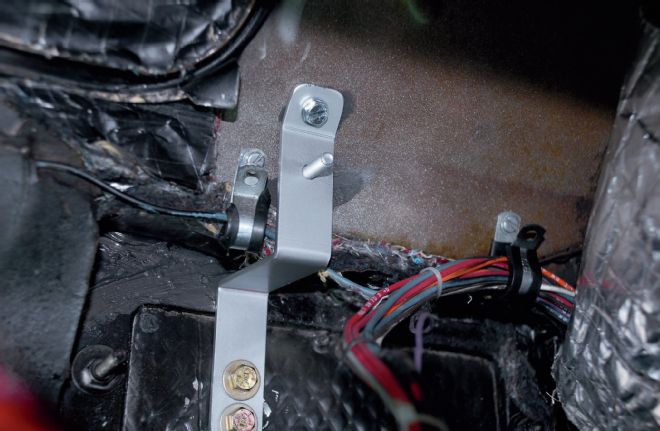
25. All hoses and wiring exit through the kick panel to enter the engine compartment. Look close and you'll see the heater valve, PEX fitting, A/C hose, and wiring harness. Note all holes employ rubber grommets. Next we'll begin work in the engine compartment.