There are some things in life that are just better left for others to do-you know, specialists who specialize in special tasks that most prefer not to mess with. Many might put paint or even bodywork at the top of that list, while others may find upholstery or engine rebuilding way out of their league. Well, in the last couple of years, I've made goals to not only attempt to perform any duties I previously thought beyond my capabilities, but to practice, learn, and come as close to perfecting them as possible. Sometimes I succeed; other times I realize full well why I shouldn't have bothered with the job in the first place.
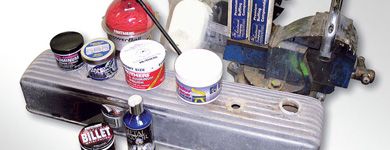
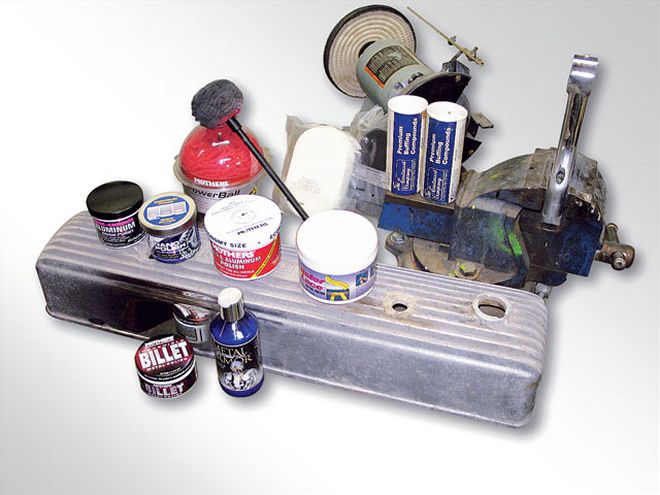
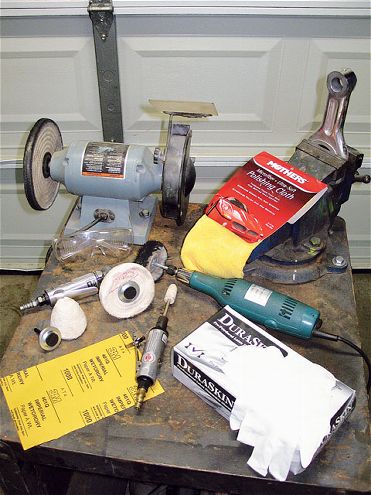 You'll need the required tooling and supplies, in addition to the necessary polishing potions, to make your aluminum shine. From fine-grade wet/dry sandpaper to latex gloves, bench-mount buffer to microfiber polishing cloth, there's more to it than just an old sock and some polishing compound.
While the art of chrome plating will never be something I list on my rsum, I can say that I'm pretty proficient at polishing aluminum-something I'd previously left for the professionals to do for me. As things in life become more expensive year after year, it's always nice when you can save a buck or two by doing something yourself, and polishing your own aluminum sure helps keep your folding money folded. Sure, you'll need to shell out some dough for the essentials, but as long as you don't have aspirations of opening your own polishing shop, you don't need to go all out and get the most expensive equipment and supplies. As a matter of fact, you could probably get completely set up with just one trip to Harbor Freight!
If you've never done more than make previously polished aluminum shiny again, let's go over what it takes to get started. First and foremost, at the very least you'll need a 6-inch bench grinder/buffer (if possible, get an 8-incher) or a handheld air grinder with appropriate arbors for mini polishing bonnets/pads. If you don't already have a bench or an anchored pedestal, you'll need somewhere "solid" to mount the buffer, as you'll be applying a lot of pressure on the polishing pad. And speaking of pads, you'll want to stock up at least two to start with: one to "cut" and the other to "buff," similar to bonnets used for polishing a fresh paint job. The remaining required materials include compound and rouge, a final polishing product, microfiber detailing cloths, and an assortment of wet/dry sandpaper (depending on the aluminum's coarseness, usually 400-grit and finer). For your personal protection and hygiene, I recommend latex or snug-fitting work gloves, safety glasses, and a shop apron if you don't want to ruin your clothing.
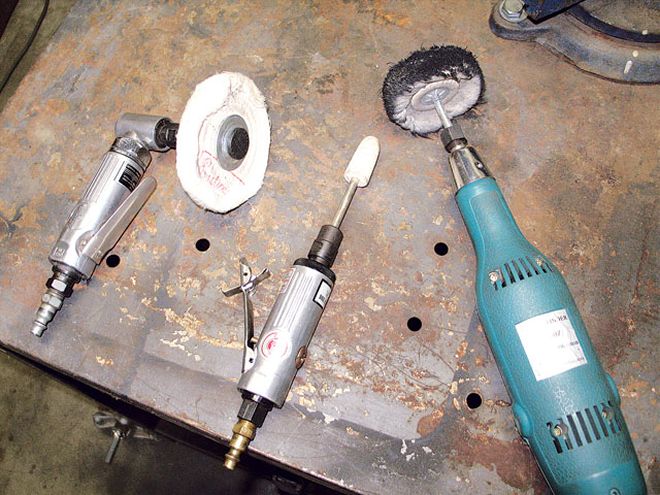 Theoretically, you can polish just about anything with handheld air and electric rotary tools. For abrasive compounds, I find a straight (as opposed to angled) buffer best, as it allows you to lean into the pad more and cut through the rough surface easier/quicker.
Basically, because aluminum is a very soft metal, it's treated like paint when polished, smoothing down a rough surface until it's uniform and shiny. And because of its soft nature, it's also easy to scratch, just like paint, so it requires periodic maintenance as well. If you're dealing with rough-cast parts, such as valve covers or an intake manifold, you'll need to eliminate the uneven surface, which is usually easiest to perform at home with regular automotive sandpaper, or, if possible, an abrasive wheel. Once the casting is taken down, you can switch to the buffer (or a handheld air-powered tool) to begin the polishing process with compound. I've found that even after machine-polishing with a final compound, you can get an even better finish by hand-polishing with a product such as Mothers Billet Polish, Eagle One's Nano-Polish, or Metal Armor's Precision Metal Polish.
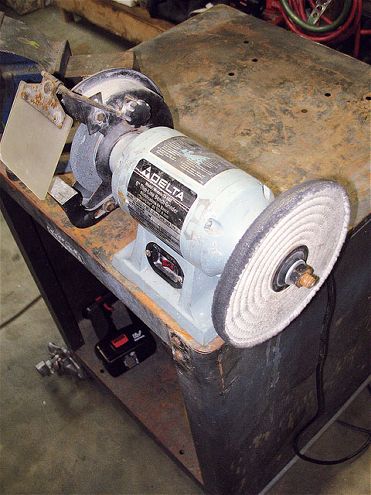 No matter what, you can't beat a good old bench-mounted buffer/grinder. However, with the ease of polishing comes a price: You have to keep control of your work, not let it control you by letting it get ripped out of your hands! If, like me, you only use one side for buffing, be sure to change out pads for rough and finish polishing; don't use one pad for everything.
You can get equal results with small parts using either basic handtools (air or electric) or a bench buffer. It's usually best working with larger equipment, if possible, to get a nice, even finish for larger parts. The equipment can be found locally or, for a one-stop source, Eastwood has everything, including a home-shop buff kit complete with a 1/3hp buff motor, abrasives/compounds, pads, etc. Be extremely careful when using any high-speed buffer, as it's very easy for parts to "get away from you" and cause damage to themselves and, quite possibly, your person as well. Actually, using a solid-mounted buffer as opposed to a handheld will more often yield better results, as you're in control of the aluminum, able to add more or less pressure to get the results you want quicker. However, both ways are messy, no matter what, so be prepared-wear appropriate clothing and set up a work area that can tolerate the spatter of spewed polish remnants.
Whether or not you end up polishing your own parts in the future, the important thing is that you gave it a shot. It's better to actually know something's beyond your abilities than to just assume and never try it. I may find this job easy, but it's time-consuming, and, if you didn't already catch the drift, quite messy!