The tough part is over. Last month's installment in our Paint & Body series covered the application of topcoats-color, clear, special effects-over prepped and primered sheetmetal. Getting the right results from the spray gun is probably the job that intimidates novices the most. If you did it right, it's time to take a breather, knowing you're definitely on the downhill side of this paint process.
We meant "take a breather" literally. Unlike paint application, which measures time between coats in minutes and keeps you jumping so as not to miss the recoat window, the final coats of paint have to dry for a while before you touch them with sandpaper. Drying times vary among paints; check the material data sheets on your chosen material for specific recommendations. Chances are good your paint needs to dry for 12 to 24 hours before sanding begins. Most of the painters we spoke with like to spray late in the day so they can leave the car in the booth overnight before rolling it out for a rubdown.
Why sand? Sanding and the polishing processes that follow make the car's topcoat as straight and smooth as possible (bye-bye orange peel) and help bring out the paint's gloss. Also, the physical act of cutting off just a bit of the paint's top layer helps its solvents to gas out, which aids the drying process.
"It's a fine issue, but as the paint is off-gassing some of these solvents, it's changing profile, shrinking back a minute amount," explained John Sloane of the Eastwood Co. "If you rush the process and don't allow it to shrink back to get perfectly level and smooth, you'd notice some more roughness in the surface."
If you set up your spray gun properly and applied a nice, single, flowing coat (as the folks at House of Kolor like to call it), chances are good the result straight out of the gun will be better than the finish on most new cars, Sloane said. But color-sanding and buffing will take it to the next, show-car-like level.
Yet you have to be careful not to sand too deep. If you rub through the clearcoat (or down to primer if you're using single-stage paint), you've effectively ruined your hard work and a repaint will be in order. How much you have to repaint depends on how easily you can match the rest of the car. A solid color can probably be touched up. If you've used special effects-kandy, pearl, flakes-prepare for a total redo. This is why the sandpaper grits used in color-sanding are so fine-1,200 and up.
Color-sanding (it's called that whether you're sanding the actual color of a single-stage paint or the clear over a basecoat) can be done either wet or dry. Wet-sanding-when the paper and the paint stay wet from a running hose or damp rag-keeps the surface cleaner and allows the paper's abrasives to cut more efficiently because they won't clog as easily. A few drops of liquid car wash soap in the water bucket will also help lubricate the paper.
Opinions vary as to whether color-sanding should be done by hand only or by using an orbital sander. "The 40 or so hours it'll take to sand an entire car makes the machine look pretty attractive," Sloane said. But novice painters may have trouble regulating the pressure on the paint. Plus, it's easier to monitor the progress of linear scratch marks from hand-sanding than the machine's orbital scratch marks. "If you're hand-color-sanding, you might sand a hood going front-to-back with the initial cut, then use a finer paper to cut side-to-side until all the front-to-back scratches are removed."
John Morrow of Johns Customz & Performance (JCP), who rubbed out the red Impala for our photos, has another reason he sands by hand only. "If some grit gets in there between the paper and the paint, I can feel it and stop. But you'd never feel it under a machine, and it'll just keep grinding and scratch the paint."
Morrow makes a couple of passes over the car with sandpaper starting with 1,500-grit and moving to 2,000 before he gets out his orbital buffer, pads, and compounds. The liquid compounds have different abrasion levels as do the pads that go on the buffer. You can vary both; Morrow used a wool pad with rubbing compound and a foam pad for the less aggressive polish. Or, as Sloane suggested, you can stick with one compound and vary the pads to get progressively finer abrasives. "It's an easier, maybe safer system to use, especially for the beginner, as he's going to be removing material less quickly and would be less likely to buff through to underlying coats."
Either way, the idea is to replace the coarse scratches from leveling the paint's surface with finer and finer scratches that can eventually be hidden with polish. "Look even at a show car under the right light and you'll see fine scratches. There's no way to avoid it in the process," Sloane said.
Some do try. "When seasoned detailers wax and buff out a car, especially a dark-colored car, they'll use linear passes front to back," Sloane revealed. "It makes all the scratches uniform and virtually unnoticeable." To achieve what he called that "final, perfect reflection," Sloane recommended polishing by hand using linear, not round or orbital, strokes.
Next time: Putting a car back together after paint.
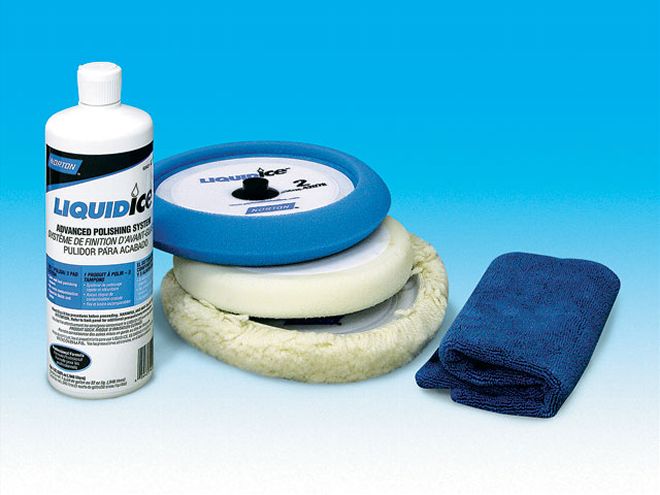 Norton's Liquid Ice kit (Eastwood PN 12013) packages liquid polishing compound with pads to take out sanding scratches, remove swirl marks, and do a final polish.
True Grit
When choosing sandpaper, keep in mind that there are two different grit grading systems: CAMI, the longtime industry standard, and FEPA, a measure of abrasive strength from the Federation of European Producers of Abrasives. CAMI grit grades are listed with numbers only-80-grit, 320-grit, and so on-while FEPA grades have the letter P in front of the numbers-P320, P800, you get the idea. What's the difference? The FEPA grading system measures abrasive materials at closer tolerances, so there are actually more FEPA abrasive grades, and the scale is tighter than CAMI.
The only place the grades are equal is at 80-grit. Above that, they vary greatly. A CAMI 360-grit falls between a FEPA P500 and P600, for example; a CAMI 1,000-grit is between P2,000 and P2,500 on the FEPA scale. So double-check before buying to make sure the paper is as coarse-or fine-as you need.