
"Hey, nice ride!" We all love the ego stroke of unmasked admiration, and nothing dishes up an automotive narcissistic feed like nice body and paint work. A straight and gleaming muscle machine is just a magnet for praise, catching admiration for no reason but pure looks alone. It's just curb appeal. Though a highly evolved automotive taste can covet the same car, bruised, rusted, and primered, the general masses will judge on the visual, and probably the visual alone. Unfortunately, the notion of good body and paint ranks as one of the most expensive and time consuming of automotive goals. Frankly, there're only two paths by which to get there-one is to find a suitable shop, drop the car, and open the wallet wide. The alternative is to learn, understand the processes, do what you can yourself, and open your wallet not quite so wide.
For the former approach, you really don't need our help. We can give you all the advice you need in one line-find a shop you can afford that can do the job, and pick it up when it's done. If you wish to delve a little deeper, here is what's involved, from start to beautiful finish. You may not be able to produce a show-winner the first time you put these techniques to practice, but you will definitely know more about what needs to be done, and that knowledge is what it takes to trade some work for big savings down the line.
Strip It
Most of us center our automotive interests on machines built decades ago, and time exposes the body to all sorts of unrighteous indignation. Now, not all paint projects necessarily require a full strip-down to bare metal. For a street driver still bearing a single decent layer of factory paint, a good scuffing of the original paint can serve as the basis for a quality re-paint. Multiple blow-over paintjobs, hacked bodywork, or dime-store primers hiding who-knows-what ills generally point to the need for a full bare-metal strip-down. There are a variety of techniques to strip the offending buildup to the metal below, and the decision on which process to use depends on the situation. Below we have a guide to the basic techniques, and where they best apply.
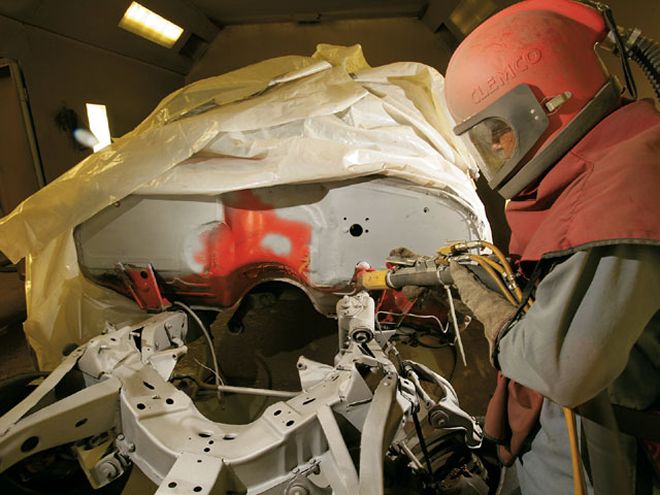 Blasting can be a very effective form of paint removal, readily taking difficult-to-access areas down to clean bare metal. There are a variety of blasting media, each with pros and cons, but the specialized equipment means this is almost always a commercial technique.
Blasting
Blasting will quickly remove paint, and depending upon the media, will also remove rust, leaving clean, bare metal. Generally, blasting is a commercial service, and we prefer companies that specialize in automotive work. The advantage of blasting is that it will clean complex and hard to get areas, such as the contours of an engine bay, or around chassis parts, frames and components that would be very time consuming and difficult to strip by other means. The downside is that the media will get into everything that isn't protected, which can create difficulties if the vehicle is still largely assembled. Also, some components, such as glass and moldings, can be damaged by certain blast media, so they need to be protected or removed. Overzealous blasting with high pressure and heavy media can also distort body panels.
Blasting can be done with sand, which is very aggressive, and will remove all rust. Sand can cause damage if incorrectly applied or allowed into unprotected components. Other media include walnut shells, soda blasting, and plastic media, which are less aggressive and primarily remove paint with little effect on rust. We like blasting on heavily disassembled cars, particularly in hard-to-strip areas like engine bays, trunks, floorpans, and chassis members.
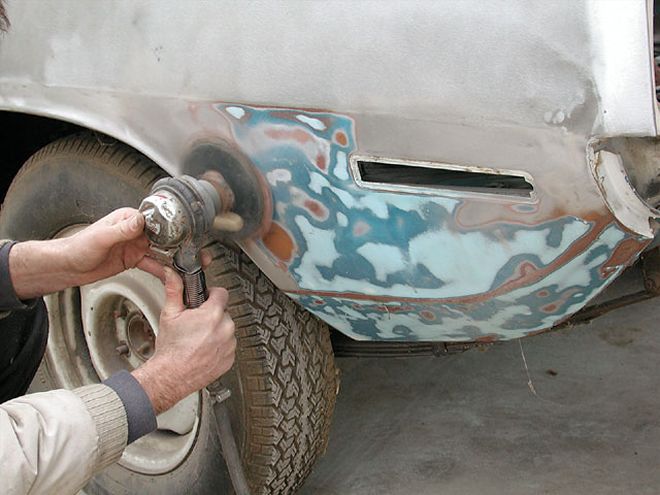 Sanding can knock the exterior of an entire car down to bare metal with one day's work. Orbital sanders, such as an air-operated D/A (dual-action) sander are preferred for automotive work, since such equipment minimizes trauma on the metal below.
Sanding
Sanding is one of the most straightforward techniques for stripping paint. Generally, the equipment used is air-powered, and a hearty compressor is a must to be effective. Electrical tools can be substituted here if a suitable air supply is not available. The key distinction in sanding equipment is the tool motion. Simple rotary sanders will tend to gouge the metal, though the cutting action will be quite fast. Orbital action, as employed by a standard autobody dual-action (or D/A for short) sander, will eliminate the tendency to gouge or damage the metal, though the paint removal rate is slower. Sanding is most effective at removing paint from large flat areas of the car body. We favor sanding to strip the exterior sheetmetal surfaces.
The key tip here is to use high-quality abrasive discs from a manufacturer like 3M or Norton, since the cutting is much faster, and the discs last much longer. Don't be too conservative on the grit if going down to bare metal-we wouldn't hesitate to knock back deep multiple layers of paint with #40- or #60-grit D/A discs. Although it may seem like a big job, the entire exterior of a typical car can easily be sanded to the bare metal in a day. Related to sanding are some of the many abrasive fiber discs on the market, such as 3M's Clean & Strip wheels. These come in a variety of configurations and sizes, and are ideal for quick paint removal in some of the more confined areas where access to the large D/A disc is limited.
Chemicals
There is a multitude of chemical stripping processes available to automotive enthusiasts. Generally, the products for home application are either brushed or sprayed on, and after some working time, the paint is scraped off. We have had very limited success with most over-the-counter products on fully cured automotive paints, especially the tough OEM paints and primers on our older cars. This is especially true since most of the highly effective but toxic methyl chloride has been removed from most of these products. We have seen some demonstrations of specialty stripping products that seem effective, but the best bet is to try a sample of the product on the material being stripped. The downside to this type of chemical stripping is that the process is necessarily messy, and time should be taken to seal off various body seams from ingress of the stripper. We occasionally use chemical strippers, but generally favor mechanical means of paint removal.
Another variation of chemical stripping is full immersion. This is a commercial stripping process where part or even the whole car body is dropped into a tank, or a series of solutions until the result is clean, bare metal. These systems can be extremely effective, especially in a total restoration scenario. We have had full car bodies subjected to the tank, and found the results very impressive. Some of these services also finish with a protective coating. For this type of stripping, total disassembly of the vehicle or component is a prerequisite.
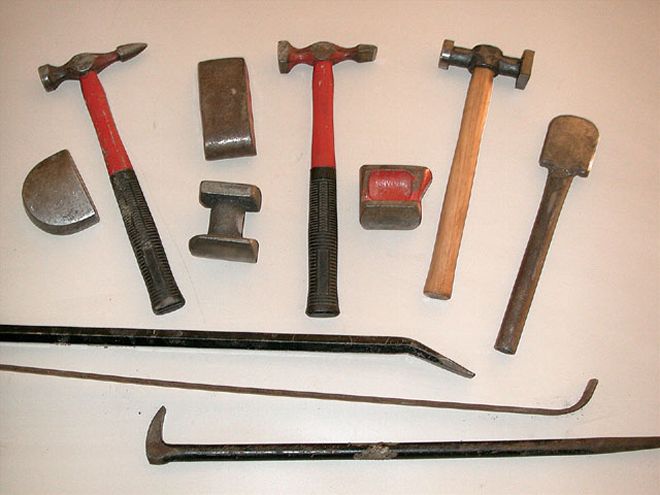 Metal working requires a variety of specialized, if somewhat crude, tools. Hammers, dollies, prybars, and slappers are all part of the rotation. In skilled hands, these can work wonders.
Hammer It
Virtually any paint project is going to involve some level of bodywork. If the metal is beat up, you'd be amazed by what can be fixed by hammer and dolly work. For the novice bodyman, it may seem kind of hard to believe just what can be fixed by the masters of the trade with practiced hands and eyes, and using the crudest appearing hand tools. The kind of feel for what it takes requires practice and experience, and there's only one way to gain that-by doing. Skill in metalwork may vary, and the difference in ability will just boil down to how close it will end up before slinging on the mud. It pays to have the metal as near perfect as possible.
The most basic metal working tools are body hammers and dollies. Body hammers, unlike framing claw hammers, are balanced and shaped for working sheetmetal. A good assortment is nice to have. The pointed pick end of the pick hammer is handy for precisely concentrated blows on small dings, while the light overall weight makes the flat side nice for controlled hammer and dolly work. A flat chiseled-end hammer is good for working bodylines, and the overall hammer weight is higher than a pick hammer, for slightly more forceful blows. A combination hammer is the heaviest, and has a square and a round head for working flats or corners.
 A handy device for moving metal is the stud-welder. The device welds studs to the panel surface, which are grabbed by a slide hammer puller to raise a dented area or crease. Avoid the old-school drill-and-screw dent pullers at all costs.
A dolly is used on the opposite side of the metal being hammered. It focuses the force of the hammer blow to the area being worked. Without a dolly the metal will just spring over a wide area and not move, or move in too broad of an area. Dollies come in a wide range of shapes, and can even be homemade. There are two main ways to use a hammer and dolly: hammering on the dolly, or off. In on-the-dolly hammering, the dolly is directly centered behind the metal being struck by the hammer. This is the technique for planishing (smoothing small distortions), or knocking down a bump from the outside. In the off-the-dolly technique, the dolly isn't place directly below the hammer strikes, but typically just adjacent. In this technique, the dolly is aligned to exert outward force at a low area, while an adjacent raised area or ridge is worked down. This is useful when working out larger distortions in the panel's shape.
One key thing to always bear in mind is that there's a fixed amount of metal surface, and metal always has to go somewhere if you're trying to move it around. If it goes down in one area, it will move up somewhere else.
Various bars and levers are also useful, particularly in blind areas between panels where there is no room for a hammer. Bars can vary from hardware store crowbars, or tools that are homemade and fashioned to a particular shape for the task at hand. Using a bar behind a depressed dent and applying a leverage force will often not move a dent or crease out, but holding tension against the dent while lightly hammering the adjacent metal (off the bar) will coax the metal back out to shape.
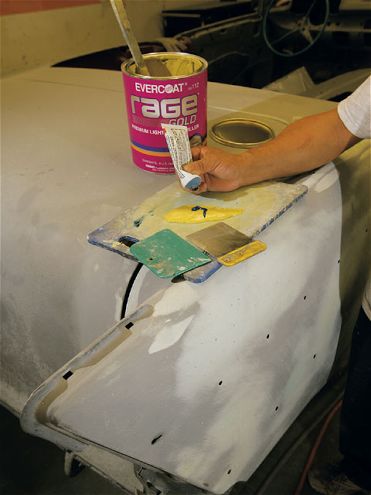 Getting it perfectly straight will always require some filler. Fillers are mixed with the hardener in the prescribed ratio, and applied with a metal or plastic squeegee. The key is to lay the filler were it is needed, without excessive thickness where it's not. This '57 Chevy quarter, being worked on by D & P Classics in Huntington Beach, CA, will be glass-smooth when complete.
Fill It
Body filler is one of the most useful, and at the same time, most abused substance in the automotive hobby. Try as you might to get the metal perfect, only the very masters of the metalworking craft can metal-finish a panel so that no filler is required. Some filler will always be required if you are looking to achieve pin-straight bodywork, and even some areas of the factory panel work are not straight enough for show-quality paint. If major panels have been replaced, some filler use is virtually guaranteed. Modern plastic fillers, applied properly, will outlast most paint-jobs. Filler should be thought of as thick primer, to be used in a light skim to build material-not as a crutch for substandard metal work.
Filler is a polyester-based paste that begins to cure when mixed with hardener in the ratio prescribed by the manufacturer. The filler will remain workable only for a few minutes, and is applied with either flexible plastic or metal spreaders. Spread the filler smoothly, feathering off well past the actual repair area. Once the filler has taken a partial set, some pros like to file it with a Surform blade to form the gross shape, in a process called cheese-grating. We find the half-round blade to be the most useful profile, though when working in thin sections, especially if the plastic has been nicely applied, cheese-grating will usually be unnecessary, and can actually do more harm than good.
Filler is usually sanded with a long, hard sanding board, or an air-operated inline sander. Use a criss-cross shallow diagonal motion to level the filler. Start with #60 grit paper, or #36 if lots of material needs removal. When the surface is level, sand out the deep sanding scratches with #80-100 grit paper. Any low spots will show up as shiny areas the sandpaper didn't reach during the coarse sanding, indicating the need to reapply filler as required. Finish sand so that the filler meets metal with smoothly feathered-in edges.
The relatively course texture of plastic filler will often show pinholes and other surface flaws. Glazing putty is usually used over the filler, which has a much finer grain and fills surface flaws, while giving a finer feather-edge. Glazing putty comes as a simple single-component fine-grained acrylic putty, or as a two-component putty with a hardener. These days, two-component spot and glazing putties are preferred due to less shrinkage and a quicker cure than older acrylic air-dry putties. Glazing putty is sanded similarly to the base filler after it cures, but use finer paper, finishing with #150, or finer.
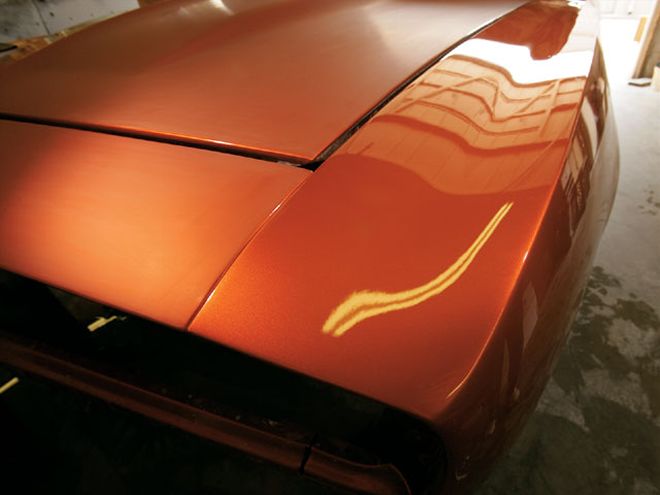
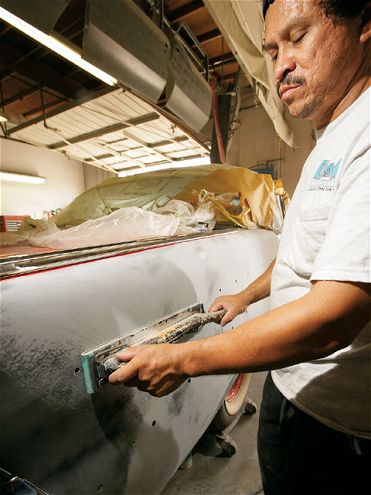 The quality of the finished product will largely depend on the sweat produced here, blocking the sheetmetal to perfection. The long sanding board will knock down the high spots, and leave primer build-up in the low spots. This primer and blocking process is repeated until perfection is achieved.
Block It
The primer and blocking stage of any paint job is what separates the men from the boys, and the show cars from the fun field. Here, we are talking about the tedious handwork that results in the unbelievably straight and smooth look that defines top-quality paint. Before starting the build-up and blocking with primer surfacer (also referred to as primer filler), the bare metal is best sealed with an epoxy primer. We believe epoxy primer offers the best protection, durability, and corrosion resistance. The primer-surfacer comes next, and is applied for the final leveling and smoothing of the body panels. Surfacers are formulated to build up relatively thick, and are easy and smooth-sanding.
Surfacer is applied to level minor flaws, and provides a very smooth and level final surface for paint. If applying surfacer over cured epoxy, consult the manufacturer's rep for the correct surface preparation procedure for the products being used. Typically, cured epoxy will need to be sanded or scuffed for adhesion. Before block sanding the surfacer, a mist coat of a contrasting color should be sprayed over the primer to serve as a guidecoat. The guidecoat will remain in low spots after sanding, indicting where further attention is required. Very minor spots may be filled with a second primer coat, though other areas may need a skim of spot or glazing putty.
Primer surfacer imparts a more subtle filling effect, leveling minute variations in the sheetmetal that will be readily picked-up by the eye once the final gloss is applied. (Don't call us! Always use proper a respirator when painting. This shot was mocked up.)
When blocking the surfacer, we like to use a fairly aggressive cut on the first round of sanding, cutting with a hardboard and #150-180 grit dry, or #220 wet paper. The more aggressive grit will give the greatest leveling effect. When sanding, follow the guidecoat to make sure the panel is thoroughly sanded. If the guidecoat is still showing in an area where the adjacent surfacer is being cut completely through, more fill is required. For a perfect result, the primer and block sanding process may need to be repeated several times-the guidecoat will tell you when perfection is achieved. A finer paper is used for successive rounds of block sanding, usually going to #600 grit wet for the final sanding. Some surfacers are a little too soft for topcoating, and require a sealer coat before final paint. Follow the manufacturer's recommendations for the product systems used.
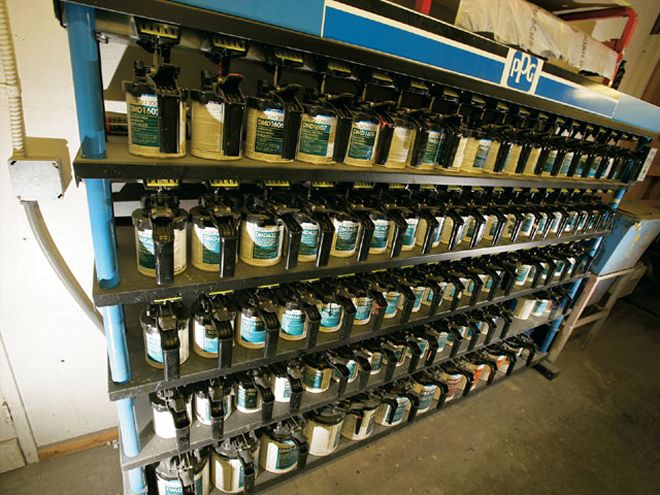 Automotive paints come in a bewildering range of formulas, and most any color can be created by a combination of base colors in a full tinting system. This Deltron system from PPG is used by D & P Classics (Huntington Beach, CA), but your local paint jobber supply should have everything you need if doing it yourself.
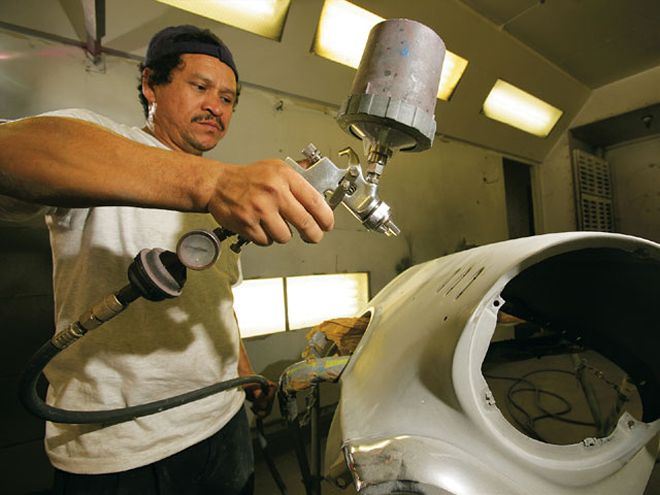
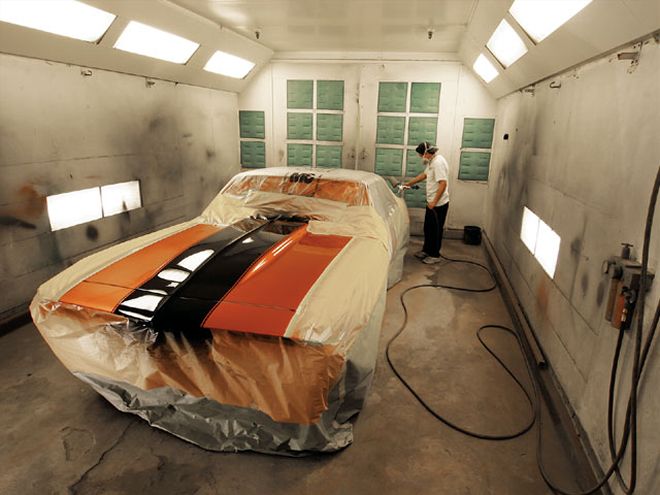
Shoot It
After all of the preparations involved in a high-quality paint job, it comes down to the moment of truth-shooting it. Here, the quality of the prep work will show its worth, or lack thereof. When everything goes right, the actual shooting of the car can be one of the most satisfying parts of an automotive project. For a clean paint job, the finish coats must be applied in a proper paint spray booth, which should be meticulously clean for the job. Care in the final preparations are the key to success, including detailed final masking, as required, which often involves masking the previously painted jamb areas, engine bay, or lower perimeter to protect the chassis. A wipe down with wax and grease remover will insure a clean, film-free surface, followed by several rounds with a tack-cloth to ensure the sheetmetal is spotless.
There are a variety of materials used for topcoating, but the most common today are acrylic enamels and urethanes. These catalyzed paints are very durable, and provide exceptional gloss. There are two distinct systems typical of modern paints, single-stage, or two-stage. A single-stage paint job is simply a single paint product that is sprayed on to provide both the color and the gloss. Two-stage paint jobs, also known as basecoat/clearcoat, begin with the base, which imparts the color, but dries to a matte finish, requiring subsequent clearcoating to provide the gloss. Either system can provide excellent results, but two-stage paint jobs are more typical of custom work, since this technique lends itself to a final cut-and-polish, especially with metallic or custom finishes.
Mixing the paint is a critical step in the process, and each manufacture gives specific guidelines on mixing ratios of the various paint components of reducers and hardeners. Typically, the manufacturer will have several products, such as reducers, in the line that must be selected based on working conditions such as the ambient temperature. Some painters will deviate from the recommendations, looking to modify the formulas for enhanced flow-out, or self-smoothing as the finish is applied, particularly in areas where the manufacturer is forced to limit the solvent content to meet the regional VOC (Volatile Organic Compound) emissions requirements. Experiment at your own risk.
Equipment is another key consideration, and here, quality counts. Modern paint formulas are very sensitive to the flow-rate, atomization, and pattern of the spray equipment. Don't expect to achieve show-car results with a $20 gun from the local farm supply. A gun from a top quality manufacturer will save a world of frustration and regret. While historically spray equipment worked off a siphon-feed system, most of today's guns are gravity-fed HVLP (high-volume, low-pressure) units, which considerably reduce paint overspray and waste. The actual application technique is a learned skill, but the basics are to hold the gun perpendicular to the surface, sweeping in before pulling the trigger on a pass, and following through after the release, while holding the gun a consistent distance of 10 to 12 inches from the surface.
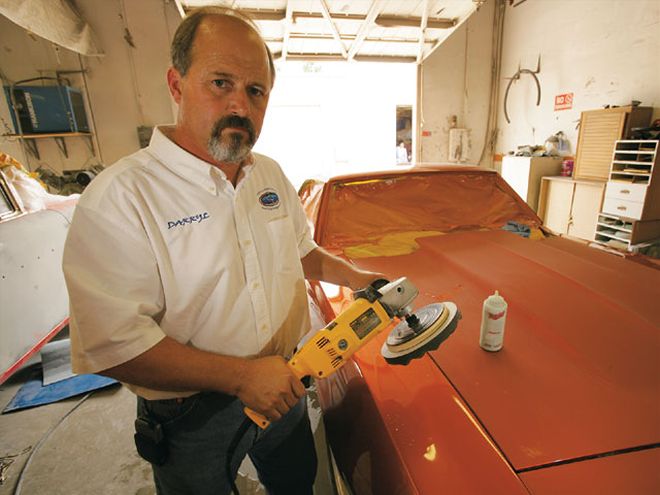
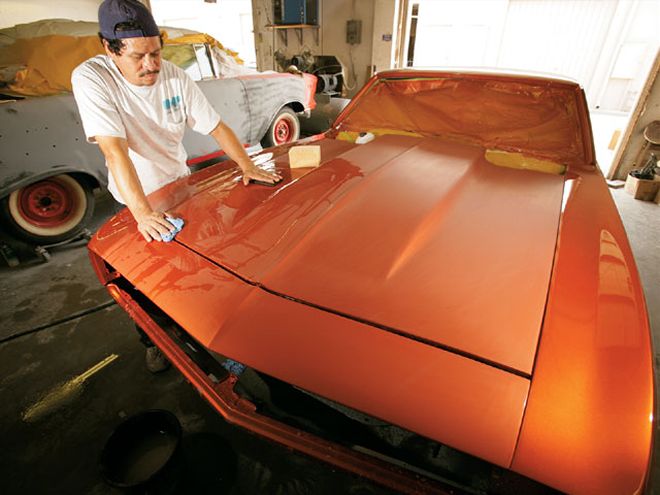 Even paint this nice can be improved by cutting and buffing for an absolutely stunning finish. The surface is carefully wet-sanded with very fine abrasive sandpaper and a backing pad.
Buff It
While a basic paint job is complete with the last pass of the paint gun, most high-quality or show finishes are cut and polished once cured. This involves color sanding the clearcoat, and then using a paint buffer with a sequence of pads and compounds to bring the surface to a mirror-like gloss. Sanding the surface will remove tiny flaws and spray texture, giving the glass-smooth look of perfection. Sanding is done wet, with very fine grit sandpaper, with the actual grade depending upon the amount of leveling required. If despite your best efforts, the clear has a moderate level of "peel," or texture, more aggressive grit will usually be required. Normally, #1000 grit paper is coarse enough for heavy cutting, but often #1500 or finer will do the job. A major factor is to be careful not to cut all the way through the clear during the sanding process. Following-up with a finer paper, such as #2000 grit, will reduce the depth of the sanding scratches, and make the polishing to follow much easier.
 Wet-sanding is complete once the surface is evenly dull and smooth. Any shiny spots or gloss left are areas that require more sanding for a perfectly level surface. Care must be taking in the process, since cutting all the way through the clear would be a disaster.
Buffing is done with a low-speed (1,800 - 2,200 rpm) rotary buffer specifically designed for automotive refinishing. Minimally, buffing is a two-step process, starting with "cutting" compound, and a wool "cutting" bonnet, followed by the polishing compound or glaze, applied with a finer wool or foam polishing pad. There are numerous manufactures of compounds for cutting and polishing paint, and it pays to stick with a system of products from a single supplier. The final polish can make a mediocre paint job pop, and will give a nicely applied topcoat a brilliant look, but it will probably make the overall effect worse with shoddy prep-work and wavy panels. Great paint requires considerable skill and knowledge, and it all comes down to making the effort for a dazzling final result.
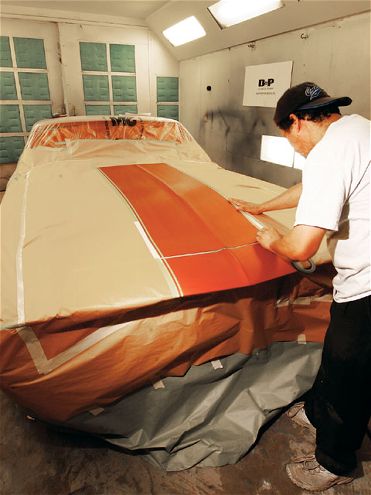 Laying out stripes essentially means masking everything that is not the stripe. Since the tape form represents the body color around the stripe, it's easy to get confused. Just remember that the unmasked areas are the actual stripe.
Stripe It
Many of our favorite muscle machines featured stripes and graphic treatments that complement their high-performance intentions. Many of these packages consisted of decal appliqus, while others were originally done with paint. While the factory finish was always single-stage, with any graphics or stripes applied right over the top, modern basecoat/clearcoat systems allow other options. Stripes can be applied over the top of the paint, in the OEM manner, or applied over the basecoat, to be captured seamlessly beneath the clear. Decal stripe packages can also be duplicated in paint in the same way.
Striping begins with laying out the design in tape, however, the tape works in reverse of the final stripe scheme, blanking out the base paint that will remain, and leaving the stripe area open to paint. Special fine-line striping tapes should be used for this purpose, since the edge is far sharper and lends itself to less edge build-up of the paint. A light scuffing of the surface with a very fine abrasive pad is usually all that is required for adhesion, and the stripe or graphic color is applied just as in the overall paint job. Peel back the mask, and revel in your work. A good hint here is to wait until after the paint has passed being tacky, as to avoid "goo strings" along the edge. Waiting too long before removing the mask, however, may cause the paint to chip at the edges. You'll want to do this soon after the paint dries and before it cures completely. For stripes set below the clearcoat, apply the contrasting color at the basecoat stage, and follow with clear as usual.
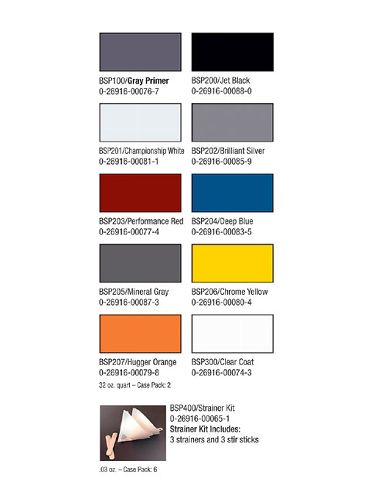
Dupli-Color Paint Shop <strong>Dupli-Color Paint Shop</strong><br> Bulk Products<br>Gray Primer<br>Jet Black<br>Championship White<br>Brilliant Silver<br>Performance Red<br>Deep Blue<br>Mineral Gray<br>Chrome Yellow<br>Hugger Orange<br>Clear Coat
Turn Your Garage Into A Paint Booth
You've read it dozens of times before, and by now that line carries about as much cred as "Build A Space Ship In One Weekend!" All the other rags have screamed the headline, "Turn Your Garage Into a Paint Booth" more than once, and it's never really been true, until now.
Dupli-Color's new Paint Shop finish system is designed for the DIY enthusiast with modest skills and even more modest equipment. No, we're not talking about spraying your pride and joy out of a can-we're talking pro-quality bulk products sprayed out of a traditional HVLP gun. The Paint Shop product line consists of eight vibrant colors plus primer and clear coat (making it a two-stage system). You buy Dupli-Color Paint Shop products in quart cans from your neighborhood auto parts store, and they come pre-mixed and ready-to-shoot. You don't have to add reducers or thinners, although Dupli-Color does give you the option of thinning with acetone.
With traditional bodyshop products, you're tied down to a re-coat window. Wait too long to add another coat and you're screwed. With Paint Shop, you can stop mid-project on a Sunday night, ramble through your day job all week, then get cranking again on Friday night, and suffer no penalty. That's because Paint Shop is lacquer-based.
Paint Shop is easy to apply, it dries quickly, it can be re-applied at any time, and it can be buffed to a brilliant finish. The product handles easily, and is designed to be used by the novice in a garage environment. In fact, Dupli-Color has created an e/Learning video module that's available on Dupli-Color's website (www.duplicolor.com). In the video, they paint a Ford Focus step-by-step in a real garage. (You can even see the plastic taped to the garage walls.) One word of advice: Paint Shop is not a free pass to get out of all the hard prep work. You'll still have to strip, clean, hammer and prep your ride before you pour the first drop of primer into the gun.-Johnny Hunkins
Bring On the Buff
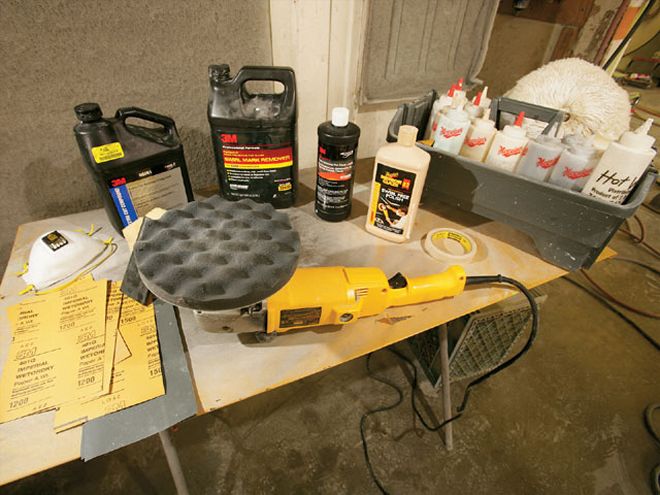
Ok, say you come to the conclusion that hammering out your own dents, priming and blocking the panels ...and, yeah, shooting the paint too, is a little too much to take on. You even realize that about the best you're going to afford is to get the car painted by one of those cheaper chain shops that basically sell the quick blow-over job. So does that mean you'll necessarily have the ugliest car around, even after it is painted? Even if you can't afford some of the equipment needed for paint and bodywork, most anyone who is out of prison and employed can probably afford all the stuff needed to wet-sand and polish a car. As we pointed out earlier, even a mediocre paint job can be made to look great, so it's reasonable to suggest that with enough care, a cheap paint job can be cut and buffed to look pretty good.
Let's take a detailed look at the minimum in equipment and supplies to do the job. The buffer should be specifically designed for automotive refinishing, and though there is a great deal of variation on quality and price, here it pays to step up to a decent name-brand unit. Don't be tempted to save cash here by using goofy drill adapters, orbital waxing machines, or an angle grinder. Excess rpm can easily burn the fresh paint, so these buffers typically run at 1,800 - 2,200 rpm. Accessorize the buffer with at least one cutting and one polishing bonnet. Wool is the traditional material, but foam is favored by some, especially for polishing.
 Automotive paint buffers work at a relatively low speed, typically around 2,000 rpm. Don't make the mistake of using a similar high-speed sander or angle grinder. Polishing bonnets, like compounds, come in a variety of grades, from coarse cutting to ultra-fine buffing pads.
The buffer is about all you'll need for equipment, but you'll still need the supplies. The color-sanding process takes a water source, which can be a slow-running hose, or a sponge and bucket. The sandpaper used normally varies from #1000 to 2000 grit, but the grit that's right for the job will depend on the type of paint, and how much leveling is required. Naturally, the rougher the paint, the coarser the grit that will be required. Too fine a grit will just tend to float over the flaws, rather than cut them. The downside of coarser paper is that it will take much more work to polish the sanding scratches out later. The grit also depends on the paint type. Some very hard urethanes can be almost impossible to buff if sanded too coarse, while even #600-grit scratches can be easily buffed out of old-school lacquers. If forced to use a grit coarser than about #1500, going back over with a light sanding of a finer grit will usually make polishing easier.
Finally, we have the compounds. There are probably more products for shining up paint than for any other automotive purpose. While the photo here shows more sauces than a French buffet, really at minimum you'll need a two-step process: compounding, then polishing. Compounding will remove the visible sanding scratches, but in sunlight the finish will show horrible-looking swirl marks. Literally the buffing pattern of the compound will show throughout the finish. Polishing (or glazing) compound completes the job, eliminating the swirl marks, and polishing the paint to a super shine. Always wash off the coarser cutting compound before beginning with the polishing.-Steve Dulcich
Online How-To Videos
You can find anything on the internet these days, and we're not ashamed to admit that sometimes the web offers more than magazines in some areas. Try as we might, we can't actually show you a car being painted, although the promise is tempting. While kicking around, we found this interesting site at Sherwin Williams (www.sherwin-automotive.com/reference/bdp.cfm). It's chock full of training videos designed to show paint professionals the preferred, or "best demonstrated practices," for using the full line of Sherwin-Williams product. We found all the nitty gritty specifics, with product recommendations, photos, videos, and instructions. The training is broken down into sections like blending, repairing metal, painting new metal, jambing, and painting both primered and unprimered plastics. Each section has valuable technical instruction, followed by tests, which we figure is a heads-up move by Sherwin Williams to ensure their dealers are using the product correctly.-Johnny Hunkins
