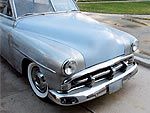
As American automakers clamored to turn out new car designs following World War II, a number of prewar construction techniques lingered, particularly on lower-priced makes and models. One was the practice of stamping hoods in two pieces and welding them together in the center. The resulting seams were typically covered by trim, ornaments, and emblems.
Not surprisingly, one of the first things many customizers do with such hoods is remove the trim and fill the seam. That's exactly what I wanted to do on my '51 Plymouth. It seemed like an easy enough task-just remove the trim, weld the seam solid, then grind, fill, and sand until you're finished, right? That's one approach, but when I enlisted Norm and William Cox at 10th Street Auto Body in Phoenix to do the work, they brought up several concerns with this method.
"You're welding on two 90-degree angles," Norm says, noting that the seam is formed by two flanges spot-welded together. "The hood would want to warp down [in the center], and it would be impossible to hammer that back up." This would not only require liberal use of body filler, he says, but there's also a corrosion concern. It's nearly impossible to fully clean and then protect the inside of the seam, so corrosion deep inside it can come back and attack paint years down the road.
So, what's the alternative? Norm and William prefer to split the hood by drilling out the spot welds along the seam and braces. After having all the pieces chemically stripped, they tack weld it back together and cut off the flange before fully welding the seam. Removing the flange offers several benefits. First, it allows them to join the hood halves with a butt weld, and creates a slight weld gap that helps prevent excessive distortion during welding. And while minor welding distortion is inevitable, you can now manage it using a hammer and dolly. Of course, the finished appearance under the hood is also nicer, Norm notes.
Some people like to add strength and style by creating a peak when they remove the center seam. This is best done by cutting out a narrow strip of metal along the hood center and welding in a peaked replacement piece created on a bead roller or sheetmetal brake (or trimmed off another vehicle). I opted to leave my hood flat, but I did want to ditch the Plymouth badge at the leading edge. This looked to be a challenge, as the hood flared out to form a flat mounting surface for the badge. Again, Norm was able to handle this in stride by making a few relief cuts and manipulating the metal to the desired shape using various hammers and dollies, a torch, and decades of acquired skill.
Adding to the challenge was the fact that Norm and William's shop is 350 miles away, and they didn't have my car there to trial-fit the hood as they welded it back together. They made it work with careful measuring and the use of several templates, but would not necessarily recommend the approach to everyone. With that in mind, take a look at how they made this two-piece hood into one.