One of the most time-consuming and expensive projects you'll ever perform on your muscle car or hot rod is to either paint it yourself or have it painted. Paint and bodywork have long been considered an art more than a mechanical procedure. a good paint job is certainly the result of many hours spent welding, sanding, and preparing the body for paint. In fact, rather than the common misconception that a "paint job" is a single step process, painting a car is really a multi-step process that leads up to the actual painting of the car. Being a good painter requires a lot of patience and a certain amount of perfectionism because that new, glossy paint job will reveal the slightest blemish underneath, but what's necessary to perform proper bodywork? We visited J.D.'s Paint and Body in Mulberry, Florida, to find out exactly what it takes to produce show-quality paint jobs, and to get hints about what you can do yourself to help the process.
Rust is a common term for the process of steel oxidizing and is normally caused by unprotected metal being exposed to water or water vapor. Adding salt to the process, as in salty roads in the winter or beach driving in the summer, only expedites the process and can quickly turn sheetmetal into an ugly, flaking, rusty mess. The worst issue of rust is that once the oxidation process has started it's very hard to stop. Even taking away the source of the moisture won't stop the metal from rusting in a self-destructive manner, so the only choices are to remove the rust completely or to stop the process of oxidation chemically. Either way, the rust must be completely removed or treated or it will return under the paint, causing unsightly bubbling.
The best way to ensure that rust won't return is to completely remove it from the car. This can be accomplished by removing the metal just in the rusty area and welding in patches, but extreme cases may require replacing the entire panel. While doors and fenders are easily replaced by bolting on the new parts, quarter panels, door skins, and floorpans are more difficult and require specialty tools such as a welder, clamps, spot weld cutter, grinder, and cut-off wheels.
 Before even considering colors or a paint booth, all the rust must be found and either removed or chemically neutralized.
Whether removing the metal due to a collision or due to rust, the methods are the same. Cut out the affected area, fabricate or purchase a patch panel, fit the panel, and weld it in place. The welding process can be a trick in itself as the heat created in thin, sheetmetal panels can cause distortion, leading to additional time spent straightening the welded-in panels. Coating the panel with a heat-absorbing compound and stitch welding (welding short segments slowly) the panel are two ways to keep the panel from warping while being welded in place. An additional concern of welding is that moisture can be trapped inside any areas of porosity, leading to future rust problems. Priming the metal in a weld-through primer and sandblasting the area after being welded are two ways to ensure the area won't rust in the future.
Most areas of light surface rust don't require metal replacement and can be chemically treated with a liquid rust inhibitor. OSPHO is a common brand, but other manufacturers, such as POR-15, make liquid rust inhibitors as well. Rust inhibitors are also found in gel form, such as naval jelly. No matter the brand, all rust inhibitors work basically the same way. Their main ingredient is phosphoric acid, which converts iron oxide (active rust) into iron phosphate, chemically stopping the oxidation process. Parts can be dipped in rust inhibitor, but the more common method is to spray liquid inhibitor on the area from a spray bottle. Depending on the severity of the rust, it can take from 2 to 12 hours for the phosphoric acid to completely convert the rust to iron phosphate, which is black in color. Remember this process is only effective on areas of surface rust that are not flaking or rusted through. Those areas should be cut out and replaced.
It's not until all the car's rust has either been removed and replaced with new metal or treated with rust inhibitor, that we can call the first step in our painting process complete. Now we have a solid foundation to build on, we can begin straightening and filling warped panels and correcting other imperfections.
We've all heard someone at a car show or cruise say that their car has all new metal with no filler, that's why it's so straight. Well, we have news for you, nearly every body panel we've seen-new, N.O.S., or used-requires some filler to be made straight. While some panels may be straightened with a hammer and dolly, most require filler to be perfect. It takes many hours of spreading body filler, sanding, and repeating the process to ensure a panel's straightness, and, again, some specialty products and tools are required. First, it is important to use quality body filler. Cheap body filler may fill the voids and imperfections of car's panels, but it won't last nearly as long as quality filler. Another benefit of quality filler is it's usually easier to sand than its cheaper counterpart, requiring less time to perform the job.
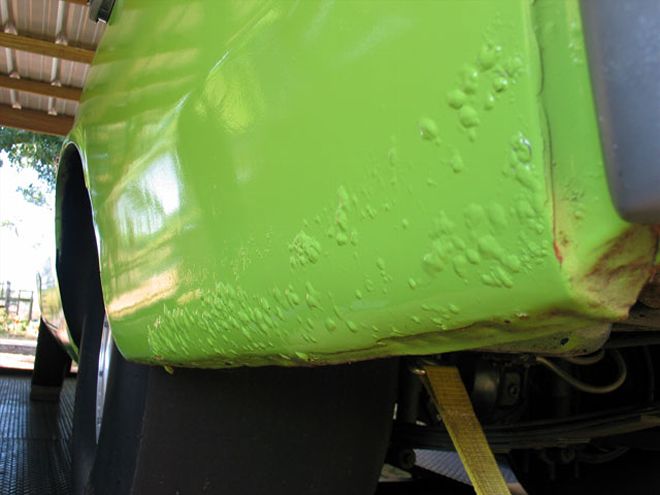 The most common cause of paint bubbles, like the ones shown on this Demon, is not removing or properly chemically treating the rust underneath before paint is applied.
After the filler is applied to the panels, the key is to sand, sand, and sand. Most of the sanding can be accomplished by using power sanders, random orbital units, and air files, but the final steps are always performed by block-sanding the vehicle by hand.
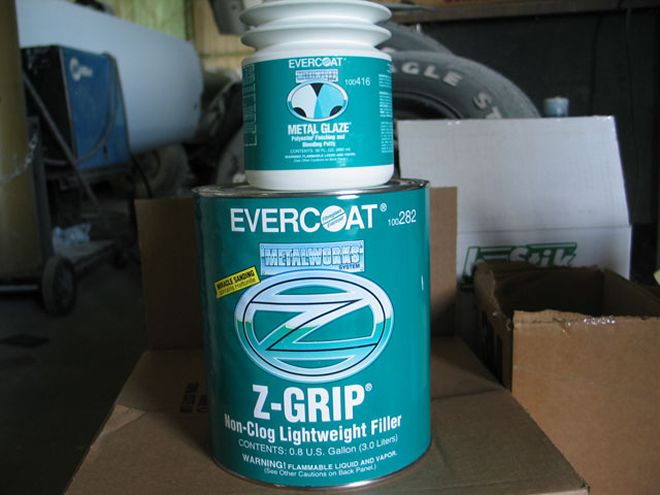 Quality body filler is an important part of straightening panels. Good fillers like these cure quickly and sand easily, reducing the time required to perform the work.
Block-sanding the vehicle is the critical step that makes the car's panels look straight. The reason a block is used is to distribute the hand's pressure evenly across the panel. Sanding without a block will leave finger grooves in the panel, which in turn will cause the panel to look wavy once painted. Blocking begins with sandpaper as course as 180-grit to knock any high spots off the filler, then by using progressively finer paper, the panels become smooth and straight. The best body men don't look at a panel to judge straightness during the block-sanding phase, they feel for straightness. The adage of "if you can feel it, it will show in the paint" holds true. a good bodyman will run his hand down a panel to feel for the slightest imperfection, correcting it before paint is applied.
There are some other tricks to block-sanding, such as sanding in diagonal strokes and using a metal ruler or paint stirrer wrapped in sandpaper to follow body contours. Low spots can be detected by misting the panel with dark colored spray paint or dry guide coat and blocking lightly. The places that remain the color of the spray paint are the low spots and need to be filled.
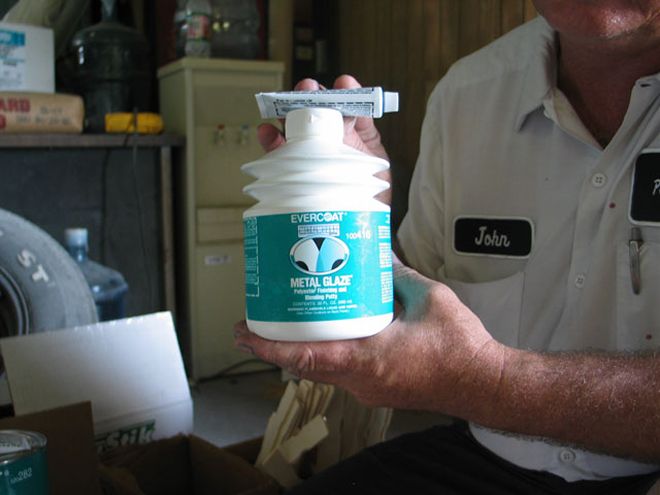 After the filler has cured and been sanded, glazing and spot putty is used to fill any voids or minor imperfections that are left.
Regardless, plan on spending lots of time on this step of the paint and bodywork process. The more time spent blocking, the straighter the car will appear when it comes out of the booth wearing fresh paint.
But we can't just roll it into the booth and start shooting; first we must make sure we have the proper equipment and make some decisions about the type of paint, not to mention primer, which will be used to cover our car. First and foremost we must understand the main function of paint is to protect the underlying metal and looking pretty is secondary. Before the paint is applied, however, the car must be primed with a quality primer and blocked once again. This step of priming is to seal the car and its bodywork from the paint above, ensuring that the paint will have a smooth, consistent surface to bond to and the different colors of filler, primer, and metal won't cause any color variations when the paint is applied. J.D. prefers a two-part, urethane surfacer for final priming.
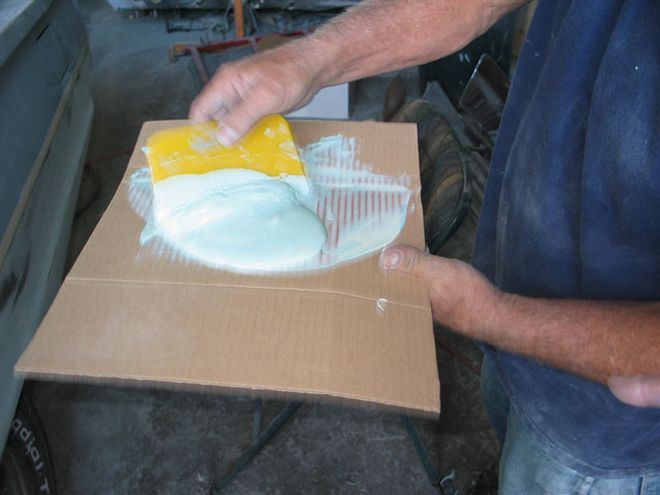 Quality body fillers must be mixed with an activator, which causes them to harden. Thorough mixing is required so the filler will harden evenly and not leave voids or soft spots.
When choosing paint, a compromise must usually be reached between the quality desired and budgetary restraints. Most modern paints do a decent job of protecting the underlying metal, but cheaper paints can be less tolerant to sun, fading quickly if the car sits outside for any length of time.
The single stage paint system, like its name, is a process in which the color is applied in one step. All of the paints ultraviolet protection, pigment, and additives are mixed in one can and applied to the car. This method works well and is still used extensively, though primarily on budget paint jobs. The latest advances in paint technology have resulted in a two-part or base/clear process that first applies the color to the car (base coat), which is followed by a clear, protective second coat of paint (clearcoat). All new cars are painted in base/clear as it offers distinct advantages, such as protecting the pigment by adding ultraviolet blockers in the clearcoat. Repairs of base/clear paint jobs can also be easier than single stage paint systems. The biggest advantage, however, of a base/clear paint job is the luster. By clearcoating over the color, the paint job looks thicker and has a shinier appearance than most single stage paints. Also, rock chips and door dings are usually less apparent in base/clear paint jobs as the colored base coat is usually left intact.
Regardless of the type of paint you choose, remember you get what you pay for. More expensive paints will last longer and retain their pigment better than cheaper counterparts. Once the choice is made, the only thing left is to apply the paint, and for that we need the proper equipment.
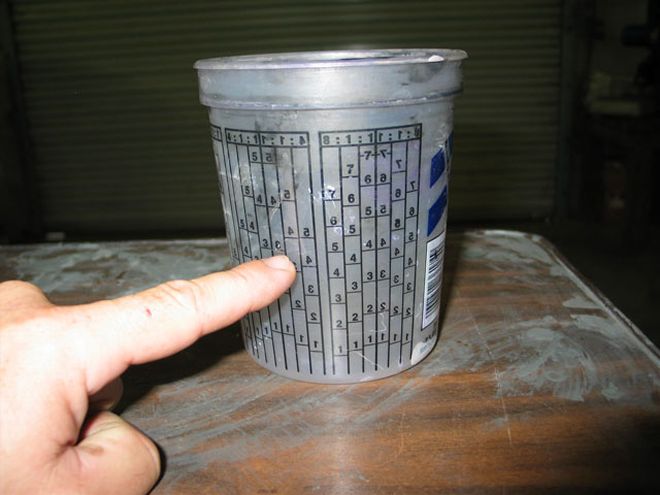 Most paints must be mixed in a specific ratio; graduated paint mixing cups are available from most paint supply stores.
Before we discuss the equipment used to apply paint, we must discuss the equipment necessary for proper preparation.
We've used newspaper for this before, but newspaper is porous and can let paints, especially clearcoats, bleed through onto the glass and trim underneath, which will require a lengthy clean-up. Plastic can be used to bag the engine bay and other areas that won't be painted, and wheel covers or trash bags can be used to cover the wheels and tires. Once taped, the car is prepared by wiping it down with a cleaner (Naphtha is usually the main ingredient) to eliminate any oils or foreign materials from the surface that could cause fish-eyes or other blemishes. Finally, the car is wiped down with a tack-cloth to remove any dust or debris that could affect the paint job.
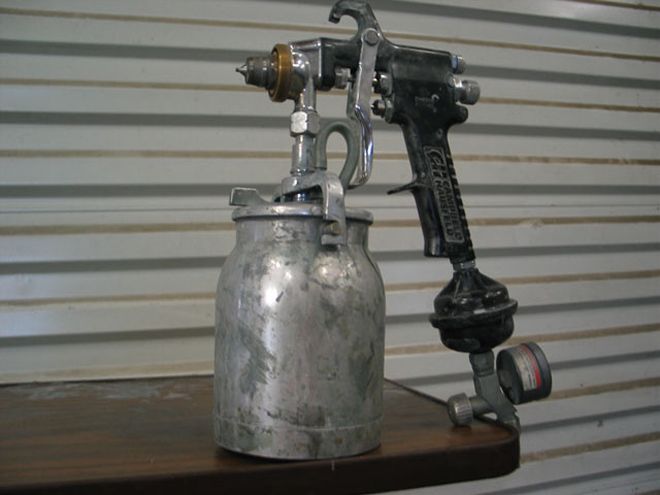 This is a can-style paint gun. While it is possible to apply a nice paint job with one of these paint guns, most professionals now use the more efficient HVLP paint guns.
Now we are finally ready to mix and apply our paint.
Paint guns are classified as can-style (paint held in a can under the gun) and HVLP (high volume low pressure) style that stores the paint in a cup above the gun. The main advantage of HVLP guns is they use less air pressure, thereby creating less overspray and wasting less product than the older, can-style paint guns. Regardless of the style paint gun used, a pressure regulator and water and oil separator are mandatory when painting a car. Air pressures and flash times (time between coats) are dictated by the paint manufacturer and can be found on the paint's MSDS (material safety data sheet).
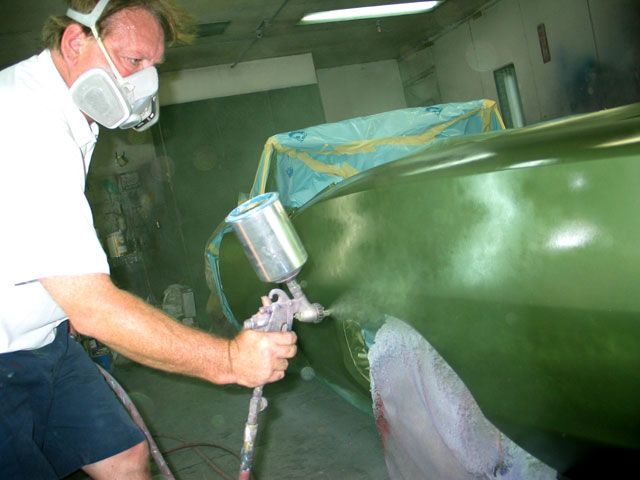
No matter the manufacturer, be sure to use the proper protective gear-gloves, safety glasses, and especially a respirator when applying paint.
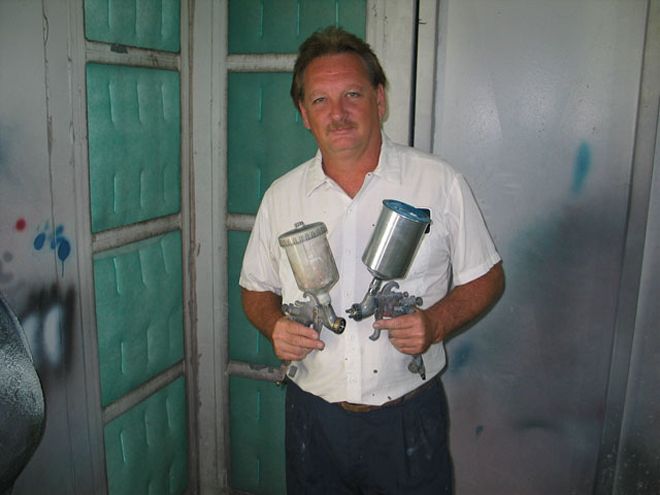 HVLP (high volume low pressure) paint guns are more efficient and use a lower air pressure, resulting in less overspray.
The actual process of painting is where experience pays off. An experienced painter knows how thick to apply the paint, and where areas prone to runs and fish eyes are and adjusts his technique appropriately. By following the instructions on the MSDS, an inexperienced painter can apply a good paint job, but experience is the key to consistent success. While we have seen some great paint jobs come from garages or even outdoors, the controlled environment of a quality paint booth is always the desired place to paint. Paint booths not only control dust, but also are usually well lit, and, in extreme cases, climate controlled to ensure exact environmental conditions each time paint is applied. Once the car is painted, be sure to observe appropriate cure times before waxing or washing the newly painted surface with soap. For an extremely slick finish, most shops will wet-sand the paint with 2000-grit paper, then buff the paint with polishing compound.
So there you have it, you can see that painting a car is not just as easy as picking up a few cans of spray paint and covering the car with it; many specialty tools are required to do the job properly. While painting a car is a job that can be handled in a small shop or home garage, we recommend letting a professional handle, or at least assist, in the process. Always remember a good-looking paint job is a function of proper techniques and preparation, so take the time to do it right. If each step is performed properly, your paint job should protect your car and look great for many years.