We're labeling this a resto piece, but consider it the Car Craft version of restoration. That means not all the subjects and methods covered here are necessarily restoration in the concours-correct, exactly-as-the-factory-meant-it sort of way. You don't build your cars that way, so why would we tell you how to reproduce a factory chalk mark or where to find date-coded glass? We're more into making stuff look good and run better so it can pound the street or track regularly. Considering that our cars usually start out rough and that we're typically over-eager to drive them, we might be considered experts of a sort on what we like to refer to as "practical" restoration techniques. We're also experts on having lots of cars in pieces, for what that's worth. Actually, we've focused on things that have worked well for us in the recent past, and most of it is stuff we wish we'd known about sooner. So reap the benefits of our late nights in the shop, and get out there.
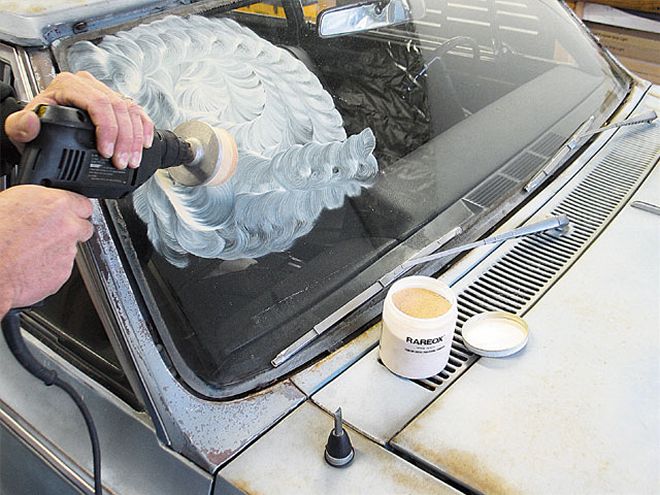
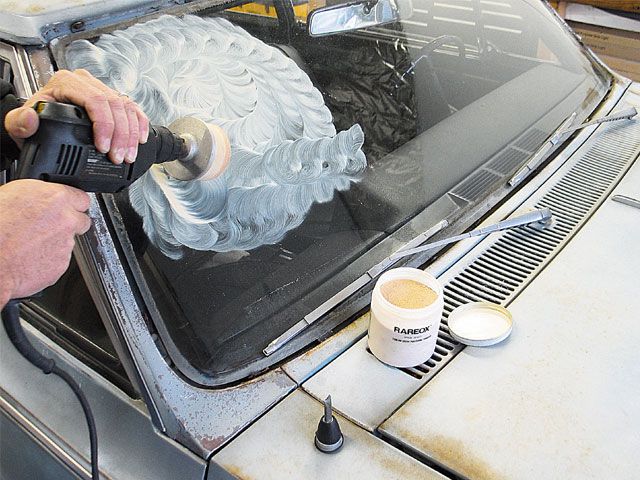
Polish Old Glass
You probably already know how annoying it is to try to see out of an old, sand-blasted windshield, but have you ever noticed how much better cars look from the outside with fresh glass? Check it out at the next car show. Of course, new glass is usually an option, as it's available for even obscure old stuff these days, but it's not cheap. Instead, try to polish your existing glass. We've seen it done with fine body-shop compounds, but Eastwood actually offers a kit with the proper polish and an arbor and buffing wheel for a drill motor. It won't eliminate anything you can catch a fingernail on, but it will get rid of small scratches, acid-rain spots, and hazing.
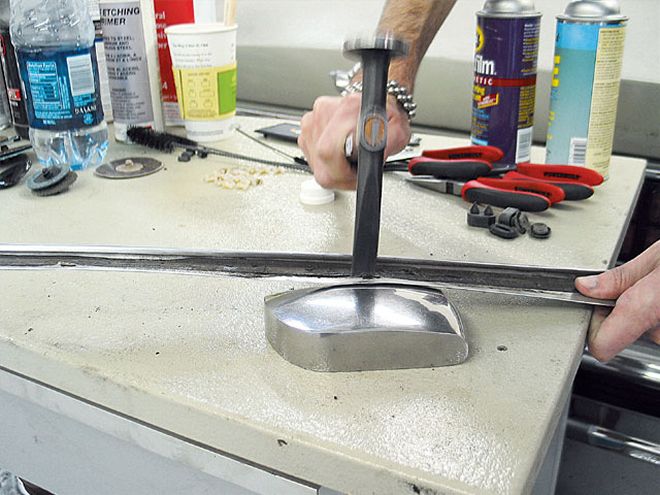
Save Stainless Trim
The older a car is, the more bright trim it's likely to have. That might have contributed to its sharpness when it was new, but now much of that trim is likely dinged, dented, and scratched. Like lots of old car parts, new stainless trim is available for many popular '50s, '60s, and '70s cars, with more applications turning up all the time, but don't expect bargain pricing. So before spending the bucks, investigate the possibility of repairing your old stuff. Stainless steel is very workable; it can be reshaped and refinished to look like new with the right techniques. Granted, those techniques require skill, but if you're adept with tools and have some patience, you can probably make your stuff look better. If not, maybe someone with skills can assist.
Hand-Paint Dash Details
Lots of old interior trim bits can be refurbished at home with simple tools and finishing products, but what separates the hacks from the heroes lies in the fine details. Take this instrument cluster from one of Smith's Chevelles, for example. It could have been sprayed with some aluminum silver and reinstalled, but instead, he masked off the perimeter, coated it with Krylon Dull Aluminum, then came back with a small, model paintbrush and carefully touched in the raised lettering around the ignition switch. His Olds F-85 has recessed lettering, so Jeff sprayed some aerosol paint in a cup, dipped a pin in it, and let the paint flow into the letters. Nice touch.

Renew Faded Lenses
Another detail item that can have a big impact on a car's appearance is the condition of the lenses. Parking and tail lenses tend to get dull with age, and now that '80s cars are a couple of decades old, the early plastic composite headlights are commonly clouded. Again, between the aftermarket and the OEs, lots of new stuff is available, but you might be surprised how much hazing and how many fine scratches can be eliminated with polishing. You can experiment with body-shop compounds here-pros advise starting with the least-aggressive stuff and moving up as needed-but Eastwood offers a kit for this as well. If you're dealing with heavily clouded plastic and are willing to take chances, we're told fine-grit wet/dry sanding followed by polishing can be very effective. We haven't tried it yet, so proceed at your own risk.

Use Factory Assembly Specs
We all know how to spin wrenches, and most of us are convinced we know how to take apart and reassemble our cars blindfolded, but do you really know everything you should? Unless a factory assembly manual was used to glean techniques, procedures, and specifications, you probably don't. For example, the subframe on an early Camaro is pretty easy to bolt up, but did you know there are alignment holes in the floorpan to help square it up? Misaligned subframes, either from improper installation or worn-out bushings, are the source of much body-panel-gap frustration. Most factory manuals are either reprinted or sitting in an auction on eBay right now, so see what the guys who built your car the first time had to say about it.
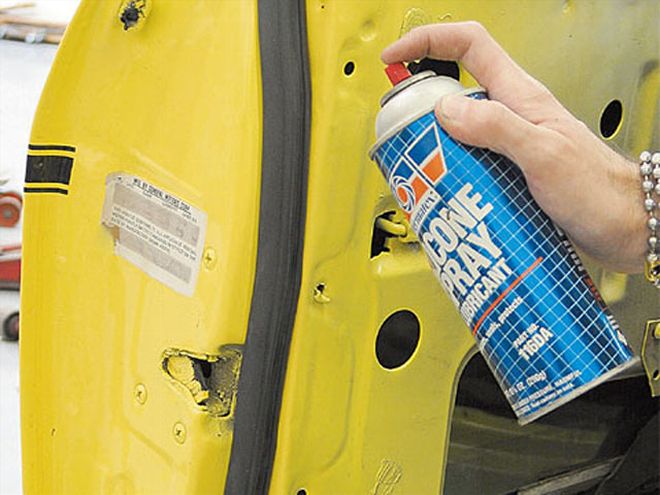
Lube Door Seals
This one is simple but might save you some aggravation. The original door seals on many cars are coated or even impregnated with silicone when manufactured to help prevent them from binding and squeaking. If you've replaced yours with repro stuff, the new seals may not have this feature. If the seals seem to be "grabbing" the painted surfaces they mate with and/or squeaking, try a light spray of silicone from an aerosol. A quick call to the tech line of your seal manufacturer is advisable to make sure there will be no detrimental effects, though.
Brighten Lamp Housings
Dull, uneven lighting makes a car look dilapidated. (That means junk-like.) Correcting the situation can be simple. Pull off the offending lamp assembly, and take it apart; chances are, the inside is weathered from faulty seals. After freshening the lenses as prescribed in tip No. 2, clean out the flakes of old paint or silvering, and treat any rust, then mask off the socket and lay down some bright, yet flat, silver or white paint. If the lens is of the clear, parking-light variety, install new amber bulbs. Finally, screw the lens to the housing using a fresh set of gaskets. The difference with the lights on will be surprisingly dramatic.
Form Your Own Bezel Gaskets
If, upon dismantling the taillights or parking lights to clean out the inside as prescribed in the previous step, you find that the seal gaskets are shot and you can't get new ones, you may have to improvise. We've used black silicone gasket sealer to repair voids in seals, and it can work well. Use the small tip, and squeeze some into the repair area, then cover it with clear plastic wrap-we like to wet the wrap with water or even spray it with WD-40 or cooking spray so the silicone won't stick. Carefully press the gasket into place, and put the lens in. If you don't use too much silicone, you should be able to get the stuff to conform, and when it sets up, the wrap should come off.
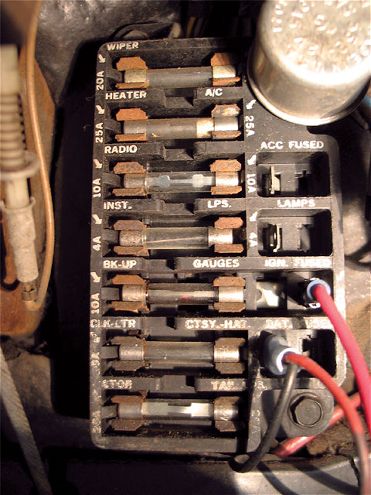
Factory-style Gauge Lighting
This isn't really a resto tip, but it can help to lend a factory feel. Add-on gauges are standard fare for musclecars, even ones that are mostly restored, but it looks cheesy if their face lighting stays on whenever the car is running, and driving at night without gauge lights is aggravating. What many don't know is that a lot of car manufacturers provided a simple means of adding gauge lighting by putting a terminal in the fuse block to tap into the factory gauge-light circuit. Plug your aftermarket gauge lights in here, and they'll come on with the lights and even dim when the knob is twisted.
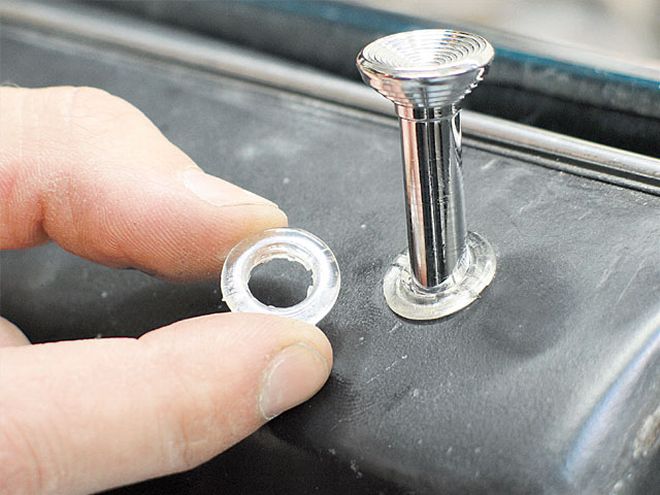
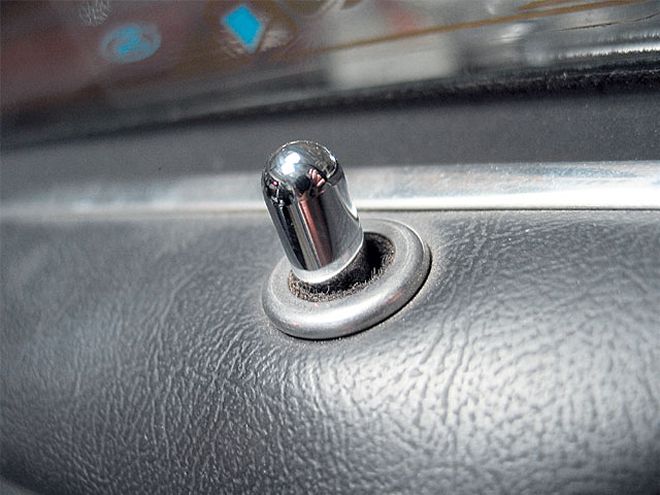
Door-Lock Ferrules
This will seem like a trivial detail, but we have a pet peeve regarding junk door-lock buttons. As small as they are, they're also obvious, and for some reason, on older cars, they've often been replaced with either the wrong type or universal parts-store junk. When the wrong buttons are used, they can bind and rattle in addition to looking lousy. New ones are offered for lots of popular cars all the way back to the '50s, and they can make a big difference in interior feel and function. The lock buttons on this '67 (left) Camaro actually serve to guide the mechanism; new buttons and new ferrules were the best $5 we ever spent. The others are from a '93 Mustang, and they have felt inside for smooth operation and no rattles. They work on older Fords, too.
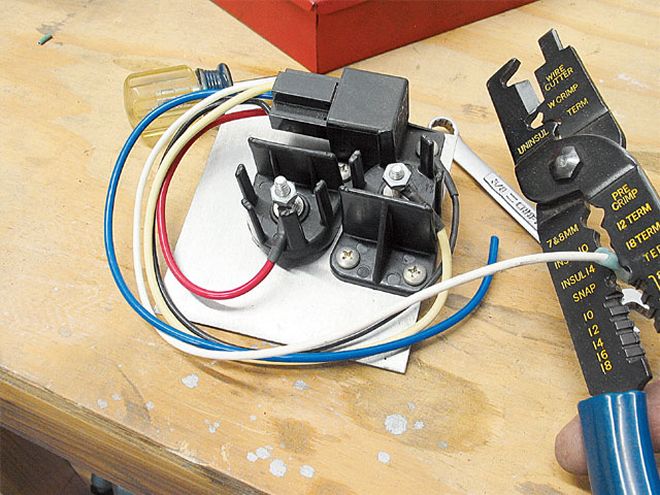
Alternative Power Source
Back in the '60s and '70s, there wasn't so much in the way of electrical accessories to add to a car, but that's changed. In addition to today's killer sound systems, it's common to add electric fans, high-amperage lighting, aftermarket power windows, and so on, not to mention all the little items, such as extra gauges, upgraded ignitions, and, well, you get it. Instead of having a snarl of wires stuffed into the stock fuse panel (most of them likely hooked to the wrong side of the fuse), why not add a fuse or switched-and-unswitched relay panel to manage the extra load? Smith made this one using stuff from M.A.D. Enterprises, and it prevents him form burning down his Chevelle.

Vinyl Dye for Success
Whether you're attempting to change the color of your interior or just trying to match reproduction pieces to your factory stuff, you're going to have to do some vinyl dying. The thought of this makes some guys cringe, thinking of how the color will peel or wear off shortly, but actually, if you use the right stuff and the right procedures, it can look and last almost like OE. First, get good dye, like the stuff the body-shop supply stores carry. We used some SEM products recently with some success. The key was also using SEM's vinyl-prep aerosol and flexible primer first. The label on the can of dye will guide you to the other products you should use with it.
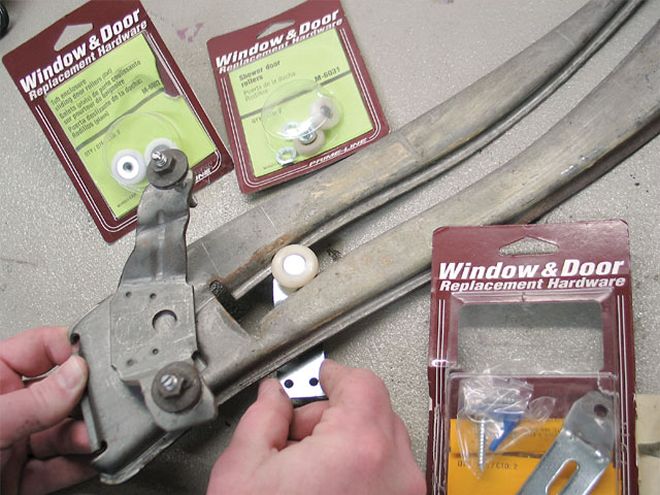
Window-Regulator Repair
One of the simple pleasures when fixing up an old car is the smooth, steady motion of a properly functioning window regulator. But after 40 years or so, most of the cars we mess with have stiff, clunky window action, and correcting it takes more than a few squirts of WD-40. What's worse is when you pull out the regulator and find broken plastic rollers that are no longer available. Try this: Go to the local home center, and check out the vast array of shower-door rollers to find a close match. We did it with a '67 Chevy and know of other guys who had similar success with other cars.
Lacquer for Interior Panels
Before interiors were layered with various forms of plastic, there was still a lot of painted steel. Trying to recondition this stuff can be frustrating, as typical spray enamel goes on thick and gets orange-peel quickly, which just doesn't look right on the inside of '60s cars. As an alternative, check the resto catalogs for aerosol lacquer interior paint. Lacquer has more solvent than typical enamel and goes on in thinner coats that seem to "flow out" more, resulting in a smooth finish just like factory. If you can't find the right color in a spray bomb, see if you can look up the paint code and have some mixed, then use a low-cost touch-up gun for the same effect.
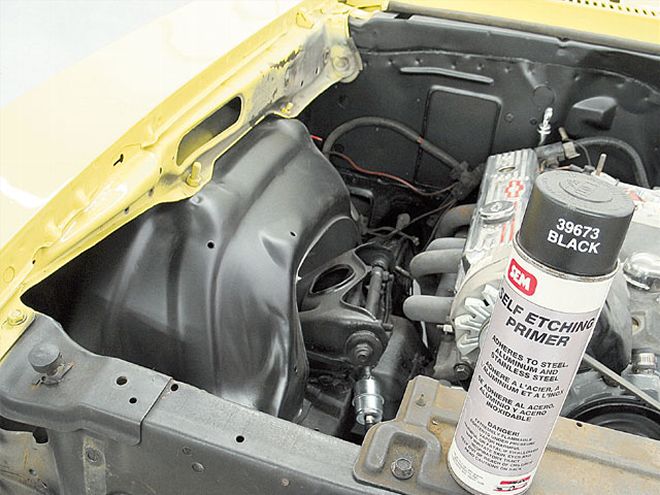
Aerosol Etching Primer
Unless you have your own body shop, chances are good that some of your resto work will involve aerosol spray paint. When painting engine parts, brackets, wheeltubs, and so on, quality paint can be made to look as good as factory with the right technique. We recently started prepping our surfaces with etching primer from a spray can; previously we thought you had to use a gun to take advantage of this stuff. The high-quality aerosol isn't cheap ($20+ per can), but it goes a long way. The real benefit is the improvement in the paint adhesion and finish; fisheyes and runs are all but eliminated, and the end result seems more even. Give it a try.
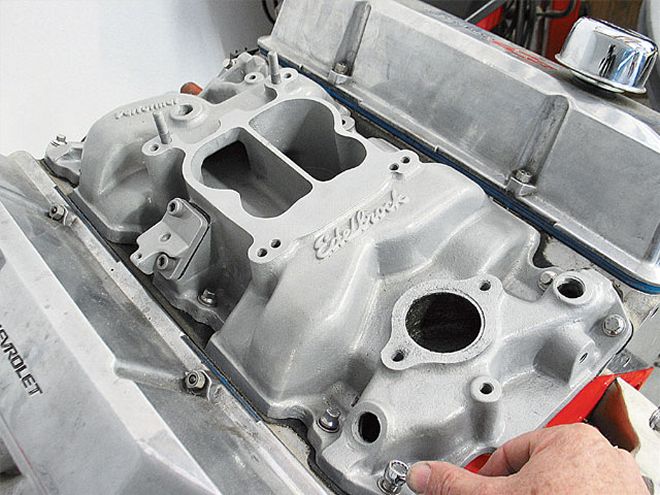
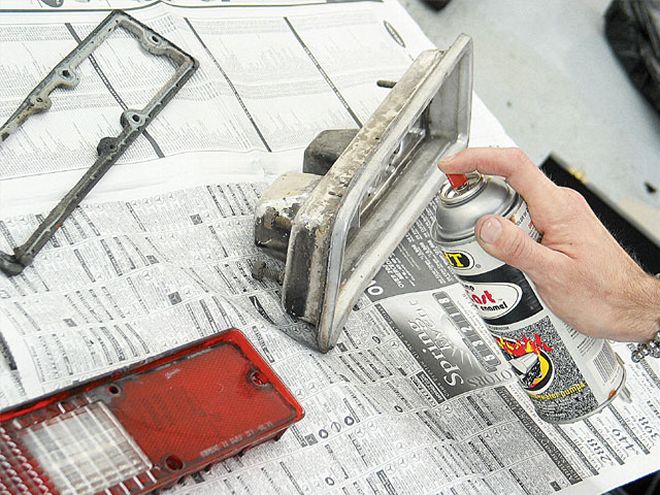
Invisible Clear
For decades, new cars have been built with lots of parts that remain in bare metal. Stuff like aluminum and iron castings or metal-finished items like zinc-coated brake boosters or backing plates all look great when new but quickly start to corrode or rust when exposed to the elements. Restoring or replacing these items brings the opportunity to hold off the oxidation process by using clear coatings, as many resto experts have been doing for years. Some guys don't want to clear their parts because they think the clear is obvious and incorrect, but that's probably because they've been using typical, glossy clears. Instead, try using a satin-finish clear to conceal its presence. Jim Grubbs of Grubbs Motorsports uses Aervoe clear engine enamel on parts like this intake, and it looks trick. There is lots of other nongloss, clear options available.
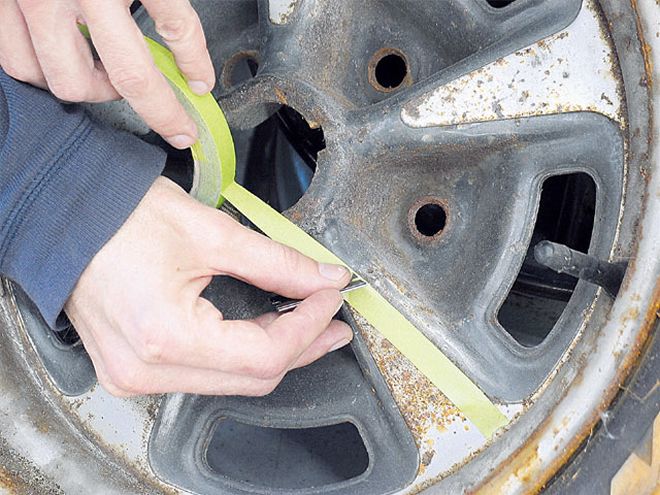
Rally-Wheel Resto
Some of the rally wheels from the muscle era used two-tone paint schemes that have either faded with time or were victims of monochromatic custom paint jobs sometime back when that was cool. Whatever the case, when you attempt to return these wheels to their original appearance, figuring out the proper colors and trying to mask off the separate sections of each wheel take up a lot of time. Fortunately, the paint part is solved for you, as factory-matched paint for most of the performance wheels from the '60s and '70s is now available from sources like OEM Paints and is sold through resto sources like OPG and Year One. To make it even easier, these places also stock wheel-mask kits made for specific wheels, like the Pontiac Rally II this guy is struggling to mask with standard tape and a razor blade. The special masks are cheap and well worth it.
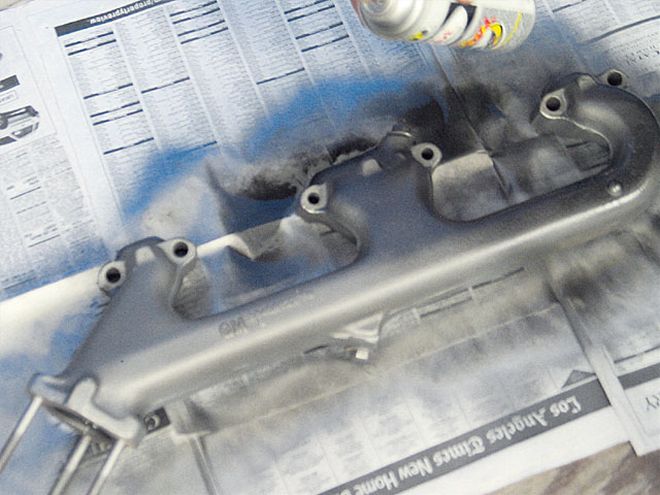
Spray Manifolds Gray
Exhaust manifolds may not be the ultimate in flow, but they fit right, they usually seal well, and they look stock. Unfortunately, they also usually look like hell, thanks to rust. You've probably tried to paint them only to have it burn off and look worse. Try this: Pull the manifolds out, strip them down to clean iron, either in a sandblast cabinet or with a wire brush, then get a can of spray graphite lubricant and follow up with a soft rag to rub it in. The spray is powdered lead in an oily binder, and it will make the manifolds look like fresh, bare, cast iron, but it won't burn off. When it eventually gets to looking shoddy again, get out the spray can and touch it up.
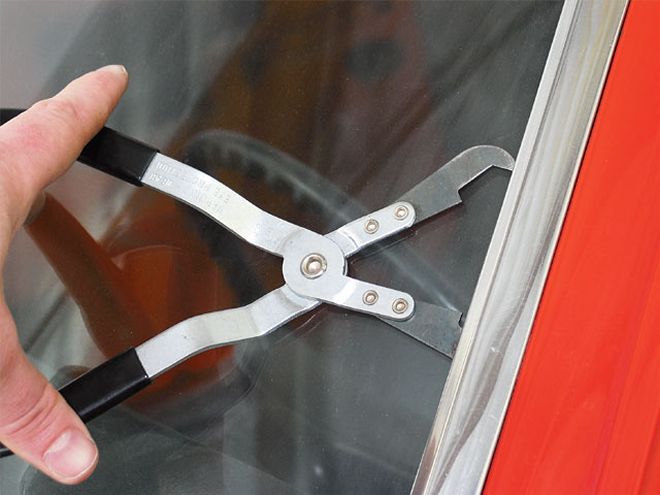
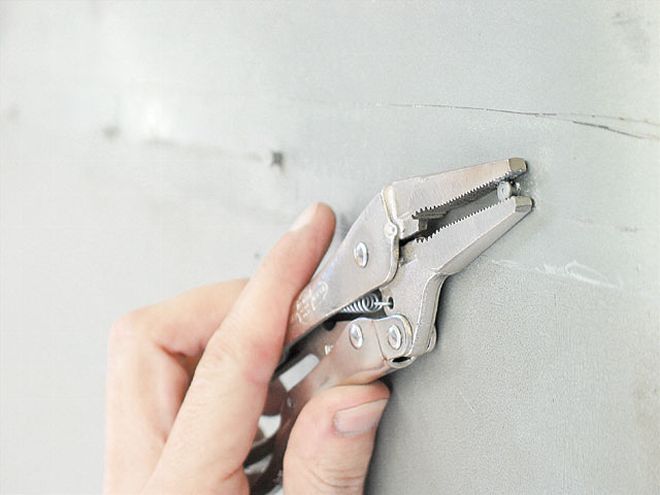
Window-Molding Tools
This one's brutally simple but still worth discussing. Metal window moldings seem like they should come off readily, but when the time comes to pull them, they usually fight, leading guys to get rough and bend/fold/mutilate them or get out the flathead screwdrivers and pry stuff into oblivion. The moldings really can be removed quickly without wrecking anything, you just need the right tool. This item came from the local auto parts store for about five bucks, and it works like a charm. Just slip it under the molding, slide one jaw until it catches a clip, then gently squeeze the other end of the clip with the other jaw-the molding pops off and no one gets hurt.
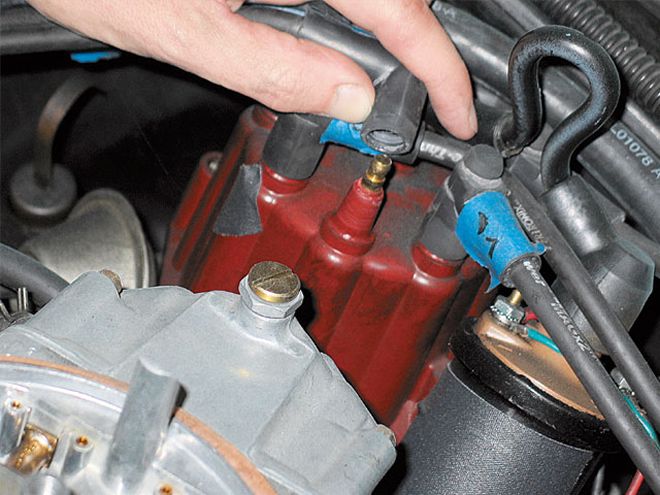
Trick Distributor Cap
If you're into the period-correct look but hate period-correct technology, here's an easy one. Electronic ignition brought additional benefits with it, such as the need for more positive connections between the spark-plug wires and distributor cap to contain the increased electrical current. But most of the later-model caps that use these wires look very different from the breaker-point versions that preceded them. For GM cars, you can get a hybrid cap that looks old-school but has HEI-style terminals (this one came from Summit). Slip it on, order a set of black HEI-type wires (as offered by PerTronix, for example), and no one will be the wiser. Might as well go the extra step and hide a PerTronix or similar electronic-ignition conversion under the cap, too.
Bright Dipping
Before plastic trim came into prominence, the shiny stuff on a car that wasn't chrome-plated steel or polished stainless was aluminum. But if you've ever tried to restore an aluminum grille or molding by polishing it, you probably noticed that it didn't come out looking quite like original, and it needed repolishing soon after. That's because the factory didn't just polish this stuff, it used a "bright-dip" process. This is a procedure that involves anodizing and other treatments to give a bright appearance that won't tarnish or corrode. We did a story on it in the Apr. '00 issue, and the results were excellent; the only trick is finding a place that performs the procedure.
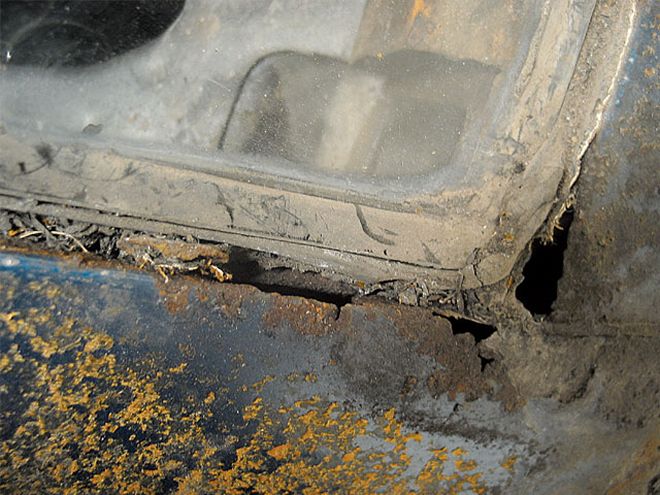
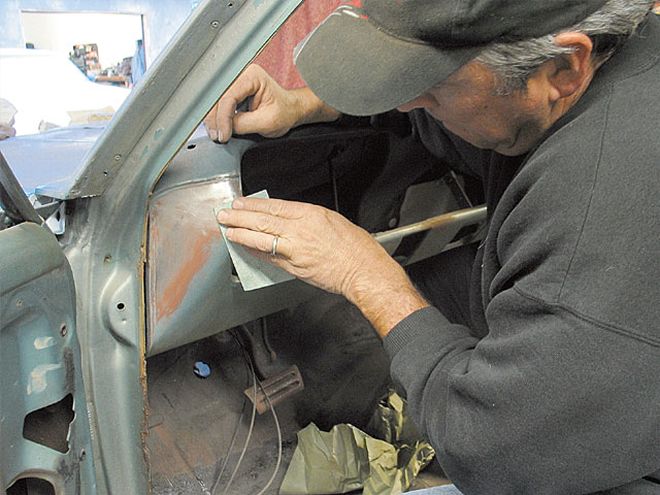
Window-Channel Repair
This one is really in interim repair rather than a resto fix. It's pretty common to pull off the window moldings on '60s cars and find that the channel that holds the glass is rotten. Dirt tends to settle here, and when it gets wet, the resultant mud helps accelerate the rusting process. But, if your vintage muscle is currently a driver, and you don't intend to pull it all the way down for a total resto, you should still make an effort to deal with the channel rot. It will only get worse as it leaks water into your trunk or cowl leading to further damage. One of the products offered by POR-15 is a putty intended for floorpan repair. The epoxy is easily formable and sets up hard as a rock. Top-coat it with POR-15 to seal up any remaining rust and seal out moisture. You can worry about replacing the affected steel later on when the real resto gets underway.
Removing Trim Studs
Sometimes the factory went a little overboard on trim moldings, and on older cars, a lot of this stuff was held on with clips that were fastened to studs and welded to the body. Getting rid of them means bodywork, but if you're careful, you can minimize the aftereffects of the removal. That means absolutely do not grab them with pliers or vise grips and start yanking; you can easily dent or warp the surrounding panel. Instead, clamp the vise grips to the stud so the tool is parallel to the panel surface. Then, swing the vise grips in a circle to twist off the stud. It should break off nearly flush, possibly leaving a minor divot that will take just a dab of filler.
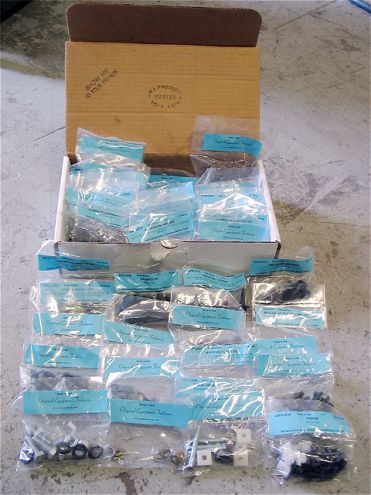
Bolt Kits
Do-it-yourself types tend not to want to spend money where they think they don't have to. So if a guy pulls apart his car, he might scoff at the thought of spending some of his budget on a replacement bolt kit, since he can always salvage the original stuff and fill in the blanks as needed, right? We say, if you take apart an old car that is anything less than mint to begin with, you ought to pony up for the repro bolt kit like the ones offered by AMK Products. These kits provide fasteners that not only function like the stock stuff, but also look just like original; it is restoration-quality stuff, after all. Everything in the kit is individually packaged and labeled, and when you're in the midst of trying to bolt the car back together, it's super sweet to be able to reach over and pick up a little baggie with exactly what you need.
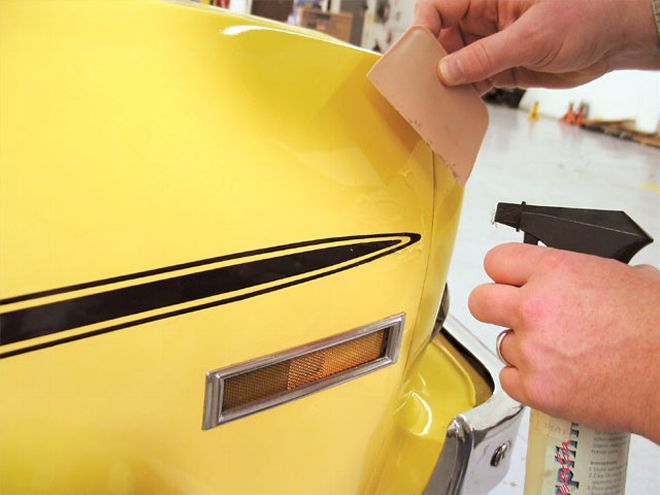
Lube Your Decals
The instruction sheets for most factory-style decal kits advise using a soap-and-water mix as a lubricant to help slide the decals into place on the painted surface of the body. Most also recommend using a specific product for this purpose as an alternative. Having tried both, we'd say the special product is worth the extra few bucks. This stuff is usually a clear gel that comes in a pump bottle, and smearing some on the surface before laying down the decal makes working out bubbles and creases much easier, particularly on vertical surfaces, since it stays put, where the soapy water will just run off. The 16-ounce bottle we have has lasted through several installs and still isn't empty.