
If you’ve ever owned a vintage Pontiac, you’ve had to deal with rust in some form. The favorite place for it to hide is in the rear quarter-panels. Road sludge kicked up from the tires, blocked drainage holes, a leaking rear window, and age all contribute to this very common condition. The good news is there are patch panels available to service that area for many Pontiac models, and we’re going to show you how install one on a ’67 GTO, along with a trunk inner side-filler panel and a portion of an outer wheelhouse.
Parts to do the job were provided by Original Parts Group, which has been serving classic-car restorers for over 28 years and has a comprehensive catalog of components for ’61-’73 Tempests, LeMans, and GTOs. Installation is being done at Classic Restoration Enterprises in Sloatsburg, New York. Regular readers will recognize the name, as HPP has done projects with this company for over 14 years, and its owner, Melvin Benzaquen, is a contributor to our Wrenching department.
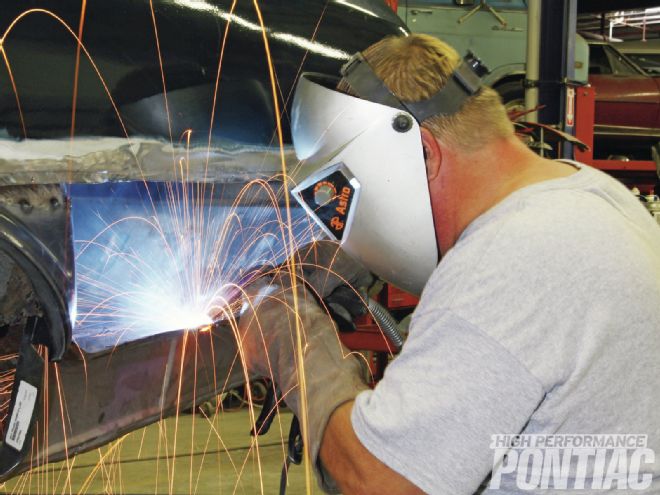
As a 30-year autobody technician, Tony Golembreski has worked on everything from Lambos to street rods, and even built a car for the Fast and the Furious. He will put his skills to good use by showing us what it takes to make a lasting repair in this rust-prone area.
There are a few ways to install a quarter-panel patch. Butt-welding is a traditional, professional method that does not overlap the panels. However, it’s not an easy task for any reader who may try this repair at home, as it requires near-perfect measurements and cuts, as well as butt-welding clamps to keep the panels positioned correctly.
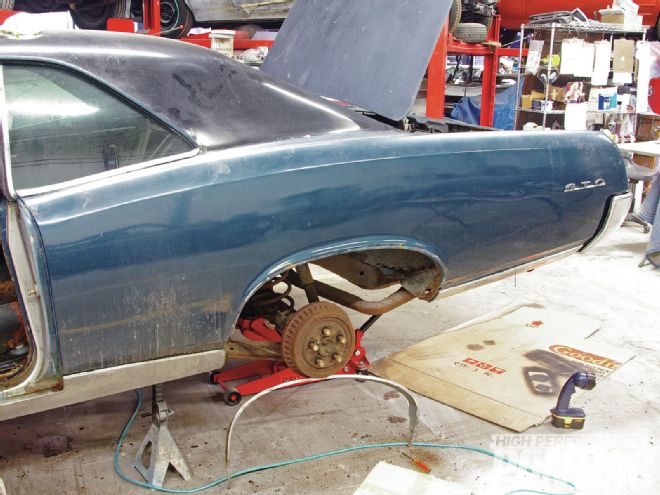 1 Here’s what we started with—one rusty lower quarter-panel. It may not look too horrible here, but body filler can make a nice sculpture. Check out the inner wheelwell.
The easiest way is to simply use the flange that the patch panel was delivered with and slide it behind the existing panel. Tony, however, decided to employ a third method. He flanged the existing panel to double the depth of the patch panel.
In doing so, when the new panel is mounted in front instead of behind the existing panel, where they meet will provide a shallow trough that will allow a bit more of the weld to remain after grinding it flush, to strengthen the joint. Tony will plug-weld in this area and then spot-weld the panel seam until there is a continuous bead.
His other reason for employing this method is he says that many times when hobbyists or shops install a quarter patch panel, the trunk side of the seam receives little or no attention. If the panel is installed behind the existing quarter, the seam faces up and can more easily trap moisture and dirt than if it faces down.
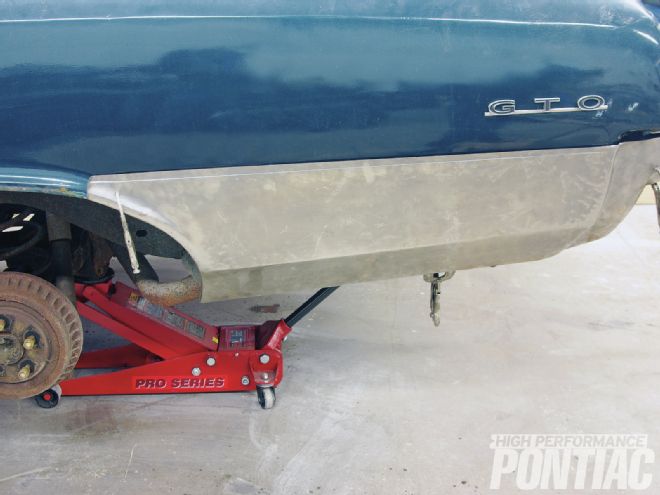 2 The rear quarter patch from OPG (PN TM300LH; $91.99) measures 43 inches across by 14.5 inches high, and Tony clamped it over the existing panel to determine where to cut it.
We discussed these three methods, so you and/or your restorer can decide what is best for your project. Now let’s get to the installation.
Conclusion
As you have just seen, there is considerable work involved to install this patch panel because it’s in an area where many sheetmetal items converge—at the wheelwell alone, the quarter-panel patch, the inner and outer wheelhouses, and the trunk inner-filler all intersect, for example.
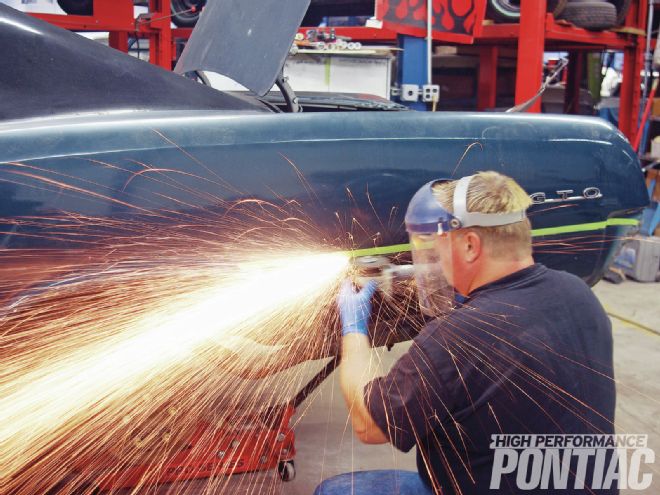 3 He then scribed a line on the existing quarter, removed the patch panel, and laid down a 3⁄4-inch tape line with the top of the tape at the scribe line. The old adage measure twice, cut once definitely applies here. Using a cutoff wheel on an air grinder, Tony carefully slices off the lower quarter along the bottom of the tapeline to take into account the 3⁄4-inch flange on the repair panel.
The quarter-panel patch fit very well and had the body character lines in the correct places. We can’t really comment fully on the outer wheelhouse fit because we only used a small piece of it, which fit well. The trunk inner-filler panel fit until we got to the rear, where it needed reworking, as we show in the photos.
Hopefully this exercise in sheetmetal repair has armed you with the info you need to tackle the job yourself or at least be an informed consumer when seeking out a reputable shop to do it for you.