

While wild graphics might be the strongest visual memory of the supercar era, many of the performance cars built at that time were fairly upscale. Often, they received big options in addition to big engines. One of the nicest upgrades on the option list that required only a small premium was a vinyl top. In some special cases like the Superbird, the top was even mandatory in order to cover unfinished bodywork.
However, those sheets of vinyl that covered your musclecar from its creation until now have been subjected to at least 25 years of wear, and the effects of sunlight, weather, and general use often leave them in need of repair. Moreover, improper installation or damage often results in rust forming beneath the surface, leaving bubbles and body damage. Obviously, any serious restoration requires its replacement.
In more cases, the top had been stripped away when bodywork began. If not, plan on spending some time removing the trim, scraping the old roof and the residual glue, and prepping the roof like you would any other surface to be painted, stopping at the sanded primer stage. Before installing the top, mask off anything you don't want to get the contact adhesive or glue on. Pay special attention to window edges, the A-pillars, and the trim mounting points. The masking needs to leave the roof trim mounts exposed so the glue covers areas that will also be held down with screws or clips for the tightest possible fit.
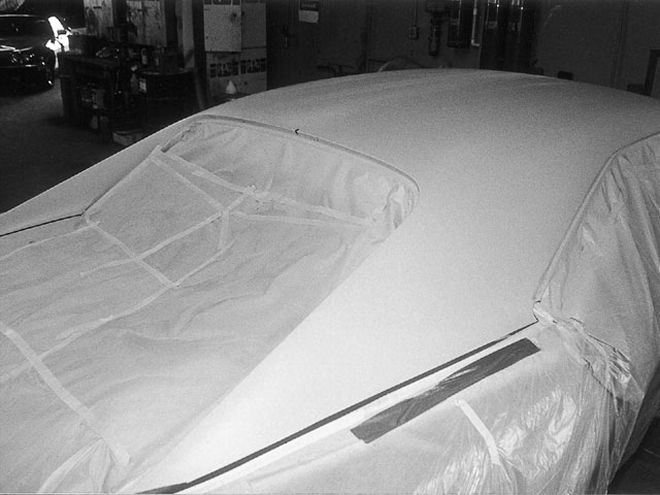 Begin by removing all trim that touches the vinyl roof and masking off both the car's windows and painted sheetmetal unless you like cleaning glue off of your new paint job. The masking needs to come right up to the outside edge of the chrome and detail trim lines. The roof has been primer prepped, and the new vinyl is sun-treated. Use a tape measure and a Sharpie to place two marks, one at the front and one at the rear, on the exact center of the roof for proper alignment. This is a critical measurement; double-check it before going any further.
If you're doing this yourself, purchase the correct top for your installation; this one came from the Paddock. According to Mike Paremsky, whose shop did the installation, the virgin top should be left outside, flat, in bright sunlight for a few hours to remove any wrinkles and minimize the risk of problems during or after the installation. Directions that come with the top should give specific information. The primary thing, like other quality automotive-finishing techniques, is patience.
The 1968-1970 Chargers offer some unique problems due to the flying-buttress rear-window design; the top will have to stretch over and down both sides of the C-pillars. As a result, doing the Paddock's Charger is a little more detailed than, say, a GTX from the same year. However, a majority of the points shown here will be applicable regardless of your body design.
We'll need several tools. While it's possible to apply the glue with a brush, a sprayer makes life easier and eliminates most chances for lumps or dry spots. A good vinyl-top adhesive is next, and buying a little extra is always better than running out before the job is done. At least one extra set of hands makes things go a lot quicker and easier as well. Finally, a pair of good scissors, rolls of masking tape and 11/416-11/48-inch-wide pinstriping tape, a razor blade or utility knife, a tape measure, a Sharpie(tm) pen, paint thinner for mistakes, and tools to attach trim and hardware should be at your disposal.
Now watch the experts at Michael's Auto Body in Winter Haven, Florida, reskin the Dodge.