 Rebuilding a quick-change rearend is relatively straightforward and can be done in your own shop with the proper procedures and tools.
Given enough time and use, everything on your car will eventually wear out, or worse, break. And of course, Murphy's Law dictates that the component on your race car that you least expect to fail will give out on the night that a win looks like a sure thing.
Most gear specialists recommend inspecting and rebuilding your rearend every off-season, even if everything goes perfectly (and how often does that happen?). You should rebuild more often if you are racing a high-horsepower car in long-distance races. And whenever you suspect you may have damaged the rearend-especially if you have been in a wreck and a rim on a rear tire is bent or flattened-you should perform an inspection before the next race to ensure you won't take to the racetrack with a rearend that's likely to fail.
 When pulling your rearend down, you need to remove the bearings from either side of the locker or spool (whichever you use). Tiger sells a toolkit made specifically for the tasks involved in rebuilding your quick-change rear, and it includes this fixture, which allows you to easily pull and press on your bearings without damaging the races.
We traveled to Tiger Rear Ends, in Mount Ulla, North Carolina, to get a better idea of what should be done when rebuilding a quick-change rear. Along with the Ford 9-inch, a quick-change rear is easily the most popular type of rearend used in auto racing. The beauty of the quick-change is that the gears can be changed quickly and easily to achieve a wide array of final gear ratios. There are different companies making quick-changes, and each has its own design, but they all work on the same principles and many of the processes detailed here are applicable to all makes of quick-change rearends.
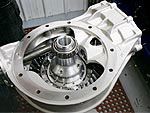
Unless there are significant problems, most rebuilds include pulling and inspecting both axles, removing at least one axle tube and bell, removing the locker or spool and pinion gear, and even rebuilding the differential if necessary. A fully assembled centersection is the most complex component of the entire rearend. It includes the pinion gear, the yoke, the jackshaft, and several sets of bearings-all of which must be installed with the correct amount of crush. Crush is the amount of preload on the differential bearings. Also, before you can even get started with a complete disassembly of the centersection, its housing must be baked in an oven to open up the housing bore diameters. Fortunately, Wayne Ingram, one of Tiger's gear specialists, says that most quick-changes can go through a few rebuild cycles without needing the centersection disassembled. And when it is necessary, it is often sent to a specialist, such as Tiger, that has the setup necessary to perform the task. For most in-shop rebuilds, like the one we tackle here, the centersection is left alone.
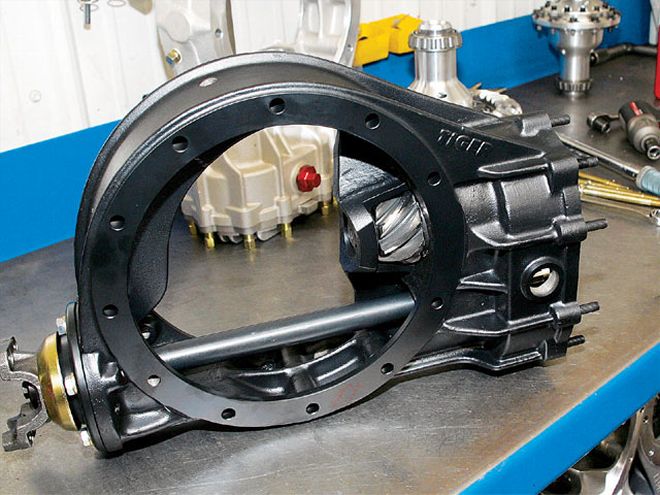
 Unless the pinion has suffered damage, the centersection of most quick-change rears will last through a couple of rebuilds before needing to be torn down.
When you begin the teardown, take a moment to check your gear oil. The lubricant in a rearend that has been run too hot will have a distinct "burnt" smell. It is hard to describe in print, but even if you've never smelled it before it is safe to say that once you do you will know exactly what we're talking about. The smell is more noticeable in mineral-based lubricants, which are more sensitive to temperature, but it can also be present in synthetic lubricants. It is a good idea to run the lubricant through a fine mesh strainer to see if there is any metal debris. If that's the case, you must find the culprit: It is usually a gear or bearing gone bad.
Teardown requires pulling the bearing from the spool or locker inside the rearend. Without the proper tools, it is very easy to damage the bearing races, so make sure you have the correct tools, such as a bearing puller. Tiger sells a rearend rebuild toolkit that includes everything needed to tear down just about any quick-change rear and properly measure lash on the rebuild.
Finally, visually inspect the rest of the components. Check all gears for discoloration. Specifically, look for a blue or brown sheen, which can be a sign of overheating. In addition, be on the lookout for chips, hairline cracks, and excessive wear. Make sure all bearings spin freely without grinding or catching. Inspect your seals for cracks or deterioration and follow that up by inspecting both bells and the centersection for cracks or other damage. Once you have identified all the parts that can be reused, thoroughly clean them to prepare for the rebuild.
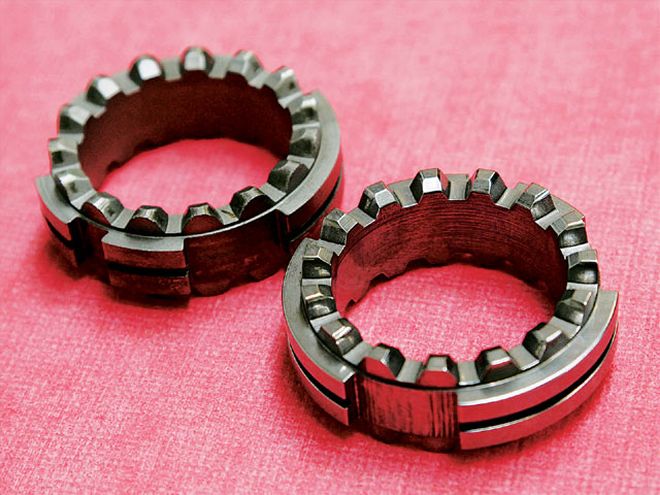 In the foreground is a new center dog for a racing locker. As you can see, the teeth are still well defined. To the left of it is a worn dog. The gear teeth are rounded, and this unit should be replaced.
You may be surprised to learn that Ingram says the greatest area of wear on a typical rearend isn't the ring-and-pinion gears, but the locker. Lockers take a little abuse every time they activate, and the more horsepower you add to the mix, the tougher that abuse gets. One of the most sensitive components always seems to be the locker springs, no matter what brand is used. A good way to extend the effectiveness of your locker is to run an oil cooler, especially if you regularly participate in races that are 100 laps or longer.
After disassembling the locker, inspect the teeth on all the dog gears. They should have sharp, defined edges. Even if the drive isn't abusive, over time they will wear and will need to be replaced. If any of those edges are worn, replace them. Begin by placing the steel rings inside the locker housing that keeps the dogs from eating into the aluminum housing.
When reassembling the dogs, Ingram cautions that you should always use enough oil or gear lube to create a film between all the mating surfaces. When reassembled, the teeth of the dogs fit very tightly together and are held that way by the springs. So, even if the locker is surrounded by gear lube, it is possible for the dogs to remain dry until you get out on the track. It's also a good idea to replace the springs at least once per season. As mentioned before, it always seems to be the locker springs that are most susceptible to heat, and simply replacing them regularly is cheap insurance.
The locker assembly goes back together into the housing, sandwiched with a spring on either side. The locker springs are quite strong, and it can be a frustrating task if you don't have a locker spring compressor, which is the proper tool for the job. Most gear specialists use a piece of threaded rod with flanges welded to nuts so that the rod can be inserted through the locker and the nuts can be threaded down to compress the locker enough for it to be bolted together. You can fabricate your own, but Tiger sells a locker spring compressor in its toolkit that works quite well.
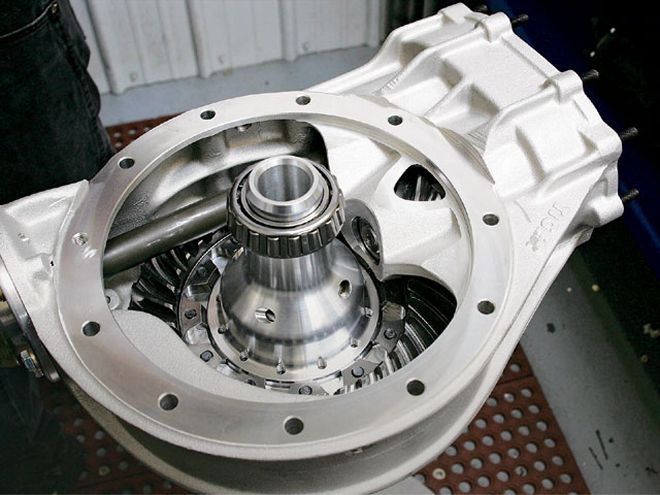
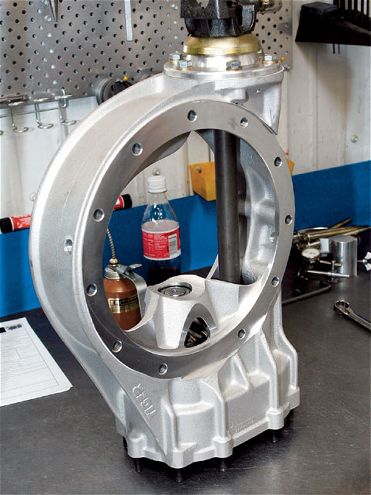
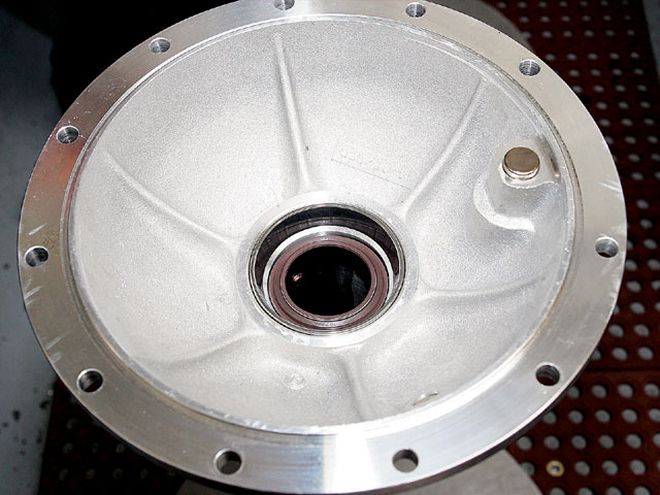 When reassembling the rear end-even before test-fitting for crush and lash-the first step is to install the wear pad in the left-side bell. It is too easy to forget the wear pad later, which will have you tearing everything back down just when you thought you were done.
Before final assembly of the ring gear to the locker (or spool, if that is what you are using), you should make sure there are no burrs or dings in the material of either the ring gear or the locker that can affect the alignment. Sometimes the smallest grit caught between the back of the ring gear and the locker can throw off the ring-gear alignment enough to cause lash problems. Clean both surfaces with Emery cloth or a flat honing stone. Finally, don't forget to use red Loctite on all the ring-gear bolts, torque to spec, and safety-wire each of the bolts.
On a rebuild, you can usually use the same shims that came out of the assembly and get the correct amount of lash, but it is still a good idea to recheck everything just in case. Ingram says the correct amount of gear lash is between 0.008 and 0.013 inch, but he aims for the tight side because lash will always open up after the gears have been run in. On a rebuild, normal use will open up the lash to around 0.020, which isn't a concern.
Ingram always sets lash with the left side of the bell and axle tube attached to the centersection and pointed down. This means he builds from the right side of the housing. The ring gear and locker are set into place, and the centersection is dropped into place on top of that. Be sure to install the wear pad now so you won't forget and have to tear the rearend down again later.
 When the bearing crush is properly set, you should be able to insert three 0.010-inch shims around the perimeter between the centersection and the right-side bell.
Both lash and crush are adjusted by inserting and removing shims behind the carrier bearings. Lash is the amount of play between the ring-and-pinion gear teeth. It can be adjusted by changing the amount of shimmed distance between the left- and right-side carrier bearings. The total amount of shimmed distance sets the crush, while the manner in which the total amount is split between the two bearings sets the lash. The process of getting both of these amounts correct is quite labor intensive and usually requires installing and removing the bearings and shims several times. Because of this, Ingram uses a set of setup bearings that have been ground on the inside diameter to allow them to slide onto the locker easily without having to be pressed on. You can do the same with a set of old bearings and a hand grinder.
On a new rearend, Ingram normally begins by inserting 0.034 inch worth of shims on the left side of the locker and 0.056 on the right side and adjusts from there. With the setup bearings in place, install the assembly into the left-side bell and install the centersection on top of that with no gasket or O-ring.
Ingram checks crush by placing the right-side bell and tube in place with three 0.010-inch shims between the centersection and the right-side bell. These shims should be spaced equally around the centersection. Press down on the bell using only mild force. If there is still space even with the spacers, some spacers will need to be removed from behind the bearings. You can tell when you don't have enough spacers behind the bearings if the right-side bell rocks after removing one of the 0.010 spacers. When everything is perfect, the 0.010 shims should fit the gap between the centersection and the bell perfectly. Also remember that you will lose crush on final assembly if you are using a set of setup bearings, so try to err on the tight side.
Once the crush is correctly set, reassemble everything (with four bolts holding both bells to the centersection) and check the lash at the pinion gear. Before setting up your lash gauges, spin the gear several times to make sure there are no rough spots from a bearing hanging up. Check the lash at four places in 90-degree increments on the pinion gear.
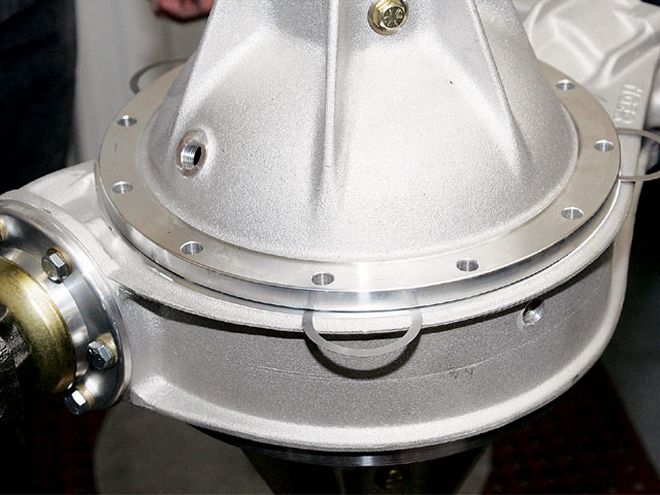
 Ingram says that coated centersections and bells are becoming more popular. The coating goes on the inside and outside surfaces and helps radiate heat away from the gears and lubricant to keep the rearend cooler. Dirt racers also enjoy it because it sheds both mud and oil more easily than uncoated castings.
Ideally, you want between 0.008 and 0.010 lash at the pinion gear. If the lash is too tight, remove some shims from the ride side of the locker or spool and add the same amount to the left side. This will move the ring gear away from the pinion. If the lash is too loose, you can move the ring gear closer to the pinion by removing some shims from the left side of the locker or spool and adding the same amount to the left side. Remember, you should never change the total amount of shim distance because this will change the crush. You only want to move shims from one side of the locker or spool to the other.
Once you have the correct amount of spacing for both crush and lash, remove your setup bearings and press on the bearings you actually plan to use. For peace of mind, check both your crush and lash again to make sure nothing changed when you added your race bearings. If everything is correct, you can begin final assembly. If not, start over, but use the race bearings. Install your tube seals if necessary. Insert O-rings between the bells and centersection, along with a thin film of silicone, and torque the bolts into place. Finally, set your wear pad adjuster. You can do this by threading the adjuster all the way in until it makes contact between the wear pad and the back of the ring gear. Then back off on the adjuster a quarter of a turn.
The last step is to reinstall your rearend cooler, if you run one. Then get everything back underneath your race car and add your gear lube. In all, a complete rebuild should only require a couple of hours and can save you from a lot of heartburn at the racetrack.