
There’s no denying how responsive the fifth-gen Camaro is to the ever-growing number of performance mods available on the market. Taking the LS3 or L99 from stock output to greatly increased horsepower numbers is just a few bolt-on parts away, combined with all the suspension, drivetrain, and other mods that are out there.
But in the quest for more horsepower, enthusiasts often overlook upgrading one critical component: the cooling system. As with any performance application, when you increase horsepower you have to keep in mind the increase in cooling capacity that’s required. More horsepower means more heat and that heat has to be dissipated somehow, otherwise your engine is going to suffer from increased wear and tear.
The system also has to cool the transmission, either manual or automatic. Burnouts, autocross runs, track days, dragstrip passes; they all add heat stress to the transmission that if not properly handled can lead to premature failure. And while the factory cooling system in the fifth-gen Camaro SS is pretty good, there’s room for improvement. Enter Flex-a-lite.
With all the badass cars being built since the fifth-gens hit the market in 2009, Flex-a-lite saw the need for increased cooling capacity so all that hard work and money wouldn’t go up in a cloud of smoke at the track. The Flex-a-fit unit features three times more cooling surface over the stock radiator, along with a cross-flow design (the factory radiator is a down flow design) that allows the coolant to remain in the cooling vanes of the radiator core longer, leading to more heat dissipation. The aluminum side tanks also help to dissipate heat, opposed to the factory nylon composite tanks. Nylon composite is basically plastic, which is a heat insulator. Combined with the cross-flow design, the Flex-a-lite radiator is also a dual core unit (meaning two rows of coolant tubes in the core), as opposed to the factory radiator that is a single core unit (one row of coolant tubes). This gives it more overall coolant capacity. It’s constructed entirely out of aluminum and fully TIG welded for the highest quality and durability possible.
And the beauty is, you can install this great upgrade in a day, with no drilling or cutting required, beyond trimming the factory radiator hoses and splicing the wires for the new cooling fans. Don’t believe us? See for yourself in the proceeding pics.
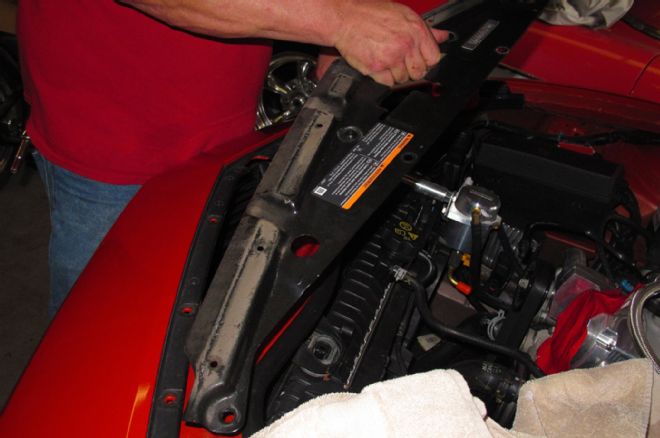
1. The first step is removing the cover over the hood hinge.
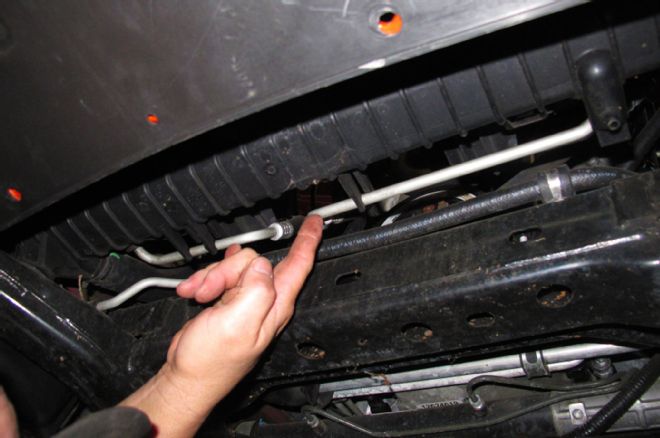
2. These are the factory trans cooler lines. Even manual trans equipped fifth-gens use a fluid cooler mounted inside the radiator, like their automatic equipped brethren. The ends of these will need to be modified to accept our new trans cooler. We disconnected and capped them off so we didn’t have fluid spilling all over. Have a catch can ready for the coolant that will drain out of the radiator though.
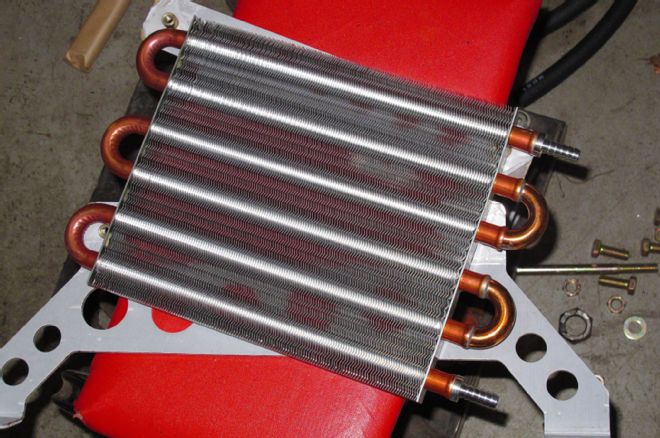
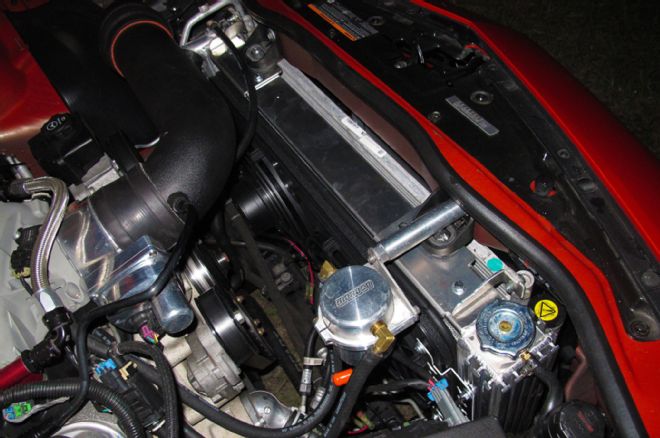
3. For better transmission cooling, we’re installing Flex-a-lite’s direct-fit Translife transmission oil cooler, PN 4116C. By going to an external cooler we can cool the trans fluid more efficiently and quicker than the integrated factory unit, and free up more cooling capacity in the radiator for the engine’s needs.
4. Next, we unbolted the A/C condenser from the factory radiator, two bolts on the top tank.
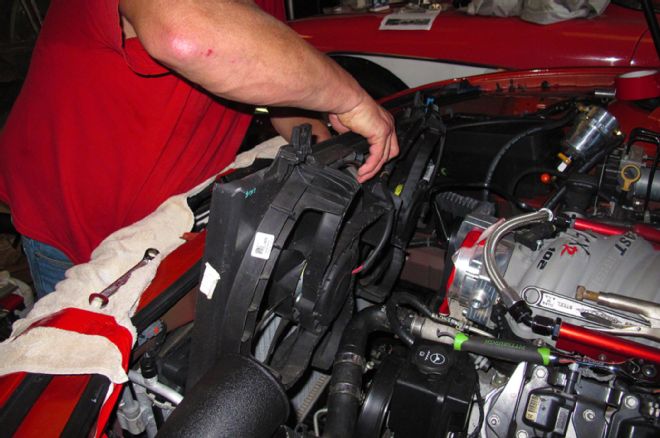
5. To make removing the radiator easier, we disconnected and unbolted the electric fan assembly and removed it separately. This gave us more room to work with to get the factory radiator out. Then we drained the radiator and disconnected the upper and lower hoses.
6. With the fan out of the way, we unbolted the upper retainer brackets from the core support then pulled the radiator out. The factory rubber insulators on the bottom will be transferred to the new Flex-a-lite radiator.
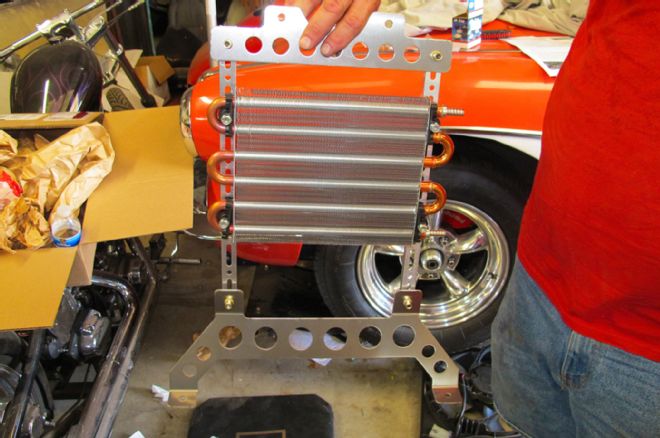
7. With the radiator out of the way, we can install the new trans cooler. It features a cool looking Erector Set style mounting bracket, and mounts the cooler in front of the condenser, so it gets the coolest air possible going across it.
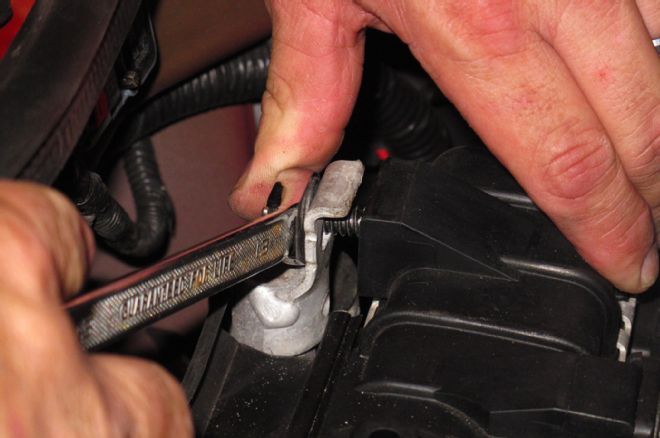
8. After putting together the whole trans cooler assembly, we disconnected the lower mounting bracket and bolted it in place first. Trying to install the whole assembly at once can be a bit unwieldy since there’s not a lot of room for your hands in this area.
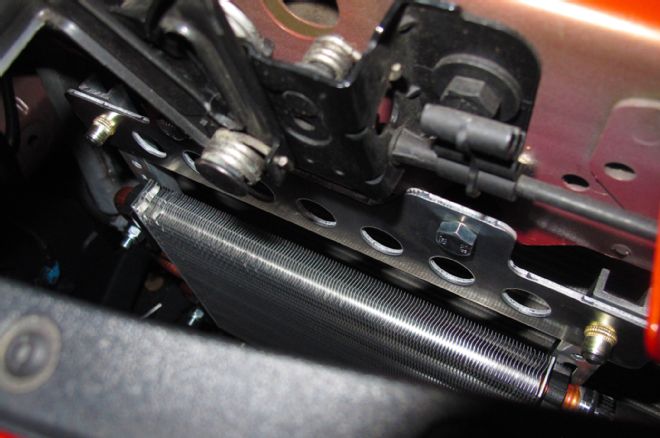
9. After we attached the rubber lines to the cooler, we set it in place and bolted the upper mounting bracket to the factory holes in the core support. One of the great things about Flex-a-lite’s radiator and trans cooler was we didn’t have to drill any holes or cut any metal on our ’10 SS. The only real cutting we had to do was trimming the factory upper and lower radiator hoses.
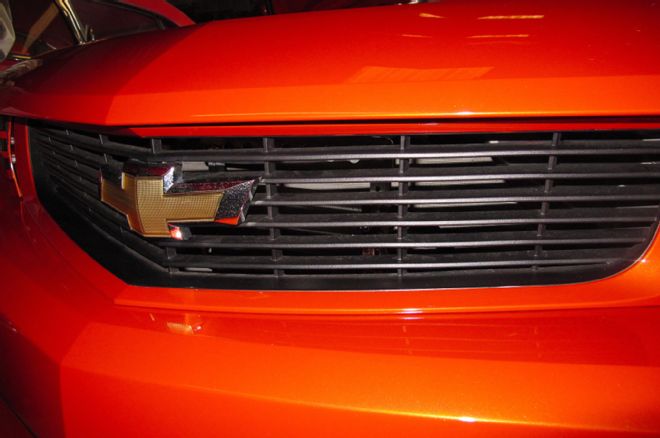
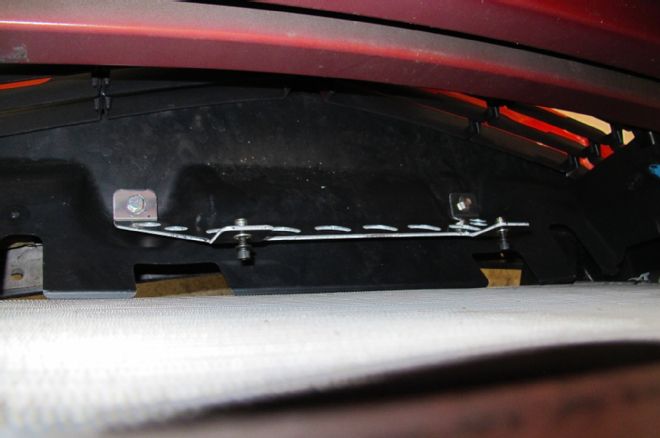
10. From the outside, you can only see the slightest hint of the new external trans cooler through the grille, so it doesn’t affect the car’s looks at all.
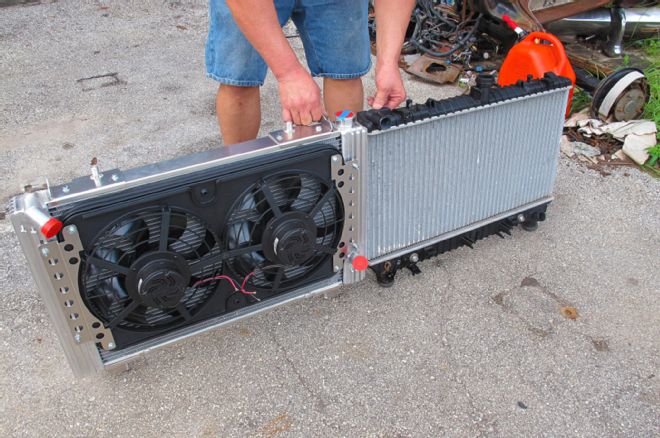
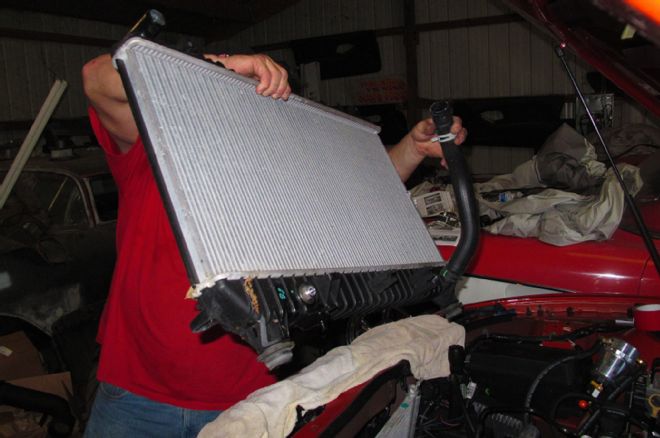
11. The factory unit is on the right and the Flex-a-lite radiator’s on the left, PN 56488. The Flex-a-lite unit is a direct fit system that includes new, higher flowing electric fans that are quieter than the stock fans. The radiator itself is a two core, cross-flow design (opposed to the factory single core, vertical flow unit) that has three times the cooling surface area of the factory radiator, along with fully TIG welded aluminum construction.
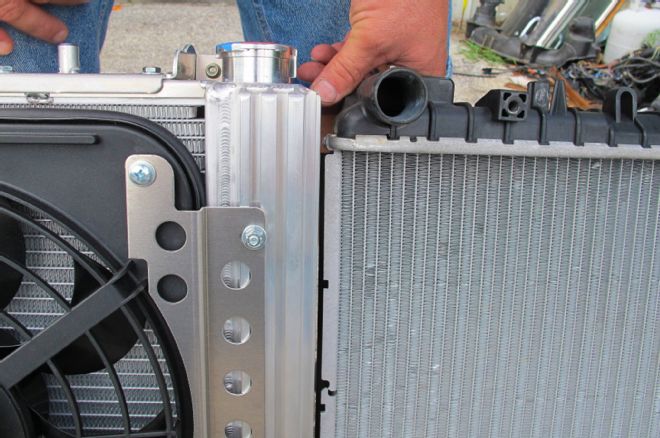
12. The side tanks on the Flex-a-lite radiator are aluminum and TIG welded to the core, where the factory radiator has nylon composite tanks that are crimped onto the core. This gives the Flex-a-lite unit a much beefier construction, wear resistance to heat cycles, and better heat dissipation. While the engine’s computer is going to keep the engine running at the factory specified temperature for optimal performance, the Flex-a-lite radiator dissipates heat much faster and more efficiently, even on the hottest days, so the cooling fans and other engine control aspects don’t have to work as hard to keep the car cool. This is especially beneficial when you’re making short, flat-out runs on an autocross course or a track day event. The Flex-a-fit channels on the side tanks not only provide flexibility for mounting things, but they also act as cooling fins to dissipate heat from the side tanks.
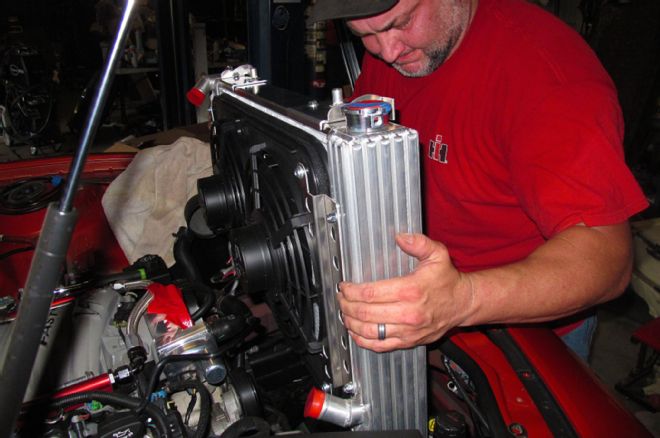
13. After bolting on the mounting adapter plates to the top of the radiator, we dropped it into the engine bay. Because the Flex-a-lite unit is a bit wider and thicker than the factory radiator, it does require a little bit of coaxing to get in place, but doesn’t require any cutting, drilling, or trimming. Once it’s in place, check the clearance on the A/C lines, as they can be pushed close to the power steering pulley.
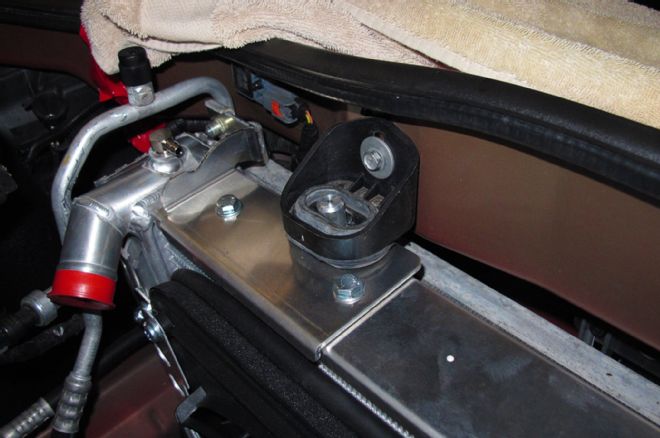
14. Once in place, the factory upper mounting brackets are reused to secure the radiator, after the condenser has been bolted back to it.

15. With the new radiator in place, the upper and lower radiator hoses are trimmed/shortened to fit up with the new inlet and outlet.

16. The lines from the new trans cooler are run down and connected to the ends of the factory lines.

17. The hose from the overflow tank is shortened, and connected to the included nipple that’s screwed into the filler neck.

18. The installation kit comes with a length of hose and clamps to connect the factory steam line to the nipple fitting on the driver’s side of the radiator.
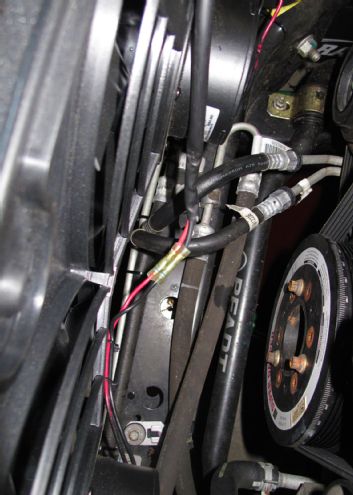
19. The Flex-a-lite cooling fans are designed to integrate with the factory wiring harness and fan controller. The plug from the factory fans is cut off then attached to the new fans using the supplied electrical connectors.
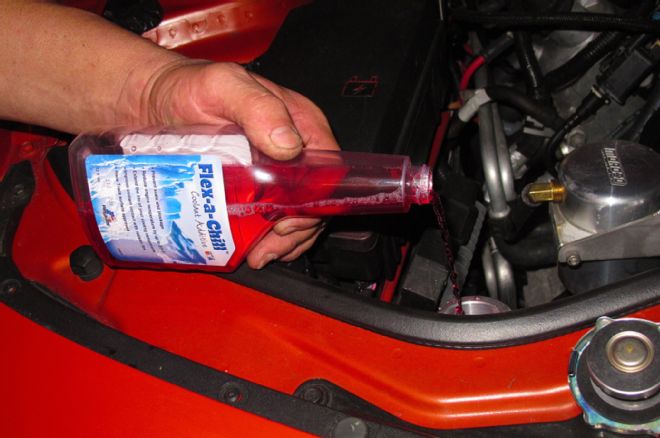
20. Before filling the radiator with Dexcool, we added a bottle of Flex-a-lite’s Flex-a-Chill coolant additive. With a pH level of 8.5, it protects the aluminum in the cooling system from electrolysis that can cause corrosion. It also has special additives to prevent contaminants like calcium and magnesium from building up inside the cooling system and creating sludge. Flex-a-Chill also gives the coolant mixture better surface contact with the metal, which helps cut down on bubbles and allows for more efficient heat transfer between the coolant and the metal of the engine. And it’s water-soluble.
21. With everything all buttoned up, here’s how it looks. We love how the polished aluminum of the Flex-a-lite radiator lights up the engine compartment. From a functionality standpoint, our post installation shakedown cruise instantly showed the results. The trans temp was lowered significantly, the cooling fans were definitely not having to work as hard, the second fan never came on when the engine got up to temperature. While playing around with the temp gun taking measurements, we even noticed a 10 degree, yes, a 10 degree drop in the air coming from the vent when the A/C was running. All this on a hot summer day in Florida that was in the 90s. And the next time we hit the autocross, dragstrip, or a mile/half-mile speed run, we’ll have no worries about the Camaro losing its cool, even when we eventually add another 100 to 200 horsepower.