 | Tein Mono Flex Install - The Next Episode
Ever buy a car and think to yourself that this is the one you're going to keep for awhile? After owning a turbo KA S13, a MKIV Twin Turbo Supra and another POS S13, I desperately needed a change. Maybe it was because I finally reached my 30s, but I wanted something a little more comfortable, not to mention easy to drive. So I picked up a `00 BMW 323ci and (gasp) it was an automatic. At first it was cool since all I really need to do is put it in drive and go, but after awhile it became boring. Living in Los Angeles we have some of the worst traffic in the country; I usually spend at least two hours a day in my car. I figure if you're going to be stuck in the car, you might as well enjoy the drive. To make matters worse, going to all our Super Lap Battle events, I really started to miss having a car that I could take to the track.
 | Tein Mono Flex Install - The Next Episode
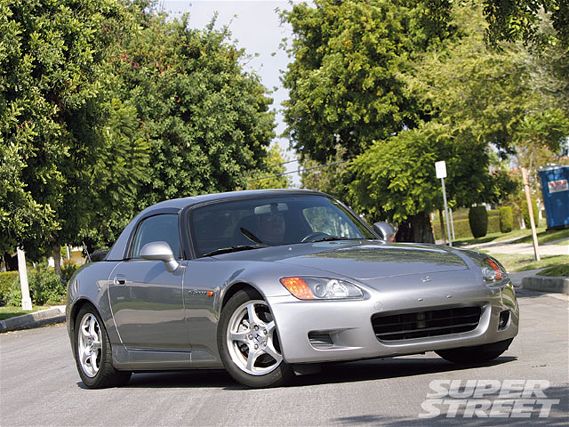
When it came down to picking a new car, I knew that whatever I picked would see the majority of its time on the street as my daily driver. I always liked the AWD platforms from Subaru and Mitsubishi, especially after getting to drive our Project STI around. Having a turbo combined with AWD is always fun but I decided to go in a different direction. Having never really tuned a NA car, I quickly set my eyes on a Honda S2000. Not only can you find them for around the $15,000 price point, but there was an endless amount of aftermarket support. After searching for a S2K for a month, a deal finally came up: My friend Vince was selling his `00 AP1 (that's chassis code talk for S2K). It was slightly modified and had a hardtop, which was the deal sealer. Before I even picked up the car I already laid out my plans of tuning it for the street and some track duty.
 | Tein Mono Flex Install - The Next Episode
With all my research on the car I found my way to Elton Lo of Raceline in Temple City. After talking to him I knew he was the guy to have work on the car. He's helped us out in the past to build our project RSX Challenge car and, in fact, holds a Top 3 overall record for our Limited FF class in the Super Lap Battle series. Not only does this guy know how to wrench, but he knows how to drive. It's one thing to be able to put parts on a car but it's another when someone knows how to set those parts up.
 | Tein Mono Flex Install - The Next Episode
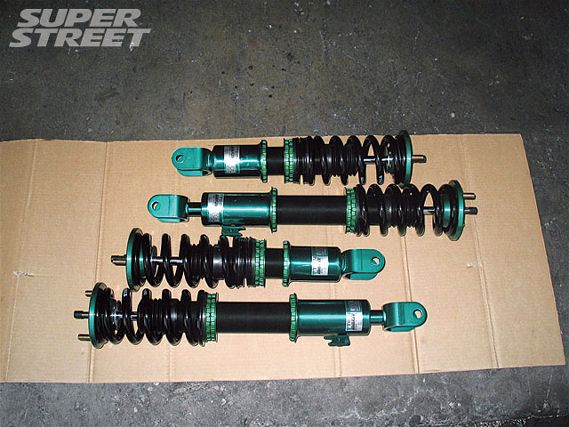
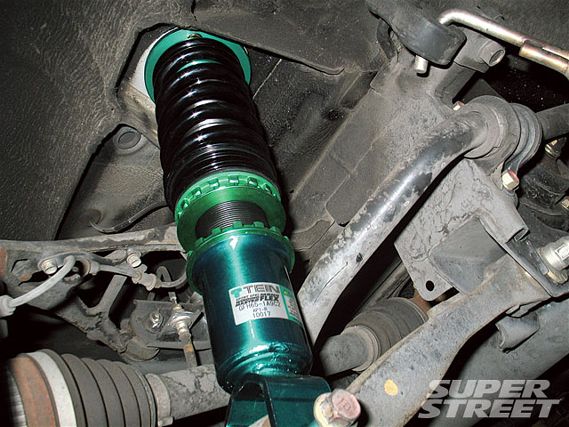
In this first installment we're going to be tackling the footwork by installing the latest offering from TEIN, the Mono-Flex coilover system with EDFC and an anti-bumpsteer kit from T1R. TEIN Mono-Flex are an inverted strut, mono-tube design with separate ride height and spring pre-load adjustments, 16-way adjustable and EDFC compatible. When I got the car it already had some Racing Gear coilovers installed, but after driving on these for a week I knew that I had to change them out. The TEIN Mono-Flex install is pretty straightforward and only took Elton 30 minutes to remove the old setup and get the TEINs in. The EDFC wiring is the most time consuming part of the install, but being able to adjust the shocks settings while driving is more than worth it. The EDFC is one of the greatest things to have since on the street I can dial in a comfortable ride, but at a press of a button, be ready for the track.
 | Tein Mono Flex Install - The Next Episode
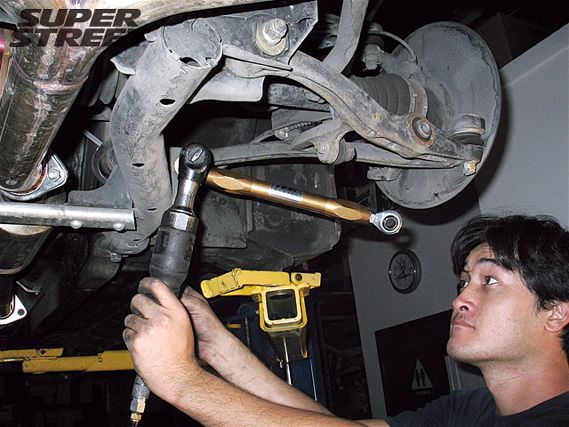
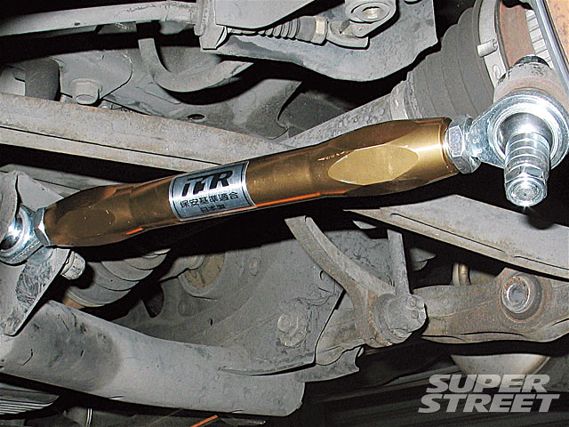
T1R Anti-Bumpsteer kit: There are two parts to this kit; one is a set of spacers for the steering rack and for the rear is a set of adjustable toe rods. Both parts are made of CNC machined Forged 6061 aluminum. When lowering the AP1, the suspension geometry is altered past what the factory suspension system is designed for. The front kit allows you to space the steering rack out, which corrects the steering tie rod angle. The rear kit is adjustable, so it allows you to correct the angle of your rear suspension travel and allows you to dial in your toe settings for optimal performance. Just like the coilover install, the T1R kit is pretty straightforward with Elton knocking it out in very little time.
Setting up a car is like cooking: The ingredients by themselves can be good, but the key is how you put them all together. In this case I started off with the best ingredients with TEIN Mono Flexes and the T1R anti-bumpsteer kit; add in Elton as the head chef and he'll create a masterpiece. In the upcoming months we'll be showing you some track setup tips from Elton, as well as adding on some 17x9 Enkei RPF1s on some Falken tires. Who knows, maybe I'll even be able to get you some track times for the next installment.
Break it Down
COST TEIN Mono Flex $1710, EDFC: $380; T1R Anti-bumpsteer kit: Front kit: $102.68 Rear Kit: $401.81
PROS Gives the car a much more balanced and predictable feel.
CONS None really; just make sure you get the car aligned after installing these parts.
INSTALL DIFFICULTY Intermediate
VERDICT ride and with the EDFC--we can set our dampening to suit any road condition at a press of a button. The T1R anti-bumpsteer kit helped get rid of the twitchy feeling in the car's handling.