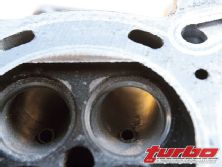
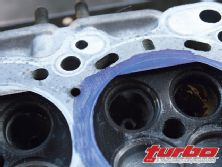
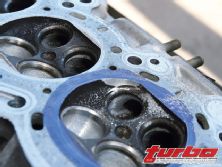
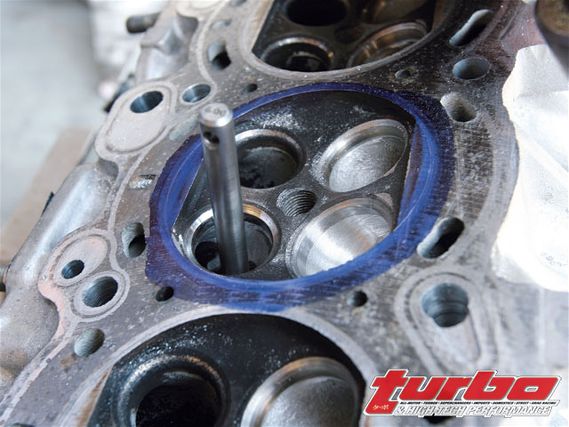
 | The head looks pretty rough with big gaps between the valve seat and port wall.
We last left project SR20 headless as we finished up the bottom end. If the bottom end can be considered the legs of an engine, the head is the heart and lungs. Building a good bottom end is the foundation of a hard-running motor. Power, however, is made in the head and races are won by how well the head works. While the cylinder head is the most expensive part of any engine build, we're still looking toward keeping our low budget approach, using methods that have DIY potential.
The cylinder head holds the keys to power by the fact that its ports are the choke points to airflow into and exhaust out of the cylinders. The more balanced and proportional flow an engine can get, the more power it can make. Some may argue that this isn't true but it is. Ports that are too large hurt power for many reasons but flow never will. Modifying heads by porting them is very labor intensive, costly, and if you do things improperly, there's a good chance you can actually hurt flow instead of gain flow.
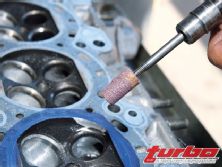
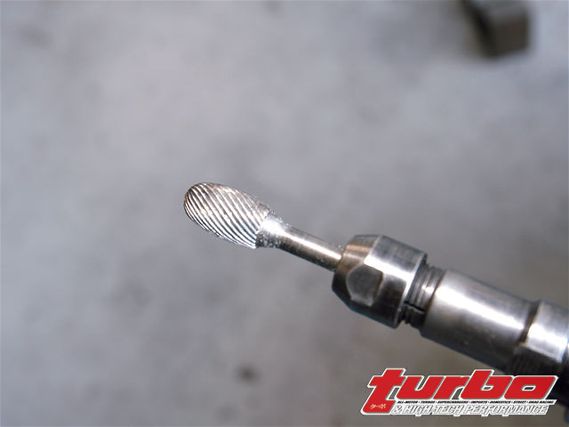 | A carbide-tipped die grinder bit is used for most of the work. These are fairly inexpensive at most industrial supply houses.
Fortunately, a large percentage of the flow gains that porting has to offer can be done by a semi-skilled enthusiast at home with some simple tools. What you need is a compressor, an air die grinder, an assortment of carbide cutter tools, a sanding roll mandrel, and a fistful of 220-grit cartridge rolls. These goodies can be purchased cheaply from your local industrial supply house or even mail order performance houses like Summit Racing.
The tricks toward modding your head can be done on any motor, not just the SR20. Usually on most heads, about 50 percent of the flow gains a skilled technician can find are in the area of the valve seat and the valve job itself. There are a lot of gains here because the velocities of the intake and exhaust gasses are highest at this point in the port, especially at partial valve lifts. Although porting is very difficult and requires a lot of skill and experience, most people can get a lot of these gains with simple porting without getting in trouble here.
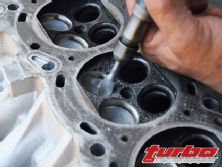
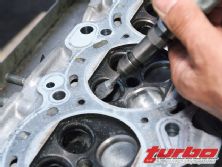
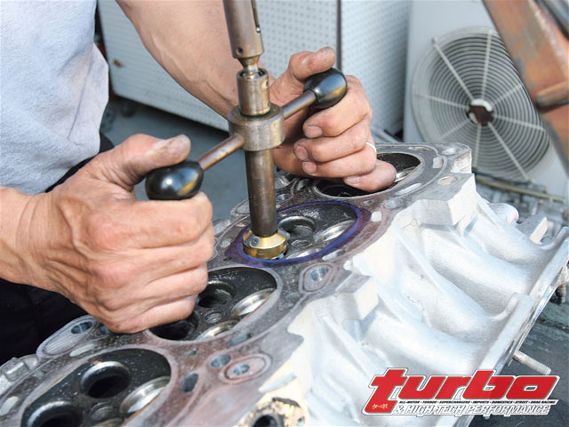
| Howard Watanabe of Technosquare first starts by smoothing out the sharp edge on the inside radius of the intake port. This minor tweak really helps flow. A lame mechanic, like yours truly, could do this sort of simple porting, but hey, someone had to take the pictures!
Before starting on modding your head it's best to make sure the head is in good condition. If your engine overheats, it's best to check the head very carefully. If it's warped beyond the factory service limit, the head should be discarded no matter what the machine shop says. SR20 engines don't like being overheated and if they've overheated to the point of warpage, they'll quickly warp again in normal use even if it's corrected by milling the deck surface. They may also tend to seize cam journals and drop valve seats. There's only one place to put a severely overheated SR-in the trash.
The first step to get more flow is to look at the junction between the steel valve seat and the aluminum head. There are always gaps between the machined valve seat and the cast cylinder head. With your die grinder, you want to eliminate or at least greatly reduce these gaps, making a smooth transition between the seat and the head. If you've never done this, it's best to practice on someone's junk head or at least turn the air pressure to your die grinder down to slow it so you don't go too far. Blend the valve seat to the port removing as little material as possible. Extend your blending about a half-inch below the valve seat and be careful not to nick the 45-degree seating surface of the valve. It's really important not to nick the valve seat because you don't want to make the seating surface for the valve very deep when the valve job is done. This reduces flow by shrouding the valve's seating surface. You shouldn't have to remove much more than 0.06 inch of material.

 | Next the valves are enshrouded. On an SR20, this makes a big difference on the exhaust side of the combustion chamber. First, a machinist-marking die like Dyechem is painted on the head. You could probably also use a Sharpie.
The high-port SR20 head like ours has pretty decent port angles. The highly placed intake port has a straight shot into the cylinder. To pick up major gains in flow, extensive work has to be done up in the port splitter area where the intake port divides into two passages to miss the valvetrain's hydraulic lash adjuster. This is a major weakness in the older SR's intake port. Unfortunately, this is a difficult area to port and it's best left to an experienced pro. Fortunately, good gains in port flow can still be had with some easy to do porting tricks that generally work well on any head. Although we're working an SR20 head, these tricks can be applied to any cylinder head with a great deal of success. Typically, these tricks can net you 5 to 15 hp on a four-cylinder engine.
To do this, we want to round off the floor humps in the port. Usually, there's a sharp edge on the short side radius of the port, as it turns downward to the valve seat. The idea here is to break this edge and make it smoother. On our SR20 high-port motor, the edge is right at the valve seat. With the low port, it's further down in the actually turn of the port itself. You can easily feel this sharp edge if you touch the port. Use a slightly longer shank die grinder bit and break the edge. Go slow, stop frequently, and feel what you are doing. You should only take out about 0.06 to 0.08 inch of material. Go too far and you can make things worse. You want to keep the basic shape of the port but just to make the edge a smooth radius. The port will still look stock. Repeat this process on the exhaust port.
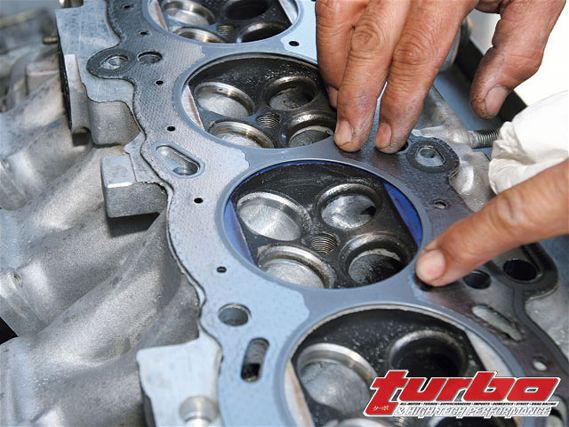 | A head gasket is placed on the head.
The next step is to blend the valve seat into the port itself to remove the step between the seat and the port. Using your die grinder, blend the steel valve seat smoothly into the port wall. This usually slightly opens up the valve seat. Once again don't take off too much material; it doesn't have to look perfect or be perfectly gapless. Be very careful that you don't over cut the soft aluminum and undercut the valve seats. When you're beginning to learn how to port, it's better to take out too little than too much, remember you can't put the metal back in. Typically on an SR20, the exhaust port valve seat has a more ragged match to the port itself and requires a little more grinding to make a smooth transition.
This next step is optional. Take your intake manifold gasket and scribe a line into the head of the outline of the port shape. Do the same on the exhaust. Now you can blend the port into this scribed line on the intake port and about 0.03 inch inside the line on the exhaust port. Blend the port at least an inch down into the port. This is called match porting. Match porting doesn't help flow that much but it doesn't hurt.
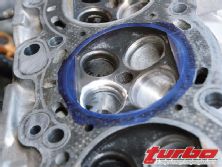
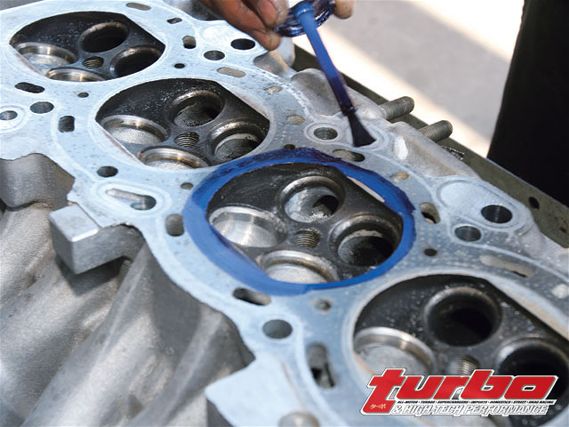
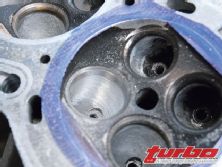
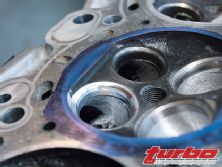
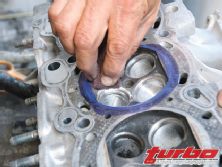
 | The border of the fire ring is scribed onto the head surface.
Once you've finished in the ports, lay an old head gasket on the deck surface of the head and scribe a circle around to mark where the head gasket's fire ring sits. Now in the area of the head where the edge of the combustion chamber comes within a quarter of the diameter of the valve, you want to remove material from here to the edge of the gasket fire ring or until you reach a quarter of the diameter of the valve. This operation is called valve unshrouding and it helps flow coming into and going out of the ports. On the SR20 this helps a lot, especially on the exhaust side of the head. The trick is again to take the least amount of material out as possible because this also reduces compression. On an SR20, this is only about 0.05 to 0.06 inch of material.
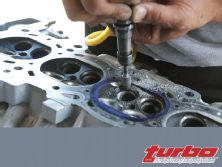

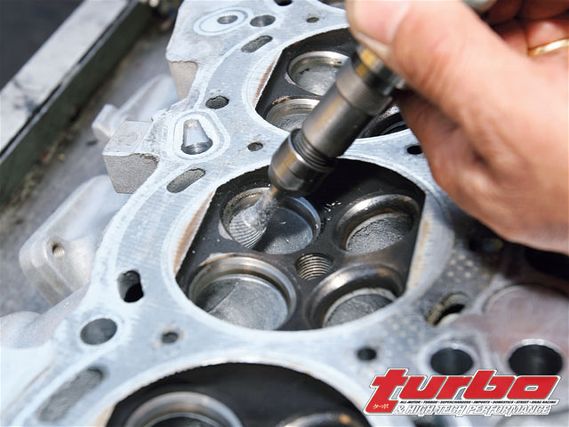
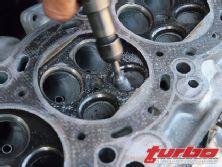
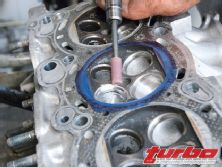
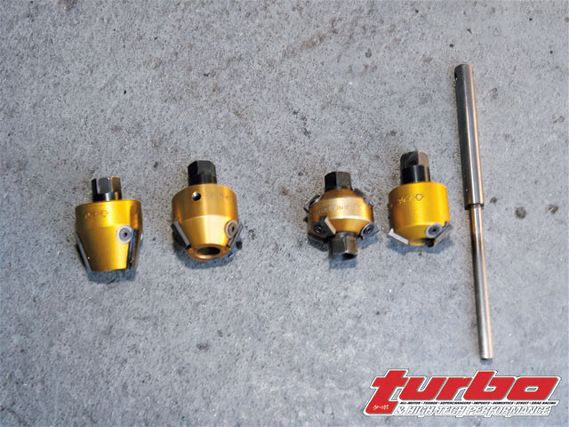 | Next, the valve seats are cut with a pilot that fits tightly into the valve guide and cutters. Howard used a 45-degree seat with a 75-degree throat cut and a 30-degree top cut.
Now you're done cutting. Next, get your sanding mandrel, chuck up some sanding rolls, and polish the ports and combustion chamber, taking care not to scratch your valve seating surface. Blend all of your cutting marks, smooth the surface, and polish out all of the sand-casting pits in the ports. It doesn't help much to make things mirror smooth so don't bother going finer than 220 grit. For our head we didn't even bother to do much more than smooth our own cutting areas, but you might want to polish your whole port to feel better about your work. In the combustion chamber you'll do the same thing where you unshrouded your valves. It's also a good idea to break the sharp edges of the combustion chamber. This will make detonation less likely. Don't go crazy; lightly break the sharp edges with your sanding roll.
Congratulations, you've successfully ported your own head, saving thousands of dollars. If you want to get more power, by all means spend the money and have your head professionally ported but, like we said earlier, you just got halfway there without spending money.
 | 20. The 45-degree seat is cut first. The minimum amount of material is cut to straighten out the seat and remove any traces of pitting.
The next critical part of headwork is the valve job. The valve job ensures that the valves' seal well, which is important to maintain compression. Fortunately for us, this being a low-buck build, the stock Nissan valve job is a performance-type three-angle valve job from the factory. (This is true for most Japanese engines.) A valve job requires special expensive equipment and skill to do, so this isn't something you'd want to do at home. Howard Watanabe of Technosquare performed our valve job.
First, Howard cut a new 45-degree valve seating face on the valve seat. Then, he used a 75-degree throat cut and a 30-degree chamber cut to narrow the seating area down to .04 inch on the intake and around 0.05 inch on the exhaust. He then refaced the 45-degree seat on the valves themselves and did a 30-degree back cut on the valves to the 45-degree seating surface. After the valve job, it's important to measure the valve stem tip height and correct the spring installed height with shims if necessary. (It's usually unnecessary in an SR motor). It's also necessary to check the side-to-side valve stem height on the intake and exhaust valves and make them equal. Nissan sells select fit shims that sit on top of the valve tips in the spring retainer to do this or the valve stem tips can be ground in a valve-grinding machine to do the same thing. This procedure is somewhat tedious and perhaps impossible for a lame machinist used to domestic engines. It's helpful to refer to the Nissan factory service manual or stick with a reputable racing head porter that has Nissan engine experience.
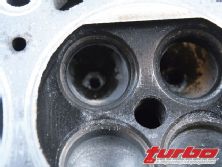
 | The freshly cut seat is clean but wide. The 75-degree throat cut is next which unshrouds the valve seat to the port, helping ease flow. Next, the seat is narrowed further by a 30-degree top cut to help flow into the combustion chamber.
SR20 engines, like most finger follower valvetrains, are also somewhat hard on its valve guides. Our head was in surprisingly good shape but others often need new guides. Using new stock Nissan guides is a pain. The Nissan replacement parts are oversized on the OD and undersized on the ID. This means that the guide holes in the head have to be reamed oversize and the guide's inner hole then has to be reamed to the valve stem diameter-a lot of work. If we needed to tighten up our valve stem to guide clearance we would've used silicone bronze inserts, a common machine shop fix for loose guides.
With cheap low-mileage bluebird SR20s so common in import junkyards like Sokken, it may be easier and cheaper to simply find an engine with less miles with a better condition head to start the build on. Most Domestic SR20s found in Sentra SE-Rs typically have really high miles and usually need to have the valve job and guides renewed. Our engine started out this way and even though it had many hard racing miles, the use of premium synthetic oil with frequent changes perhaps spared it from excessive wear. We got lucky and our head's excellent condition enabled us to stick to a really low budget.
Finally, to assure a good head gasket seal, we gave our head a light surfacing on a mill with a really fine slow feed to give a finish as smooth as possible. This enables the leak free use of MLS and other tough head gaskets. We removed the minimum amount of metal possible, which was just enough to assure a completely flat sealing surface.
With our head now ready to rock, we'll turn our attention to the valve train and header to complete our engine.