In the Sept. '09 issue, I covered the JDM front-end conversion on our not-so-lovely DC2 Integra. The original plan was to swap the front end and send it for paint less than two weeks later. However, two weeks turned into three, then four, and it was getting downright embarrassing to drive this thing around. The weird looks that I would normally give drivers in "Fast and Furious"-style cars, I was now getting. Enough was enough, I had to paint this car.
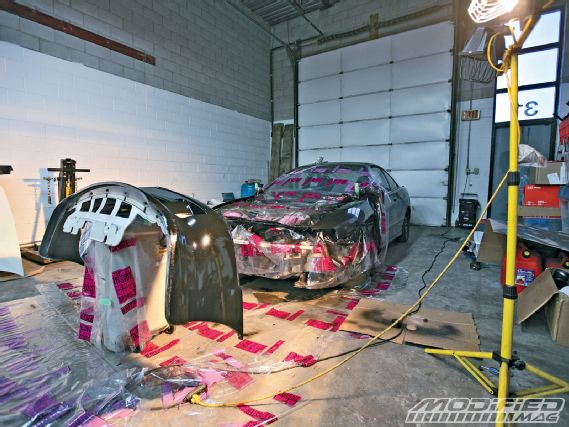 |
Integra Paint Job - Paint Booth
|
Integra Paint Job - Paint Booth
Unfortunately, the body shop that I was planning to use was in the middle of moving, which meant at least another month before they could get to the car. It was at that point that I decided a quick rattle-can spray job would get me by until I took the Teg in for some real paint.
I quickly searched the Internet to see what the best technique was; however, I couldn't find anything concrete. The one reoccurring theme I did pick up was to prep it well, but I knew that already from my days of fixing rust holes in my many DSMs that I had previously owned.
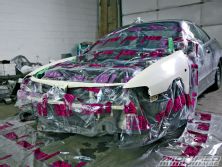

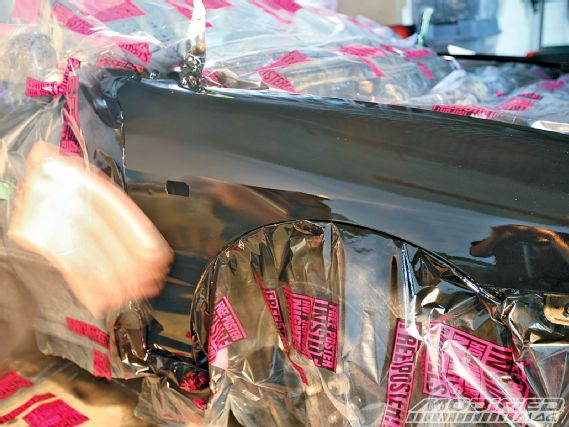
Off to the hardware store I went. One hundred and fifty dollars later, I was armed with eight gloss black spray cans, some 3M scuff pads, two rolls of masking tape and a tin of acetone. I had an old roll of magazine polybag wrapping sitting in my basement which I would use to mask off areas of the car, but you can get away with newspaper or buying a roll of something similar at the hardware shop.
Luckily, I was able to convince SG Motorsport to use the back of its shop as a paint booth (thanks, guys!), but if you're going to be doing this in a much more confined space like a garage then remember to mask the walls, floor and even ceiling because all of a sudden you've painted your car and everything in the garage.
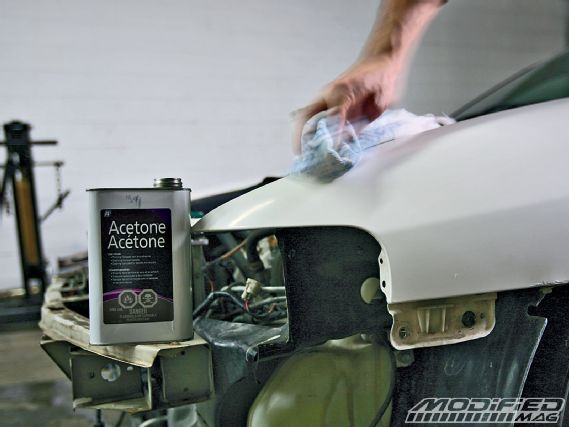 |
To ensure a clean and contamination-free surface, use acetone and gently wipe the surface.
|
To ensure a clean and contamination-free surface, use acetone and gently wipe the surface.
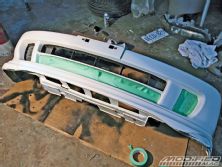
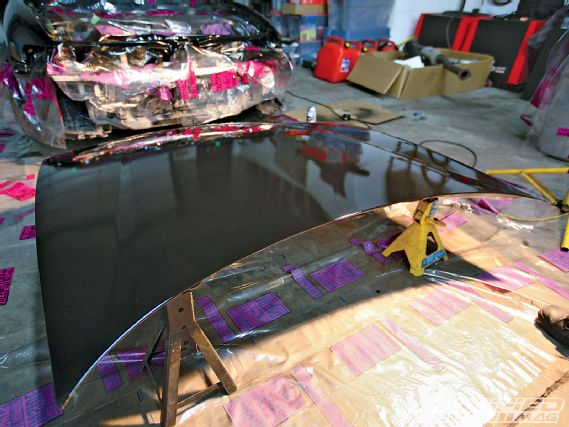
It's really up to you as to what you want to take off the car to paint, obviously having a fender off the car will be easier to paint and less masking to do but it can be a bit more time consuming. I decided to rip off the front bumper and hood, leaving the fenders on to paint. Masking was actually just as time consuming as painting but well worth it, in my opinion-overspray will ruin your day and make the job look super hack.
When I had everything wrapped, the next step was to scuff the paint. The reason for this is to ensure the paint will adhere to the surface. If you just go ahead and paint, be prepared from some blotchy spots and orange peel. Using a 3M scuff pad, lightly sand the panels until they begin to look dull and hazy. Be careful not to push to down too hard because you'll leave deep swirl marks that will be visible after. I learned this the hard way and now if you look really close at the hood you can see the swirls through the paint.
 |
Paint the surface wet, meaning you don't want to have any dry areas while you are painting. This ensures an even finish after drying.
|
Paint the surface wet, meaning you don't want to have any dry areas while you are painting. This ensures an even finish after drying.
The last step is to go over every panel with a rag that has been lightly soaked with acetone. This will clean the surface of any oils (from your fingers) or contaminants left on the surface. We're now ready for some spray can action!
Common sense should state that if you spray too heavily in one spot it's going to run, so try to be even when you are spraying. There is a trick, though: you want to have the panel that you're painting completely wet so that it dries evenly. Otherwise, it's going to look blotchy. So be quick with the spray can. I found lots of light coats work better than trying to load it on all at once. Also, be prepared to spray with alternate hands; you'll be surprised how quickly your finger tires holding the nozzle down..
 |
For the hood, we had two people spraying it at once to ensure a proper finish.
|
For the hood, we had two people spraying it at once to ensure a proper finish.
Now it's time to wait. Since I had to drive the car home that night, I waited six hours until the paint was dry to the touch, then I pieced the whole car back together. I suggest leaving it for 24 hours so that the paint can cure a bit.
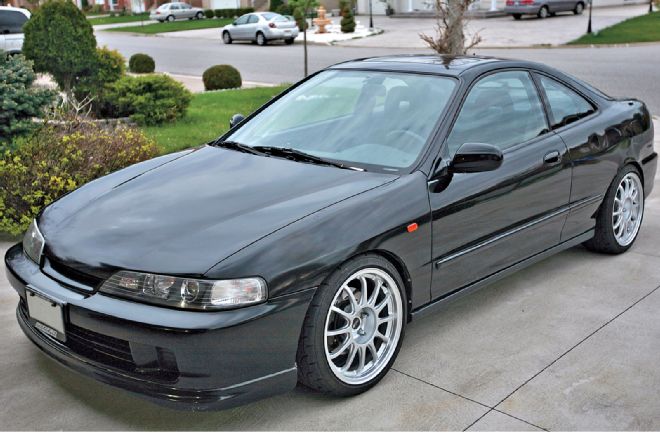
The end result was actually very surprising. I expected orange peel city, but seriously, there wasn't any sign of it. I did find two tiny runs, but hey, you can't be perfect. When some friends saw the car, they couldn't believe it looked that good considering I had spray canned it. In all honesty, I was more than happy with the outcome, but I didn't expect much going into it. I think with proper prep and masking you could paint an entire car to acceptable standards.
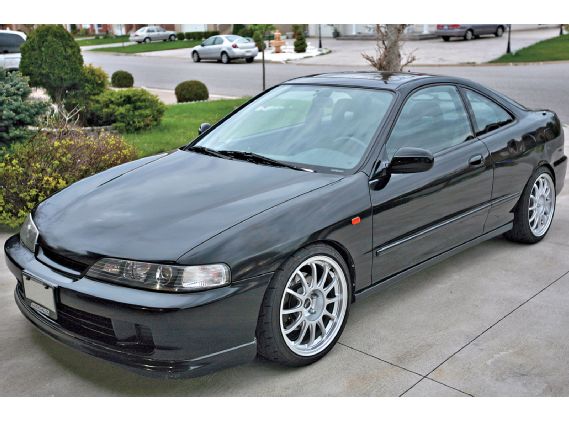 |
The finished product. Looks remarkably good.
|
The finished product. Looks remarkably good.
As it sits, I'm now debating whether I should have the car painted completely. The beater, faded paint look has grown on me so much that I may leave it like this. I'll never have to worry about scratches or the paint getting beat up at track days. What do you guys think? Paint it to show car quality or leave it as is?
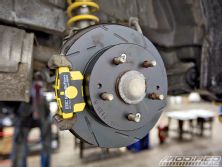
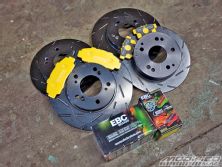
Brake Upgrade
I decided to be adventurous and not only do the paint in a day but install a simple brake upgrade consisting of EBC Ultimax BlackDash Slotted rotors (USR for short) and Yellowstuff brake pads which are perfect for street/track use. Although, if you plan to get very aggressive on the track, then the EBC Bluestuff pads might be a better option. For everyday use, though, the Yellowstuff pads and USR rotors have stopped the Integra better than any OEM replacement pad I've ever used. Best of all, to this day I have yet to hear them squeal, a common trait for street/track pads.