The JDM Honda Integra front-end conversion is nothing new to the Honda crowd; in fact, some consider it a played-out swap that now lacks originality. If you look at how long it has been around and the countless Integra's running the conversion, then that statement could ring true.
 |
JDM Front Installation - Gets A Nose Job | Project DC2 Integra
|
JDM Front Installation - Gets A Nose Job | Project DC2 Integra
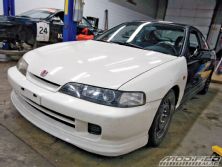
For myself, however, it's a matter of personal taste. One thing is certain: I really dislike the USDM Integra front end. Those four quirky headlights and the long, overhanging nose just don't jive in the looks department for me. The JDM front end, on the other hand, is classic Japanese sport car styling that I've really come to like.
Sourcing a JDM front end isn't very difficult, but be aware that there are three main variations: the silver housing headlights, black housing headlights and the more sought-after and rare black housing HID-equipped headlights. Obviously, prices vary depending on what you want. I opted for the non-HID black housing front end because it was in stock and it saved me a couple bucks. My front end came from Teknotik, a local Honda and JDM parts specialty store. Minus the standard small nicks and scratches from shipping, the front end was in good shape and had all the required pieces needed for the conversion.
 |
JDM Front Installation - Gets A Nose Job | Project DC2 Integra
|
JDM Front Installation - Gets A Nose Job | Project DC2 Integra
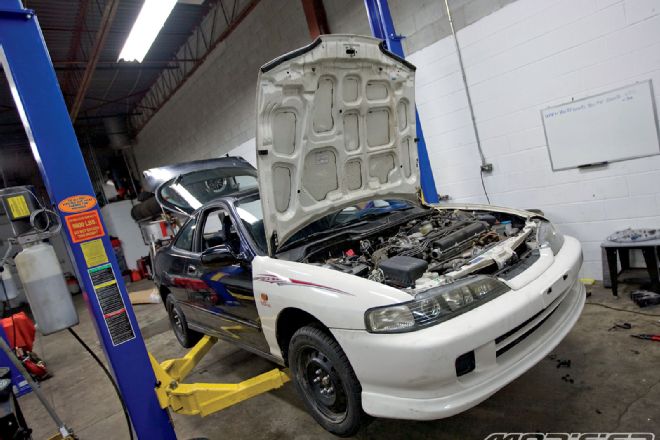
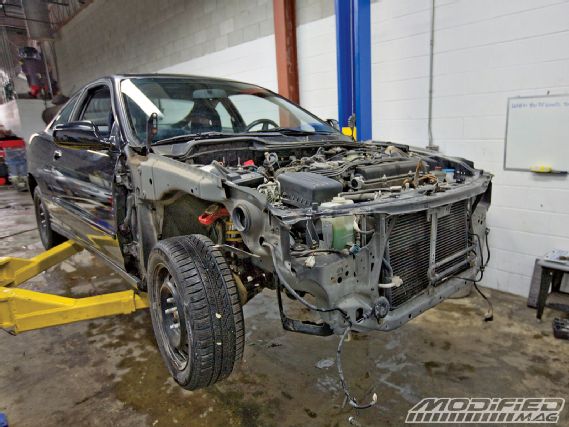
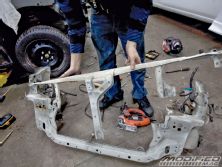
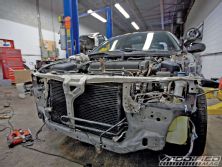
This swap may scare some people because it requires cutting off part of the front rad support and welding on the JDM one. Don't be intimidated, though-it's not as hard as it may look. As long as you measure twice and cut once, you'll be able to pull this off at home. I'll skip the step-by-step process and quickly cover some of the more critical elements of the conversion since really all you're doing is swapping some sheetmetal over. After you remove all of the USDM front end, including the bumper support, you'll have to cut the rad support off and use the JDM one because the headlight brackets and hood latch are in different locations. At this point, you have several options. You can cut the entire rad support out or cut a portion of it out. Because it's thin sheetmetal, the support doesn't offer much structural rigidity and to cut it out completely would take a fair bit more time than to cut half of it out. The issue isn't the cutting itself but the spot welds that hold the support in need to be drilled out and that will take forever if you plan to cut it all out. With all that in mind, it was a no-brainer to cut only the portion that we needed to replace.
 |
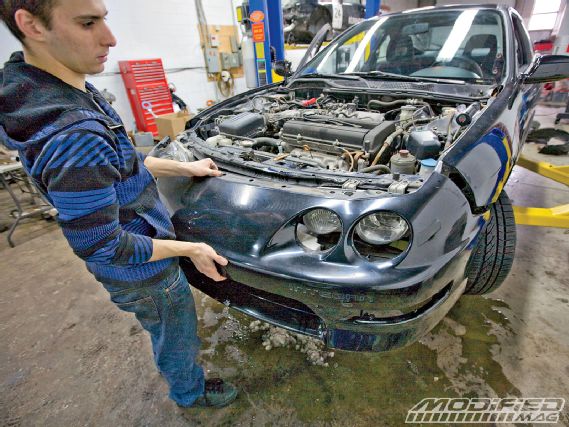
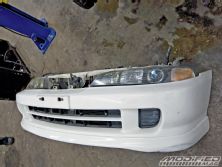
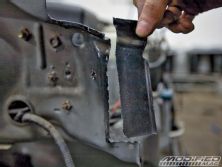
The bumper, lights, fenders and hood must all be removed for the JDM conversion. Nothing will be reused, so you can either sell them off or scrap the old parts.
|
The bumper, lights, fenders and hood must all be removed for the JDM conversion. Nothing will be reused, so you can either sell them off or scrap the old parts.
As the pictures show, measure carefully, take your time and don't press too hard when drilling out the rivets as the metal tends to deflect quite a bit. We overlapped the JDM support onto the USDM one to ensure proper and precise fitment. Before you go welding everything up, use some clamps to hold the JDM support in place and mock the front end up to see if all the gaps line up. If not, adjust the support until everything looks even. Then take it all off and weld the support into place. You'll also have to cut a small portion of the side of the frame sheetmetal, otherwise the JDM lights won't fit. The hard part is now done. All that's left is to secure both fenders, the hood and the bumper with the rebar behind it. The small issue of wiring the lights is really all that's left. The JDM light has a large rectangular plug and the USDM has two plugs for the high and low beams. You'll need to cut USDM headlight plugs and connect them to the rectangular plug-luckily, the wire colors match. Because I was fitting an HID kit meant that I just had to wire up the high beams. I didn't wire up the foglights because I didn't have a relay handy. I'll get to those next month.

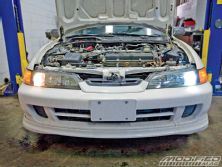
The Ignited HID conversion kit I installed has the slimmest ballasts on the market, making them an ideal fit for the cramped space behind the JDM headlights. I chose the 6000K color temperature, but a variety of "cooler" temperatures are available. Using the Ignited kit made for a plug-and-play experience since they plug directly into the factory harness. The light cut-off is exceptionally clear with the JDM projector headlights, but you'll need to adjust the left one down and right light up since it's setup to be driven on a right-hand-drive road.
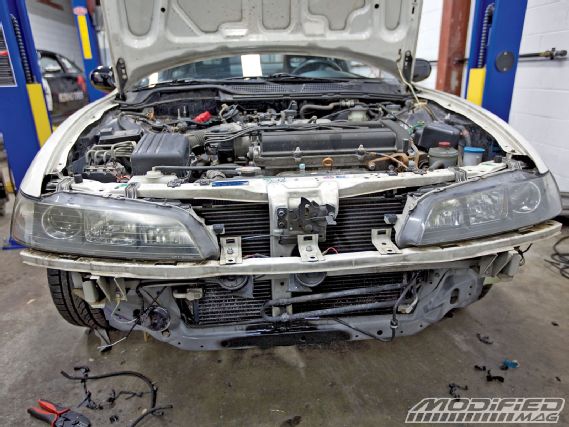 |
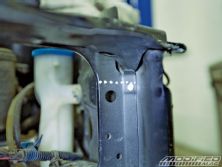
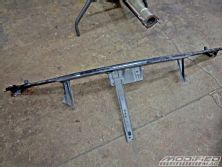
Test-fitting everything to get the gaps and lines proper is highly recommended before welding the rad support. It can save many headaches later on.
|
Test-fitting everything to get the gaps and lines proper is highly recommended before welding the rad support. It can save many headaches later on.
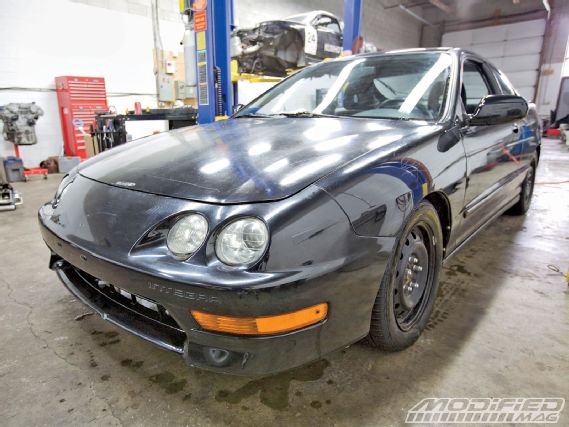
The installation portion of the JDM front end is complete. However, there's the issue of driving a car that's half black, half white. It's a huge eyesore, so I'm going to tackle it with a rattle can paint job covered in next month's issue. Eventually, Project DC2 will see a proper coat of paint, but it needs a DIY job stat!
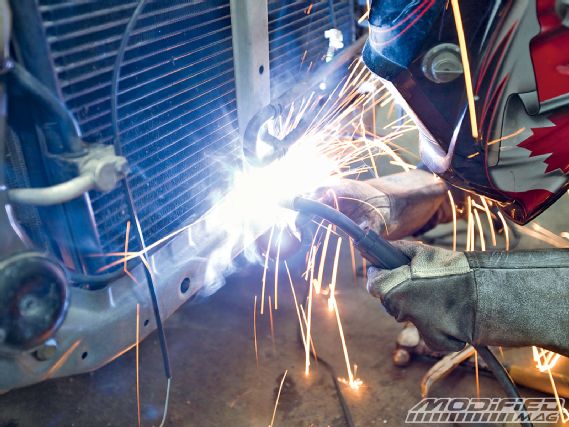 |
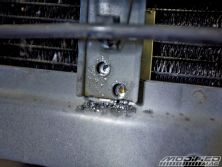
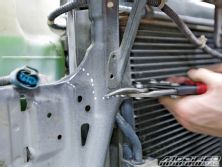
Weld all the points where the spot welds were located. It also doesn't hurt to add supporting welds at the seams where the JDM rad support meets the USDM one.
|
Weld all the points where the spot welds were located. It also doesn't hurt to add supporting welds at the seams where the JDM rad support meets the USDM one.