Hey, everyone - I wanted to let you all in on my latest project, a '11 Lancer Ralliart Sportback! In case you don't already know, I have a time attack EVO X, but I needed a daily driver and cool project car, so I picked up the new Ralliart Sportback. Ever since I saw the pre-production version during Mitsubishi Owners Day 2009, I knew I wanted one, especially considering the EVO drivetrain it comes loaded with (4B11T, TC-SST, AWC and so on). Even stock, you can see the car has a ton of potential.
 |
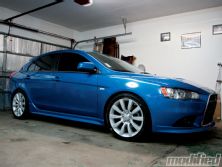
2011 Mitsubishi Lancer Ralliart Sportback - Project Sportback
|
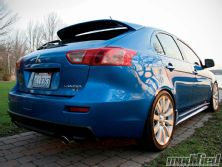
2011 Mitsubishi Lancer Ralliart Sportback - Project Sportback
Jump ahead to winter 2010 up here in Minnesota, and my EVO is at AMS Performance getting a new rollcage installed - transforming it from street car to full-on race car. At that point, I knew I needed a dedicated daily driver. After making a few phone calls, I was able to find a brand-new Lancer Ralliart Sportback in California, so I booked a flight and was on my way out to the West Coast; Project Sportback had officially begun. The flight turned into a major brainstorming session. I wrote down some ideas, plans, goals and I even did some drawings for Project Sportback. I was so pumped for this car! With a pretty wide range of ideas written down, Project Sportback could end up a million different ways. One thing I did know was that I wanted to stay true to the same philosophy I used for my EVO X: Keep it simple.
 |
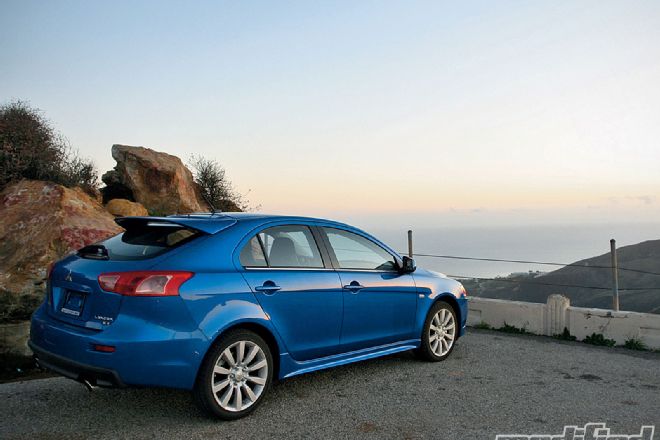
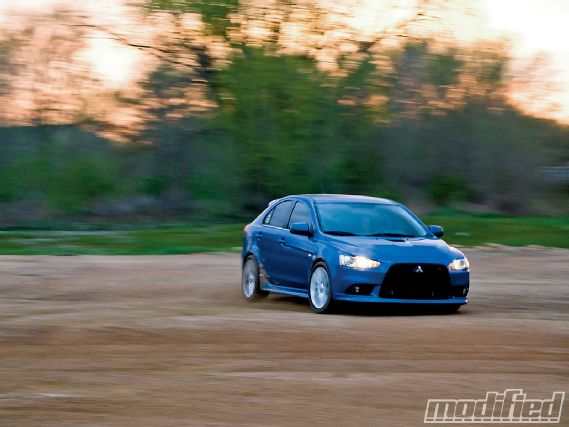
Project Sportback at the top of the Malibu canyons after some spirited driving runs.
|
Project Sportback at the top of the Malibu canyons after some spirited driving runs.
More than 2,000 miles later, I was on the ground in the Long Beach about to pick up my new ride, a loaded '11 Octane Blue Lancer Ralliart Sportback. Conveniently, it's the same color as my EVO, which is actually kind of cool. I got things sorted with the dealer and I was off on my long drive back home. I hadn't driven a car with Mitsu's new TC-SST dual-clutch transmission yet, and admittedly, I was pretty skeptical about the whole idea. But after just a few minutes of driving, I changed my mind. It's smooth, fast and fun in manual mode, but when you want to just drive along in auto it's perfectly seamless - a nice surprise. Before the drive home, I took the car to the Malibu canyons to get a quick base test. While ripping through the canyons, I immediately realized the car isn't an EVO wagon and doesn't handle at the same insane level as the EVO X, but it's far better than I had expected. That's actually a good thing, though; a huge part of this project for me is to transform the way the car handles, and a set of bad-ass JRZ dampers will help tremendously.
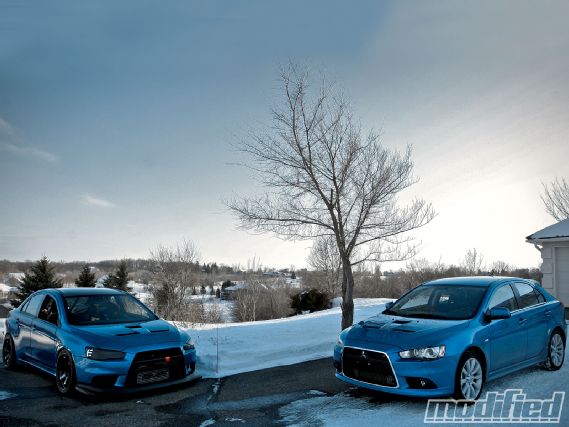 |
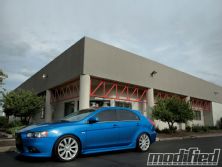
The Gates311 EVO X meets Project Sportback for the first time.
|
The Gates311 EVO X meets Project Sportback for the first time.
After a little time in the canyons, I wanted to get on the road back home to get things started with the project. The drive itself only took 22 hours, but in that time I learned a lot about the new car (the TC-SST proved yet again to be amazing). The Ralliart Sportback is also a great cruiser (90 mph feels like 60 mph) and the NAV unit is sick - thank God for Sirius radio! The car also comes with the same Recaro seats as an EVO X, so that's awesome for the track and long road trips.
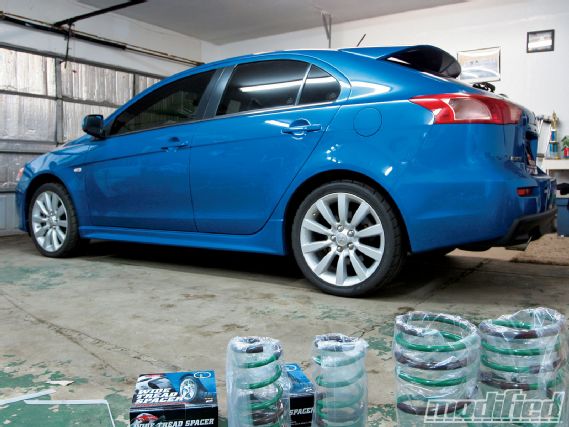 |
The Sportback awaits a set of TEIN S.Tech springs and 25mm Project KICS spacers.
|
The Sportback awaits a set of TEIN S.Tech springs and 25mm Project KICS spacers.
When I finally got home, I dug into the car right away. I wanted to set the Sportback up on an OEM+ mod path, meaning I'd try to maximize the potential of the car by using some simple upgrades and retaining mostly OEM parts. First things first, though - tuning was a must. Kris from AMS Performance emailed me a base flash to start with, along with a boost pill to help the turbo hold a bit more pressure throughout. Those two things alone completely changed the car! It was peppy stock, but after the tune, it's actually quick - like E46 M3 quick, as my boy Luis found out. I threw in a K&N panel filter for good measure later that week; the car was shaping up to be a great daily driver.
The Sportback sits really tall. So tall, in fact, that I could fit my face in that wheel gap. To fix that, I called Evasive Motorsports and ordered a set of TEIN S.Tech springs and two sets of Project KICS 25mm spacers. It's going to take a few months to develop a proper suspension package with JRZ for this car, so the TEINs went on mainly for looks. Surprisingly, the S.Techs proved to be pretty great! They lowered the car about 2.2 inches up front and 1.8 inches in the rear, yet they ride similarly to stock (but with a more firm response). The car handled much better, too - nice and flat. A spring install is something that anyone with simple hand tools and a jack can accomplish. It took my friend and I around two hours to do and we had to get creative with the lack of tools we had.
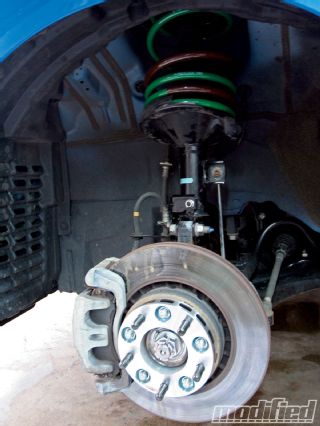 |
The TEIN springs and 25mm KICS spacers installed in no time.
|
The TEIN springs and 25mm KICS spacers installed in no time.
The last part of the initial suspension package was a set of 225/40R18 Nitto NT05s. The Nittos are much grippier than the OEM tires and really help the car feel sharp. The S.Tech, KICS 25mm spacer and Nitto NT05 combo completely changed the car's look - it was now so much meaner and proper looking, and in turn, I became a firm believer in Wagon Love. It's a simple combo anyone could do that really makes the car stand out that much more over stock. If you can't afford coilovers or new wheels, just be creative with what you've got and make the best of it. Again, keep it simple.
A few more key things were done to the car to help it look much better. The windows were tinted 15 percent all around by local Minnesota tint magician Kevin at Shaded Image. I was short on time and he had the whole car tinted in less than an hour, plus he gave me a great deal on top of it all. To go with the black windows, I wanted to black out the chrome trim along the windows and surrounding the grille. You can accomplish both in a few different ways. I chose to paint the front grille with matte black outdoor paint and order the base Lancer window trim, which comes black from the factory. The cost of the Lancer trim may not work for everyone (a few hundred dollars), so another way to black out that chrome trim would be use some electrical tape. You'll need a razor, patience and a steady hand, but if you do it right it can actually turn out pretty good. For the front grille, I had to put a few extra coats of paint on it to avoid pitting and chips from the road, especially with all the junk left over on the roads up here in Minnesota.
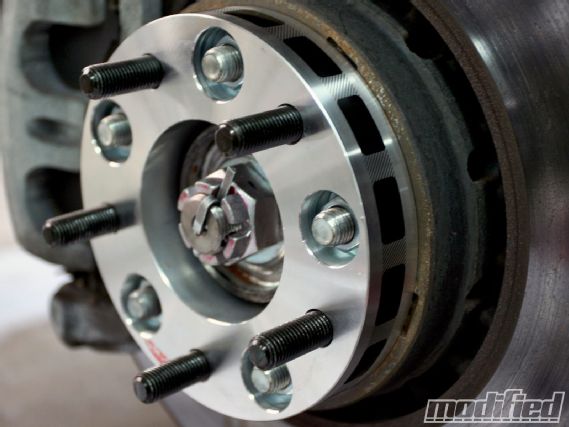 |
A close-up of the 25mm bolt-on Project KICS spacer. These will help the stock wheels fill up the fenders nicely.
|
A close-up of the 25mm bolt-on Project KICS spacer. These will help the stock wheels fill up the fenders nicely.
Every car has at least some potential; they all just need a little love. With a few simple yet effective mods, you can make good use of what you have. My interpretation of OEM+ is super simple, but I'm pumped with how it has turned out so far. The look of the car has completely changed - it's still clean, but it has some subtle aggressiveness that makes it special. From here, things are about to get real fun with Project Sportback. As I write this, the car is at AMS Performance getting some real power and some beta parts testing. I also have a set of 18x10 wheels sitting in storage. Hmm, how are those going to fit?