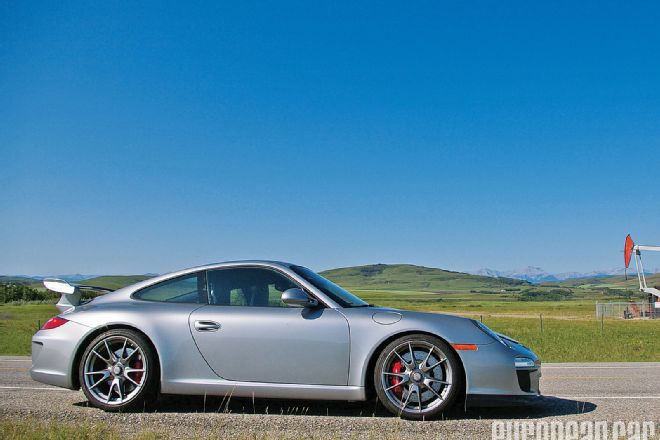
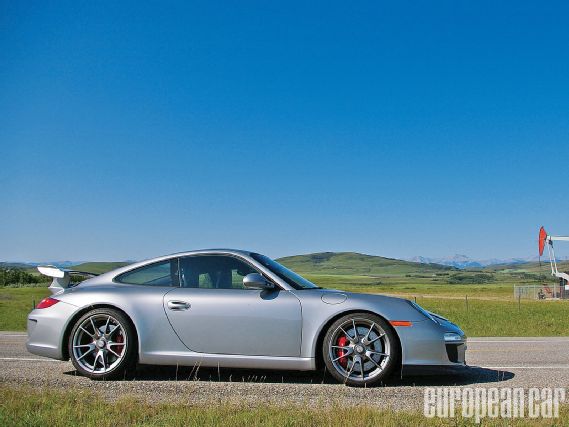
There it is: my first (and likely only) factory ordered Porsche 911, with beautiful GT Silver metallic paint and factory red calipers-more or less just as I always dreamed it would be. More than 25 years ago I decided that purchasing a Porsche 911 built at the factory to my precise specifications was something that I absolutely had to do during my lifetime. What I didn't know until recently was that my path through life would lead to Porsche's new and improved, and already infamous, 2010 GT3. Thanks for starting me in the right direction, Dad!
 |
Porsche GT3 T-Rex - Project Car Part 2 - Dem's Da Brakes
|
Porsche GT3 T-Rex - Project Car Part 2 - Dem's Da Brakes
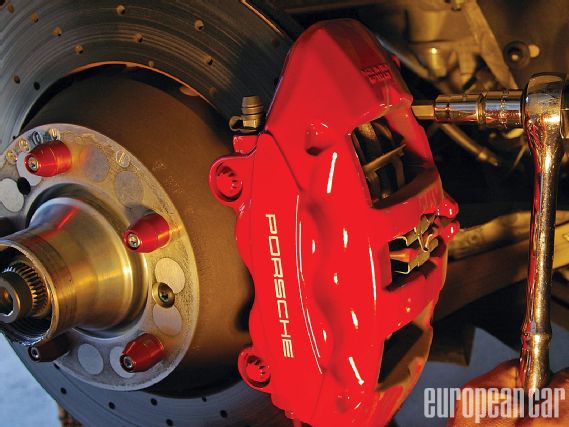
I noted in Part 1 of this series that I opted to go with the standard equipment cast iron brake setup for a couple of reasons. First, my past experience in 911s equipped with Porsche Ceramic Composite Brakes (PCCB) was not favorable in the pedal-feel department under hard-driving track conditions. Second, since this car would see some serious track time, the cost of consumables was definitely something to consider. Also, the "Big Reds" (terminology dating back to the standard brakes on the 993 Twin Turbo), made in Italy by a very well known brake manufacturer, had a certain purist and aesthetic appeal for modern Porsche models that I hadn't even considered messing with; putting them on my list of modifications was subliminally taboo. So my plan was to leave the Big Reds and new, updated two-piece rotors in place, and only upgrade the brake pads and fluid to aftermarket products with better track capability.
However, near the beginning of my project research and planning, Editor Bidrawn suggested that I contact the guys at Global Motorsports Group for some extra hardcore ideas. A long discussion with GMG co-owner Fabryce Kutyba yielded some superb suggestions, a few of which turned into plans for the suspension and safety areas (which you'll read about in future articles). But I found it intriguing when he also strongly recommended that I contact StopTech about its newly released Trophy Big Brake Kit lightweight brake upgrade for the 2010 GT3 (and 2007/8 GT3), as he believed it was an absolute must-have for track enthusiasts. Upgrade already-excellent brakes, really? Why?
When I read the full specifications for the Stoptech kit, my cherished Big Reds became a distant memory. StopTech's competition-level kit comes with lightweight STR-60 (six-piston) and STR-40 (four-piston) calipers. They feature the same basic metallurgy and design as the standard line of StopTech calipers with a removable stiffening bridge, but are engineered to provide a 17 percent reduction in weight without sacrificing stiffness or performance. Each caliper is forged aluminum, deftly machined for maximum weight savings, and comes with a hard anodized finish; there's no paint present to insulate "track-hot" calipers. Especially important to those of us who enjoy looking at our cars as well as driving them, the STR caliper finish contains no dyes or pigments, so it cannot fade or change color even after extended time spent at racing temperatures. In addition, all StopTech calipers are 100 percent leakdown and pressure tested to 2,500 psi at the factory. StopTech Trophy Sport Big Brake Kits for street driven vehicles include dust boots and anti-rattle rotor mounting hardware, as well as StopTech Street Performance brake pads. Trophy Big Brake Kits for racing, or for cars used nearly exclusively on the track, have no dust boots and allow full axial rotor float to prevent the pads being pushed away from the rotors due to hub flex under high cornering loads. All StopTech Big Brake Kits include caliper mounting brackets and hardware, and DOT-compliant flexible stainless steel brake lines. A very nice package to say the least.
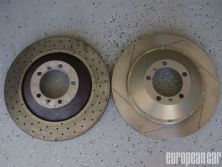
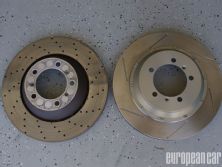
On the 2010 GT3, the OEM steel rotor specs are 380x32mm in front and 350x28mm at the rear. The Stoptech Trophy rotors measure 380x32mm front and 355x32mm rear. However, the StopTech rotors are 4.8 pounds and 1.8 pounds lighter, front and rear, respectively. The narrower annulus (rotor surface swept by the brake pad) reduces the amount of cast iron, and the aluminum hat is slightly larger in radius than stock. With the whole kit installed, the setup weighs about 11 pounds less up front and the about same as the OEM assemblies in the rear. Note also that the rear STR calipers are much more substantial than the OEM units they replace.
There are several advantages to the new StopTech STR design when compared to other options: strength, stiffness, reduced total unsprung weight over the cast-iron OEM setup, pure useable stopping power, track endurance, good value for the money, improved brake balance and caliper cooling, ease of pad replacement, and a wide variety of street and track pad choices. There is nothing on the market that's better in all of these categories, so let's get these installed and get to the track to prove it up.
The installation is pretty straightforward for the do-it-yourselfer, but only if you have some previous experience or a strong mechanical aptitude, confidence, and some patience. For first timers, it helps to have thoroughly read the provided installation instructions, and to have done some research on the subject. Turn the page for a brief run-through.
Trophy Big Brake Kits
For your track-day warrior
StopTech's Trophy and Trophy Sport Big Brake Kits using their new lightweight, anodized, forged calipers can almost certainly be ordered for your car. Based on the StopTech ST-60, ST-40, and ST-22 calipers, all existing StopTech big brake kits can be special ordered in Trophy or Trophy Sport format. Note that "Trophy Sport" kits are designed for street driven vehicles which retain dust boots and anti-rattle rotor mounting hardware, and include StopTech Street Performance brake pads and stainless steel brake lines. Typical prices range from $2,900 to $4,500 per axle.
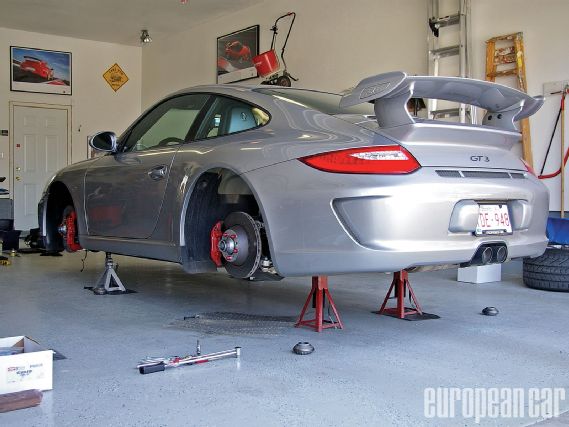 |
Loosen the centerlock wheel nuts with the OEM socket and 3/4-inch drive breaker bar, then lift the vehicle up onto four axle stands and remove the CL nuts and wheels.
|
Loosen the centerlock wheel nuts with the OEM socket and 3/4-inch drive breaker bar, then lift the vehicle up onto four axle stands and remove the CL nuts and wheels.
Upgrade
Cost Summary
MSRP for the 2010 Porsche GT3 Sport Trophy Kit is $7,490.
Six hours of labor is about $600.
 |
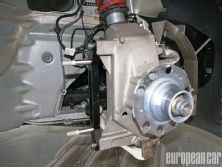
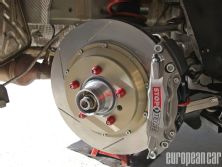
Remove the OEM calipers by first disconnecting the brake pad sensor wiring harness, then the OEM rubber hydraulic lines at the inboard location, and finally by loosening and removing the 10mm Allen head mounting bolts. Next, remove the OEM rotors by removing the two large Phillips head set screws.
|
Remove the OEM calipers by first disconnecting the brake pad sensor wiring harness, then the OEM rubber hydraulic lines at the inboard location, and finally by loosening and removing the 10mm Allen head mounting bolts. Next, remove the OEM rotors by removing the two large Phillips head set screws.
Installation Notes:
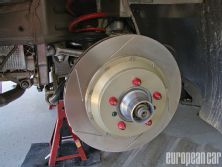
Thoroughly clean the new rotors with soap and water, followed by brake cleaner, to ensure the removal of the factory-applied rust inhibitor. (Required for shipping, the rust inhibitor will complicate your brake pad bedding procedure if not removed). Then transfer the factory red wheel lug "dummies" from the OEM rotors to the new StopTech rotors (torque ~12 lb-ft).

Installation Notes:
Install the new front calipers onto the supplied mounting brackets and use the new spacers for the rear along with the supplied new hardware. It is a good idea to pre-install the new brake pads into each caliper beforehand, as it makes the total job easier. However, it's much easier to install fresh pads in the new StopTech calipers than in the OEM calipers once they are in place. Install the new stainless steel brake lines first at the caliper and then at the inboard position. This ensures the proper line bend orientation.
Depending on pad choice, you may or may not be able to reuse the brake pad wear sensors. If not, you must cut the harness at about the halfway point, splice the two wires, seal the splice from the elements, and secure the wire so it will not interfere with the brake or suspension components. Check torque settings: mounting bolts (55 lb-ft), hydraulic lines (12 lb-ft), and rotor set screws (12 lb-ft).
Final Notes:
With the help of an assistant, carefully flush the brake fluid and bleed the hydraulic system per StopTech's instructions (www.stoptech.com/tech_info/wp_howto_bleedbrakes.shtml).
Lower vehicle and torque the CL wheels as per the owner's manual (370 lb-ft) with a very large 3/4-inch drive torque wrench. Then, finally, carefully follow the StopTech brake pad bedding procedure described for the appropriate pad type (www.stoptech.com/tech_info/wp_bedincontents.shtml). Upon original installation of a new brake system, and after the system has cooled from the initial bed-in, bleeding the calipers again so as to completely flush them with new brake fluid may further improve the pedal feel.
First Impressions:
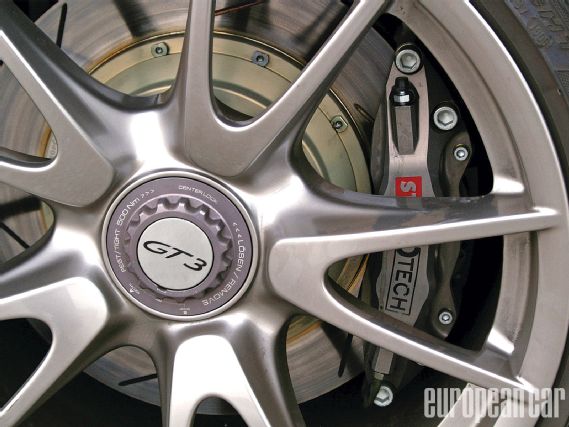
With an extremely firm brake pedal underfoot (racecar hard, in fact), slowing or stops at street and highway speeds are smooth, simple to modulate, and completely effortless. The lighter brake hardware up front is noticeable at speed, giving finer feedback through the steering; this should be quite helpful at the track to interpret the grip during high-g cornering. The most noticeable result of the upgrade, however, is the increased rear bias: It is now possible to "feel" the rear brakes truly working. Finally, the new setup also really "looks da' business" behind the Porsche factory centerlock aluminum wheels, completely understated, yet rather menacing. So the calipers aren't red-but what's not to like?
 |
Porsche GT3 T-Rex - Project Car Part 2 - Dem's Da Brakes
|
Porsche GT3 T-Rex - Project Car Part 2 - Dem's Da Brakes
Next we'll take Project T-Rex to the track and put our new Stoptech setup to the stopwatch using our Traqmate GPS system. We'll also have some trick new pieces to install, track test, and show off as well. The evolution continues...