
Sometimes a brush with greatness will show you where you need to go. Having spent plenty of time behind the wheel of Project GTI to learn its various strengths and weaknesses, it was time at the wheel of a 997 Porsche GT3 that inspired us to make further improvement.
Driving a supercar with plenty of power, wide tires, great brakes and sports suspension will obviously leave an impression, but it was the little things that we really noticed. For example, it was the GT3's sharp responses that got our attention. Little things like shifting gear, turning into a corner, or feathering the throttle on an exit made us decided to incorporate these details into our humble project GTI.
Fortunately, some of the best upgrades are also the cheapest. After a call to our friends at 42 Draft Designs, we soon had the first changes in hand: cable-end shifter bushings.
These might not be sexy but like almost everything on a street car, there's some in most linkages. So every time you move the shift lever, those little rubber bushings on the end of the cables will flex and make the experience less sharp. This happens every time you change gear, so improvements in this area will have a long lasting effect.
The rubber bushings serve to soften the action of moving the transmission from one gear to the next. It's done in the interest of making things smooth and vibration-free. But as driving enthusiasts, we want sharp, purposeful shifts. Fortunately, it's relatively cheap to achieve this result, with the new bushings starting from $35 a set, depending on your year and model.
So we headed to our friends at New German Performance for a quick installation. As it happens, NGP also recommended teaming the 42DD bushings with shifter bracket bushings from Integrated Engineering - these do a similar job where the shift cables attach to the bracket.
It sounded like more of a good thing, and similarly inexpensive at $29.99, so we threw them into the mix. After a quick and painless install, we were eager to experience the difference these small pieces of CNC'ed aluminum and brass would make. Quite simply, they do exactly as advertised, removing the slop and flex from the system, making gear selection sharper and more precise. They also seemed to compliment our Forge Motorsport short shift kit better than the stock rubber bushings.
While we're obviously nowhere near every aspect of that GT3, these simple, effective and inexpensive upgrades from 42 Draft Designs and Integrated Engineering are a no-brainer for anybody with a modern VW.
Applications range from the Mk4 (or earlier in some cases) up to the most current GTI and Golf R. Furthermore, most 2002.5 and newer VW/Audi models with a transversely mounted engine (such as the GTI, Jetta, Passat, CC, TT, A3 and more) can benefit from the bushing upgrade.
Next, we'll apply a similar concept to the suspension with subframe bushings from Tyrolsport. Stay tuned for more!
*It should be noted that although the installation shown covers the 2006 GTI 2.0T, there are variations from year to year and between each transmission. Some versions include more parts or processes, but the installation is generally similar and results will be the same - an improvement in feel and precision of shifting. When in doubt consult a professional...
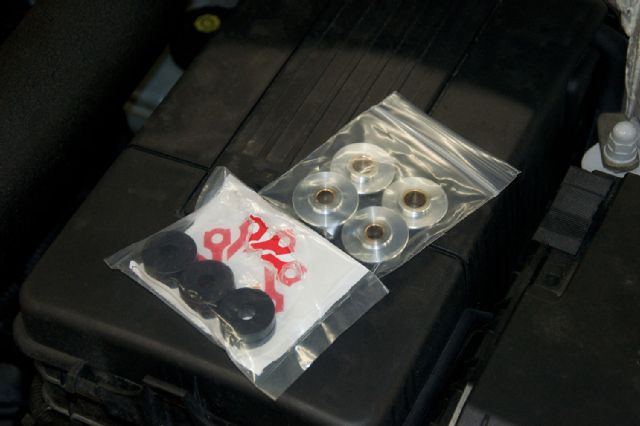 | The 42 Draft Designs and Integrated Engineering bushings are simple and inexpensive. (The IE bracket bushings, shown here in black, are currently only available in silver)
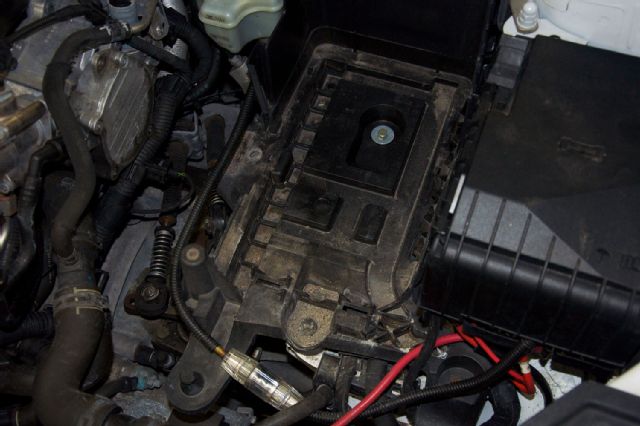 | After removing your intake system, remove the battery by first disconnecting the ground, then power cables with a 10mm wrench. Remove the 13mm battery hold-down and carefully remove the battery. This exposes the three 10mm bolts that hold the battery tray in place. Once those have been removed, pull the back of the tray, rotate to the left and upwards to remove
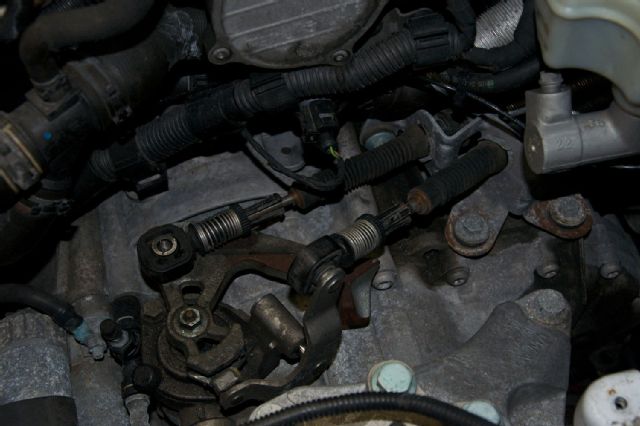
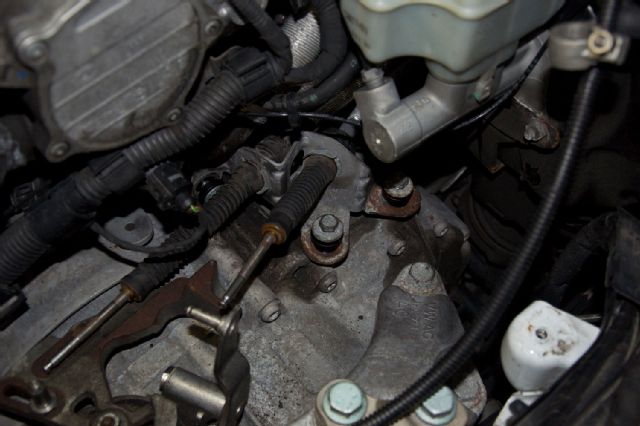
 | Removing the battery tray exposes the clips that hold the shifter cables to the transmission. Use a small pick tool or screwdriver to lift the tab and release all three clips that secure the cables. They are small, don't lose them!
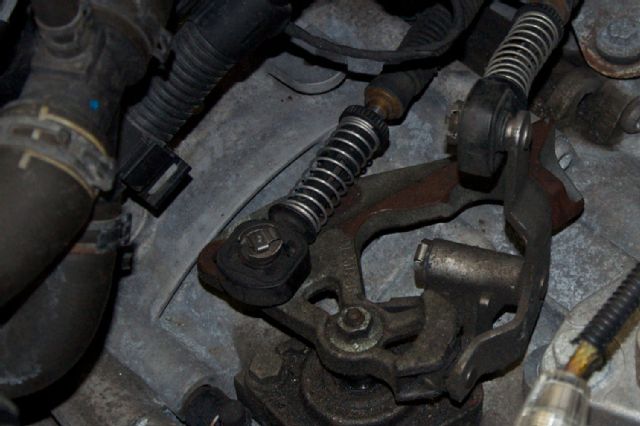
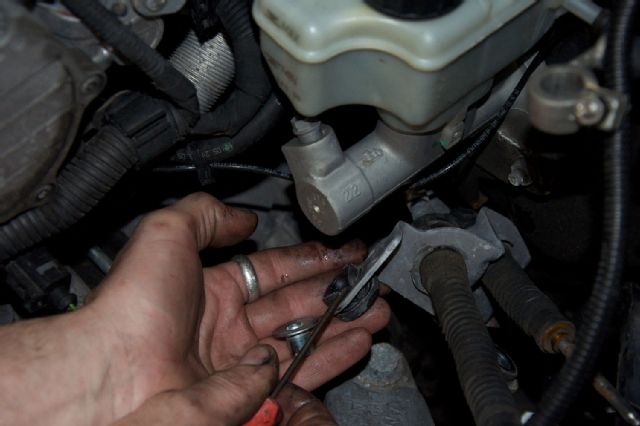
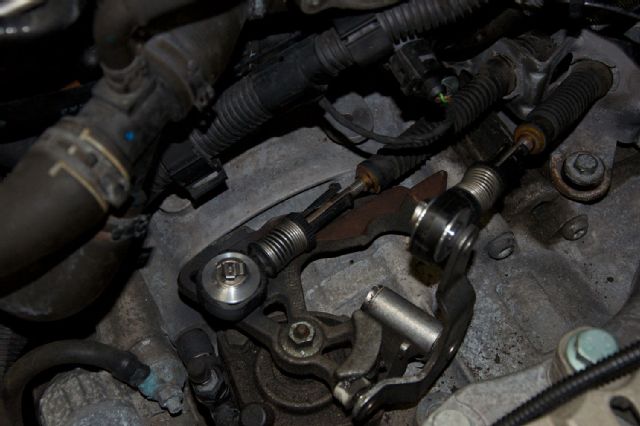
 | Push the sprung ring that's on the cables to the end of the cables. Once compressed, rotate slightly to lock into place. This disconnects the cable end from the cable itself. Remove the two ends and set them aside
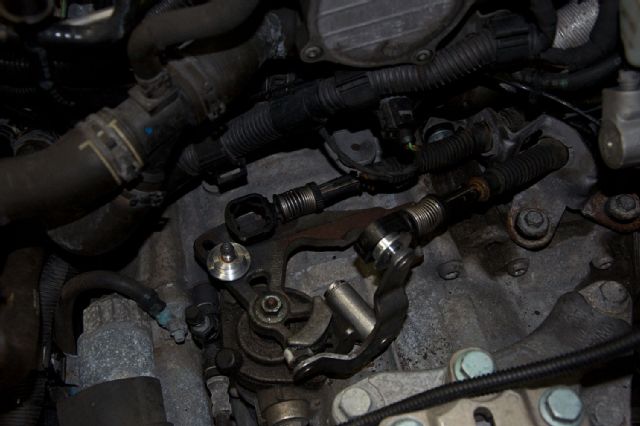
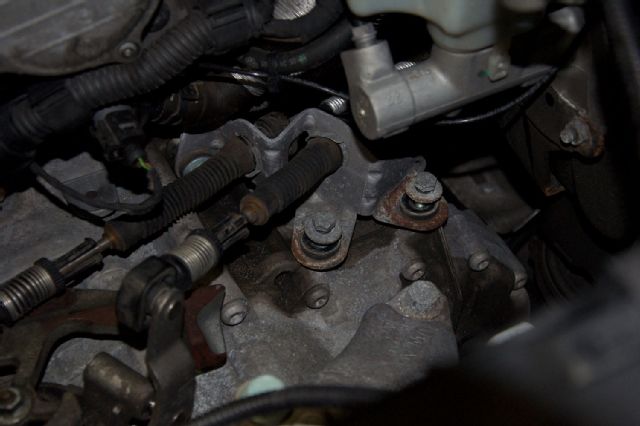 | Remove two 13mm bolts and one 13mm nut that hold the shifter cable bracket into place
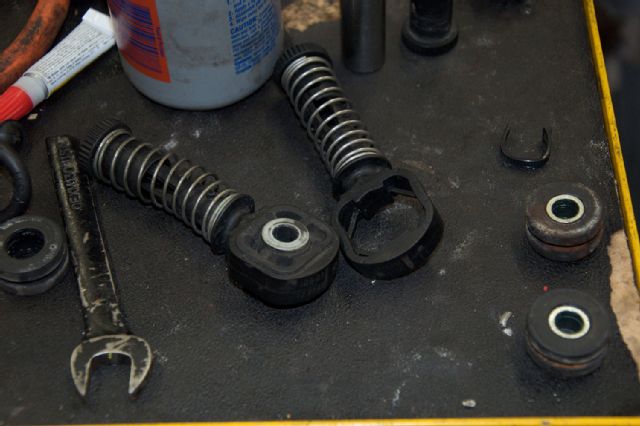
 | Remove the steel sleeves and rubber bushings from the bracket using a hook tool
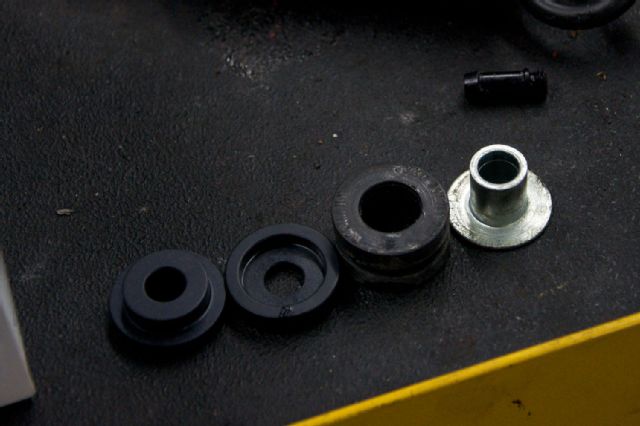 | Side by side, the two-piece Integrated Engineering bushing versus the stock parts
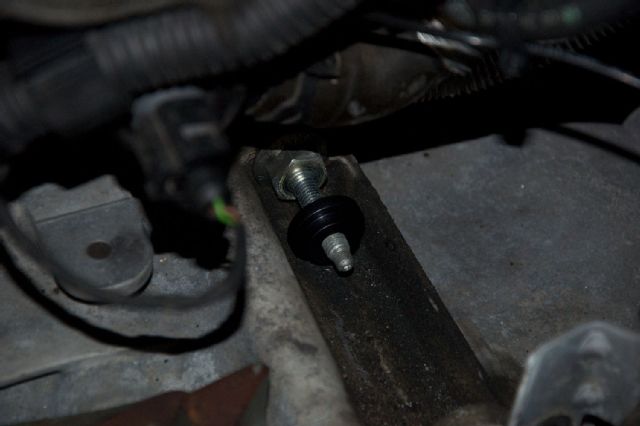 | Start fitting these IE bushings by putting a male side onto the side bracket stud. Put the bracket into place and then the female bushing. Start tightening the nut but not fully. This will hold things in place but allow movement to finish the other bushings
 | Carefully position the male bushings on the bottom, and females on top. Then start the bolts to attach the bracket. Be patient, it can be a pain. Take your time and don't cross-thread the bolts. A spot of anti-seize is helpful
 | Once everything is aligned, torque the bolts and move onto the shifter cable ends
| Push the metal inserts out of the bonded rubber
| Once everything is aligned, torque the bolts and move onto the shifter cable ends
| Push the metal inserts out of the bonded rubber
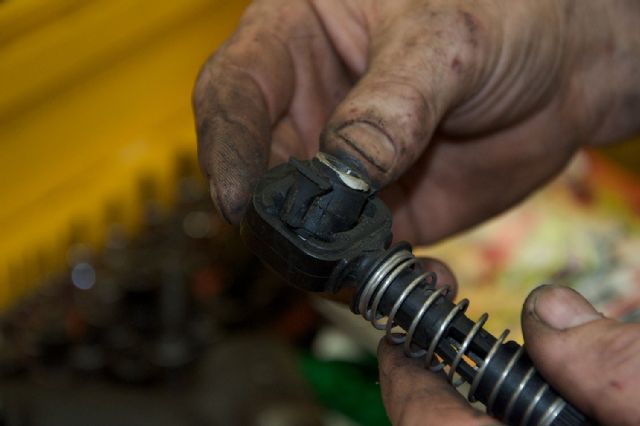
 | Using a hook tool, pick out the rubber bushing from the plastic end of the shift-cable. The plastic cable ends are pretty strong but don't use too much excessive force and don't stab yourself!
 | Side by side, we have one cable-end ready for the 42DD bushings and one with the stock bushing in place
 | Use graphite lube on the shifter lever pins to make the process easier. The 42DD bushings can be a tight fit but are machined for zero movement. The pins are difference sizes so you can't mix them up. Make a sandwich with the bushings and cable-end (bushing/end/bushing), then put the cable-end back into position
 | Once the bushings are in place, replace the clips, but don't release the sprung cable-ends! You need to align the shifter inside the car first
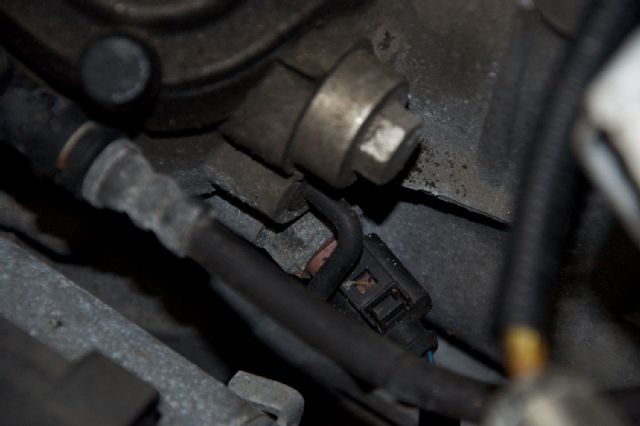 | With the transmission in neutral, push down on the shift mechanism. Rotate the small black rod (shown here) up and over. Then jiggle it in. It will lock the mechanism into the down position
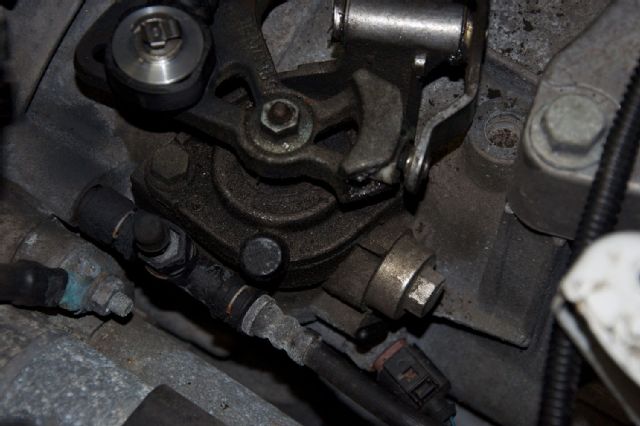 | The shifter mechanism locked into place - note the position and location of the black pin
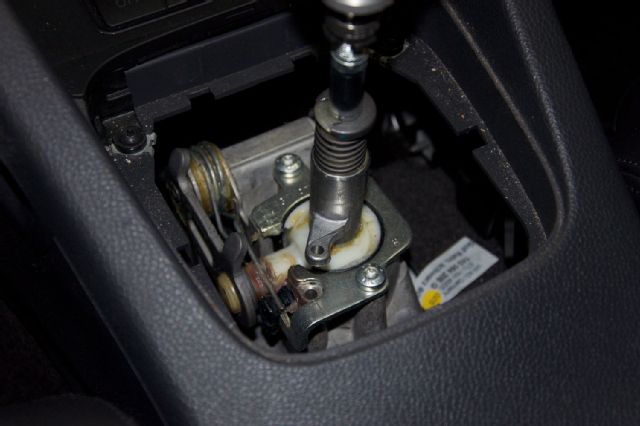 | Inside the car, lift the shifter surround and note the ring on the shifter and the bracket - align these
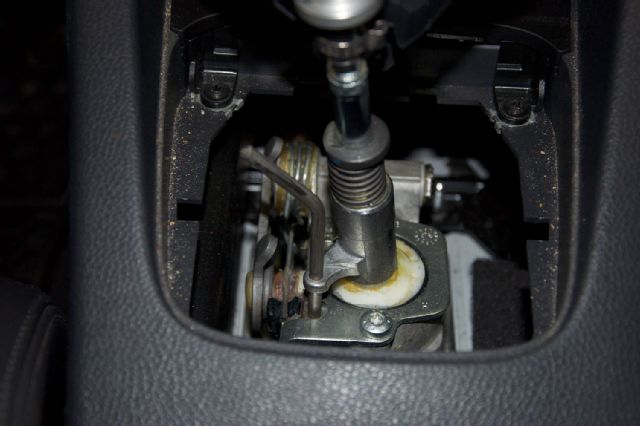 | Using the proper VW alignment tool (shown), or a similarly size nail, lock the shifter into place
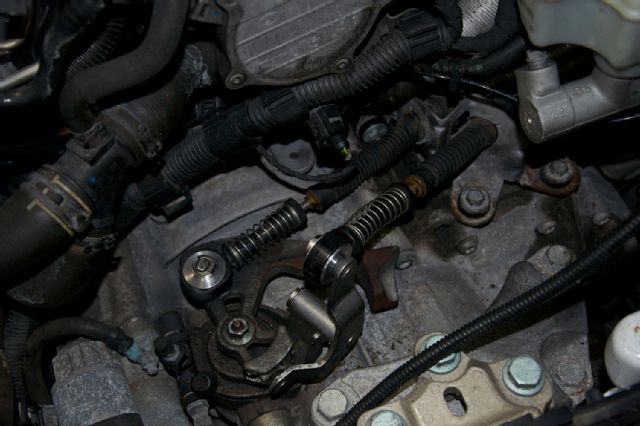 | Under the hood, rotate the sprung shifter ends and allow them to pop into place. The grooved shifter cables and shifter cable ends are now locked into place and aligned. Re-fit the battery and intake, then enjoy the new shifting precision