 | Axles & CV Boots - Wrenchin'
Axle Tech
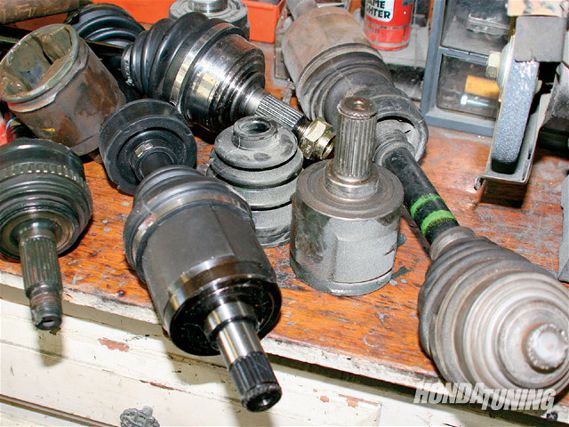
Axles (also known as driveshafts) transmit torque from the transmission to the wheels. Without them, you'll go nowhere. Sometimes both of them transmit torque-like in limited-slip differential applications-the rest of the time only one does. Either way though, they've all got a pair of CV (constant velocity) joints-one for each end. CV joints are a collection of bearings and cages that allow an axle to rotate in sync with the transmission and deliver power to the wheels. They're what allow an axle to change angles and vary its lengths as the wheels turn and the suspension travels up and down. A CV joint's internals are protected inside a layer of grease that's held inside the joint by a flexible, rubber boot. The boot keeps dirt, grime, and water out to protect each moving part. But rubber boots deteriorate over time, eventually cracking and leaking. Once moisture and dirt get into the joint and grease makes its way out, an axle's days quickly become numbered. The question then becomes: Do you spend the money on a new axle for a quick and easy swap, pay someone else to rebuild it, or rebuild it yourself, saving some cash but gaining the satisfaction that you did the job yourself? Buying a new axle almost never makes sense. Unless yours snaps in half, twists, or you've stripped the shaft's threads, most any axle can be rebuilt. Typically, it costs about $100 to have an axle rebuilt, or you can do it yourself for half that. There are a few ways to know whether or not you're due for an axle repair. The most common signs are splattered grease on wheels, brake calipers, or steering components. Act fast and situations like these typically involve no more than a CV boot swap. Clicking sounds or metallic crackling noises while turning, accelerating, or braking, often times mean the axle needs to be professionally rebuilt or possibly replaced.
But Which One Is Bad?
Find an open parking lot and drive in a circle at about 10 mph while slightly applying the brakes. Have a friend stand in the center of the circle, listening for any clicking sounds that might be coming from an axle. Be sure and circle in both directions in order to narrow down which axle is the culprit. Of course, if your rim's covered in grease you can skip this step altogether.
The Right Tool For The Job
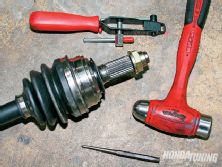
You'll need a few tools to properly rebuild an axle. They include:
* Bench vise * Marker * Wire cutters * Snap ring pliers * Electrical tape * Boot band tool * Hammer * Small punch * Shop rags * And whatever tools you need to remove the axle from the car
How To Do It
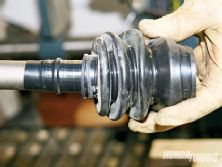
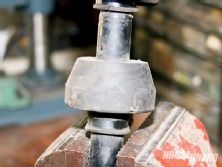
* Once the axle's removed from the car, clamp it into a bench vise with its inboard side (transmission side) facing up. Cut off the metal boot bands with wire cutters or metal cutting sheers.
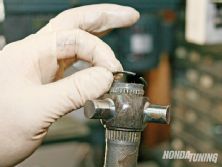
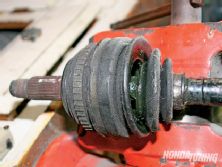
* Slide the boot back, wipe off any grease, and mark each inboard bearing with a paint pen or a marker. Number each bearing's location on the inboard joint housing and the bearings themselves. Also, remember which direction the bearings face.
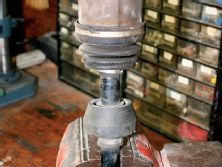
* Carefully remove the inboard joint housing and bearings without dropping them
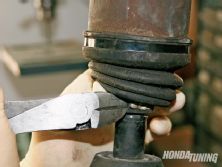
* Use snap ring pliers to remove the stopper ring.
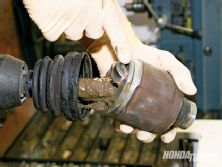
* Slide the spider off and the inboard boot, followed by the dynamic damper and outboard boot. By removing the dynamic damper, you can pull the outboard boot off from the inboard side, which means you'll need to take apart fewer things on the outboard side.
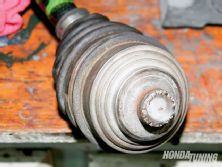
* Clean and inspect the outboard joint housing for faulty movement, cracks, and wear. If its surface is rough or has excess play, it's bad. If not, move on to the next step.
* Clean the axle and each of its components. Wrap its inboard splines with electrical tape to prevent damage to the inboard and outboard boots. * Slide the new outboard boot, dynamic damper, and new inboard boot onto the axle. Remove the electrical tape and install the spider and stopper ring.
* Reinstall the bearings in their original positions on the spider using your marks. Clamp the axle in an upright position with the inboard side facing up to prevent the bearings from falling off.
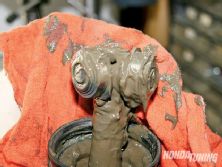
* Pack the inboard joint housing with grease and reinstall over the bearings. Slide the inboard boot into place.
* Install the replacement boot's bands onto the boot starting with the large end first. Remove any slack from the band by hand and hold it in place.
* Mark the band approximately 10-14 mm from the clip. This will prevent you from over-tightening it.
* Using the boot band tool, tighten the band until your mark meets the edge of the clip
* Raise the boot band tool 90 degrees and use a center punch to set the clip and hold the band in place.
* Cut the band with wire cutters or metal cutting sheers approximately 5-10 mm from the clip. Secure the end of the boot band by hammering it down over the clip.
* Repeat steps 11-15 to install the small end's boot band and steps 10-15 for the outboard joint side, and you're done