
Installing an aftermarket coilover kit - like we've done this month with Project RX-8 - is a job that any enthusiast can do in his home garage with basic hand tools, a floor jack, a couple jack stands and access to a shop manual. It's really just a matter of removing a few nuts and bolts that connect the OEM shocks/springs to the strut towers and lower control arms, and then swapping in the aftermarket assembly. It's one of those DIY jobs that's both relatively easy and extremely satisfying because it changes your car's look and feel so much.
 |
DIY Wheel Alignment - Tech Talk
|
DIY Wheel Alignment - Tech Talk
But once you've done this, you'll need to do a four-wheel alignment because in the process of installing that aftermarket coilover kit, you've no doubt lowered your car's ride height a fair bit. This reduction in ride height causes the top of each wheel/tire to angle in (negative camber) and the front of each wheel/tire to point in (toe-in) or out (toe-out). Too much negative camber, and especially too much toe, will cause rapid tire wear (not to mention unpredictable handling), so you either need to drive your car to the nearest alignment shop for a professional 3-D laser alignment and the $100+ cost that comes with it or acquire a few simple alignment tools and do it yourself. Your DIY alignment may not be quite as precise as a pro alignment, but you'd be surprised how close you can get.
The first time you attempt a DIY alignment, you'll likely end up spending a few hours working away at it because changes to a wheel's camber setting also results in a change to its toe setting. So you can end up in a bit of a vicious circle, but with experience you'll start to better understand the relationship between camber and toe on your vehicle and as a result get to the desired camber and toe settings with fewer adjustments.
 |
This is a good example of someone leveling the garage floor in preparation for a DIY alignment.
|
This is a good example of someone leveling the garage floor in preparation for a DIY alignment.Source: elantraclub.tripod.com
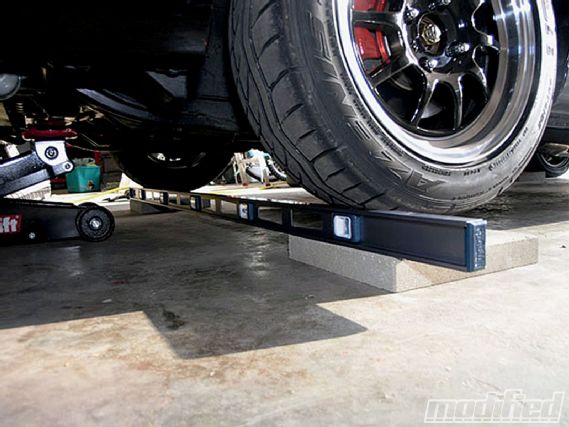
The first thing you'll need for a DIY alignment is a level piece of ground so that your alignment measurements are accurate. For most of us, that'll mean the concrete floor in our home garage, and in many cases this will be a sufficiently level surface for an alignment. However, if you plan to do a lot of alignment work then you should consider investing in a set of corner scales with adjustable feet and built-in bubble levels, since these will allow you to set up a perfectly level surface anywhere you take them. A lot of serious racers have a set of corner scales and ramps (to get on and off the scales easily) with them at the track for this very reason.
Once you've found some level ground, you'll need a way of measuring camber and toe. To measure camber, or the degree of deviation between the top edge of the tire and a true vertical line running through the center of the wheel, you'll need to purchase a camber gauge. These come in all shapes and sizes, as well as prices, so do a little research to determine which is best for your needs and budget. One feature I'm particularly fond of is the ability to zero the gauge, which allows you to get an accurate camber reading even if you're not on a perfectly level surface. Set the gauge against a L-square on the floor you'll be doing the alignment on and zero the gauge so that when you mount it on the wheel it'll give you an accurate measurement. At the opposite end of the spectrum, you can "build" your own camber gauge using a plumb bob and a measuring tape (plus some math to convert to degrees), or you can build something slightly more elaborate like the ghetto fabulous gauge (pictured on the next page) that my dad built me years ago. These days a lot of the DIYers are using the Craftsman Digital Torpedo Level, which is a digital level that converts to degrees so it can easily be adapted to use as a camber gauge.
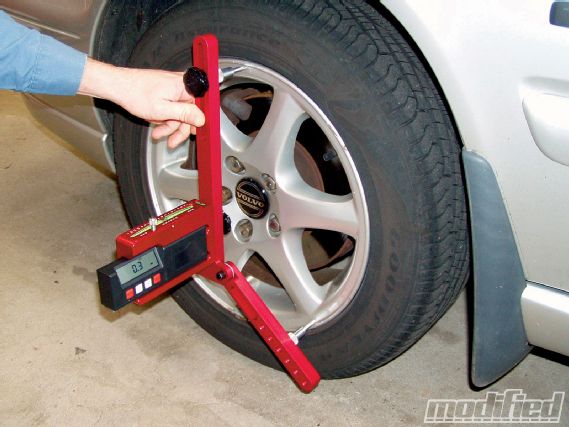 |
Whether you buy a digital camber gauge or build your own, being able to accurately measure camber is a must have in the DIY alignment toolbox.
|
Whether you buy a digital camber gauge or build your own, being able to accurately measure camber is a must have in the DIY alignment toolbox.
Once you've measured camber, adjusting it is a simple matter of crawling under the car, cracking loose whatever camber-adjustment hardware your car is equipped with and moving the adjuster in the desired direction. In the case of our RX-8, there are factory camber bolts on all four corners with a wide range of adjustability, but on a lot of imports you'll need to install camber adjustable upper ball joints or control arms because there's no factory adjustable hardware for camber. Once you have the camber dialed in to your desired setting, it's worthwhile paint-marking the fastener (with a paint pen from your local hardware store) once you've tightened it so that you can monitor it for any slip. The last thing you want is a slipping adjuster that allows your carefully dialed-in alignment to fall out of spec.
 |
DIY Wheel Alignment - Tech Talk
|
DIY Wheel Alignment - Tech Talk
Now it's time to adjust toe, or the difference in track widths between the leading and trailing edges of the tires. If the track is wider at the front, the wheels are toed-out; if the track is narrower at the front, the wheels are toed-in. Toe-out on the front wheels is an effective way to improve turn-in response, but too much toe-out will make the car feel darty and can contribute to rapid front tire wear. For autocross and track day applications, 1/16-inch of toe out on each front wheel or a total of 1/8-inch front toe is a good starting point. Toe-in is often the desired setting on the rear of a car, since this will give the rear added stability during aggressive cornering and help reduce any unwanted oversteer. But ultimately you'll need to do a little experimenting to find the optimum camber and toe settings for your car, driving style and form of competition. Arm yourself with a probe-type tire pyrometer and collect tire temp data obsessively and you'll really start to learn a lot about how alignment can impact your tires' performance.
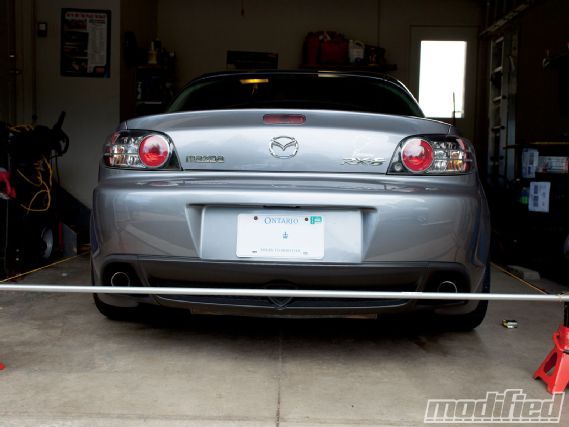
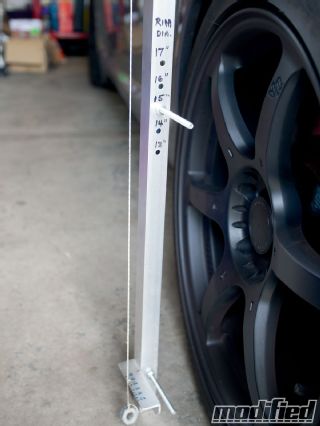
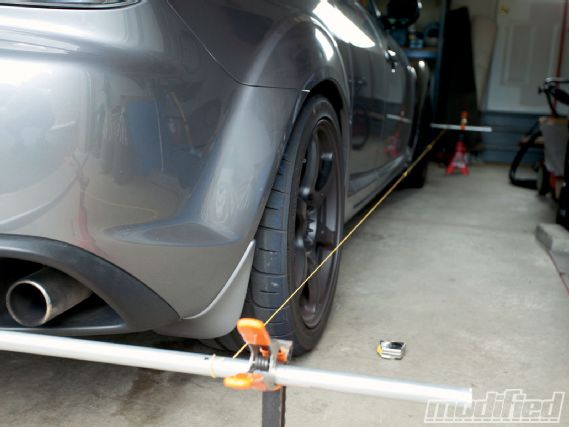
To measure toe, you can either use toe plates, which measure total toe across the front and rear tires, or set up a string box to measure toe individually at each tire. Toe plates are a quick and easy way to check toe, but obviously it's preferable to be able to measure and adjust the toe accurately at each wheel, so setting up a string box is the preferred method. As you can see from my string box setup, building your own is a simple matter of buying a couple pieces of conduit, drilling a few holes and running equal lengths of string between them. This ain't rocket science!
 |
DIY Wheel Alignment - Tech Talk
|
DIY Wheel Alignment - Tech Talk
To square up your string box, measure out from the center cap of each wheel and make sure the distance to the string is equal from each front and rear wheel. Now you can measure the distance from the string to the leading and trailing edges of each wheel to determine toe. If the measurement is longer at the front of the wheel than at the back, then you've got toe-out; if the measurement is longer at the rear of the wheel than the front, you've got toe-in.
All cars have factory toe adjusters on the rear and adjustable tie rod ends on the front, so all you need to do is jack the car up, crack them loose and then move them in the direction required to set your toe alignment where you want it. Just remember to center the steering wheel before adjusting the front toe and to make front-end adjustments without moving the front wheels or steering off center. Otherwise, you'll end up with a steering wheel that's off center when you're driving in a straight line, and that's not going to impress your lady friends or your engineer buddies.
 |
A string box is a simple DIY tool to make and a very effective way to measure toe. Make sure the string runs through the horizontal centerline of each wheel.
|
A string box is a simple DIY tool to make and a very effective way to measure toe. Make sure the string runs through the horizontal centerline of each wheel.
That's really all there is to a DIY alignment. For more information and even some DIY videos, put the magic of fiber optics to use by applying your Google skills. No matter what tools and gauges you use, if you take the time to set up a level surface and a square string box, you'll be amazed by just how accurate an alignment you can achieve and how much of a difference this will make in the steering and cornering response of your car. It's time well spent and a great way to get to know your car more intimately, and we all want an intimate relationship with our car, right?