When you’re dealing with an older body style, new-to-you truck, there’s bound to be a handful of modifications already performed on it. When you take ownership, it’s up to you to determine whether you can run it as is, or if everything done to it needs to be undone— rip it all off and start over. If you’re lucky, you will find a truck with modifications that can be used as a base to build on, and continue the customizing right where the last guy or gal left off.
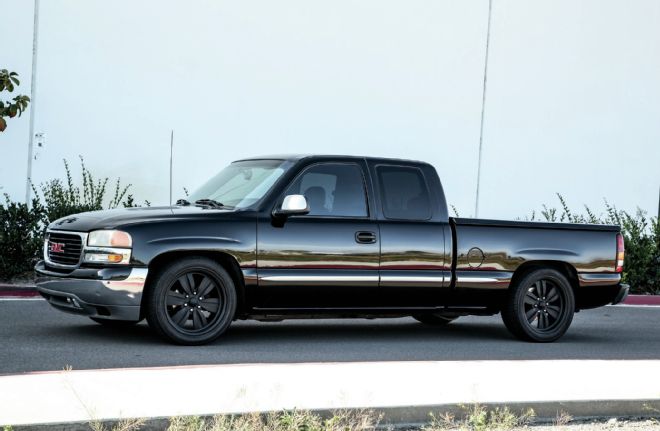
When we picked up a ’02 GMC Sierra 1500 a while back we gave it a good examination. Suspension wise, it had been lowered with a Belltech 2/4 drop and had an Air Lift Ride Control rear load ’bag kit installed. The lowering components were still in great shape, but the ride was definitely soft and by this point there were mismatched shocks installed. We were happy with the stance (for now), but really wanted to get some performance out of the truck, namely with cornering and braking.
After plenty of Interweb research and a few phone calls we had our parts list finalized. For a serious brake upgrade that didn’t break the bank we went with 14-inch Alumasport calipers and rotors from Baer. To tighten up the suspension we first added adjustable shocks from QA1. They now have part numbers specifically for the sport truck market to make things much easier for us to order. We also added giant sway bars from Hellwig onto both the front and rear of the truck. For rolling stock, we went with the 22-inch Milners from U.S. Mags. We figured it was a good fit since it is part of their Tuckin’ series, and we’re big American Graffiti fans. Finally, we ordered up a set of Conti Sport Contact 5 tires from Continental.
We spent the day in the Truckin Tech Center performing the install while New Century Tire mounted and balanced the new wheel and tire combo. After bedding and seasoning the brakes, we did some serious cornering through our industrial complex. The truck now acts like a true performance machine. There were no rattles or rubs to speak of, and we still have a smooth ride headed down the highway. Check out how we did it and check the websites in the source box for more information.
| Used Lowered 2003 Gmc Sierra 1500
Although our ’02 Sierra looks decent from this angle, the handling and braking performing left a lot to be desired. Don’t worry, those freshly powdercoated Centerlines are keepers and will find a new home soon.
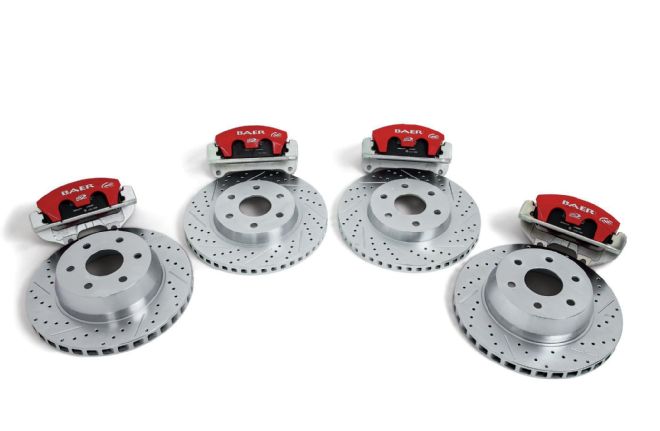
| Baer Brake Kit
Baer’s front and rear 14-inch AlumaSport Brake System features a two-piston caliper mounted to a one-piece slotted, drilled, and zinc plated rotor. The calipers come complete with everything needed for the install, and are designed to reuse the factory hoses. Best of all, the replacement pads are readily available (’05 Chrysler 300c PN), and the addition of the Baer system does not change the track width of the truck.
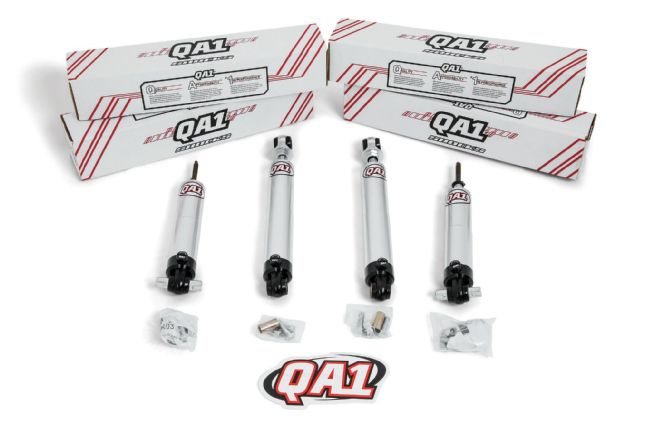
| Qa1 Shocks
The Stocker Star single adjustable shocks from QA1 are a lightweight aluminum non-coilover shock and are available for a variety of stock mounting applications with multiple valving options. The part numbers we used were TS-507 and TS-801.
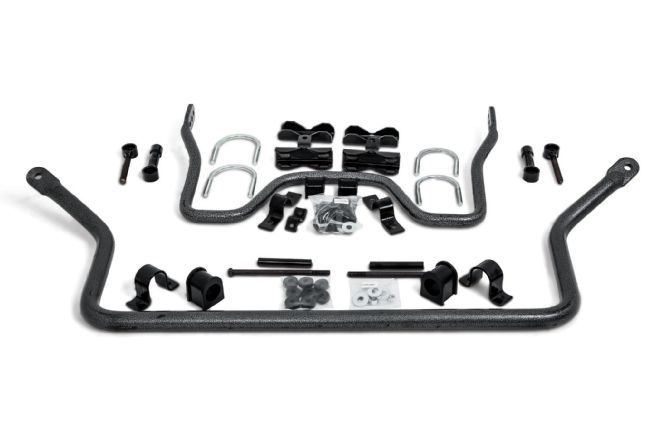
| Hellwig Sway Bars
Hellwig sway bars are designed to reduce body roll and greatly improve cornering traction. They’re made of high-quality 4140 chromoly steel and come complete with high-tech polyurethane bushings. The 7702 front sway bar is a 1⅜-inch diameter while the 7800 adjustable rear uses a 1⅛-inch bar and works great with lowered trucks.
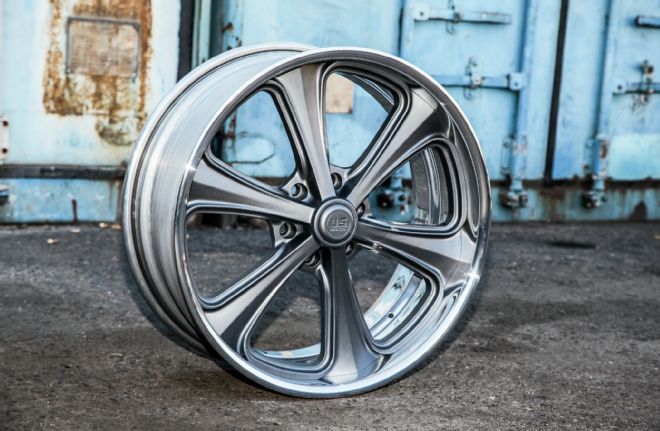
| Us Mags Wheel
U.S. Mags began in the mid ’60s when racing legend Parnelli Jones and his childhood friend Art Hale Sr. started up a wheel company called U.S. Mags. Over time, this and other brands were consolidated into the American Racing brand, but a few years ago the Hale family and MHT brought U.S. Mags back. The Tuckin’ Series are made just for our style of trucks and the six-lug Milner features 22-inch cast centers welded into spun forged outers. We chose a matte Anthracite center finish with polished outers. The front width is 9 inches with a 6.25 backspacing and the rears are 10s with 6.75 inches of backspacing.
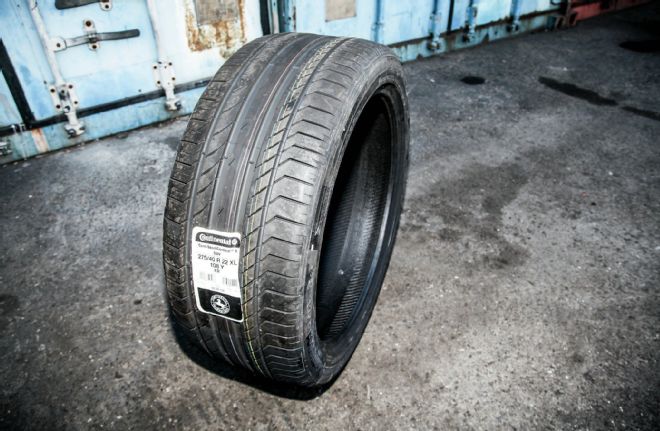
| Continental Contr Sport Tire
The Continental Conti Sport Contact 5is a premium ultra high performance tire designed to combine short braking distances and solid cornering traction with fuel efficiency and long tread life. Just what the doctor ordered. We used 275/40R22 in the front and 295/40R22 in the rear.
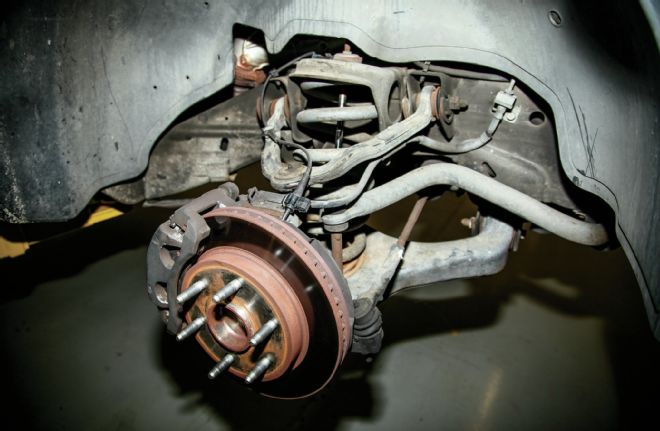
| Front Suspension Will Belltech Drop Coil
Our front end was bone stock with the exception of the Belltech 2-inch drop coils.
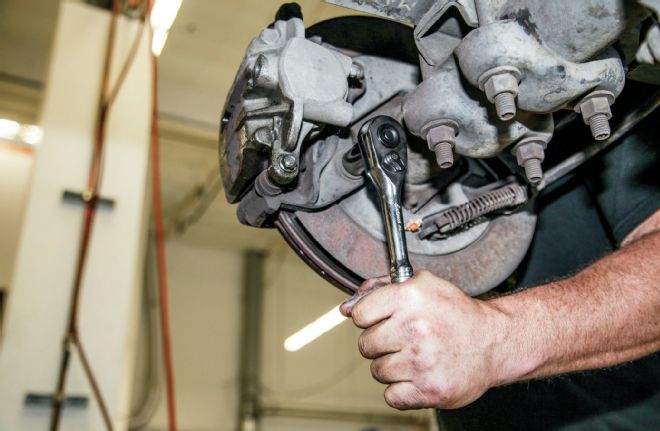
| Brake Removal
We began by removing the brake hoses from the calipers, then unbolting the calipers and removing them along with the stock rotors.
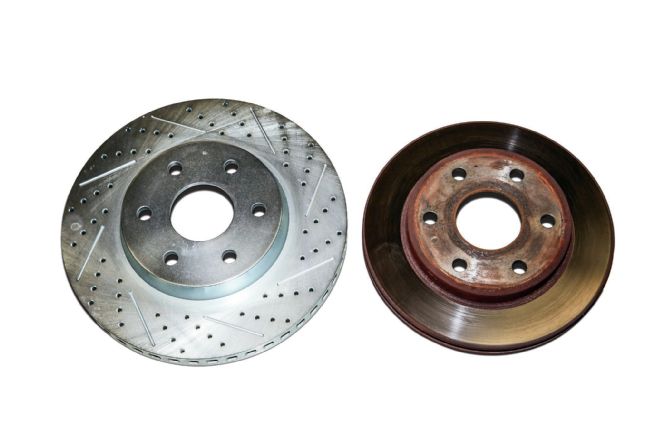
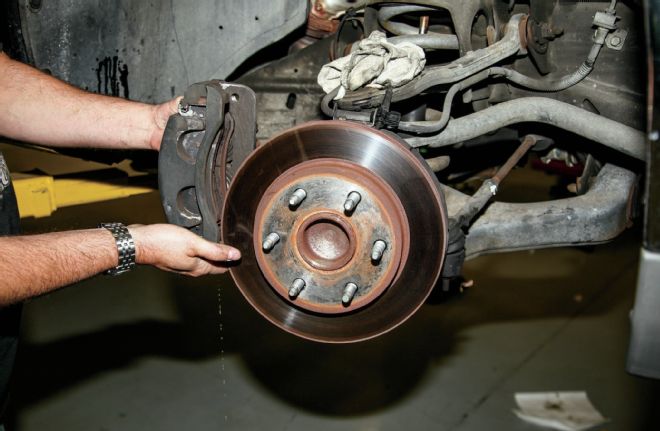
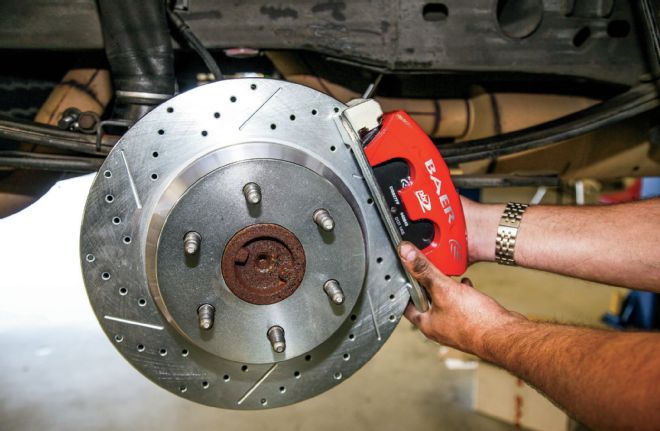
| Brake Comparison
Upgrading to the 14-inch Baer rotors has its obvious advantages.
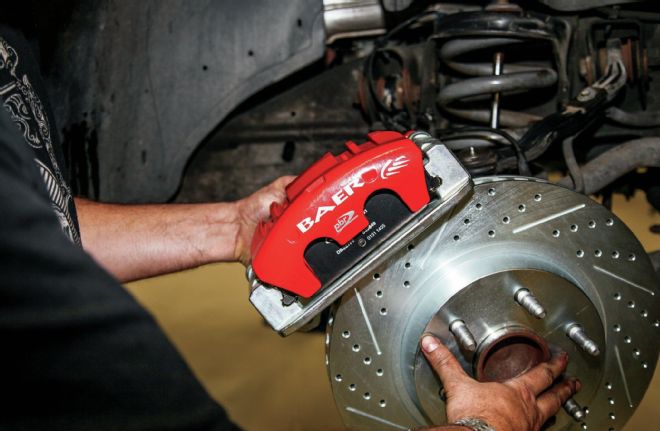
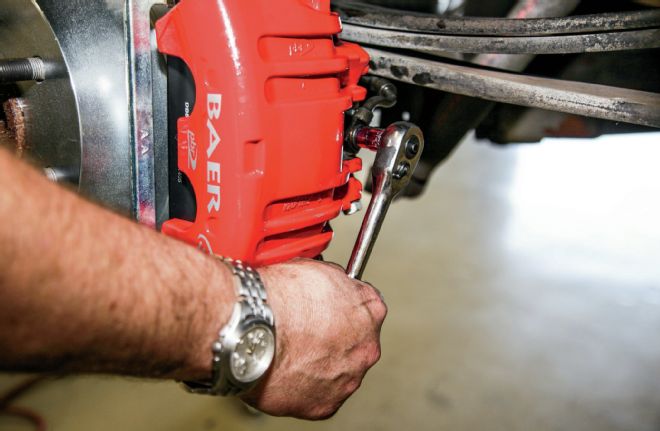
| Baer Brake Install
The Baer AlumaSport caliper comes ready to install and we held the rotor in place while we slid the caliper on and tightened up the two stock bolts.
| Brake Hose Install
Using new copper washers, the brake hose was installed onto the new caliper.
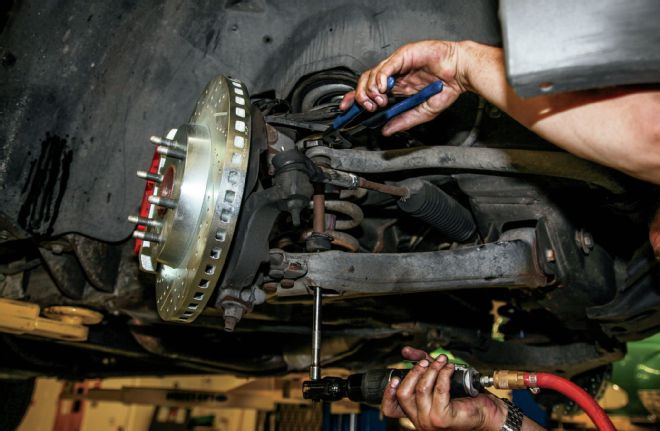
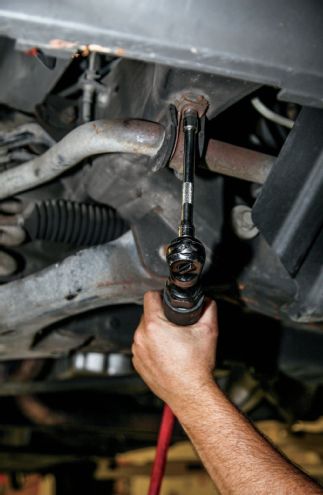
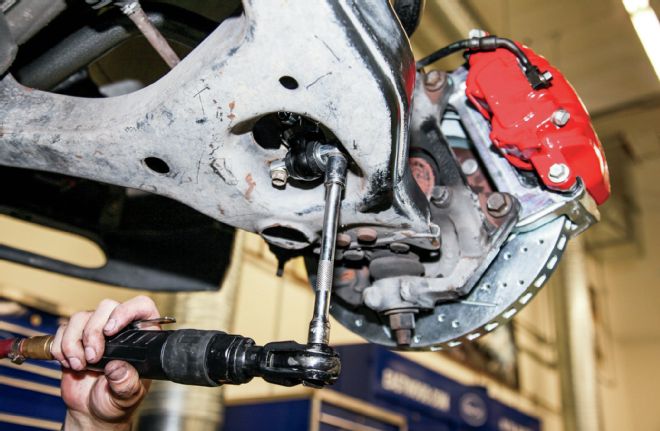
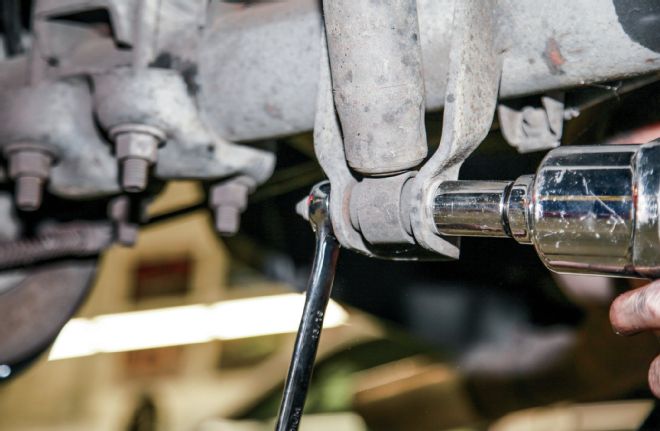
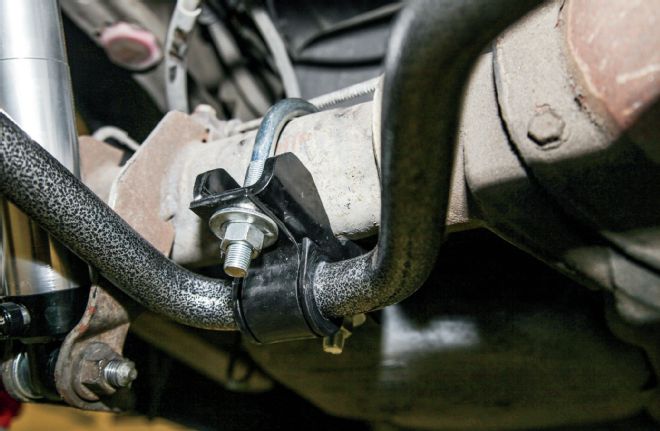
| End Link Bolt Removal
Moving to the sway bar, we held the top nut while we buzzed out the endlink bolt.
| Swaybar Removal
Next we removed the frame mounts. We also removed the bottom bolts holding the skidplate in place.
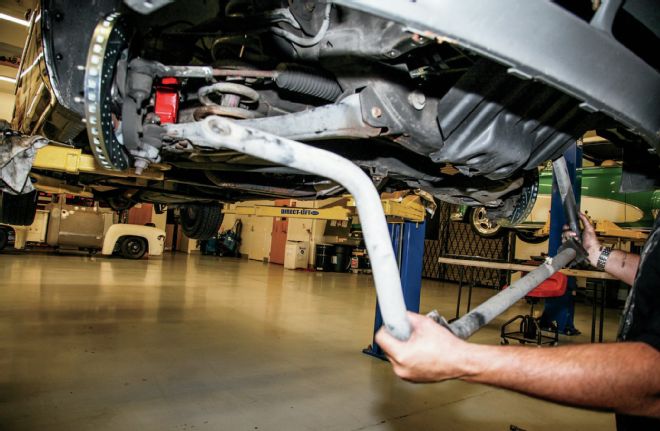
| Swaybar Removal
Now the stock sway bar could be dropped down to make way for the Hellwig unit.

| Hellwig Swaybar Install
We put a ton of the clear sticky poly grease on the bushings, and then installed the new, larger sway bar into the stock location.
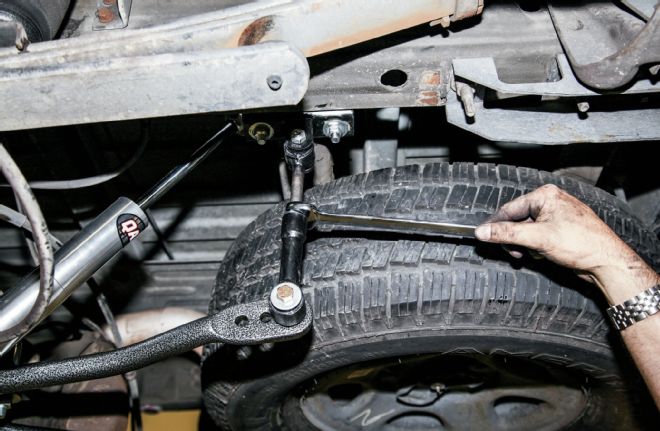
| Endlink Install
We threaded all of the new endlink components into place and cinched it down. The endlinks need to be rechecked once the truck is back on the ground.
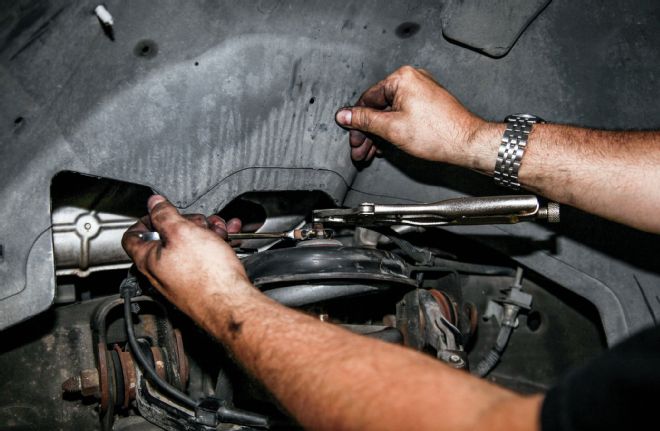
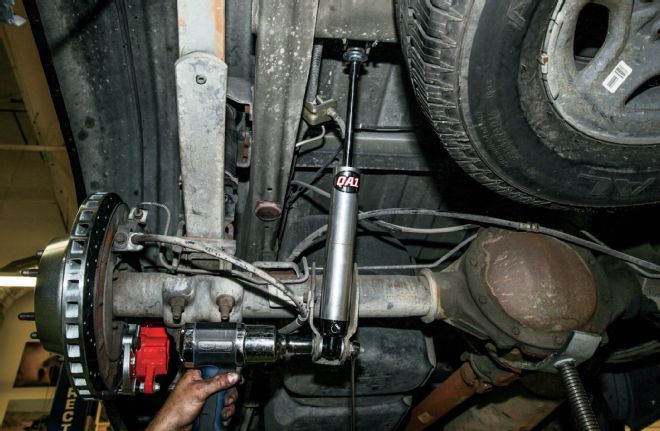
| Shock Install
Next up were the shocks. We secured the stud and removed the top nut. Then we removed the two nuts that secure the shock to the lower control arm.
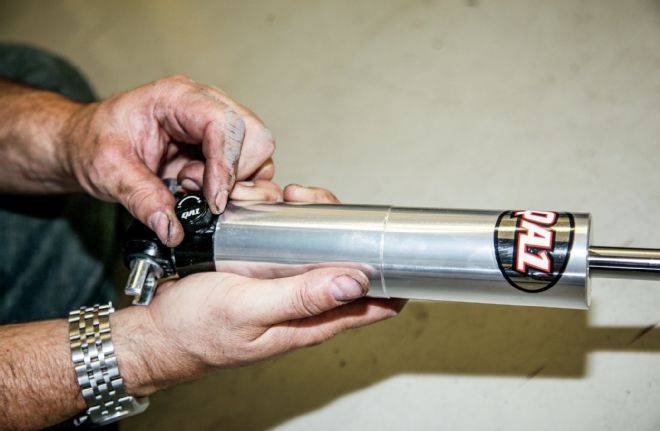
| Qa1 Adjustable Shock
There are 18 increments of adjustment on the QA1 single adjustable shocks. We decided to set the fronts to 10 as a starting point for adjustment.
| Qa1 Shock Install
The QA1 shock was then fed up through the lower arm and tightened down at both ends. At this point the front was complete and we headed to the rear of the GMC.
| Rear Brake Hose Removal
We started on the rear by removing the brake hose from the caliper, then removing the two bolts that hold the caliper in place.
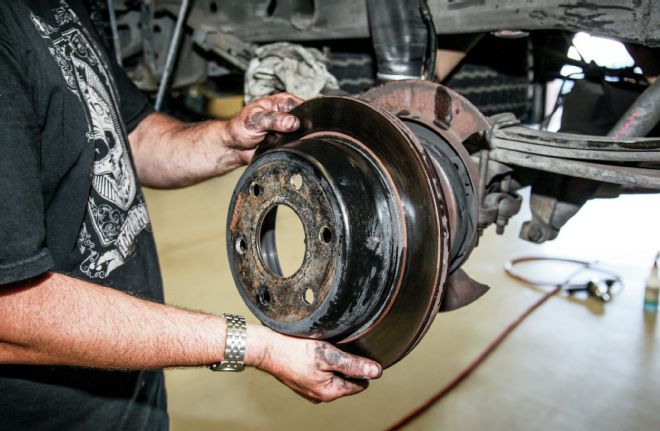
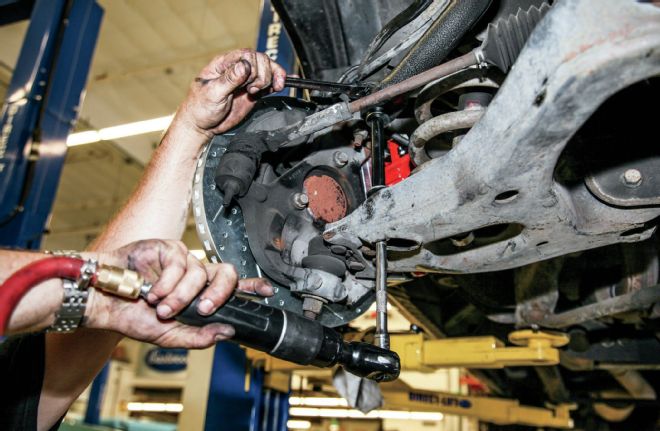
| Rear Rotor Removal
Next the calipers and rotors were removed from the axle.
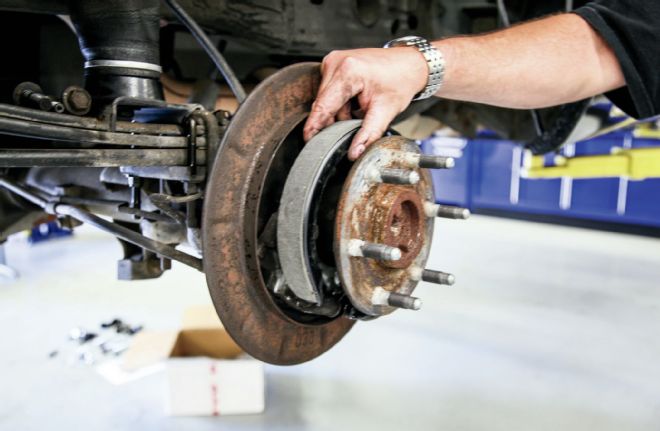
| Parking Brake Shoe Replacement
Before assembly, we opted to replace the emergency brake shoes. The originals were shot.
| Rear Baer Disc Brake Install
Now the rotors and calipers could be installed using the original caliper bolts.
| Brake Line Install
Then, the brake hose was installed onto the Baer caliper. At this point we bled the brakes, following the specific directions that Baer provides.
| Rear Shock Removal
The rear shocks were removed next. We buzzed the bottom and top bolts off in seconds.
| Rear Qa1 Shock Install
And just as quickly, the QA1s were buzzed back on. We also set the rears to 10 as a starting point.
| Rear Hellwig Sway Bar Install
The Hellwig rear sway bar looks complicated at first, but ended up going together pretty quickly. After greasing up all the polyurethane parts we hung the bar from the axle using the U-bolts and mounts, checking to make sure it was centered.
| Sway Bar End Link Install
U-bolts are also hung from the tubular frame crossbar, which locate the upper endlink mounts. The goal is to get the sway bar mostly flat while making sure it is clear of exhaust, shocks and other components. We adjusted the end links accordingly and snugged everything up.
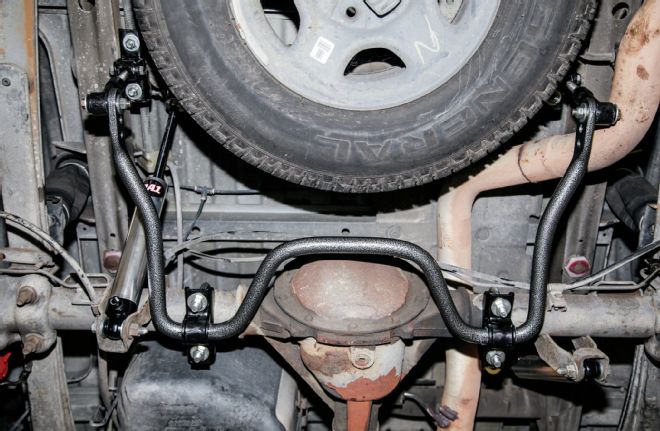
| Hellwig Rear Sway Bar Installed
Even with all the moving parts, the Hellwig sway bar had no clearance issues at all. We didn’t even have to remove the spare tire to install it.

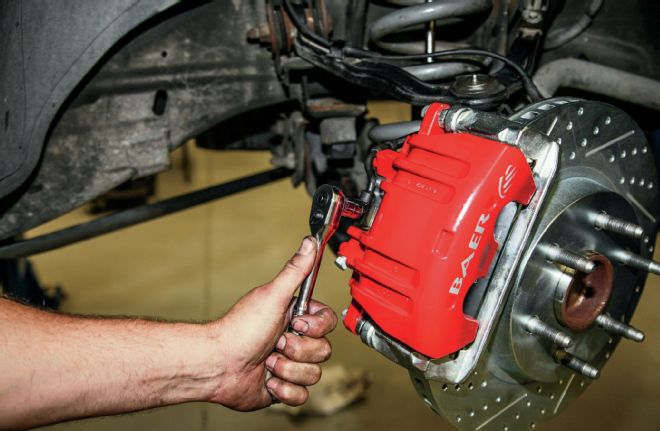
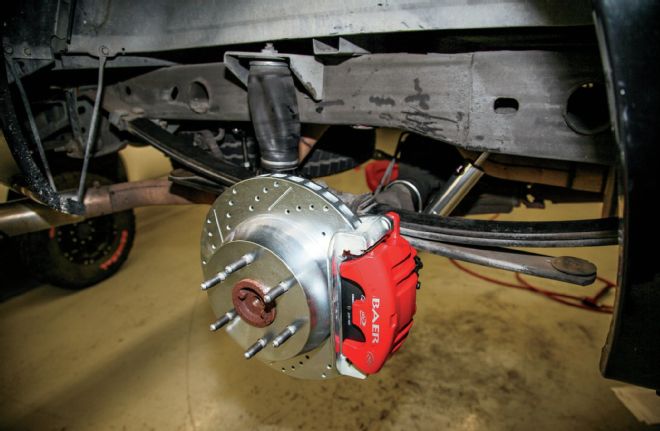
| Baer Front Brakes Installed
We got a ton of upgraded performance for a relatively small amount of work on the front end. And those calipers and rotors will look great behind our new wheels.
| Baer Rear Brakes Installed
The upgrades to the rear will undoubtedly add to our simple hanger and shackle with load bag setup.
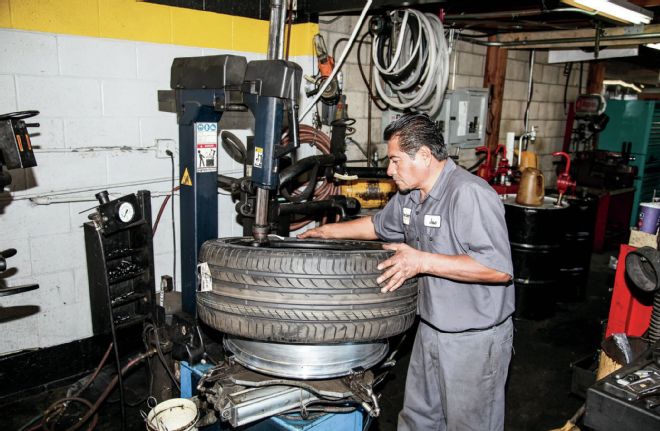
| Mounting Tires
Over at New Century Tire in Westminster, California, Junior and the crew made quick work of the mounting and balancing of the U.S. Mags and the Continentals.
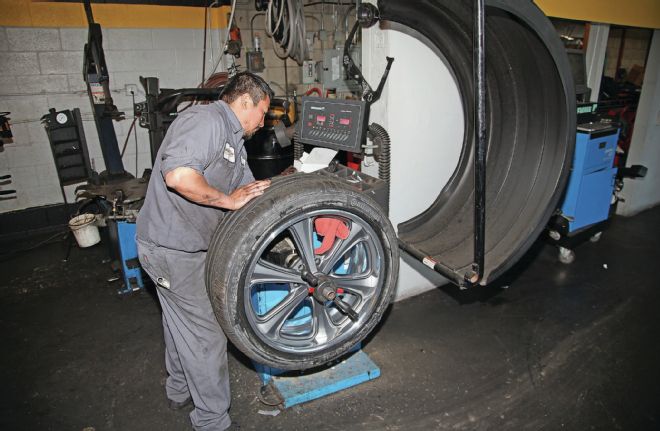
| Balancing Wheels And Tires
All four wheels balanced out with relatively little weight. Now it was time for the moment of truth.
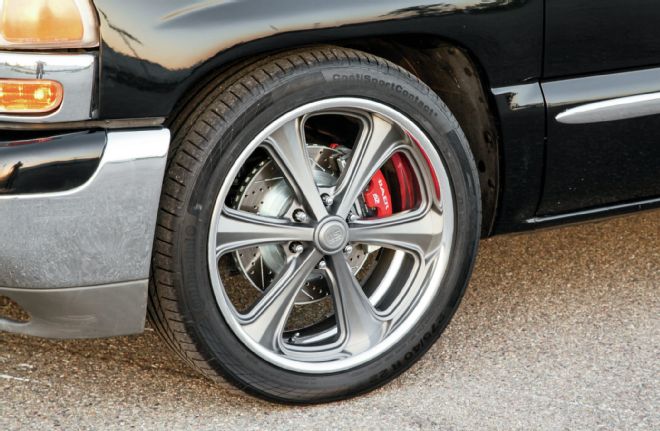
| Us Mag Wheel Installed
We were perfect with our backspacing measurements and the 22s filled the wheel openings perfectly. Out on the road, we started by bedding and seasoning the brakes, then taking some hard corners to determine if we needed to adjust the QA1s. This truck went from spongy to responsive in just one day and became a lot more fun to drive.
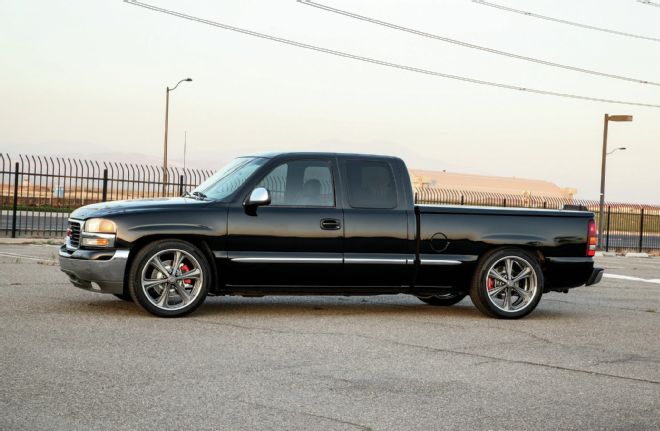
| Lowered 2002 Gmc Sierra 1500
Besides the great looks of the U.S. Mags, we now have the truck cornering and braking smoothly and still have a nice ride.