Lift kits are nothing new. For years the truck market has been infatuated with producing lift kits without any forethought into the longevity of how well the truck rides, handles, or steers—just make it higher. Unfortunately, somewhere along the way the ride suffered, the ball joints went to hell, and steering input felt more like driving a city bus. The higher your truck, the worse it got. Eventually, your pride and joy became more of a chore to drive rather than a joy. But hey, at least it looked good in the parking lot, right? Not so much for Cognito Motorsports (CMS) out of Bakersfield, California. CMS is fast at work redefining what lift kits should be with well-engineered components that function.
When we last left you with our ’09 GMC Duramax, we were pounding the dyno with 469 hp and 808 lb-ft to the rear tires on the Banks Engineering dyno (TK issue). Of course, we weren’t done yet and went deep in search for the proper curb appeal to match its performance. And thanks to CMS, this is completely possible with their 4/6-inch Cognito Motorsports lift kit for ’01-10 Chevy/GMC 2500HD trucks.
We wanted the components to be engineered like a power lifter ready to face the harshest adventurous driving with the finesse and precision of an MMA fighter and cut through traffic without the sacrifice of a bone-jarring ride. Could we have the best of both worlds? In most cases, it’s a matter of sacrificing one for the other, in which case you’ll never be able to have both. However, what if we proved you could have an appealing truck that would be a stunner in traffic with suspension travel that could soak up holes big enough to swallow midsize cars?
With overall driveability critical, CMS suggested their 4/6-inch non-torsion drop lift kit. It came complete with upper control arms, differential mounts and skidplate, new front and rear crossmember sections, spindles, and every piece of hardware to go along with it. What’s more, we even installed their Alloy Series Race steering system for the ultimate in control and strength. For our application, we added in a set of Fox Racing 2.0 shocks on all four corners while the rear was upgraded with a rear mini-pack leaf-spring kit from Deaver. We completed the setup with a set of 20x9 BMF F.I.T.E. wheels and 35x12.50R20 Nitto Terra Grappler G2 rubber for an aggressive and utilitarian stance. Watch this extended cab Duramax truck go from bland to bombshell. Better yet, after all was said and done, it rides better than stock. Believe it.
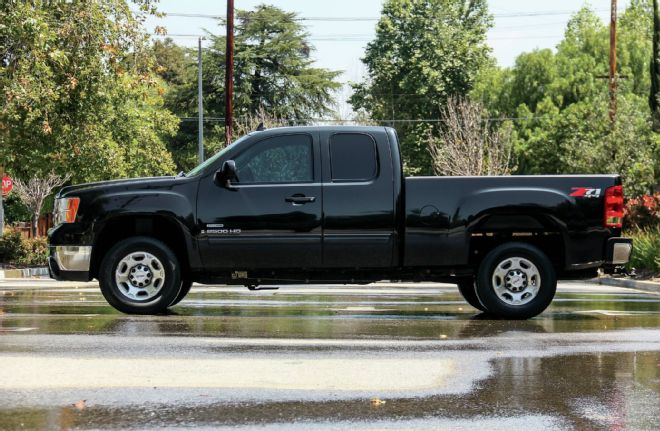
| 2009 Gmc 2500hd Side View
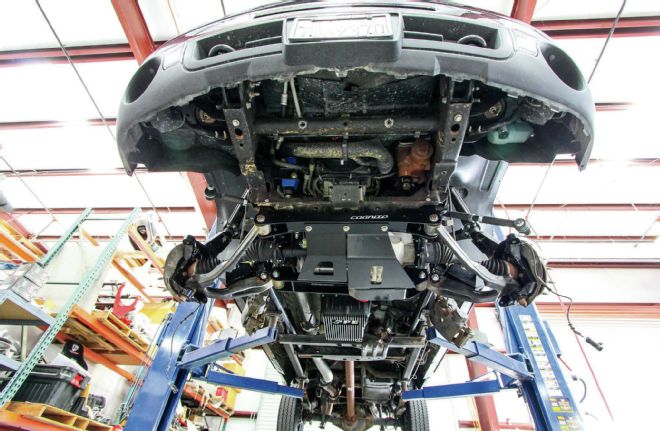
1. From the factory, these HD trucks are great performers both on and off the pavement. However, we were after a more attractive wheel-and-tire combo, and the extra altitude to set this truck apart from the rest. The heavy factory suspension rake wasn’t very appealing to us either.
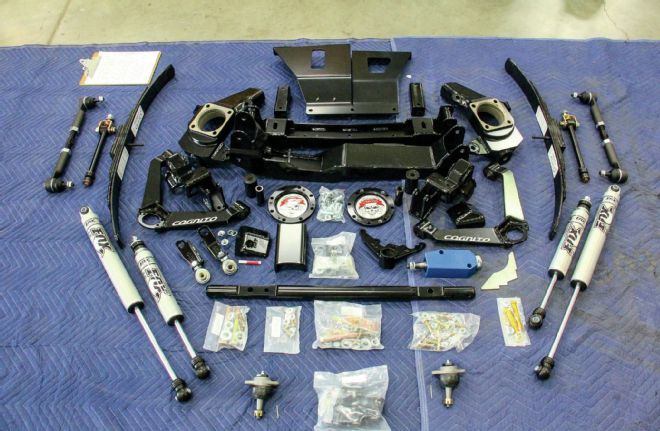
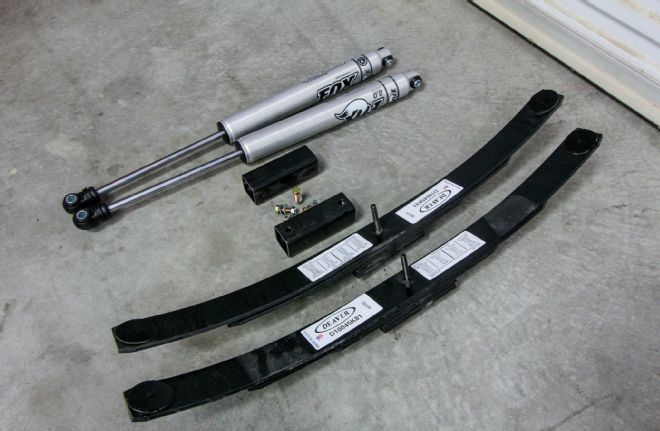
| Cognito Motorsports Kit
2. To say the Cognito Motorsports’ kit was well engineered and thorough would be an absolute understatement. It contains beefy components throughout. Just take a look at what’s involved here; it’s complete right down to hardware and decals!
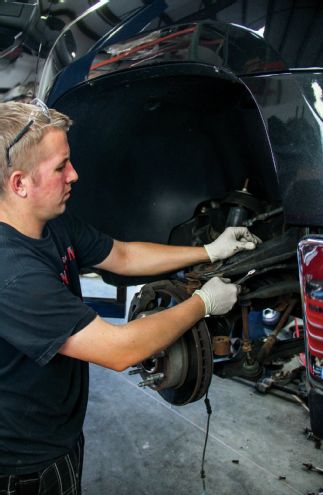
| Front Suspension
3. With the truck securely on the lift, Ryan Kawiecki began by first disassembling the entire front suspension from both sides, including the brake calipers, rotors, spindles, upper and lower control arms, and the torsion bars with the sway bar and endlinks.
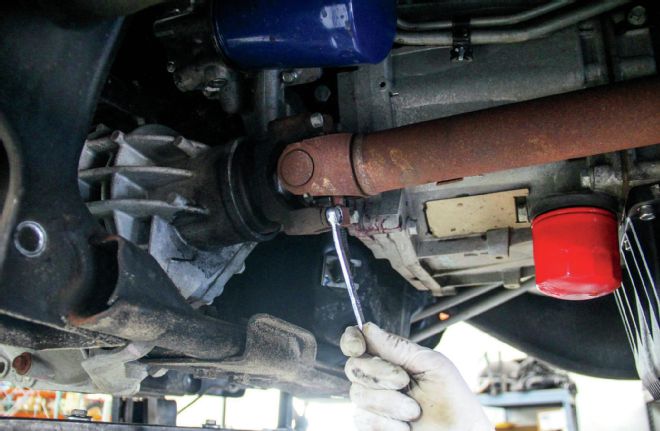
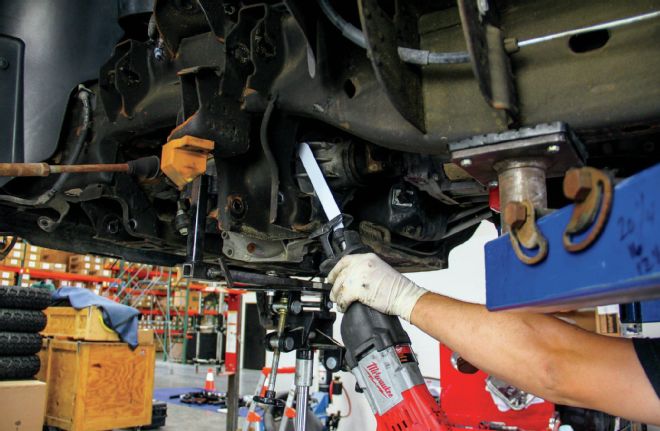
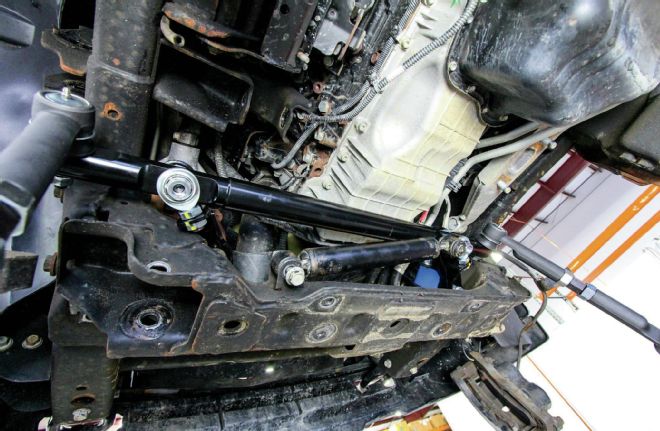
| Cv Shafts Bolts
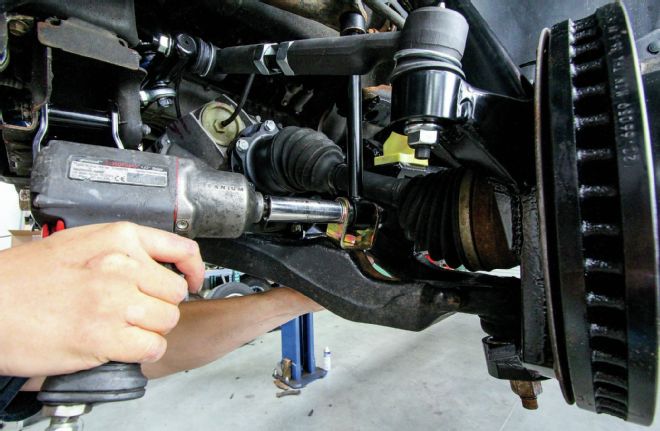
4. From there, Ryan could move on to removing most of the front driveline, including the front CV shafts and bolts, which fasten the differential to the crossmember. Here, he uncouples the U-joint from the front driveshaft of the transfer case.
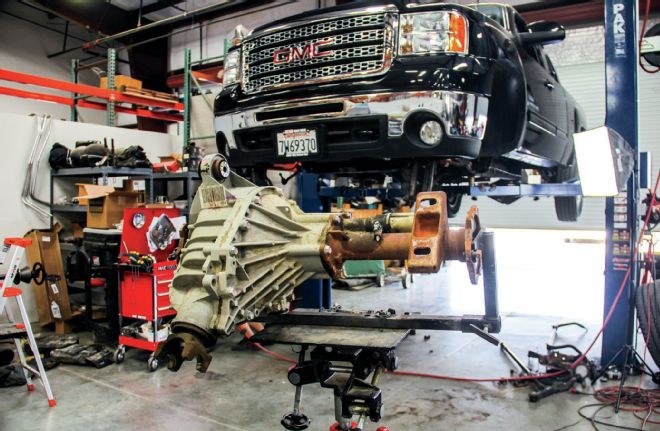
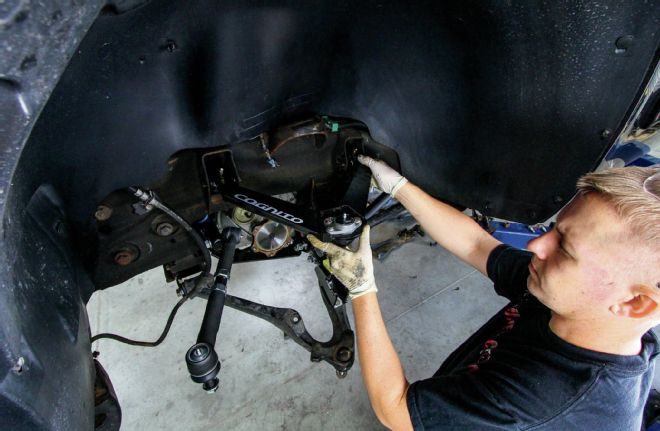
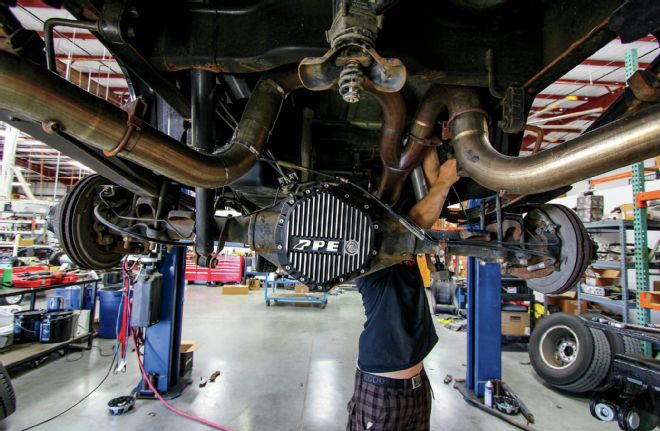
| Hydraulic Jack
5. Next, we could begin the process of dropping out the front differential. Using a hydraulic jack for support, Ryan removed the front differential from the truck and set it aside. It will need to be modified before reinstallation.
| Factory Bolt On Components
6. With the factory bolt-on components gone, the front of the truck was essentially barren for Ryan to begin cutting out the driver-side rear crossmember with a Sawzall. Keep in mind, this is completely normal for all aftermarket lift kits on these trucks. We’ll be replacing this section of the crossmember with a bolt-in assembly from Cognito.
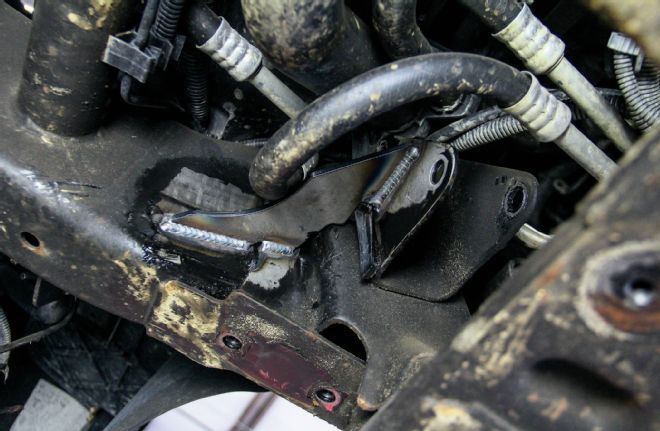
| Weld In Steering Gusset
7. Since access to the front end of the truck was available and with no factory steering components in the way, we could take advantage of the extra real estate to install the Cognito Motorsports’ weld-in steering gusset. Though not required on this specific lift kit (included in Cognito steering gusset kit PN IPAWG8), this extra insurance will prevent any flex or play in the steering bracket under load—yet another piece of engineering that sets Cognito apart from the rest.
Cognito Motorsports Alloy Series Race Steering Kit
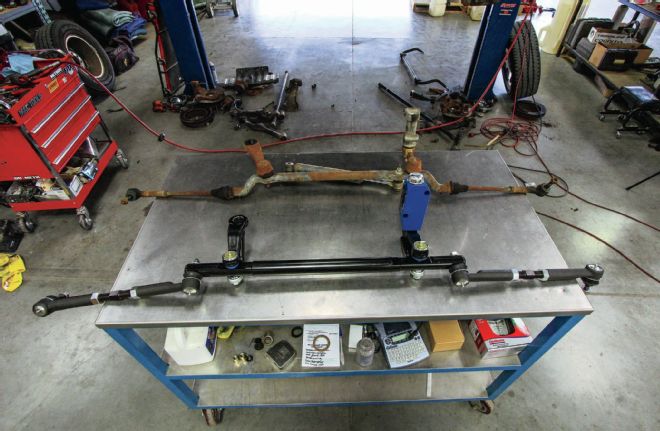
| Cognito Motorsports Alloy Series Race Steering Kit
8. The ultimate in fortifying the factory steering assembly for 8-lug GM trucks just got better thanks to Cognito Motorsports. Compared to the stock components, the CMS Alloy Series Race Steering kit replaces the painfully weak centerlink in favor of this super-thick, straight alloy setup. It comes complete with outer tie-rod ends, inner tie-rod ends, tie-rod adjusters, and hardware. Best part, it’s also powdercoated for a long durable life and bolts in like the factory components. It even allows for the factory steering stabilizer shock!
| Drop Down Crossmembers
9. Before we could begin installing the drop down crossmembers, we first installed the alloy race series centerlink kit, which bolts in like the factory unit. While we were there, we also installed the included CMS pitman and idler arm support kit (PN PISK2008) with brand-new OEM idler and pitman arms (not supplied from CMS). This will ensure years of use and longevity with no need to service these components any time soon.
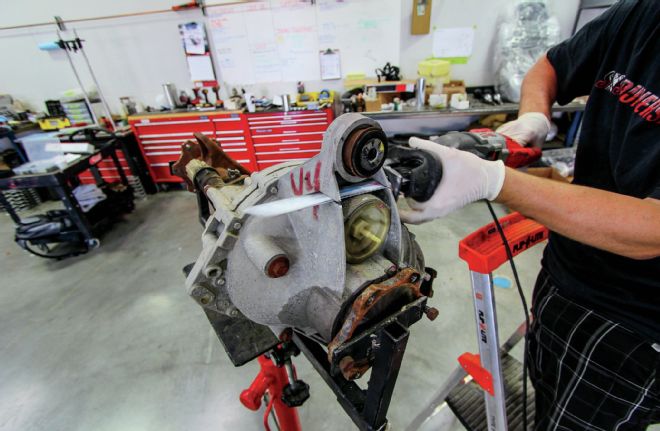
| Differential Mount
10. Back to the front differential, in order to maintain clearance for the steering draglink, the top differential mount must be cut off. We used a reciprocating saw to cut the mounting ear off as close to the differential housing as possible. CMS also makes a conversion bracket to reestablish this mounting point if the vehicle needs to be returned to stock height without having to purchase a new differential case.
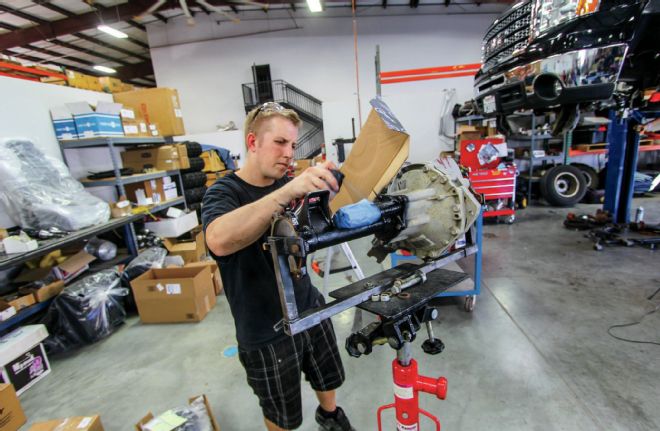
| Cv Shafts
11. Before going back into the truck, we gave the front driveline components, including the front differential and CV shafts a quick coat of paint. From there, we had it bolted back into the truck now in its lower position.
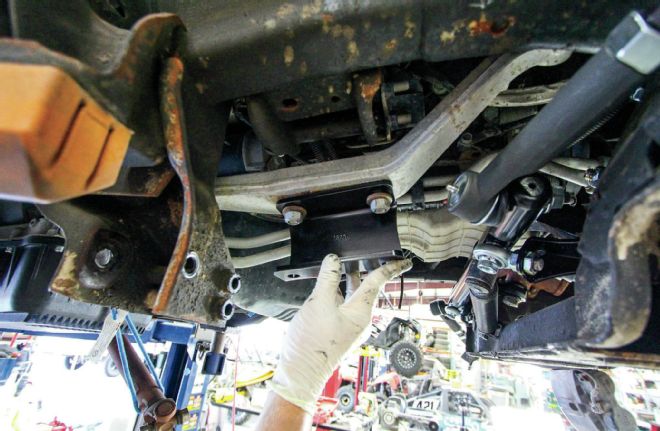
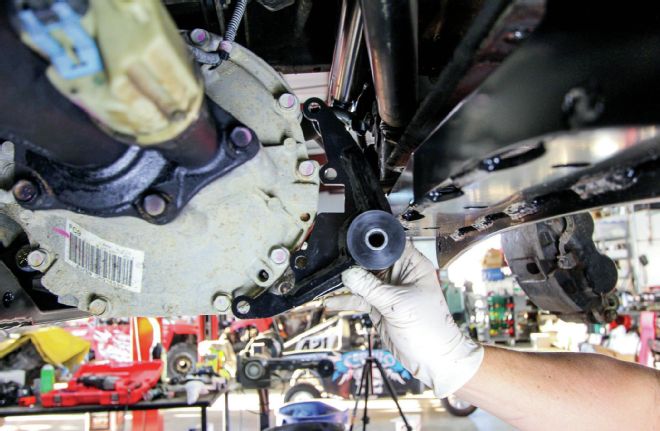
| Cms Passenger Side Drop Down
12. Next, Ryan installed the CMS passenger-side drop-down differential mount to the factory differential mount. This bracket positions the differential lower than the factory position. We used the factory hardware and fastened it down to 85 ft-lb.
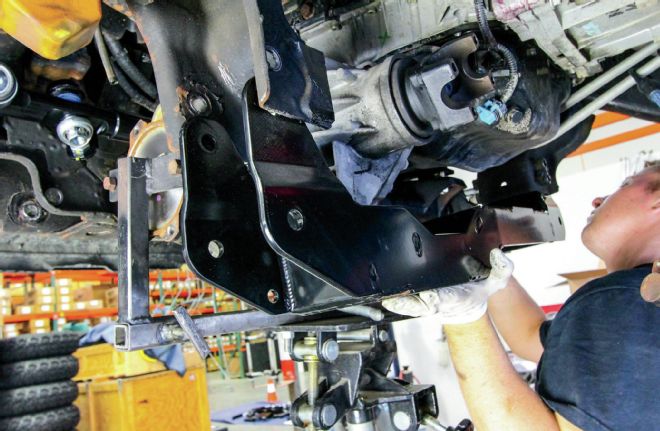
| Cms Rear Crossmember
13. The CMS rear crossmember is every bit tank-like. It features CNC cuts and precision welds. What’s more, it’s also powdercoated for a durable life underneath the truck where it counts most. It was installed with the crush sleeves into the lower control arm pockets using the factory control arm bolts.
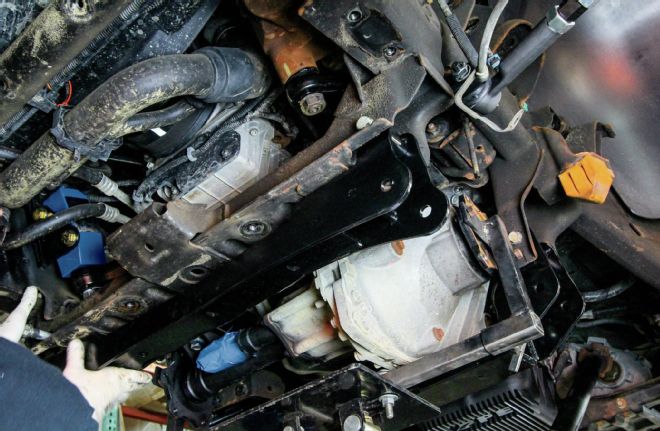
| Front Corssmember
14. Moving on to the front crossmember, it’s equally as impressive as the rear with precision-cut pieces welded together. Better yet, it bolts right under the factory piece using the stock hardware.
| Polyurethane Spring Bushings
15. Cognito Motorsports includes everything you’ll need for a completed system. To finalize the front differential install, and before the skidplate is installed, we inserted the two polyurethane spring bushings and steel crush sleeve into the mounting bracket. From there, we simply removed four of the front differential case bolts and installed the bracket. We then added a touch of thread locker to the new, longer hardware bolts and torqued them down to 40 ft-lb.
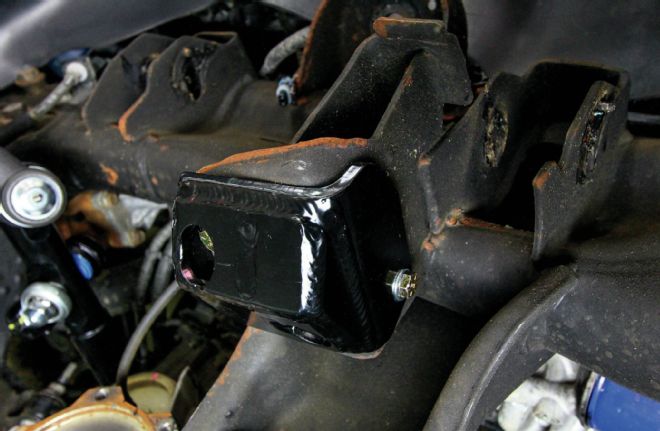
| Bumpstop Brackets
16. New bumpstop brackets were also installed. We first removed the factory bumpstop, and then, using the supplied 5/16 x 1¼-inch hardware, bolted it in under the factory location. Rather than use the old bumpstops, we purchased new OEM pieces to replace them.

| Differential Skidplate
17. CMS includes their fabricated differential skidplate with the system. It also received the same, laser-cut treatment, robot-like welds, and powdercoating to withstand the toughest environments. Using the supplied hardware, we began at the center of the skidplate and fastened it to the middle-mounting hole on the Cognito front crossmember. Ryan then ran all the bolts from the bottom to the top so each bolt head is visible.
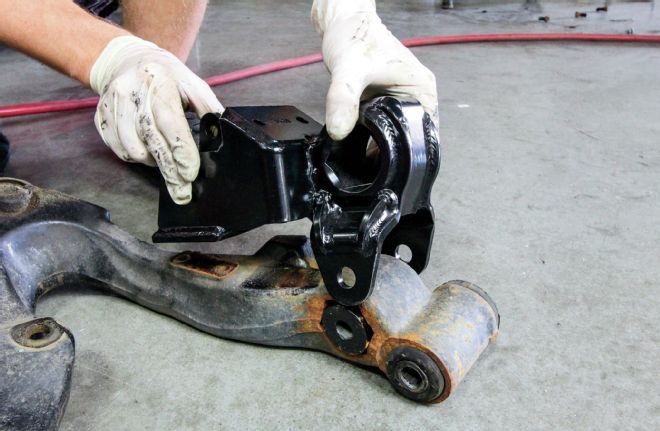
| Lower Control Arm
18. The top of each lower control arm receives this new, heavy-duty torsion bar bracket. This bracket will relocate the torsion bar and also serve as the new position for the lower bumpstops. We first removed the lower shock mount bracket from the arms. Notice the mandrel installed into the factory lower control arm torsion bar hole. Next, we fastened the new hardware through the bracket and hardware.
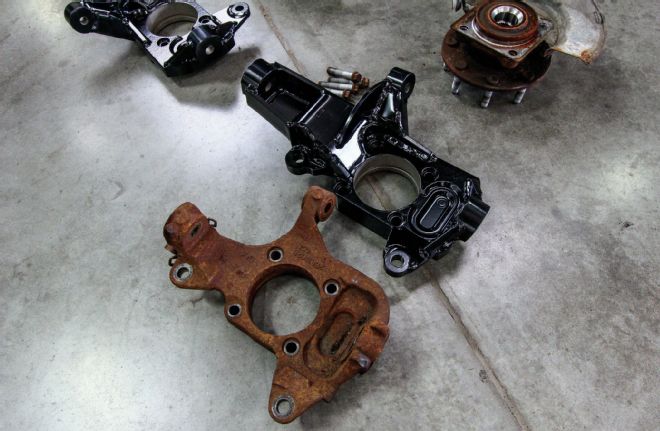
| Cms Lift Spindles 1

| Cms Lift Spindles 2
19.-20. No, that’s not Boeing 747 landing gear you’re looking at. That is the new CMS lift spindles, which have no doubt upped the ante with this build compared to the factory spindle side-by-side. We disassembled the factory hub from the spindles. We also removed the brake rotor shield and added special attention to removing the factory O-ring from the bore of the spindle being careful not to damage it. From there, we cleaned the surfaces of the hub and brake rotor shield and transferred all of these to the new CMS spindle. We used the factory spindle bolts to lock it together with a bit of thread locker. Each bolt was torqued to 95 ft-lb.
CMS Boxed Upper Control Arms

| Cms Upper Control Arms
21. Our lift kit wouldn’t be complete without a fortified set of CMS upper control arms. These are designed as direct replacement arms, which mean they require no modification and bolt in using the factory hardware. They really are the bread and butter of this package, which let those curious fenderwell onlookers identify with which gear you’re running on the truck. Each arm must be built with the supplied, bolt-in ball joints, polyurethane bushings, crush sleeves and hardware. We installed these ball joints onto the top of each arm pocket, rather than the bottom to take advantage of a better, overall suspension geometry.
| Frame Arms
22. With the CMS control arm built, we installed each arm back to the frame with the factory bolts and eccentric washers.
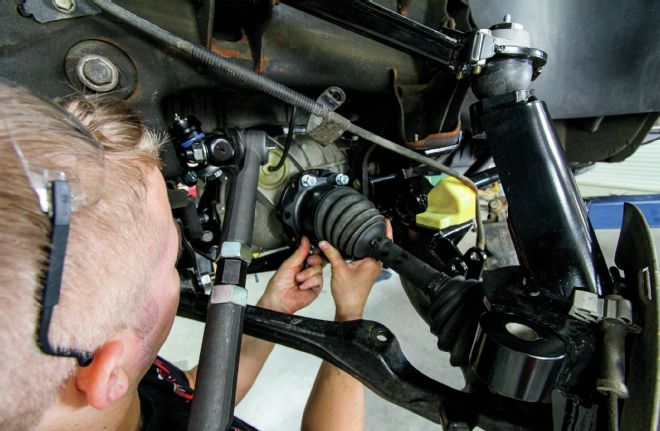
| Painted Cv Shafts
23. Our freshly painted CV shafts were next. However, this time, we installed the supplied spacers to the differential and used the new, longer hardware to lock them into place.
| Fox Racing 2 0 Shocks
24. At this point, we still had the Fox Racing 2.0 shocks to install and other odds and ends, including the endlinks and sway bar, but take a look at how this package is coming together!
| Endlinks
25. CMS builds and supplies these super-beefy endlinks specifically for the upgraded steering packages. The install is simple and replaces the factory unit on each side.
| Fox Racing Shocks
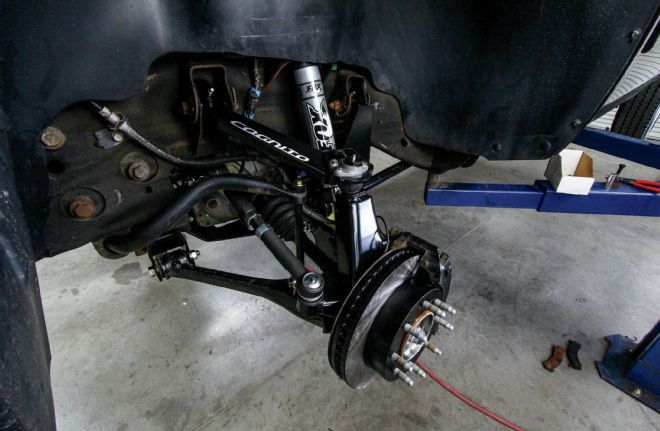
26. It’s pretty evident this package is as complete as it gets. New upper arms, spindles, endlinks, and brackets make this an unmatched system. Notice the new Fox Racing 2.0 shocks were installed to complement the lift kit, though Bilsteins come standard.
| Factory U Bolts
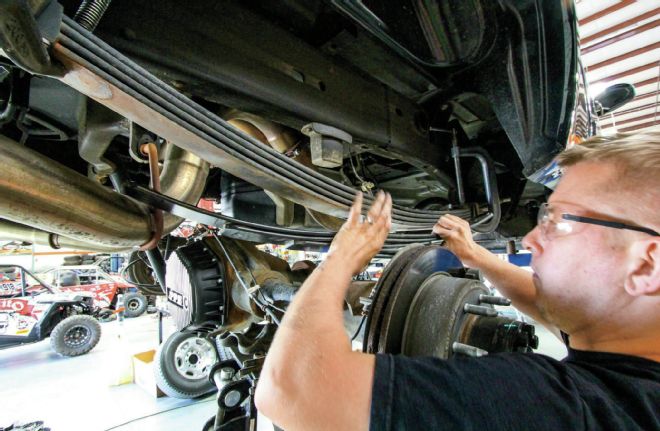
27. With the front completed, we could move on to the rear of the truck. Ryan made quick work of the factory U-bolts and removed the helper/load leaf from the factory pack of leaves. We’ll be replacing this with a unique, mini-pack from Deaver.
Deaver Rear Mini-Pack Leaf Springs
| Rear Mini Pack Leaf Sprigs
28. This is exactly what sets Cognito Motorsports apart from the rest. Rather than using a 4-inch lift block to add height to the rear, Cognito relies on a specifically packaged Deaver leaf-spring pack. These packs come brand new and replace the factory helper spring and add lift with spring arc rather than blocks. We complemented the package with a set of Fox Racing 2.0 shocks and brackets, which relocated the rear bumpstop.
| Deaver Mini Pack Install Passenger Side
29. Just check out the difference in angle (height), which is already evident with the Deaver mini-pack installed on the passenger side. No lift blocks here!
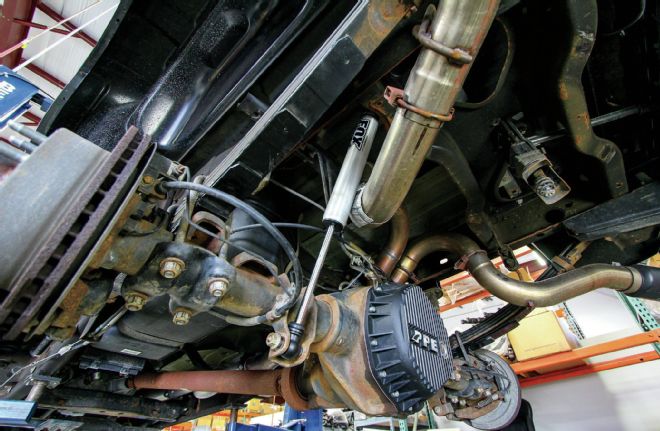
| Fox Racing Shocks
30. We finished off the rear with these Fox Racing 2.0 shocks. Though Bilsteins come standard, these Fox Racing monotubes are specifically tuned for the 4- to 6-inch Cognito Motorsports lift kits. Each shock bolts into the factory location.
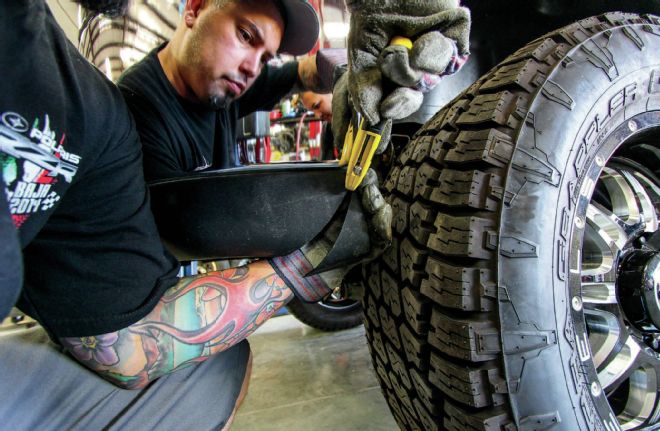
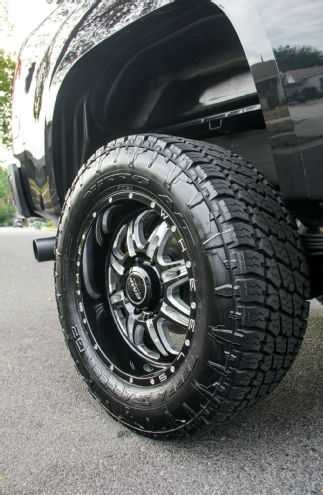
| Nitto Terra Grappler Tire
31. To run our 35x12.50R20 Nitto Terra Grappler G2’s, some clearancing of the inner fenderwells is necessary. Thankfully, it’s quite simple, though, requires some cutting of the factory metal behind the plastic wells. To find the DIY wheelwell modification tutorial, head to www.norcaltruck.com.
BMF Wheels
| Bmf Wheels
32. No lift would be complete without a set of new hoops. And what better way to show off all that curb appeal than with a set of 20x9 BMF Wheels in the F.I.T.E. design with a 5-inch backspace to keep the wheel-and-tire combo flush with the fenders. We grabbed up our set in the Death Metal Finish (black with machined accents), and we couldn’t be happier with the outcome. Don’t have an 8-lug truck? Not to worry, BMF Wheels makes this same wheel and others in 6-lug for half-ton trucks, too!
Nitto Terra Grappler G2
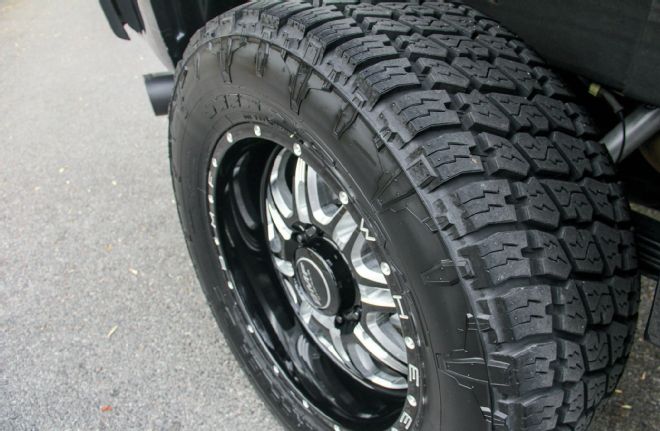
| Nitto Tire Terra Grappler G2
33. When we heard that Nitto was designing an all-new generation Terra Grappler that would be better than the current generation, we were itching to give them a try. Nitto finally delivered on their promise with a brand-new compound that is versatile while also increasing longevity. It’s even backed with a warranty! The G2 also features reinforced coupling joints, which connects the outermost tread blocks to the center blocks to increase rigidity. Full depth sipes also offer a functional benefit and help maintain the appearance of the tread design as the tire wears. Biting edges have also been improved by staggering the shoulder lugs, and the new sidewall design connects the sidewall lugs starting from the shoulder block down to the middle of the sidewall surface. Two distinct and bold sidewall designs are also apparent. Notice the original Terra Grappler thunderbolt pattern, which is now raised while the other side features a brand-new aggressive “blade” design.
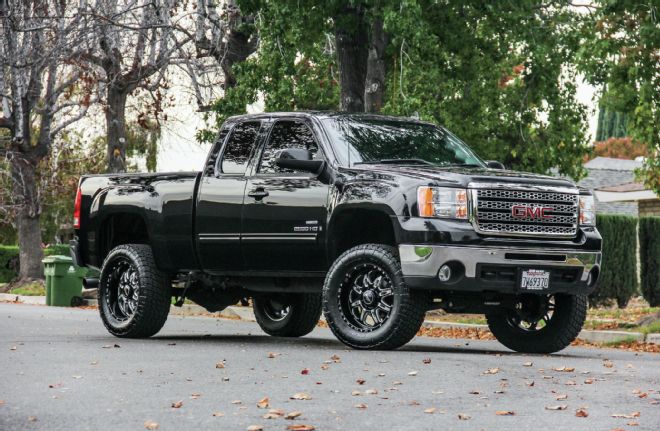
| 2009 Gmc 2500hd Lifted
34. When things come together, they really come together. We spent two days with Cognito Motorsports learning about their 4- to 6-inch lift kit and were more than impressed with their dedication to the industry. It’s hard to argue when the truck looks this good parked on pavement. Now, it’s time to get this thing dirty!
Lifted Proof, Just The Measurements
They always say the proof is in the pudding. Well, here it is … just the cold, hard facts.
Ride height driver/passenger Pre-Lift Post-Lift (in inches)
Front fender to the ground 39.5/40 45.5/45.75
Front center hub to fender 25/25.5 29.25/29.5
Front top tire to fender 9.75/10 12/12.25
Rear fender to ground 41.5/42 44.5/45.25
Rear center hub to fender 26.75/27 28.25/11.5
Rear top tire to fender 11.5/11.75 11/29