With high-quality passenger-car-style interiors, easy handling, greater visibility, and lift kits that retain original handling and ride quality, multipurpose eight-lug trucks are very popular these days. Our point is very well-taken by an Oregon real estate agent, Janet Chard, who wanted a lift on her '05 Chevy 2500HD Duramax 4WD. For her clients and her 5-foot 4-inch height, Janet selected Rancho's 4-inch lift (#RS6548B). This kit covers GM's '01-'08 Silverado 2500HD pickups, but they do have the '99-'08 GM 2500HD, 2500, and 1500HD pickups covered as well with this same 4-inch lift kit (using different part numbers). Janet uses her eight-lug truck to go to dinner, tow freight, and take clients on real estate tours, so it's definitely her daily driver.

| Before the Rancho installation, the GM 2500 4WD Duramax sat at stock height with original 16-inch wheels and stock 311/2-inch tires. The lower-body nerf bars had been previously added.
Janet went to Brad Haga of Coos Bay Off-Road for the Rancho lift kit installation that included new wheels and larger tires. She also had a Precision billet grille and DeeZee polished stainless rocker panel trim installed for a more appealing look when she shuttles real estate clients to prospective homes.
If you are in the marketplace looking at lift kits for your truck, there are a couple of things you should know and a couple of questions you should ask your local dealer. First of all, is the kit you are looking at alignment-friendly? Second, does it retain the stock steering geometry and ride qualities the factory engineered into your truck? You should get a "Yes" for these questions, or move on to the next kit. Most well-known manufacturers like Rancho (in business since 1955) have very alignment-friendly kits. This means after the kit is installed, its alignment specs fall within the original factory alignment guide limitations (see the photos). This is how your truck will retain the same factory handling characteristics. Most lift kits retain the original springs or include new replacement springs to keep the same suspension travel and factory ride. You may want to ask if you can tell the difference in the ride with the kit springs.

| After the Rancho 4-inch lift kit (#RS6548B), a new Precision grille and DeeZee stainless rocker panel trim were added. Janet Chard's multipurpose daily driver Duramax now has a much better look and function for business and pleasure.
There are generally two types of lift kits produced by the aftermarket industry. There are bracket-style lift kits that use frame extension brackets to lower both of the original factory upper and lower A-arms (which lift the truck). These kits are offered because of the front suspension design and the height of the lift (usually tall lift kits over 4 inches). The other is a spindle kit, like the one in this installation, that includes a new taller cast-steel spindle that keeps the steering and upper A-arms in their stock location and uses frame brackets to lower the bottom A-arms. Both kits are very strong, however spindle kits usually take less time to install because fewer parts need to be relocated. If your pickup is a 4WD (like the one in this installation), the front differential will also be lowered, usually resulting in some trimming of the original factory mounting brackets and adding new support brackets.

| The Rancho Suspension 4-inch lift kit is available for '99-'08 GM Duramax 2500s and 1500 and 2500 Silverados. Three different part numbers (RS6548, RS6549, RS6550) cover the GM field listed. Check their Web site, www.gorancho.com, for more info on your truck's lift kit. Rancho's #RS6548B and RS5000 nitrogen-filled shocks were also ordered for the '05 GM 2500 Duramax 4WD diesel installation shown here. The Rancho kits come powdercoated in red or black.
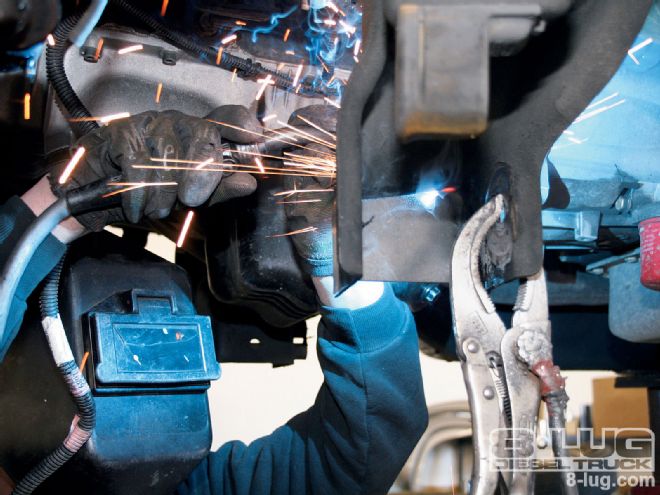
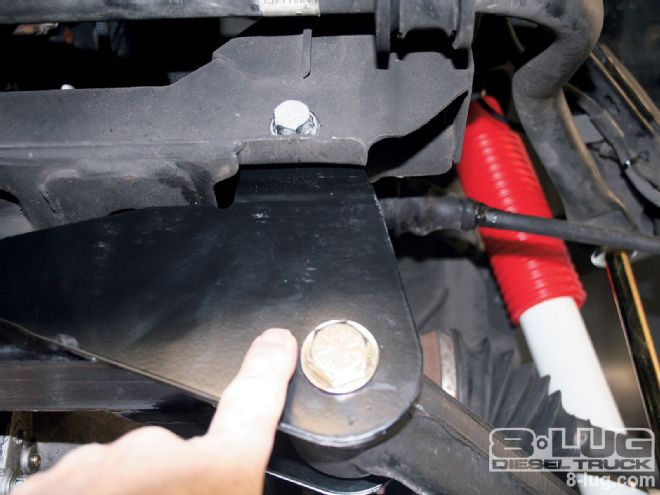
To start the installation, the lower A-arms holding the torsion bars, stock spindles, and 4WD front differential are removed. Since the Rancho kit includes a new taller spindle, the steering (rack) and the upper A-arms remain in their stock location. Next, the front differential and the lower A-arms are lowered on the frame using new brackets from the kit. The rear driver-side lower A-arm mounting pocket needs to be modified to make room for the lower position of the differential. As you'll see in the photos, a new reinforcement plate included in the kit is welded in place to keep the strength in the new lower A-arm pocket. After the trimming and welding, Brad Haga paints and undercoats the new areas. The new brackets that lower the A-arm pockets mount about 1 inch farther to the outside, which increases the front track width by about 3/4-1 inch. This equates to a 41/2-45/8-inch backspacing limit on the new wheels, as opposed to the 51/2-53/4-inch backspacing on the original factory wheels. This is partly due to the shape and length of the new spindle and lower A-arm positions. This does not affect the turning radius or ride quality.

| Before all the parts are removed, you can see that the A-arms are much closer together than in the comparison photos. The taller spindle provided in the kit eventually separates the upper and lower A-arms to lift the truck 4 inches.
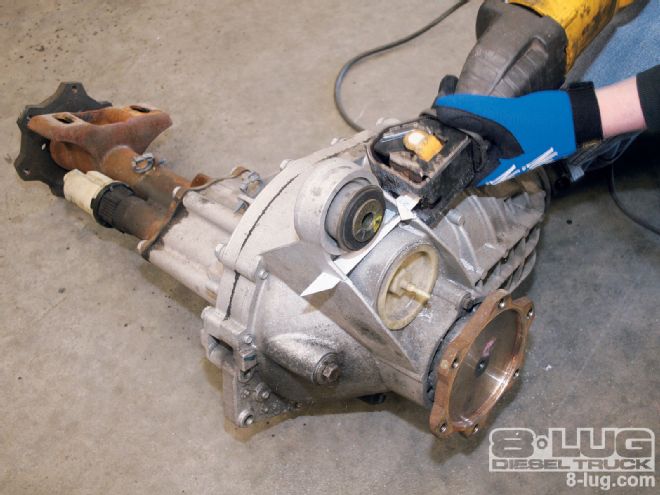
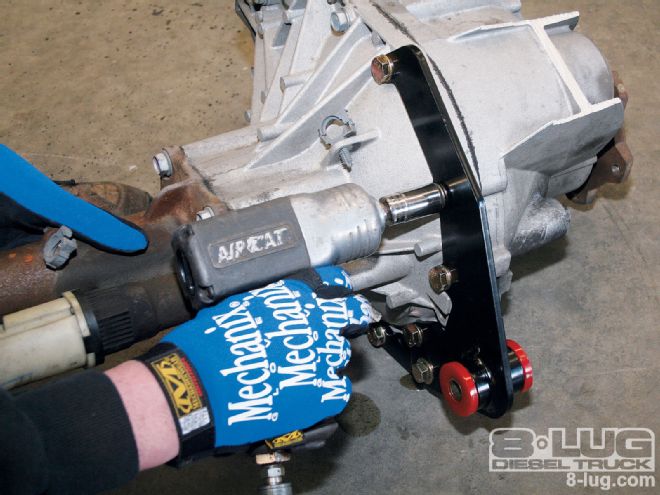
The new taller spindle uses the same bearings and seals out of the old stock spindles, while the upper mounting bushing and bracket on the transfer case are cut off and replaced with a new bolt-on bracket. This new front differential bracket lowers the transfer case in the frame and allows the stock steering geometry and steering center-link between the idler arms to retain its original position. The stock mounted rack-and-pinion steering arms attach to the new spindle from the top. This reverse taper in the new spindle's steering arm is what allows the factory steering to keep its stock geometry. The stock front driveshaft is retrained without modification.

| With the lower A-arms, spindles, and brakes removed, Brad Haga, owner of Coos Bay Off-Road, can finally remove the front 4WD differential and start on modifications and reassembly. It took one man about 21/2 days with interruptions to complete the installation.
Reassembling the front suspension is the next step. The lower A-arms and the new spindles with stock bearings and seals install between the stock A-arms. The front halfshafts reconnect between the new spindles and the differential with a 1.5-inch spacer (see photos), and Rancho 5000 nitrogen-filled shocks replace the factory units.
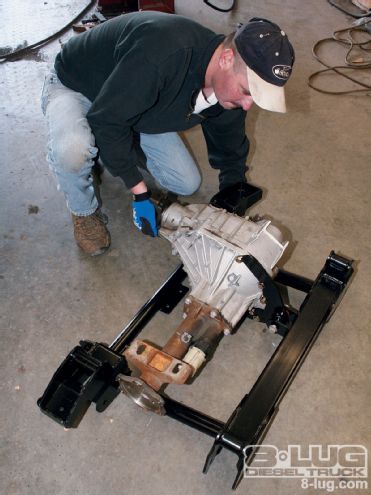
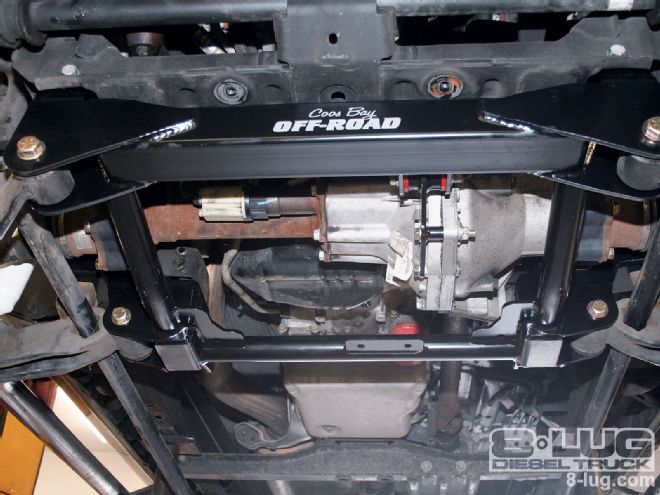
The front antisway bar reconnects to its original location via longer bolts and tube spacers. Next, the torsion bars receive a new rear lower bracket (see photos) to keep the original torsion bar parallel and level under the truck. The new brackets lower the torsion bar crossmember that was mounted up inside the frame. Now the new urethane-bushed brackets mount the crossmember below the framerails. The torsion bars can now be installed back into the lower A-arms and the rear bracket. To support the new lower front suspension brackets holding the differential and the lower A-arms, Rancho has designed urethane-bushed support arms that strengthen the entire front assembly and mount front-to-rear between the differential bracket and the bottom of the transmission crossmember.

| The first modification is to the rear of the driver-side lower A-arm pocket that was part of the front differential mount. Since the differential will be lowered, that bracket gets cut away and a new bracket welded in its place for factory strength.
To lift the rear end and match the front suspension height, a 4-inch block under the rear springs was installed along with Rancho 5000 rear nitrogen-filled shocks. Since Janet does real estate tours, she wanted her truck to look good, so she added a set of LT295/75R16 Nitto Terra Grappler 341/2-inch all-terrain tires. These are 3 inches taller than the stock LT265/75R16 tires, which actually give a 11/2-inch higher stance to the truck. Janet also opted for new American Eagle Series #187 polished aluminum wheels with 41/2-inch backspacing. The 341/2-inch diameter tire is the largest diameter that can be installed in this factory fender opening. This requires trimming about 3/4-inch from the rear of the plastic bumper ends just in front of each (front) wheel. As you look at the finished photo, you'll see she also added one of Precision Grilles' #601295 billet grilles and DeeZee polished stainless rocker panel trim for a classier look. Now Janet's first step with the 4-inch lift and larger tires is just 25 inches off the ground.

| The side and the back of the lower A-arm pocket are trimmed off.
Alignment is the very last issue to address before the truck gets washed and test-driven. At Coos Bay Off-Road, they offer a full wheel, tire, and alignment service for a complete one-stop installation (and they wash your truck too). Their electronic Hunter S611 alignment will tell if the front and rear axles are parallel, and if the distance between each front and rear wheel is correct. This way, a thorough check to see if the track is "square" is part of the alignment process, including centering the steering wheel if necessary. The Rancho kit aligned perfectly within the factory specs of: caster 4.5 degrees (plus or minus 1 degree), camber 0 degrees (plus or minus .3 degrees), and toe in at .1 degree (plus or minus 2 degrees). Now Janet's truck can take on even more roles in the future.

| This is the material that was removed from the backside of the lower driver-side A-arm pocket. The new plate (right) provided in the kit strengthens the back of the pocket.
