 | 1999 Chevy Silverado Front Suspension Installation 1999 Chevy Silverado
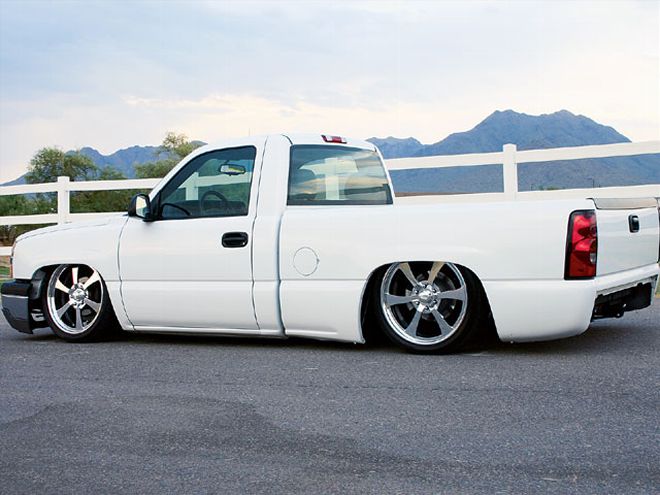
Last month, we showed you the ins and outs of laying frame in a '99-and-later Silverado, using top-quality components and 22-inch-diameter rims. We covered replacing the rear suspension with airbags and KP Components' linked suspension, as well as relocating everything that hung below the framerails so that the truck would lay flat once the air was released from the 'bags. This month, we wrap up the whole deal by showing you how to modify the bed for reinstallation without cutting any gaping holes into it. We'll also go into detail on the front suspension installation, clearing the firewall for the larger tires, as well as the plumbing and wiring of the entire system. The finish line is just around the corner for all Silverado owners, so pay attention and you just might learn something.
| 1999 Chevy Silverado Front Suspension Installation 1999 Chevy Silverado
Last month, we showed you the ins and outs of laying frame in a '99-and-later Silverado, using top-quality components and 22-inch-diameter rims. We covered replacing the rear suspension with airbags and KP Components' linked suspension, as well as relocating everything that hung below the framerails so that the truck would lay flat once the air was released from the 'bags. This month, we wrap up the whole deal by showing you how to modify the bed for reinstallation without cutting any gaping holes into it. We'll also go into detail on the front suspension installation, clearing the firewall for the larger tires, as well as the plumbing and wiring of the entire system. The finish line is just around the corner for all Silverado owners, so pay attention and you just might learn something.


 | 3.
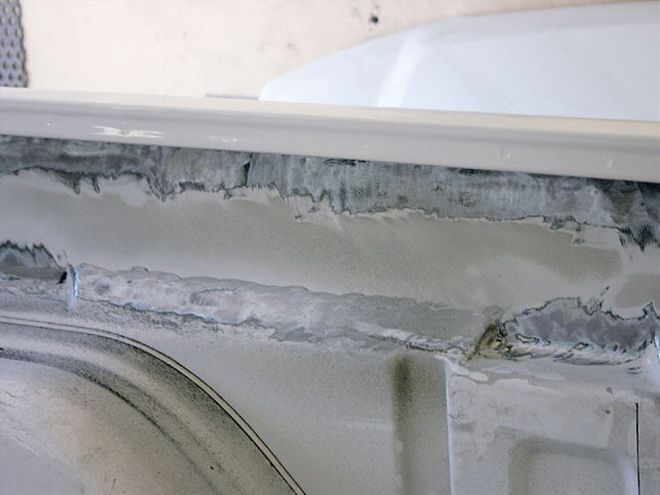
3. When the airbags are deflated and the framerails rest on the pavement, the rocker panels are approximately 2-3/4 inches away from the pavement. This means that we'd have to body-drop the bed floor the same amount in order for the rockers to touch the ground after the bed is reinstalled. The only problem with that theory is that the step notch would prevent us from reinstalling the bed, unless we cut holes in the floor for the protrusions. We'd need to body-drop the floor an additional 2-3/4 inches and re-mount the bed on spacers that equal that amount. This will provide plenty of clearance for the step notch beneath the bed floor and keep us from having to cut any unnecessary holes in the floor. We marked out a total of 5-1/2 inches for the body drop and removed the paint in the areas we'd be cutting and welding in. The lower line is where we'll cut the sheetmetal apart, and the upper line is where we'll reattach the sheetmetal, at exactly 5-1/2 inches higher than it came from the factory.
| 3.
3. When the airbags are deflated and the framerails rest on the pavement, the rocker panels are approximately 2-3/4 inches away from the pavement. This means that we'd have to body-drop the bed floor the same amount in order for the rockers to touch the ground after the bed is reinstalled. The only problem with that theory is that the step notch would prevent us from reinstalling the bed, unless we cut holes in the floor for the protrusions. We'd need to body-drop the floor an additional 2-3/4 inches and re-mount the bed on spacers that equal that amount. This will provide plenty of clearance for the step notch beneath the bed floor and keep us from having to cut any unnecessary holes in the floor. We marked out a total of 5-1/2 inches for the body drop and removed the paint in the areas we'd be cutting and welding in. The lower line is where we'll cut the sheetmetal apart, and the upper line is where we'll reattach the sheetmetal, at exactly 5-1/2 inches higher than it came from the factory.
 | 4.
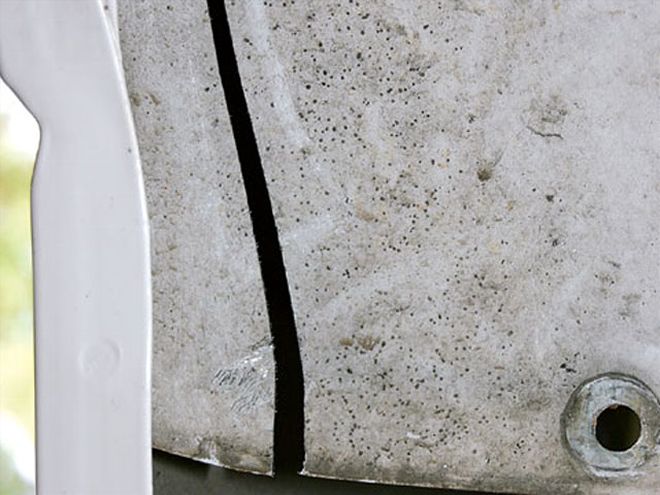
4. Before we can raise the bed floor upward, we have to separate the bed sides from the inner wheelwells. These sections attach to the bed sides at the fender lip. We cut just to the outside of the outer bed side support bolts.
| 4.
4. Before we can raise the bed floor upward, we have to separate the bed sides from the inner wheelwells. These sections attach to the bed sides at the fender lip. We cut just to the outside of the outer bed side support bolts.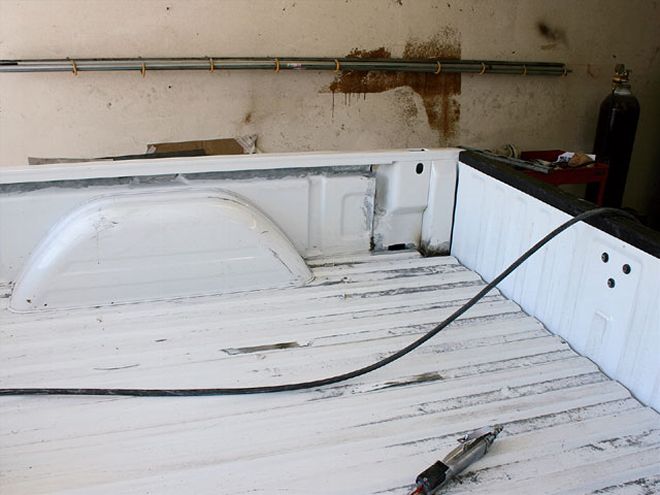 | 5.
Since we're not actually body-dropping our truck yet, we'll make 5-1/2-inch-long bed spacers out of 2x2-inch square tubing and install them using 180mm M12 bolts to space up the mounts on the frame and compensate for the difference in height between the bed and the cab.
| 5.
Since we're not actually body-dropping our truck yet, we'll make 5-1/2-inch-long bed spacers out of 2x2-inch square tubing and install them using 180mm M12 bolts to space up the mounts on the frame and compensate for the difference in height between the bed and the cab.


 | 23.
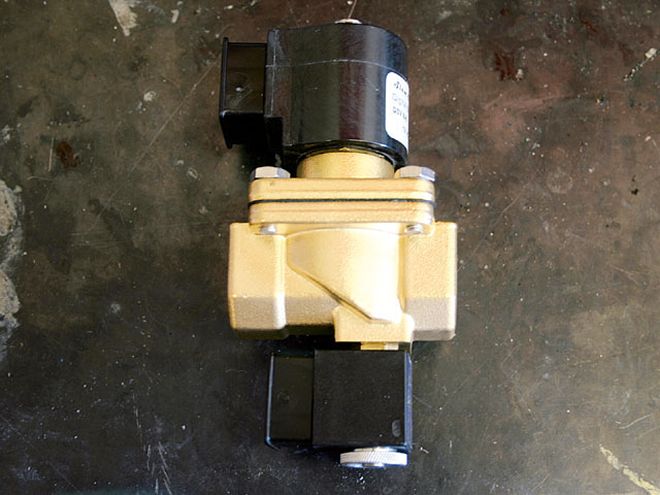
23. For this installation, we're using Slam Specialties' new Digital Stealth Valves (DSV). These valves offer two different speeds of lift and drop. If you've ever wished that gravity wasn't the only way to drop your truck, take a look at these.
| 23.
23. For this installation, we're using Slam Specialties' new Digital Stealth Valves (DSV). These valves offer two different speeds of lift and drop. If you've ever wished that gravity wasn't the only way to drop your truck, take a look at these.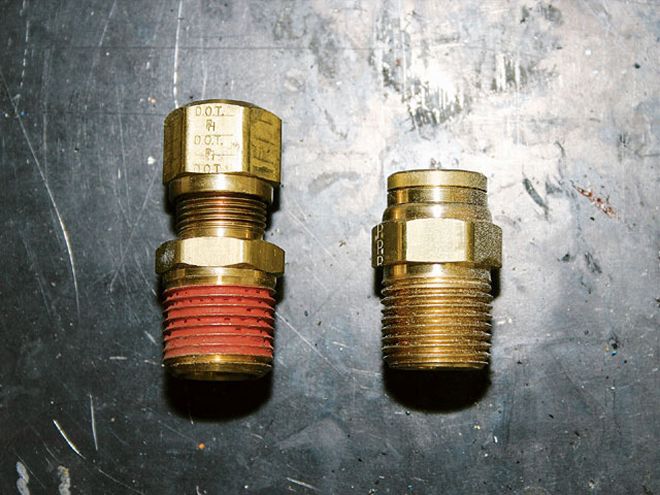 | 24.
PTC fittings are more convenient because you just push the hose into the fitting, pull it back to lock it in place and you're done. The problem is that you can't do that too many times or your hose end will eventually wear out and leak. We used both types of fittings in our installation.
| 24.
PTC fittings are more convenient because you just push the hose into the fitting, pull it back to lock it in place and you're done. The problem is that you can't do that too many times or your hose end will eventually wear out and leak. We used both types of fittings in our installation.


