Having a new truck is always a treat in itself, but to have a new truck and have it go faster with more torque is even better. That's exactly what the owner of this ’14 Chevrolet Silverado 1500 wanted. He wanted a daily driver that would quickly get up and move when his right foot got heavy. To get the extra power needed, Magnuson Products were contacted and one of their Intercooled Supercharger Systems was ordered. This kit is a direct bolt-on kit that will increase horsepower and will not affect the day-to-day driving ability of the vehicle. There are three options when ordering this kit to consider. One is to remove your factory computer and ship it to Magnuson for them to reprogram it. The next option is to order it with the SCT Tuner, which will install a new tune into your factory computer. The last option, and the one we chose with this install, is to have the truck tuned at a profession performance shop. Being we contacted PCM of NC in Morrisville, North Carolina, to do the install, we knew with their years of GM performance upgrade experience, getting a custom dyno tune was our best bet and would achieve the best outcome. PCM had already done a custom tune on the truck after the Kooks headers and exhaust was installed, so they had a baseline ready to go.
When we contacted Magnuson, we told them we had the new 5.3L Direct Injection motor so they sent us their new complete intercooled kit for the truck, PN 01-19-53-182-BL. This kit would add about 120 rear-wheel horsepower and is an all inclusive kit. Follow the next few pages to see what it took to add this blower kit to our truck.
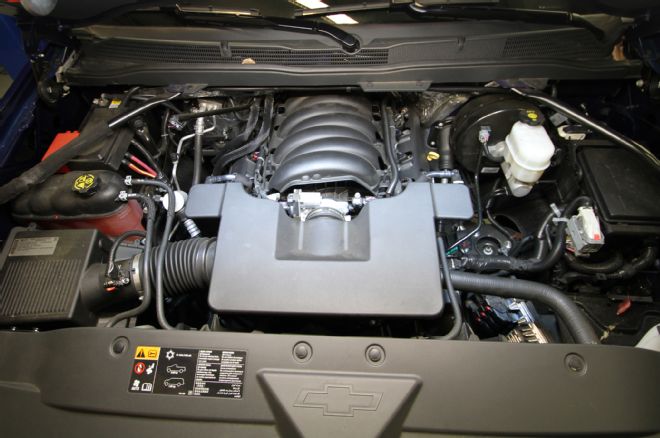
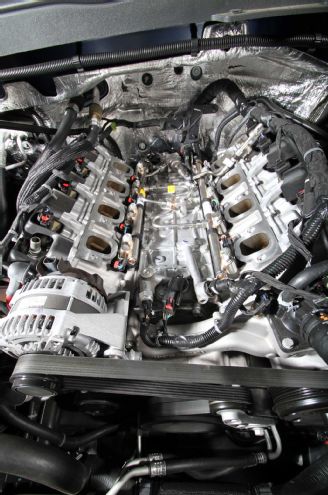
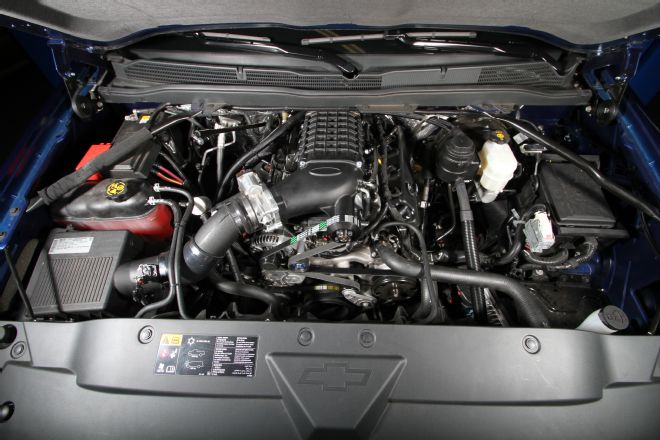
| 2014 Chevrolet Silverado Engine Bay
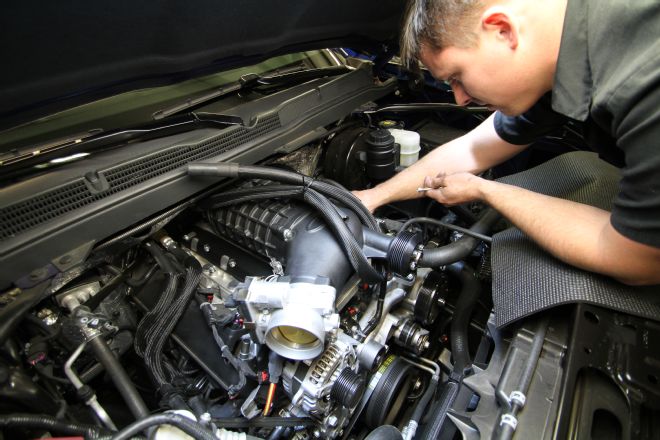
01. The factory engine bay looks good from the factory, but it screams for this upgrade.
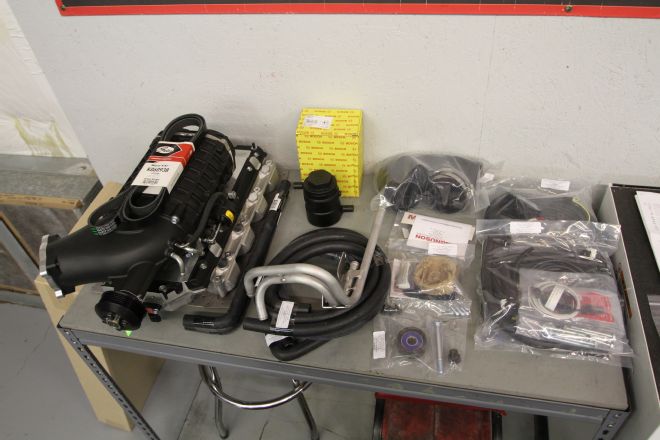
| Magnuson Kit
02. This kit comes with everything you need, except the tools, to bolt the supercharger on your engine.
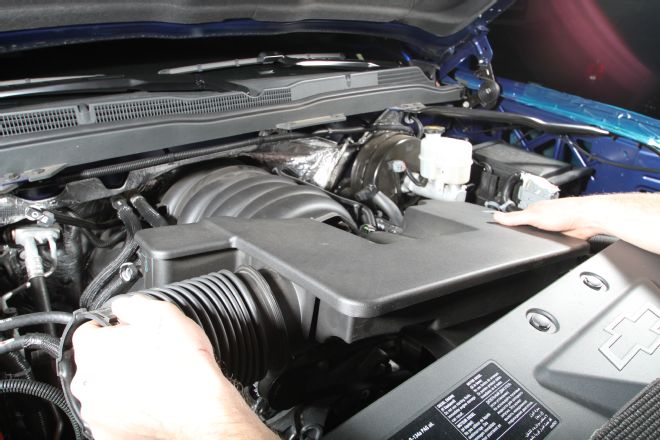
| Factory Airbox
03. The factory airbox and all tubing came off first to make room to access the factory intake manifold.
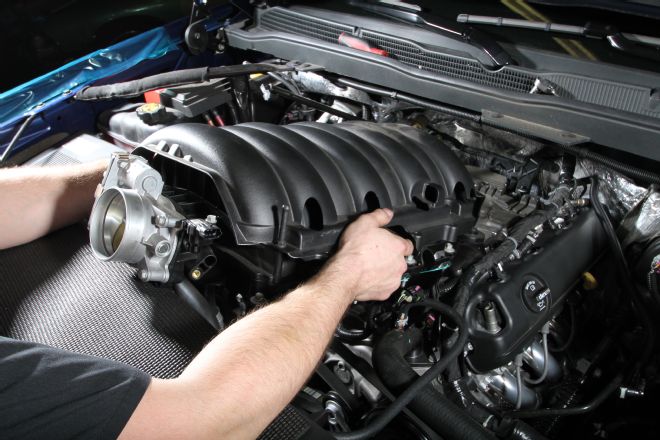
| Factory Intake Manifold
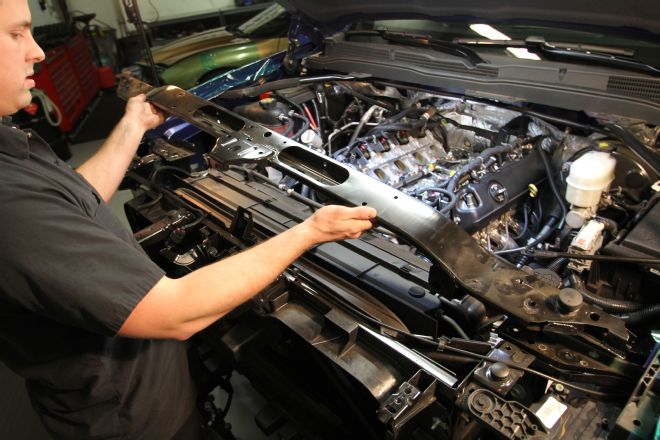
04. After all the connections were unplugged and the bolts removed, the factory intake manifold was lifted off of the motor and out of the engine bay.
| Clean Intake Valley
05. Once the factory intake manifold was removed, we made sure the intake valley was clean of any debris and nothing gets dropped into the motor. For extra safety, you can put tape across the intake holes until the new blower is set in place.
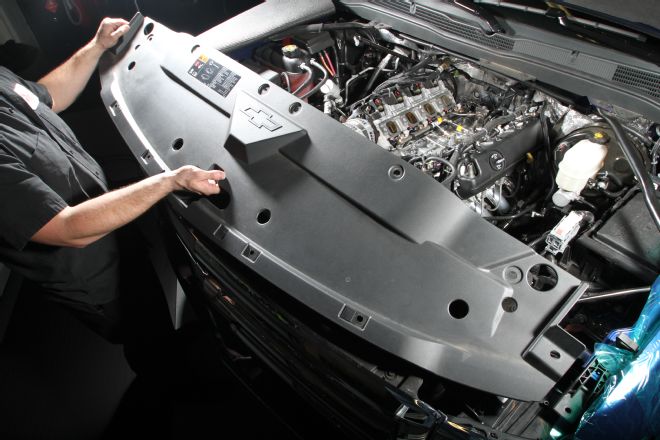
| Plastic Radiator Shroud Cover
06. The plastic radiator shroud cover was removed to access the radiator core support and the grille bolts.
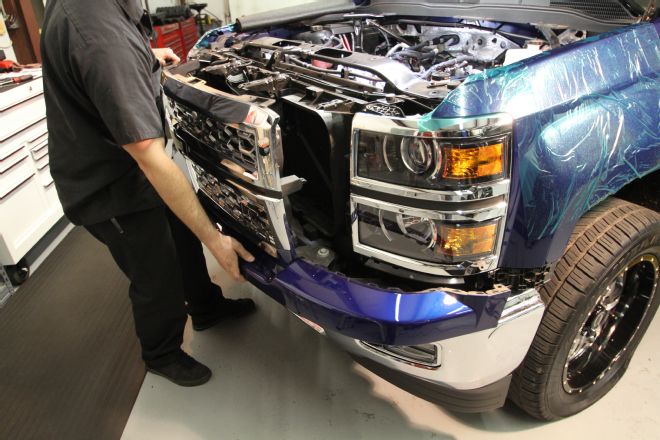
| Fenderwells
07. The grille and bumper cap were unbolted in the fenderwells and behind the shroud cover. Then, it all came off in one piece. It was set aside so it wouldn’t be damaged.
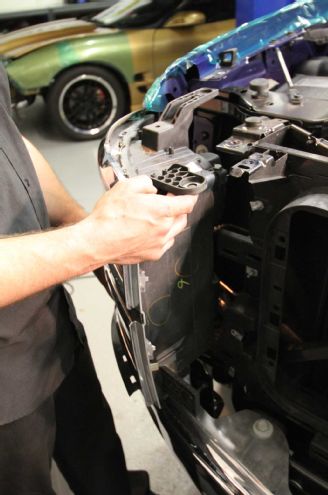
| 2014 Chevrolet Silverado Headlights
08. Both headlights needed to be unbolted and removed to allow access to run the blower coolant lines.
| 2014 Chevrolet Silverado Engine
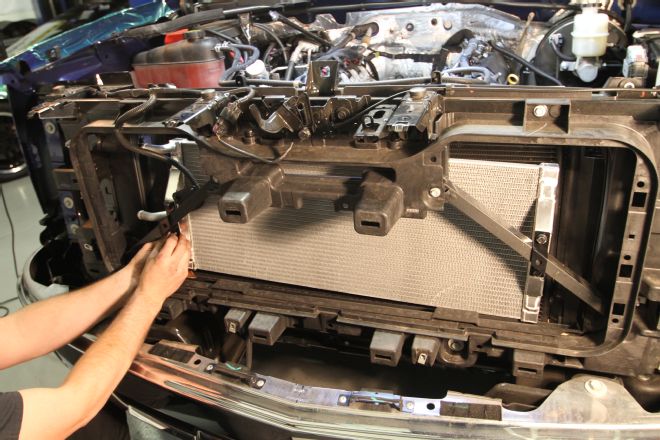
09. The core support was removed to be able to get the provided low temperature radiator (LTR) in front of the factory radiator.

| Factory Radiator
10. We pushed the top of the factory radiator toward the rear of the vehicle to allow enough room to slide the LTR between the front A-frame braces and the factory radiator.
| Mounted Ltr A Frame
11. Using the supplied brackets and grommets, we mounted the LTR to the A-frame in front of it.
| Passenger Side Headlight Coolant Lines
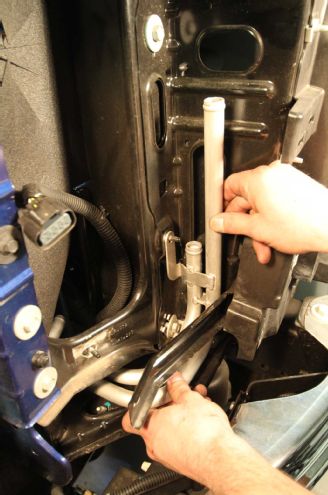
12. We ran the coolant hard lines in the passenger-side headlight bucket and bolted them into place.
| Ltr Coolant Lines
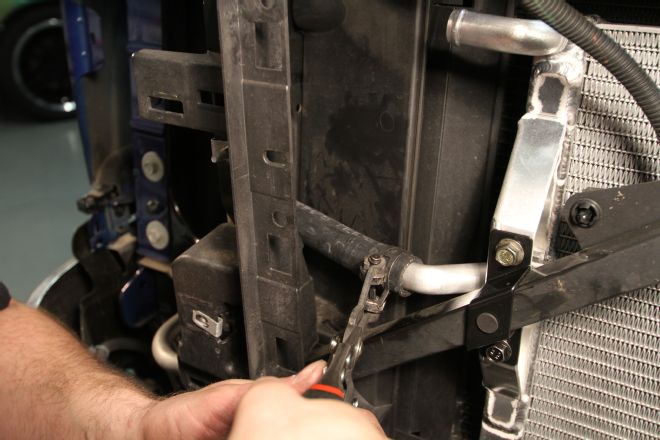
13. Next, we clamped the supplied coolant lines between the hard coolant lines and the flange on the side of the LTR ensuring they are tight so there are no leaks.
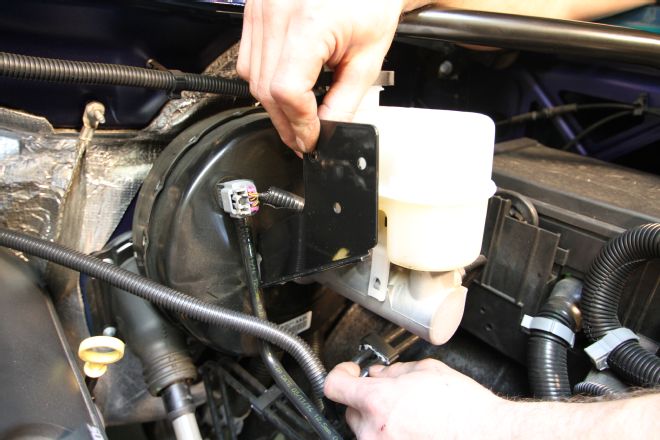
| Coolant Reservoir
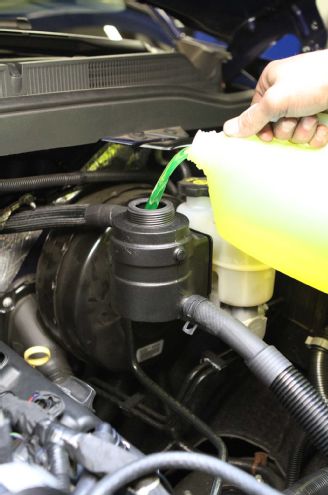
14. The new coolant reservoir mounted to the factory brake booster with the master cylinder bracket bolts. The nuts went back on at 33 ft-lb so we made sure to double-check the torque wrench settings.
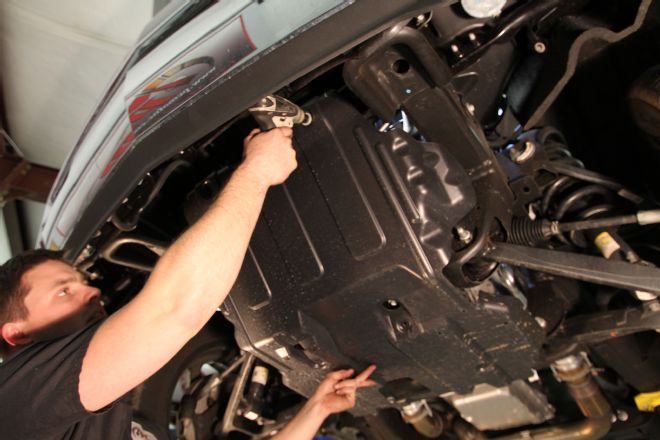
| Lower Skidplate
15. We removed the lower skidplate from the bottom of the motor. This is to allow access to run all the coolant lines.
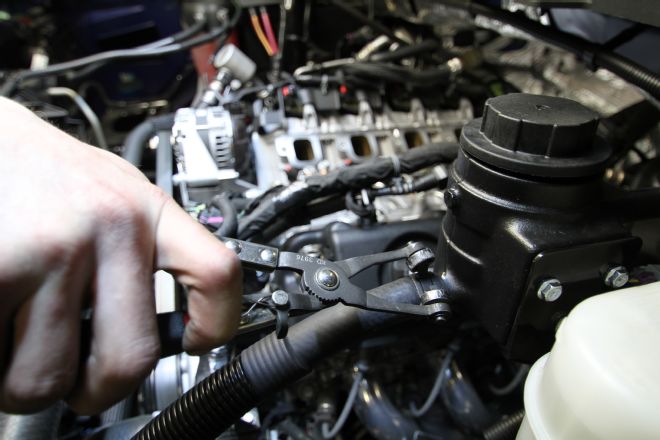
| Coolant Reservoir Line
16. Next, the line from the LTR to the front of the coolant reservoir was connected using the supplied hardware. You also need to loom the line so nothing rubs through it.
| Supercharger Inlet
17. After removing the throttle body from the factory intake manifold, we removed the factory throttle body gasket from the factory intake manifold and install it into the groove of the supercharger inlet.

| Supercharger Inlet
18. Now we could install the factory throttle body on the supercharger inlet using a 10mm wrench and torque to 106 in-lb.
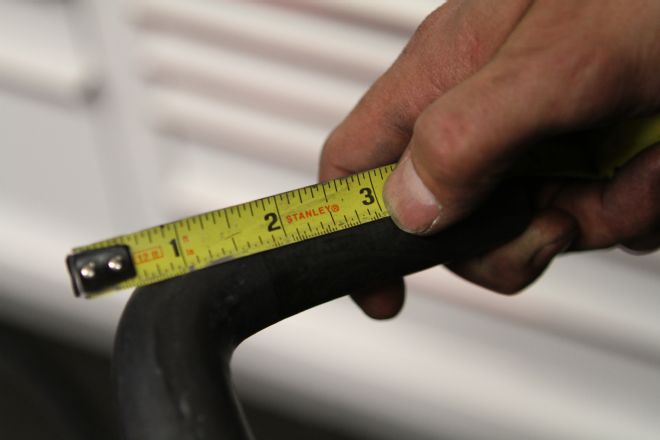
| Measuring Tape
19. We then cut the supplied hoses with 90-degree elbows to 3 inches to allow for proper fitment on the rear of the supercharger.
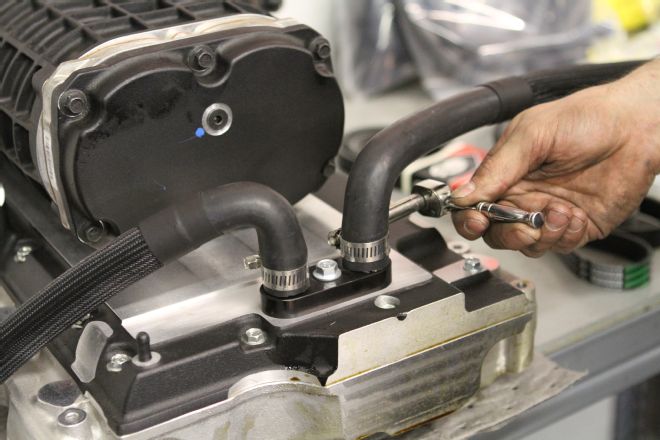
| Rear Supercharger
20. Then, we connected both of the cut elbows to the barbs on the rear of the supercharger. The 23-inch-long piece goes to the lefthand side and the 51-inch piece goes on the righthand side. We secured them in place with the supplied hose clamps.
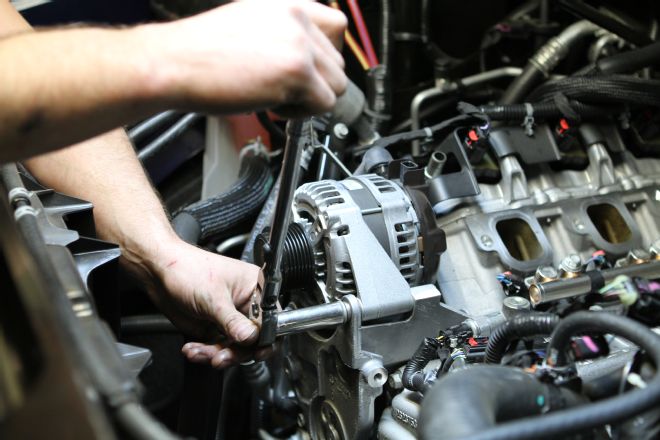
| Center Mounting Bolt
21. After removing the belt and discarding it (as it will not be used again), we removed the center most alternating mounting bolt using a 15mm wrench.
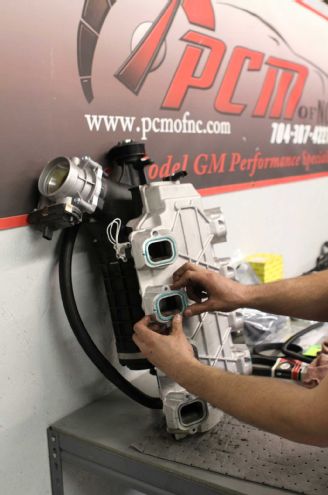
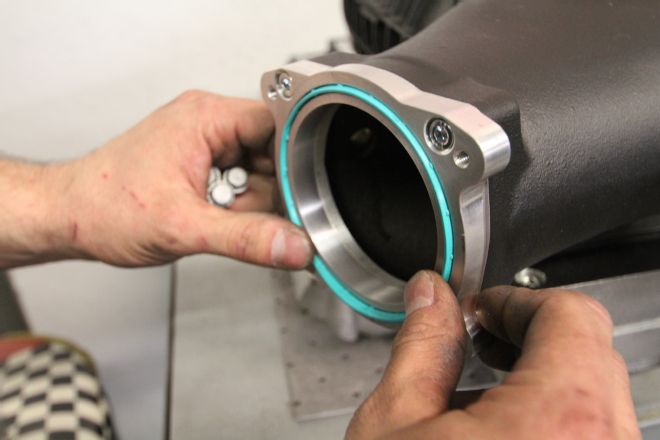
| Factory Intake Manifold
22. Now that the supercharger was ready to be installed, we removed the factory O-ring gaskets from the factory intake manifold and installed them into the grooves in the bottom of the supercharger. If any of these get damaged in this process, you need to replace them with GM replacement parts only. The tab will line up with the slot on the outside edge.
| 75mm Long Mounting Bolts
23. We set the supercharger in place and installed the 10 provided 75mm-long mounting bolts and torqued them to 106 in-lb using a 10mm wrench.
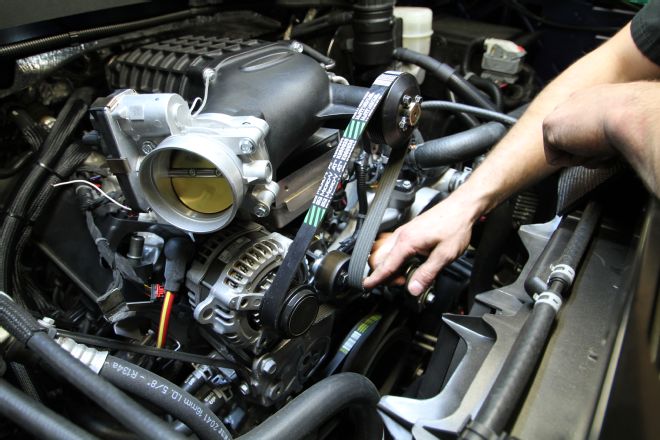
| Drivebelt
24. Now we could install the provided accessory drivebelt.
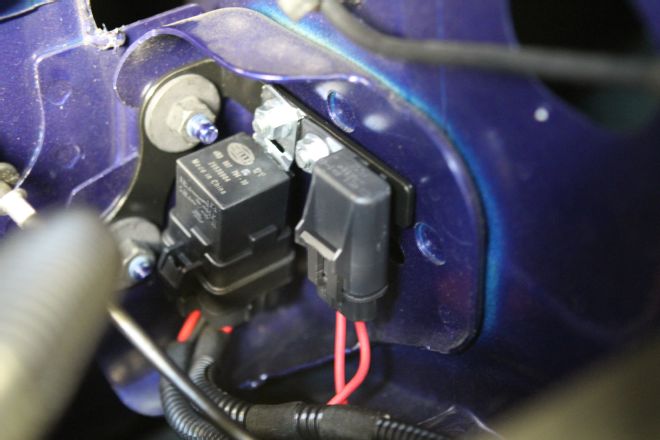
| Driver Side Hood Hinge
25. The provided relay and fuse were mounted under the driver-side hood hinge using factory mounting studs. We were careful when routing these wires so they do not rub on the sheetmetal.
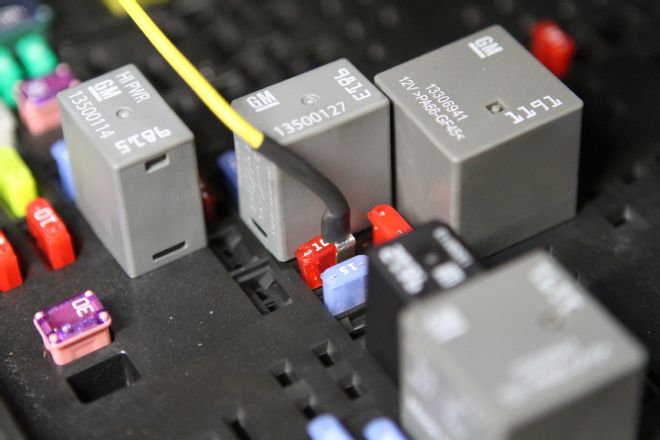
| Underhood Fuse Box
26. As per the instructions, we removed the fuse number 3A (labeled MISC IGN) from the slot in the underhood fuse box. We connected the fuse tap end of the yellow wire from the intercooler wire harness to one leg of the fuse that was just removed, and then reinstalled the fuse.
| Ground Bolt Firewall
27. We connected the black ground wire to the existing ground bolt on the firewall just above and inside the brake booster canister.

| Throttle Body Factory Airbox
28. Now it was time to install the air tube components and connect the throttle body to the factory airbox.
| Air Cooler System
29. While filling the air cooler system with a mixture of coolant and de-ionized water, we reconnected any plugs that were unplugged, reinstall the parts removed (headlights, grille, core support cap, radiator shroud) and reconnected the battery.
| 2014 Chevrolet Silverado Engine Bay Jpg
30. With everything buttoned up, you can see that not only does the Magnuson kit make for a clean install, but the engine is about to make some serious horsepower.
| 2014 Chevrolet Silverado Front View
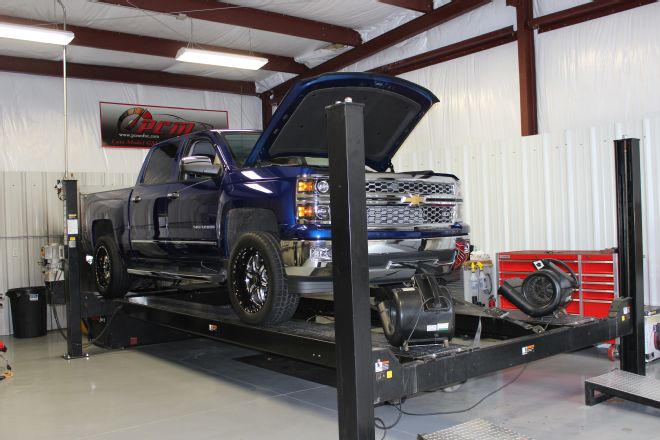
31. Since PCM has an in-house dyno, the truck was set up and run through its paces to get the perfect tune possible with the addition of the supercharger.
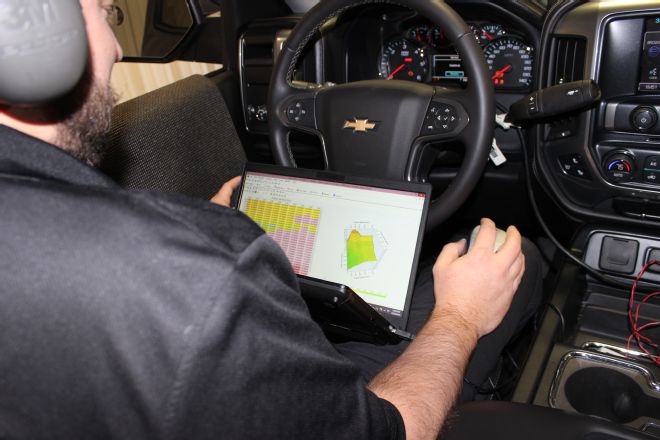
| 2014 Chevrolet Silverado Interior
32. While on the dyno, the computer was reprogrammed and the truck run again to ensure they pulled every bit of extra horsepower they could out of the supercharger and ensure it would run properly for daily driving. The truck already had a set of Kooks headers and a Kooks cat-back exhaust so those elements were factored into the new program.
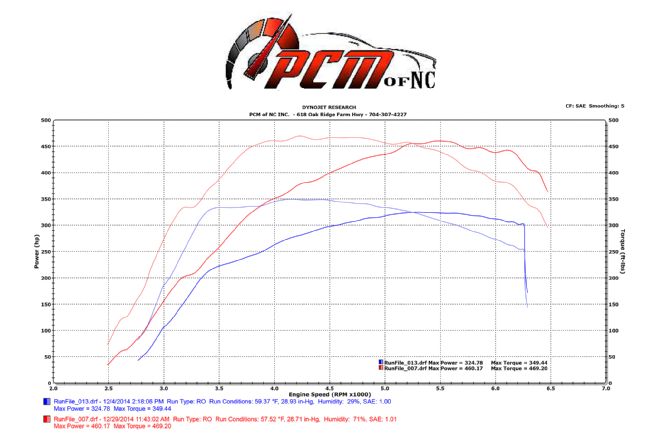
| 2014 Chevrolet Silverado Dynojet Research
33. PDF Chart: Once the truck has tuned, the total output to the ground was 460 hp and 469 lb-ft of torque. That was 136 hp more than the base line run with just the headers and exhaust!