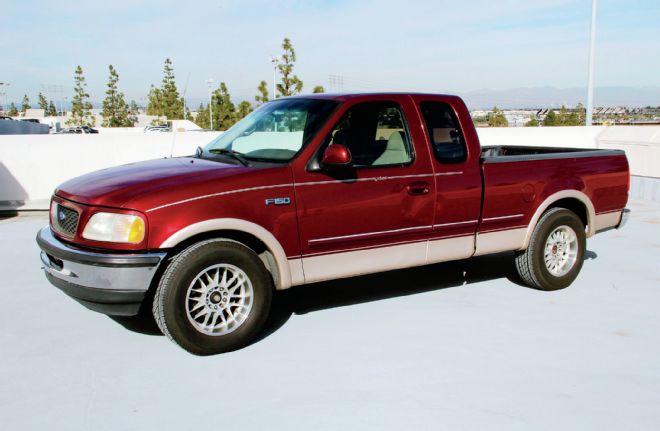
Last month we introduced a new project, affectionately known as Larry, short for F-150 Lariat. It has been with the company since 1996, when it won the coveted Truck of the Year (TotY) title for Ford Motor Company, hence the clever “TotYl” title. Judging by the neglected exterior, bad battery and tires, and empty crankcase, we thought ol’ Larry may be a lost cause, but a trip to the K&N Engineering dyno proved otherwise. We made around 10 to 15 hp less than the original OE specs and gained an instant 10 just by adding K&N’s FIPK intake. Now we knew we weren’t throwing parts at the truck in vain, but we also knew that the gains would be more modest from here on out. We’re told that the heads on the first-generation 5.4L engines are so restrictive that it is all but pointless to go beyond the basic upgrades without upgrading them, at least to the later versions (which we’re told can add as much as 65 hp just by bolting them on. We wrapped last month up with a pretty healthy tune-up from Summit Racing that included ACCEL coils, plugs, injectors, filters, and Lucas lubricants.
This month, we decided to add some tried-and-true power adders to round out the engine portion of this resurrection. We started by heading out to Gibson Performance so they could weld up their stainless Single Swept cat-back system (it’s available as a bolt-on kit as well). While we were there we also picked up a set of Gibson’s ceramic-coated street-legal headers, and headed back to the TEN tech center for an install. Finally we looked to Summit Racing for advice regarding a performance tuner and they recommended the 50-state legal and vehicle specific PCM programmer from SCT.
With everything buttoned back up we headed back out to K&N and made a few more runs on the dyno. While we only made a grand total of 197 hp at the wheels, which is roughly 17 hp over stock, this is still significant for two reasons. First, this is an engine that has 120K miles and was neglected for the past several years. Second, the peak horsepower numbers sometimes do not tell the whole story. Our low and midrange power and torque increas ed by 30 points for much of the curve. This equates to a much more responsive throttle and noticeable power gains during everyday driving. Check out the install below and check back soon, and see what we do to ol’ Larry next!
| 1.
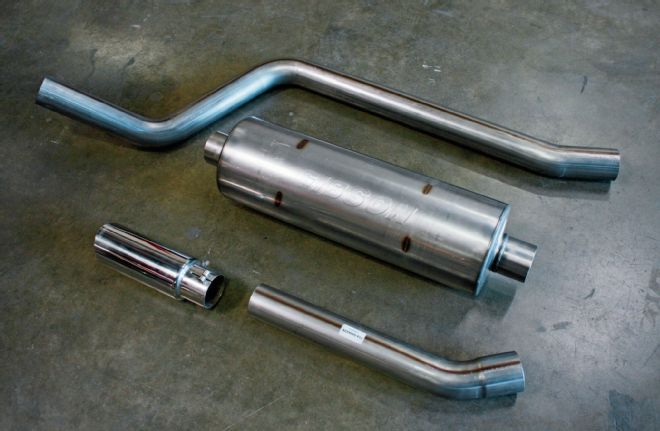
1. Gibson Performance Exhaust provided their sweptside cat-back system made specifically for the 1997-2003 Super Cab, shortbed Fords. Features of the kit include mandrel-bent tubing, T304 stainless round slash cut tip, and includes all the hardware and factory-style hangers for an easy bolt-on installation. The Gibson muffler features a baffled and chambered design, no internal packing, and a powerful deep tone.
| 2.
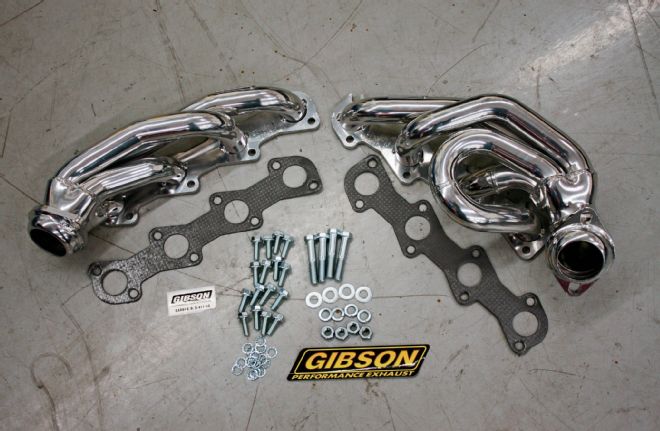
2. Also on our parts list were a set of Gibson’s ceramic-coated headers (PN GP206S-C). They feature 1.50-inch stainless 16-gauge mandrel-bent tubing, are complete with the EGR fitting, and include premium gaskets with the kit. The best part for us Californians is that they are 50-state legal.
| 3.
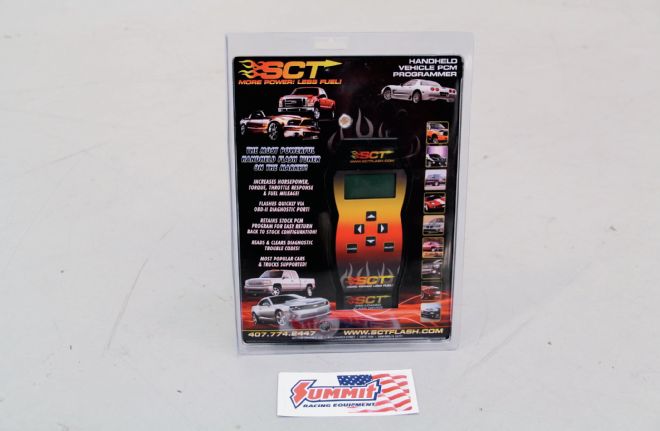
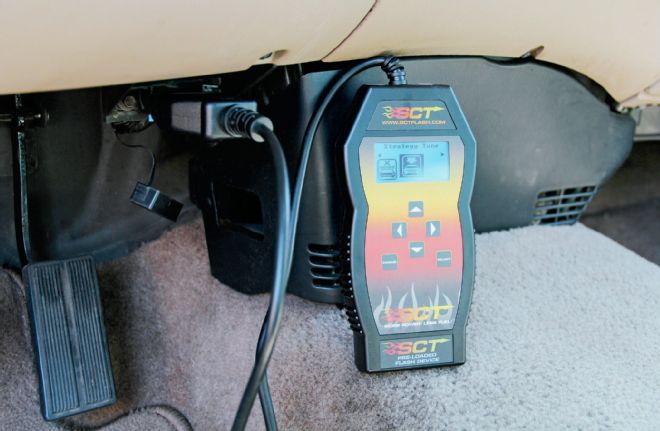
3. Summit Racing provided us with the SCT SF3 EO Power Flash Ford Programmer (PN 3015EO) SCT programmer arrives loaded with proven tune files and is literally as simple as plugging the OBD-II connector into your port and selecting the preloaded tune file from the menu. Best of all, this SCT programmer is also 50-state legal.
| 4.
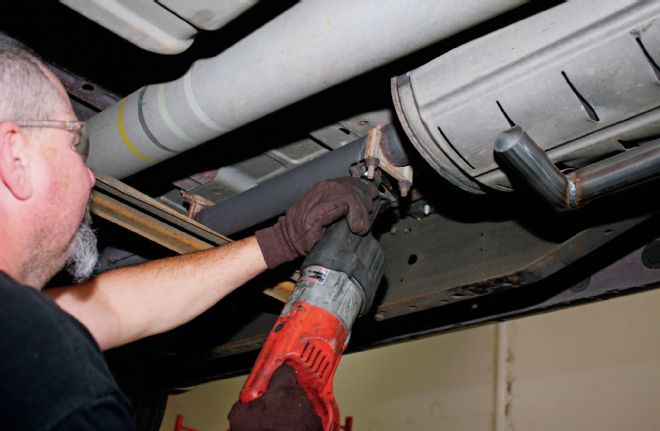
4. We began the install in Corona, California, at Gibson’s R&D facility where we put the F-150 up on the lift and wasted no time in cutting the rusty stock exhaust system off and removing it by lubing and prying off the stock rubber hangers. Most of these will be reused.
| 5.
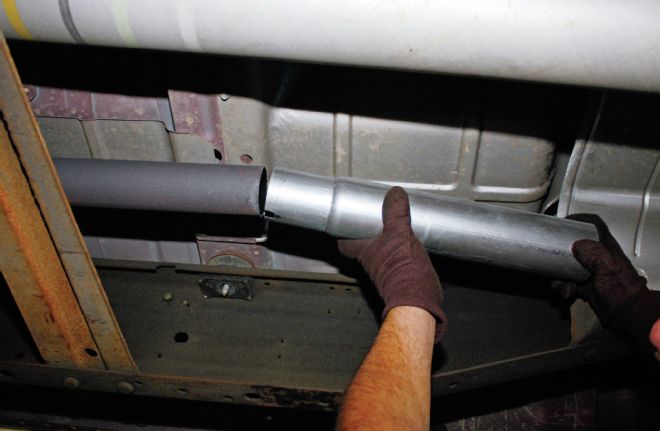
5. The Gibson installation starts with the first section that slips over the original pipe.
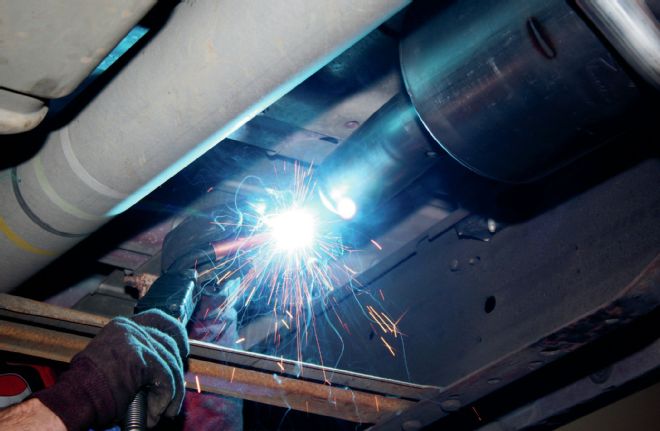
| 6.
6. Now the Gibson muffler is raised into place on a custom-built cradle where it will slide into the pipe. Since we’re welding it up, it is double-checked to be perfectly level.
| 7.
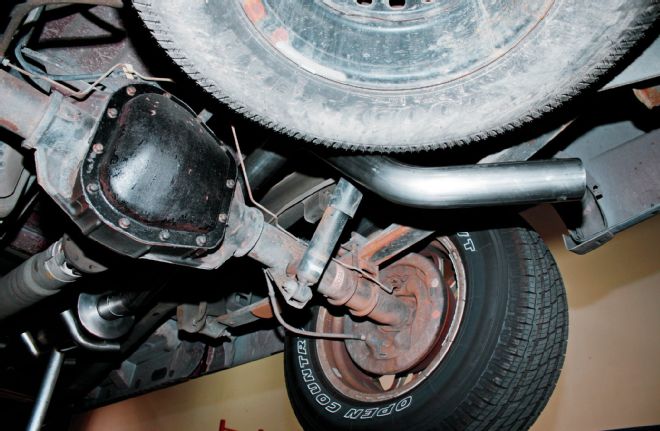
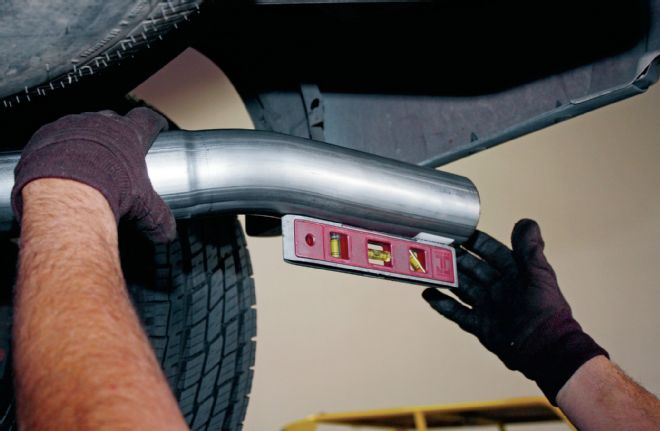
7. Next, the rear section of the system was fed over the axle and into the stock hangers.
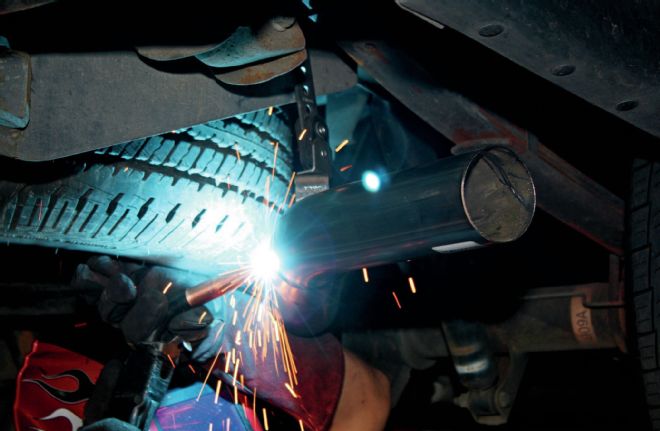
| 8.
8. Finally, the tailpipe was slid on and once again checked with a level.
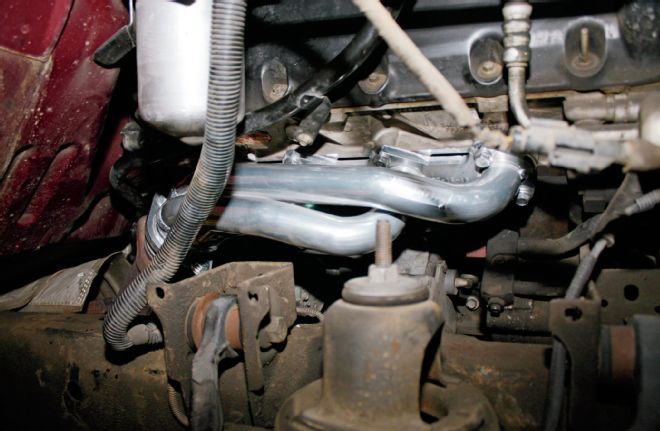
| 9.
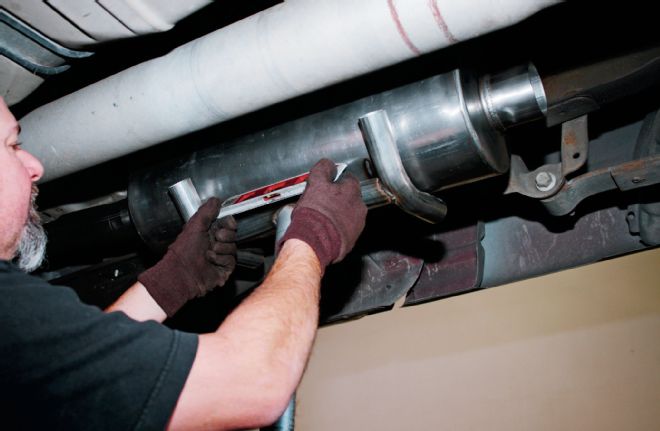
9. Moving back to the front of the system, each section was again checked to be level before it was welded solid.
| 10.
10. We worked our way back to the tailpipe until everything was welded. Notice the new, non-stock hanger we also welded on? It’s because we started with a side-exiting exhaust on this truck so the rear hanger was missing. We remedied the situation and you can do the same in a bolt-on configuration if you let Gibson know what you’re starting with when you place your order.

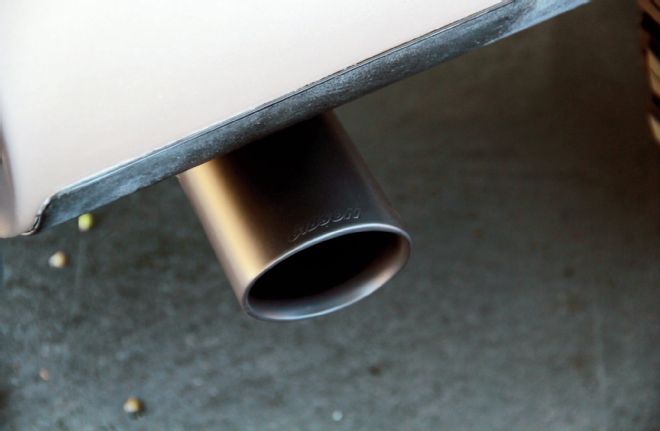
| 11.
11. Shawn and the Gibson crew surprised us with this cool-looking satin black exhaust tip for our F-150. It doesn’t match anything yet, but we’ve got big plans ahead!
| 12.
12. Back on the ground, we were looking and sounding a lot better, but we still had a long way to go.
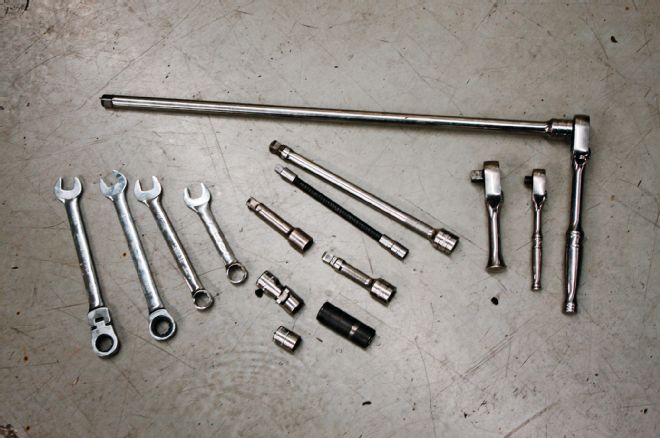
| 13.
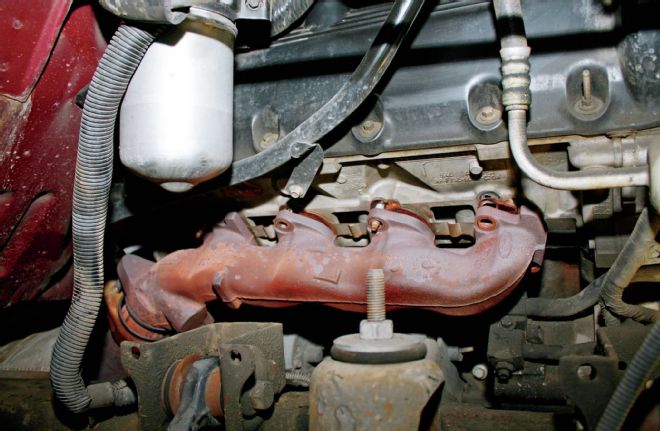
13. Back at Truckin HQ, we began the tedious task of removing the stock exhaust manifolds and studs to install the Gibson Headers. We were instructed to take our time and have plenty of tool options available because it was a tight squeeze. You better believe that we used every tool here at least once!
| 14.
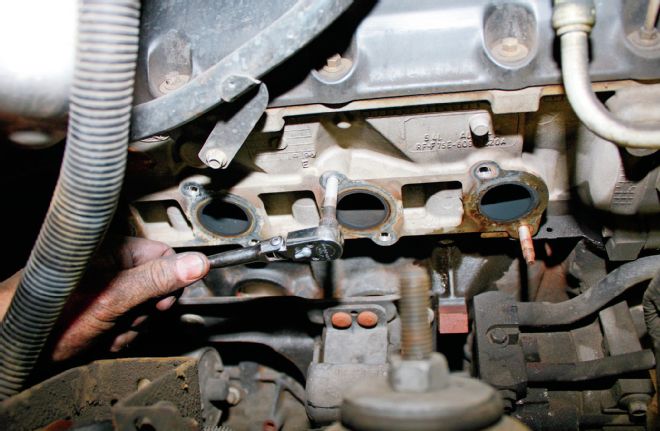
14. With the truck on a lift, we removed the wheels as well as the inner fenders and disconnected the Y-pipe from the stock exhaust manifolds. The passenger side was pretty straightforward -- you can actually see all of the studs. Once all eight of the nuts were removed the manifold was fished out.
| 15.
15. Thankfully, the studs have tiny hex heads on them so they can be removed fairly easily. As you can see, some came out with the nuts, and the rest did not put up too much of a fight.
| 16.
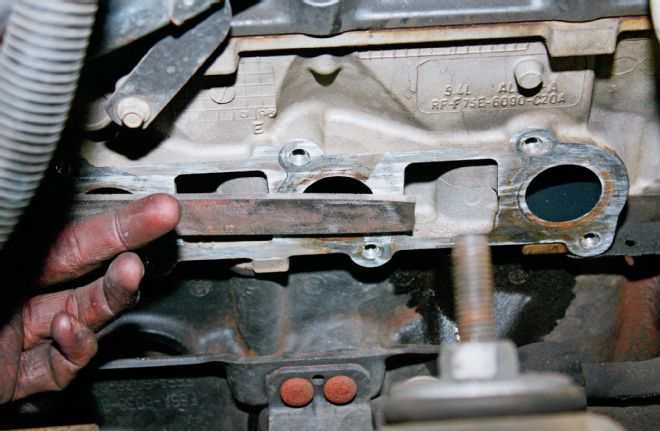
16. Before installation, we ran a file over the mounting surface of the head just to make sure there were no extremely high or low spots.
| 17.
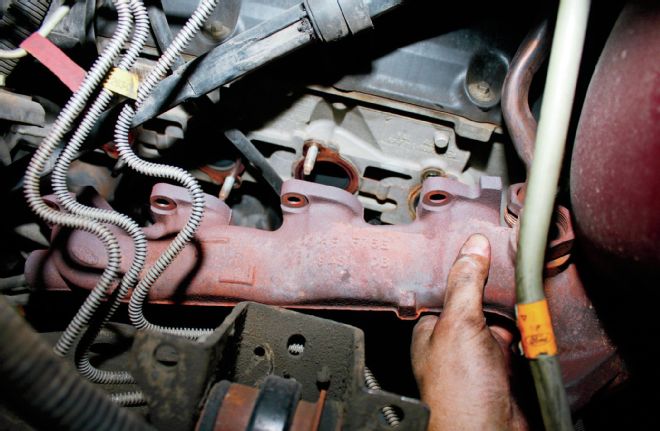
17. Because of the slotted upper mounting holes, we could pre-hang the gasket with the upper four bolts, making the header installation a whole lot easier. This side wiggled into place pretty smoothly.
| 18.
18. We got the bolts in place pretty easily with our assortment of 13mm tools and extensions. OE torque specs are only 20 lb-ft, which we exceeded before knowing, but use extreme caution because repairing a stripped-out hole in the aluminum head is a whole lot more work than installing headers.
| 19.
19. The driver side is an exercise in patience. The space is so tight that it was difficult to even get photos, let alone do the work. We took one bolt at a time, found the right tool, and made it happen. The EGR tube is located over here as well, adding to the fun.
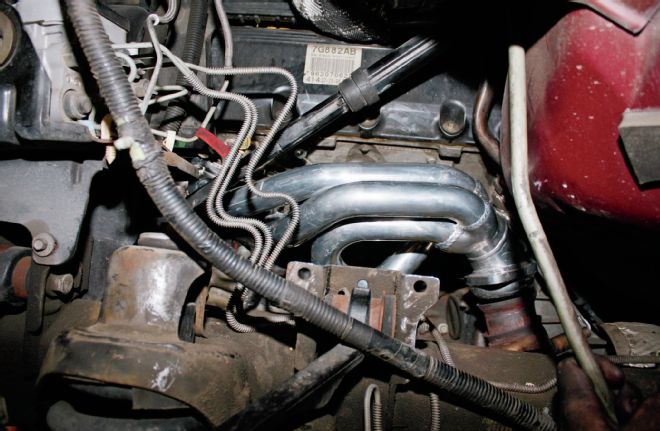
| 20.
20. We spent a solid hour wiggling studs out and the new header into place. When the EGR and Y-pipe were reconnected we got the truck nice and hot, then let it cool so we could double-check each bolt -- because we don’t want to do this again for a while!
| 21.
21. Finally, we were back on the ground, and in the cab even, for the final part of the install. The SCT programmer simply plugged into the OBD-II connector to get things going.
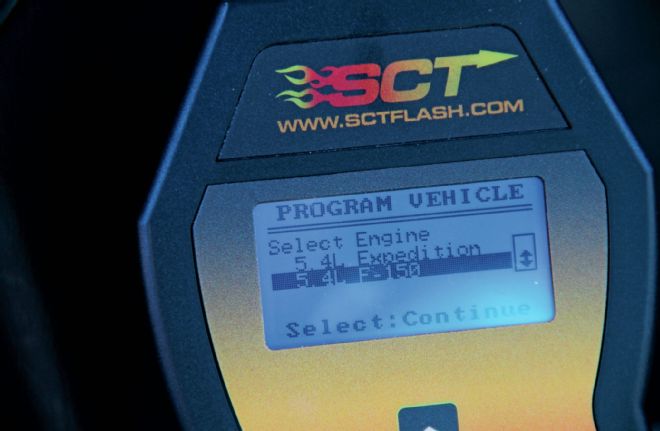
| 22.
22. We followed the prompts for about a minute, and like magic, the truck was reprogrammed for better shifts, mileage, and power.
| 23.
23. With all of our upgrades we gained about 17 hp at the wheels. But more importantly, we gained over 30 hp and torque points all the way through the low and midrange rpm. The truck went from being barely driveable to a reliable freeway flyer or hauler in just a few days. Unfortunately, the truck still looks like this. We rubbed the paint some for this photo, but we still have a long way to go before we call it good. This is Truckin after all! Which way are we going to go from here? Check back soon to see!
| TechCenter2013