For those of us who are GM performance car and truck enthusiasts, the letters LS engine signify reliable, modern, efficient power. Replacing the venerable small-block Chevy in the late ’90s, the LS engine family has become the go-to solution for state-of-the-art performance applications. GM’s Vortec truck engines have also utilized LS architecture for many years, but often with a few tweaks to better suit truck applications. In the case of this article, we’ll be tearing down and rebuilding an iron-block LY2 Vortec 4800, which is a sister engine to the LS2 that can be found under the hoods of 1999-2009 Chevy and GMC trucks and SUVs.
By gutting this engine’s old factory internals and precisely machining the block, we will set a strong foundation for the new upgraded internal components we’ll be adding later on. During the machining process, we’ll be significantly increasing the cylinder bore from the standard 3.780-inch figure to 3.905 inches. This increase in bore will be compounded by the addition of a new Eagle crankshaft that increases stroke length by approximately 3/4-inch to a total of 4.00 inches. It may not sound like much, but the combined change in bore and stroke will increase displacement from 4.8L to 383 ci (about 6.3L), hence the term 383 stroker. At the end of the day, this means increased power and torque -- after all, there’s no replacement for displacement. Best of all, we’re doing all of this with a super-popular base engine that can be found at a junkyard for around $400.
With a wide array of new internal parts in hand from Eagle, Comp Cams, RHS, ARP, and Summit Racing, we called up Superior Automotive, in Placentia, California, to bring it all together. Superior began by handling the engine teardown and machining, which we’ll be showing you this month, and they later completed assembly of the engine components, which we’ll be showing you in next month’s issue. Follow along to see how this 4.8L block got a new lease on life thanks to some precision machine work and added displacement.
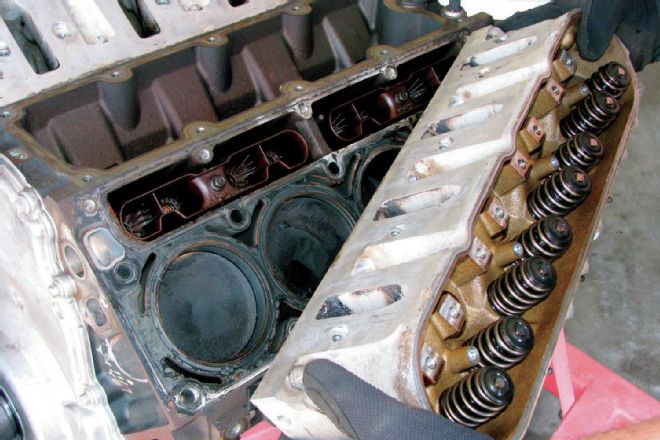
| Removing the heads on this old 4.8L revealed that it had seen better days. Fortunately, that’s nothing a good cleaning and some machine work can’t fix.
| 1.
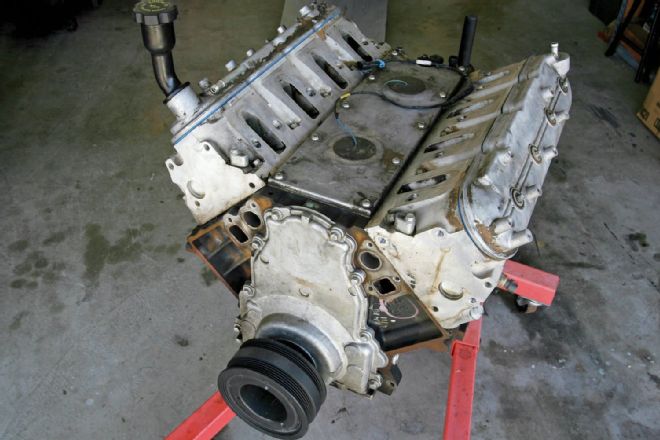
1. Sitting on an engine stand and covered in grime and rust, this Vortec 4800 had reached the end of its life. In order to be reborn as a 383 stroker, we first needed to tear it down.
| 2.
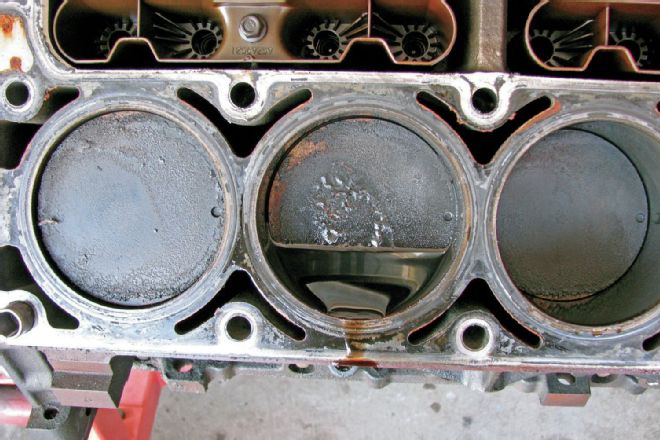
2. The cylinder heads were removed, showing pistons that were coated in a thick layer of carbon and oil. These will be going straight to the scrap heap.
| 3.
3. Flipping the engine over, the oil pan and windage tray were removed to provide access to the rod and main bolts.
| 4.
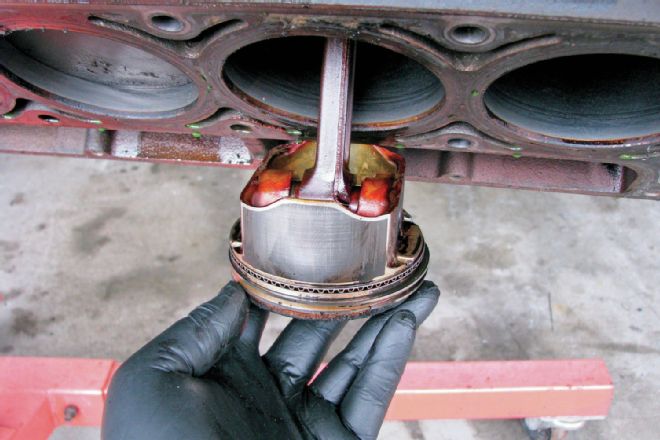
4. After removing the rod bolts, the rods and pistons were lowered out of each cylinder and scrapped. We’ll be replacing these with high-performance forged units from Eagle and Mahle.
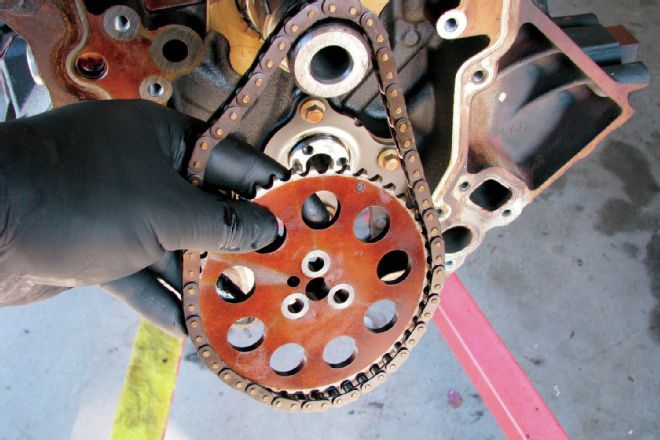
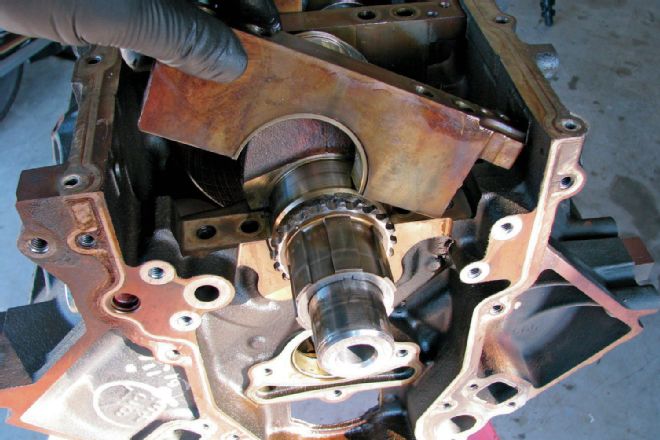
| 5.
5. At the front of the engine, the timing chain assembly was unbolted and pulled free, giving us room to remove the camshaft retainer plate and camshaft behind it.
| 6.
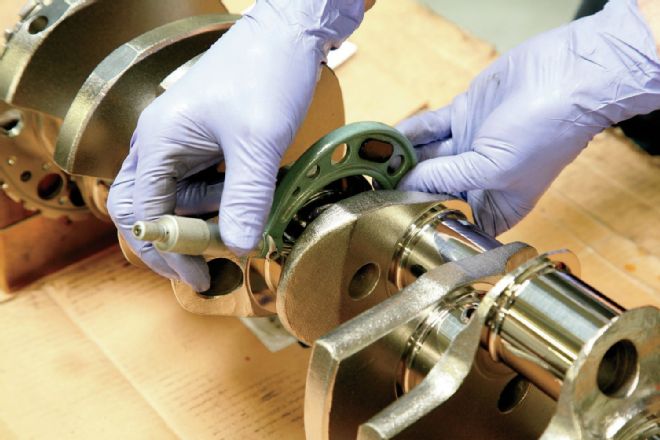
6. Next, the main caps were carefully unbolted and set aside. We’ll be reusing these after cleaning them along with the engine block—more on that later.
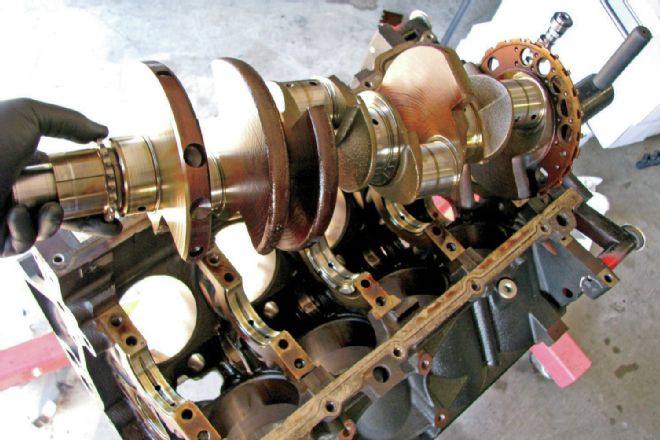
| 7.
7. With the main caps out, the crankshaft was easily lifted out of place. This will be replaced by a new Eagle crank with altered dimensions for a longer stroke length.
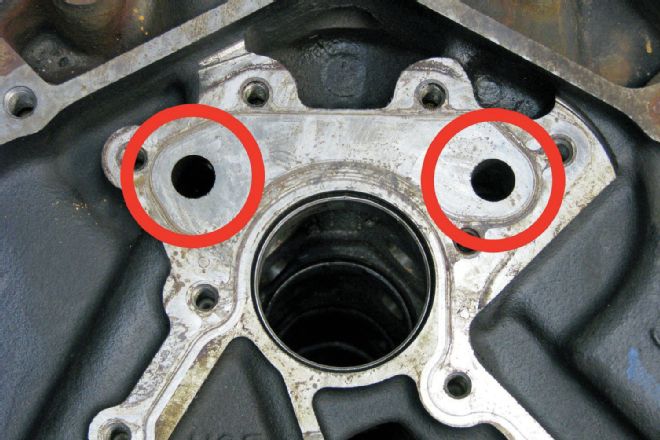
| 8.
8. At the rear of the engine above the camshaft, two oil galleys can be seen circled in red. On earlier block castings, these galleys are not connected, but on later LS2 castings a small channel connects the two for better oil flow and lubrication. Since our block is an earlier model without the channel, we’ll be machining it out for the benefits it provides.
| 9.
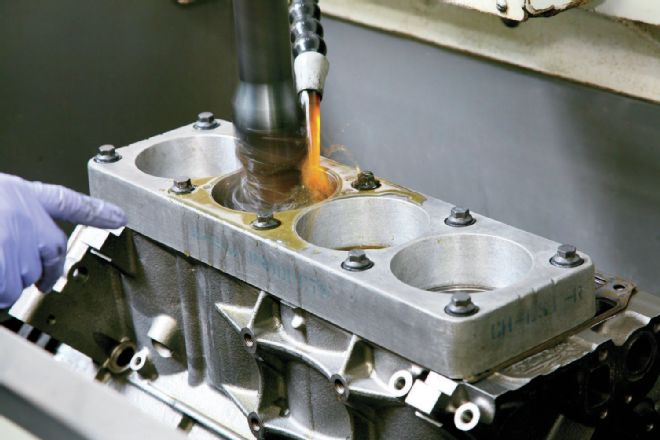
9. At Race Engine Development, in Oceanside, California, owner Steve Demirjian used a CNC router to machine out this channel between the oil galleys. This will give us improved lubrication of the rear cylinders, something GM recognized by altering their later block castings to add this feature.

| 10.
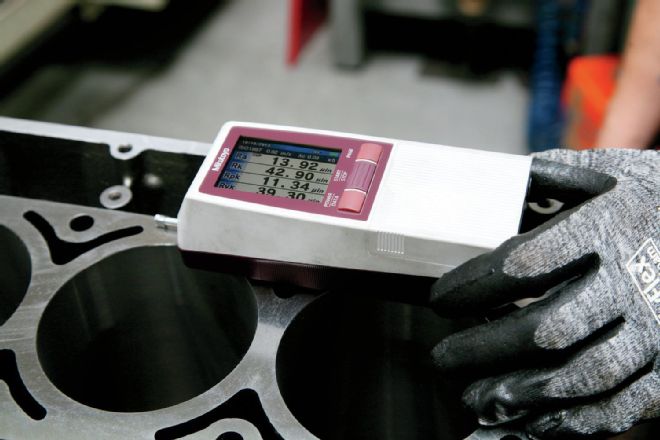
10. On the workbench, we unboxed our new 383 rotating assembly from Eagle. The kit (PN: 12922, $2,299 at CNC-Motorsports.com) includes an Eagle 4340 forged steel crank with optional oil-shedding ESP Armor coating, Eagle 6.125-inch forged H-beam rods, and Mahle 3.905-inch bore forged pistons with a -26cc dish and valve reliefs.
| 11.
11. While we were ogling our new rotating assembly, Superior hot-tanked and thoroughly cleaned the engine block to remove all dirt, rust, paint, and debris. Since we’ll be over-boring the cylinders by a significant margin resulting in a thinner cylinder wall, the block was also sonic tested to check for adequate cylinder wall thickness at this stage.
| 12.
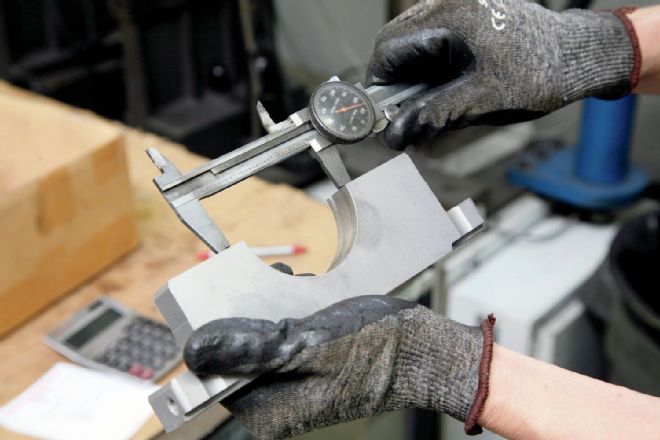
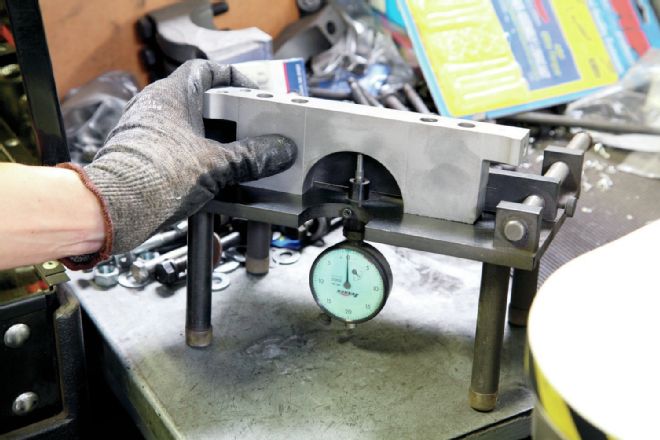
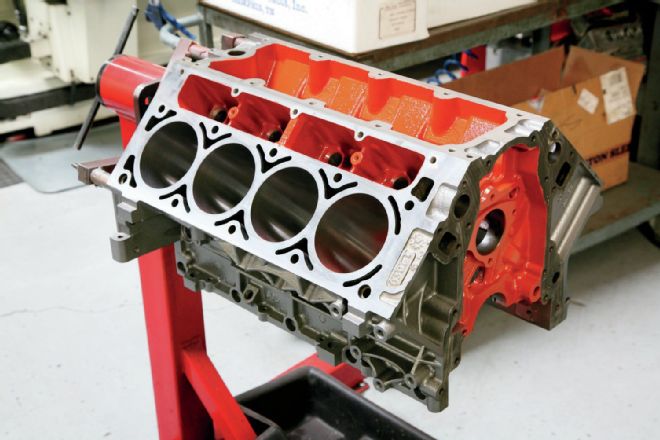
12. After cleaning the original main caps we set aside earlier, they were carefully measured to ensure uniformity and a precise fit around our new crankshaft.
| 13.
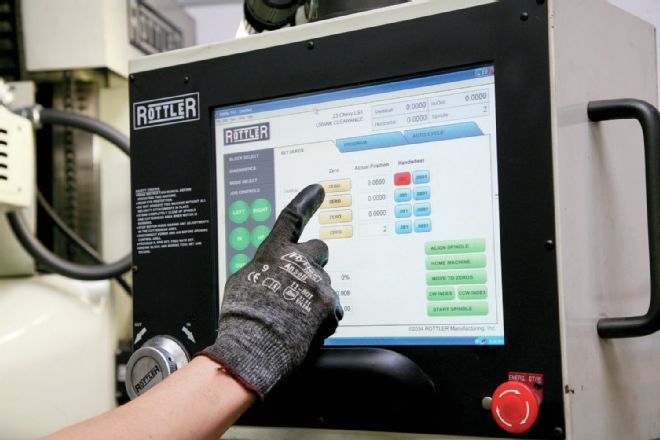
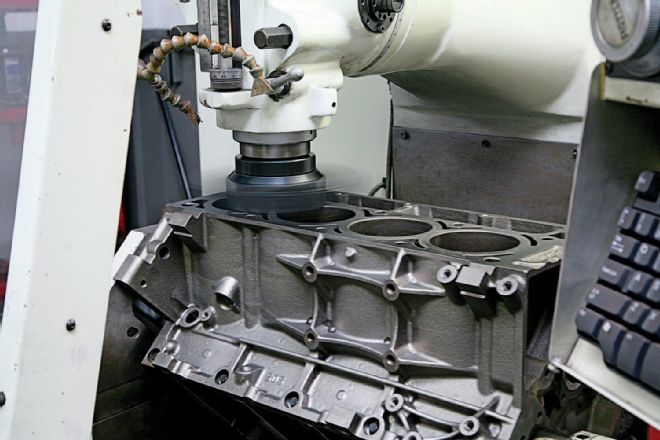
13. The engine block was then placed in a Rottler CNC machine, and a touchscreen control panel was used to bring up stored dimensions of an LS engine. The machine then blueprinted the block by checking its dimensions against the stored values with a precision probe.
| 14.
14. Once the machine detected any and all miniscule variations from the factory blueprint, a cutting bit was installed, and it machined the main cap mounting surfaces down to a perfectly level, even finish. For the utmost in reliability and power, this step is crucial.
| 15.
15. In order to ensure the crankshaft is held securely in place with no play, the lower edge of each main cap was machined down slightly until it reached the desired height. This also makes sure the main caps mate flawlessly to the freshly machined block surface.
| 16.
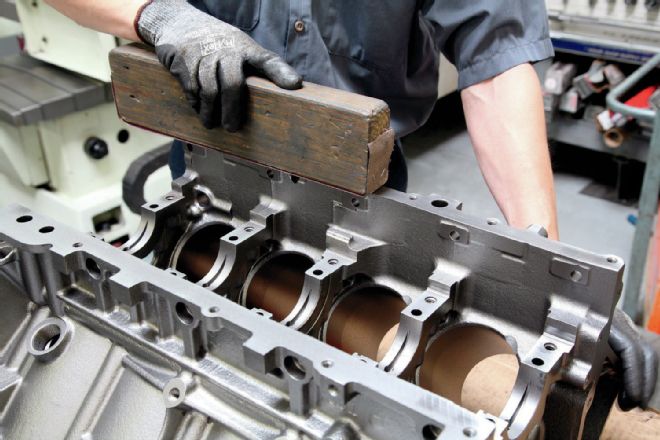
16. For a perfectly smooth finish, all edges of the newly machined block were sanded and de-burred by hand. This kind of precision and attention to detail is a time-consuming labor of love, and it’ll all pay off when the engine roars to life.
| 17.
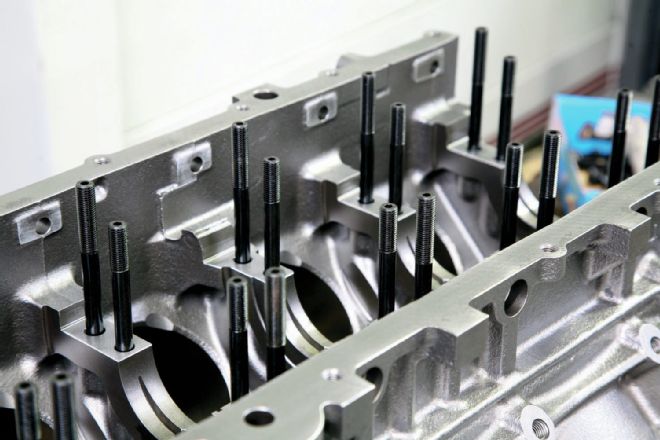
17. Before align-honing the block, we installed a new set of new ARP main studs. These will secure the main caps -- and our stroker crank -- firmly in place.
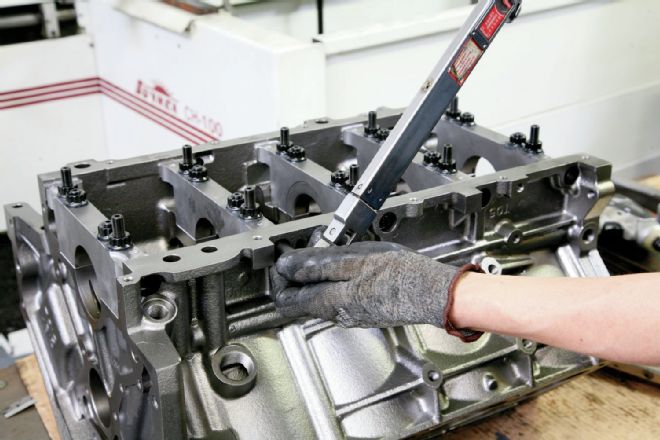
| 18.
18. The main caps slid in place on the studs, and were bolted and torqued down using ARP 12-point hardware.

| 19.
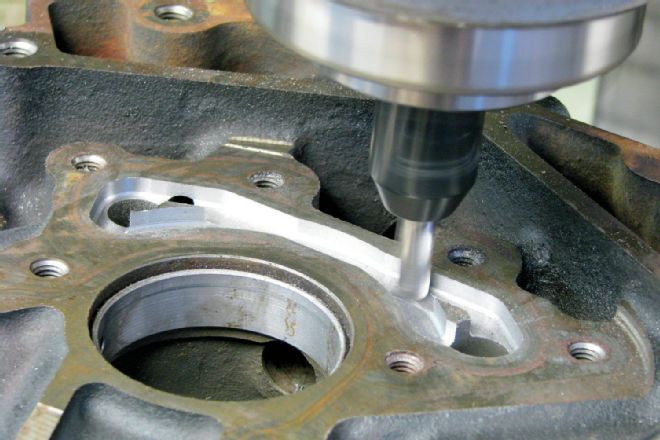
19. Next, the block was placed in the align-honing machine. There, a long spinning bit honed the main bore where the crankshaft will sit to a perfectly round, even surface.
| 20.
20. Once the block was align-honed, the main bore size was checked against the crankshaft diameter. The difference in these values will determine the thickness of the main bearings we use when installing the crank.
| 21.
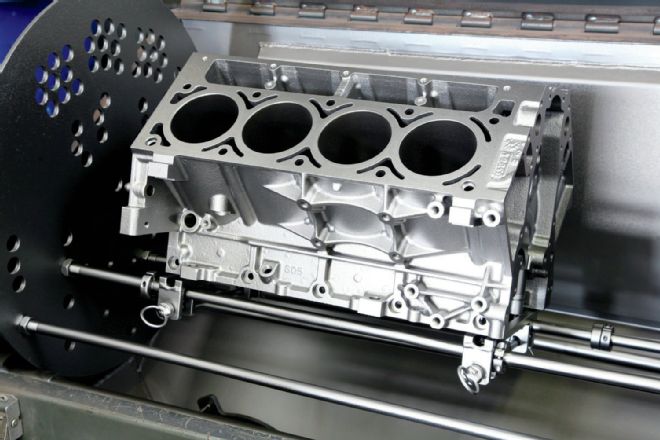
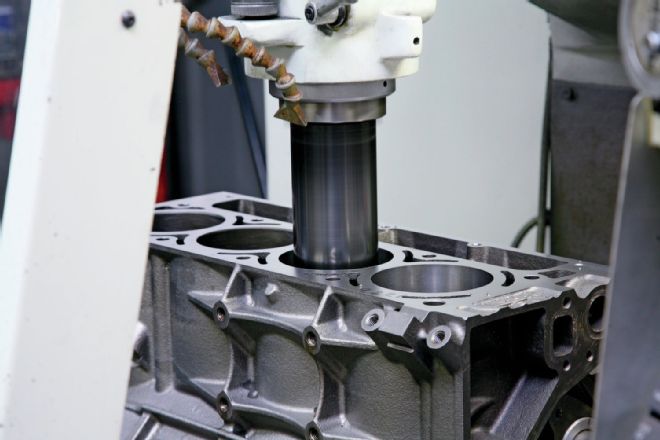
21. The block returned to the Rottler CNC machine to be decked. Decking removes a thin layer of metal from the top deck of each cylinder bank, providing a perfectly smooth and flat surface for the cylinder heads and head gaskets.
| 22.
22. The CNC machine was then used with a different bit to bore out the cylinders to the desired size. In this case, we would be taking the bore size from 3.780 inches to 3.905 inches to fit our new larger pistons and increase the engine’s displacement.
| 23.
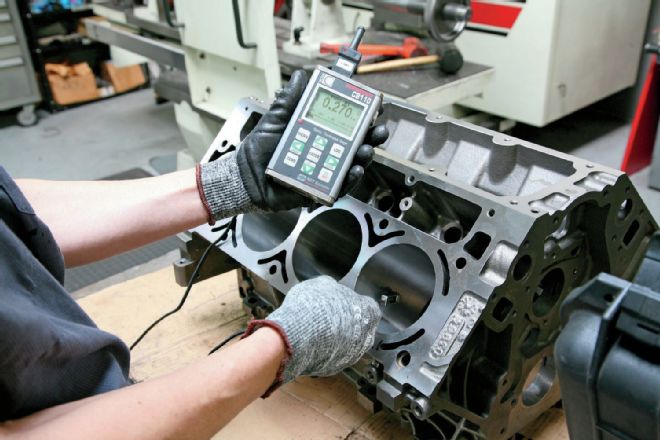
23. A mere 0.125 inches may seem like a tiny change in bore size to the uninitiated, but to a machinist that’s a very large amount of metal to remove—a typical rebuild only removes 0.030 inches. So, a handheld sonic tester was used to make sure our cylinder walls were still thick enough to take the heat.
| 24.
24. This specialty instrument drags a tiny needle across the deck surface to check for microscopic imperfections in surface smoothness. This sort of attention to detail may seem absurd to some, but it ensures perfect quality of the engine block and machine work.
| 25.
25. Much like the main bore was align-honed, each cylinder was also honed to ensure perfect roundness and exact adherence to our 3.905-inch bore size.
| 26.
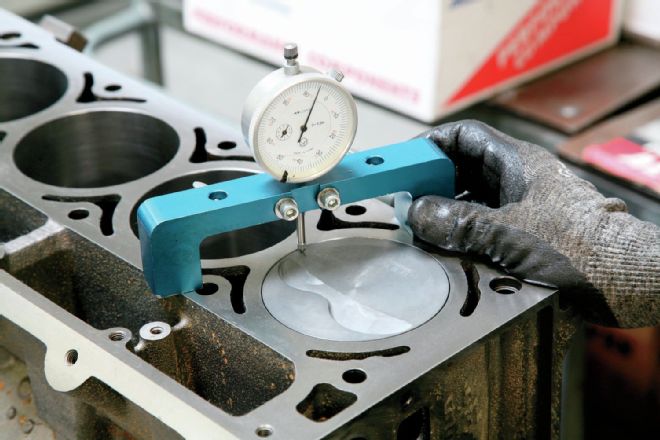
26. With the machine work complete, the crankshaft was installed along with one piston and rod. This allowed us to check piston-to-deck clearance, or the amount above or below the deck that the piston sits at the top of its travel. For this build, the piston sits approximately 0.05 inches below the deck.
| 27.
27. All Eagle crankshafts come balanced within plus or minus 2 percent of the ideal value, so balancing the crankshaft perfectly was a simple affair. The crank was spun on the balancing machine with bobweights in place to simulate the rods and pistons, and a small amount of metal was drilled out from one end to achieve a free-spinning perfectly balanced crank.
| 28.
28. Finally, the completed engine block was painted in a two-tone of silver and Chevy’s signature red-orange enamel. We now have a clean block with exact dimensions and tolerances upon which to build our 383 stroker. Pick up next month’s issue to see how the rotating assembly, heads, cam, valvetrain, and accessories all came together in final assembly.