Every now and then we test something that exceeds our expectations. The new MaxxFan is one of the select few to have done just that. Let’s be honest, roof vent fans aren’t really anything new. We’ve all had them. They accomplish one thing: ventilation. To make a vent fan really special, it needs to get its job done quietly, efficiently, and with the least effort on our, the users, part.
We picked up our Carson Trailer Field Test Lab and headed to Pick-Up Parts in Mission Viejo, California, for the install. The MaxxFan fits all standard 14-inch vents. It was cakewalk to install, and once done, playing with all its features was a joy, to say the least. The remote made it easy to change the temperature in the coach while in bed at night. The multiple fan settings allowed us to quickly evacuate hot stale air, reverse the flow, and slow it down a bit to fill the coach with fresh new air. The MaxxFan’s automatic climate setting was also a nice feature. Set it to a desired temp and the MaxxFan will do its best to keep the temp there, slowing down, or shutting down all together once it reaches the set temperature.
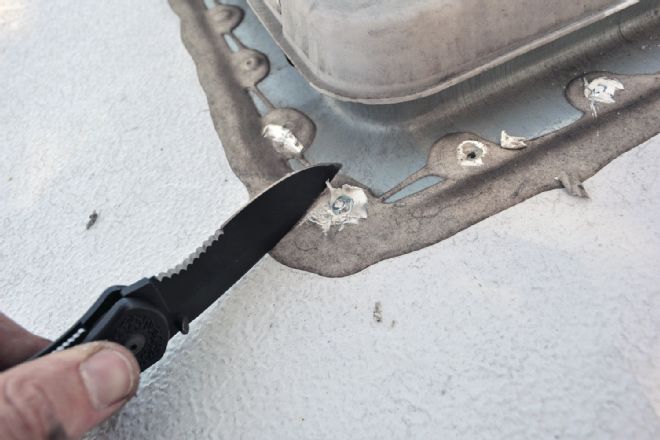
| 1 Clearing layers of roof sealant and removing the existing vent proved to be the toughest part of the install. Although, the guys at Pick-Up Parts had it off in less than 10 minutes.
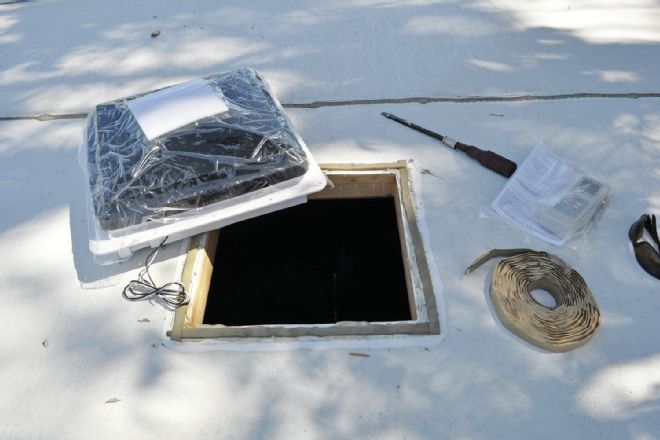
| 2 Once the original vent was removed, the mating surface on the trailer was cleaned and prepped with new roof sealant putty. The MaxxFan was dropped in place, secured with the supplied screws, and a healthy layer of self-leveling roof sealant applied over the screws and mating surfaces to ensure no future roof leaks. Luckily for us, the trailer was pre-wired from the factory for a vent fan, so all we had to do was make two connections for the DC-powered MaxxFan.

| 3 The last thing to do was installing the interior trim ring. Not all vent fans are built the same and neither are all RVs. The MaxxFan comes with a cut-to-fit trim ring. All we had to do was cut the new part to match the old part’s height. A jigsaw or body saw works best here.
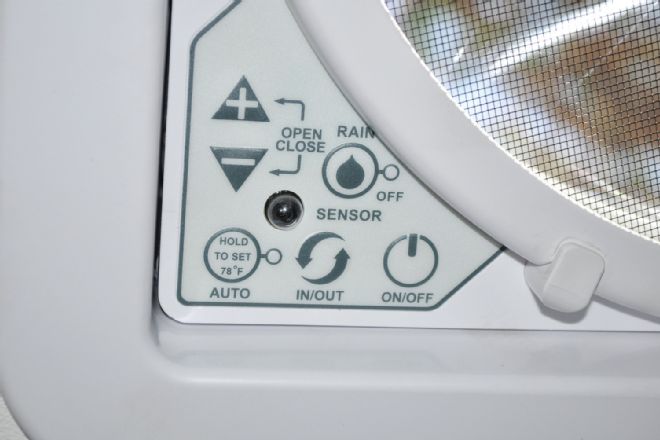
| 4 Close-up of the fan’s control panel shows buttons for direction of flow (in or out), power open or close, rain sensor, and auto temperature, as well as all on or all off. Should the fan loose power unexpectedly, there is also a manual control for the lid on the opposite side of the fan.
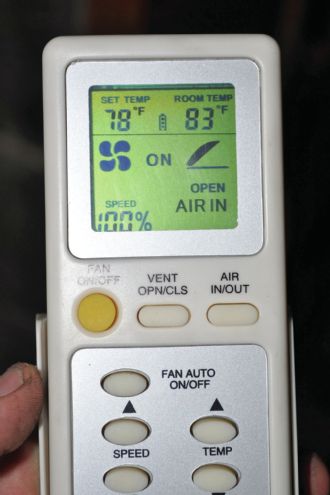
| 5 An LCD screen on the remote shows exactly what the MaxxFan is currently doing. This makes operating it extremely easy. We liked the backlit screen, especially at night. With the lights off and while in bed, adjusting the fan settings did not necessitate climbing out of bed or even finding a flashlight.
| 6 The remote controls all the MaxxFan’s functions. We’ll never have to get out the stepladder (8 foot ceiling…) to mess with the vent ever again.