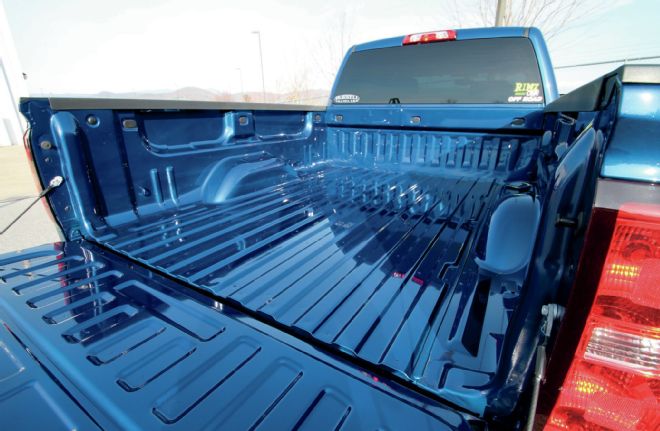
When most people buy a truck, they plan to use it not only as daily transportation, but also to haul gear or supplies. Even though not every truck will see a bed full of gravel or dirt, there is always something that needs to be hauled from one place to another. That’s the main purpose of a truck bed, but for day-to-day use having a lockable and weatherproof cover and secure storage will make sure all the items you need to haul stay safe and dry.
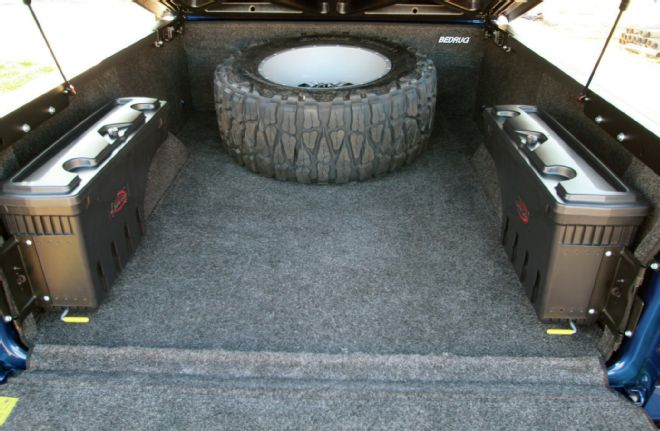
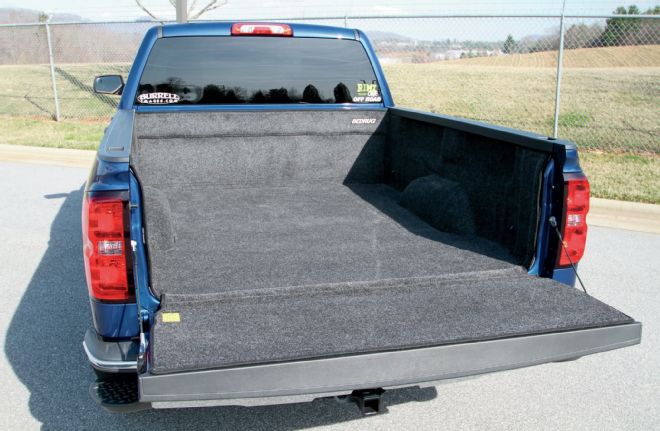
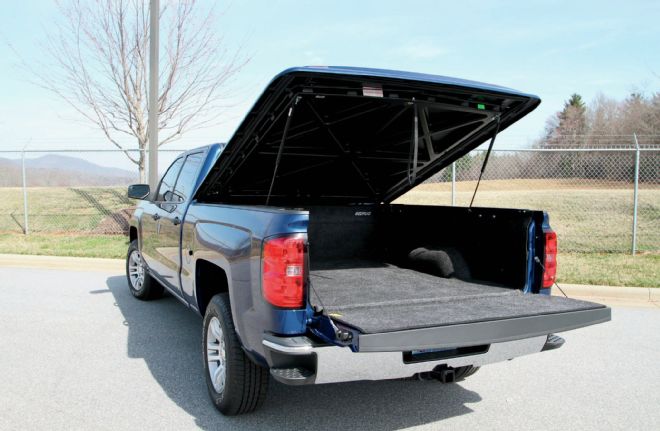
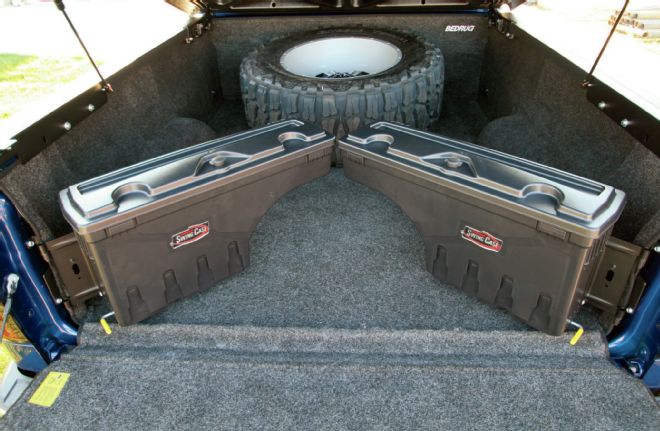
Our project truck will never be used to haul a big load of mulch or rock, but will see daily use and its fair share of groceries, luggage, and camera gear packed into the bed. Knowing we wanted to keep everything secure and out of the elements, we contacted the guys at Undercover Truck Covers and ordered one of their painted LUX covers that matched our truck’s paint, PN UC1136L-GTS ($1350). This cover provides a weather-tight seal, fits the body lines of our truck, and is lockable to keep everything secure. It also came with a perfect paint-matched finish to the truck. You can order yours with either a textured black finish or the painted finish like we chose. We also picked up a pair of their Swing Cases, PN SC100D and SC100P ($249 each) that mount at the rear corners of the bed and allow lockable storage that stays latched out of the way yet swings toward the tailgate for easy accessibility when needed. They also lift out with ease if you need to haul something big. To keep things from sliding around and anything from being scratched, we also picked up a BedRug, PN BRC07SBK ($413) that covers the floor and all sides of the bed, including the inside of the tailgate. This package of parts worked perfectly for our application and can be easily installed in an afternoon with the help of a friend or two.
| 2014 Chevy Silverado Bedrug
Another cool feature with this setup is the ability to remove the tonneau and Swing Cases to haul larger items. The tonneau can be removed in a couple minutes and only requires the help of another person. The twist knobs at the front of the bed are loosened and the shocks are unclipped from the ball mounts on the bedrails and secured in the clips in the tonneau cover. Then, just simply lift it off and hang it on a garage wall on the supplied hooks. The Swing Cases are simply lifted off the hinges. The BedRug is completely weather resistant and does not have to be in a covered bed. You can haul anything you want, and then simply rinse out the bed like you would without the BedRug. Having this kind of versatility is very appealing and one of the reasons we chose this setup. Follow along as we install the trio of bed enhancements.
| Bed Cleaned
1. We first made sure our bed was clean and dry. This ensures the install will be easy and that all the Velcro tape will stay attached to the truck.
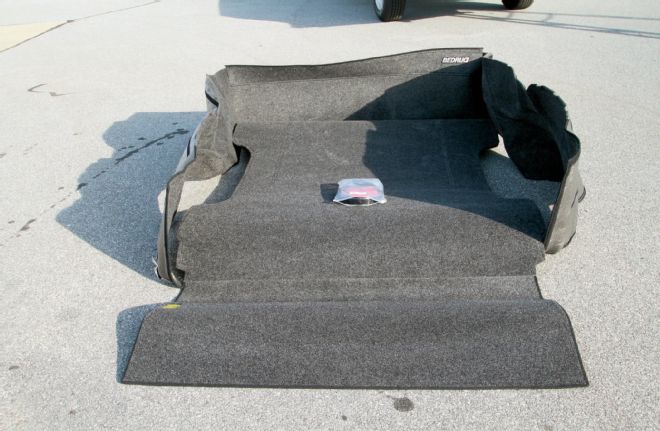
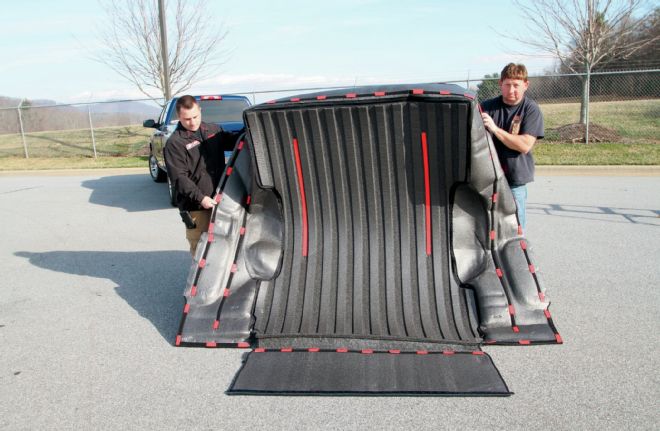
| Bedrug Floor Tailgate Piece Sides
2. The BedRug comes in two pieces: the floor/tailgate piece and the sides, not to mention all the needed Velcro tape. Letting the BedRug soften up in the sun a bit will also aid in the installation.
| Bedrug Upside Down
3. We began by flipping the BedRug upside down and zipping the sidepiece and the bottom piece together.
| Supplied Velcro Pieces
4. Next, we attached the supplied Velcro pieces to the floor sections, corners, and throughout the sides where the strips are sewn into the BedRug.
| Velcro Pieces Bed Attached
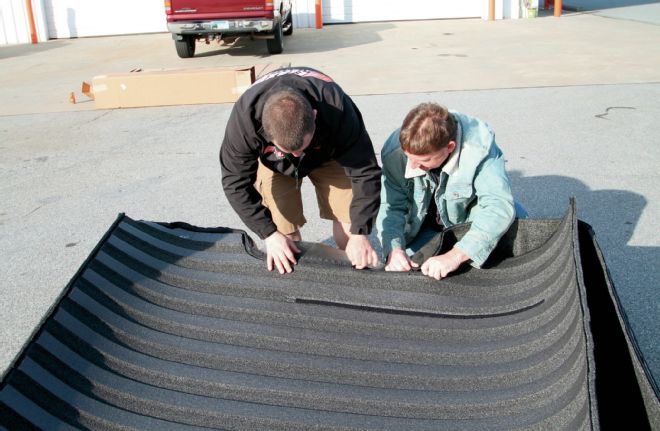
5. Once we attached all the Velcro pieces, the BedRug was ready to be flipped over and set into the bed of the truck, making sure it is pushed all the way into the front corners to ensure it is centered in the bed. This is where having an extra set of hands comes in handy. We made sure to leave the backing on the tape for this step.
| Bedrung Tape
6. With the BedRug in the truck, we peeled the tape backing off for one side of the floor section and securely attached it to the bed floor. Once the first side is secure, we pulled up the other side of the BedRug and removed the other strip of backing tape and pressed the BedRug to the floor of the bed.
| Bedrug Bedrail
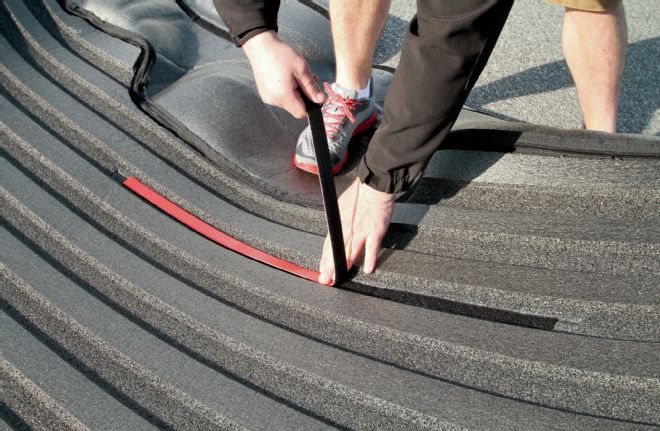
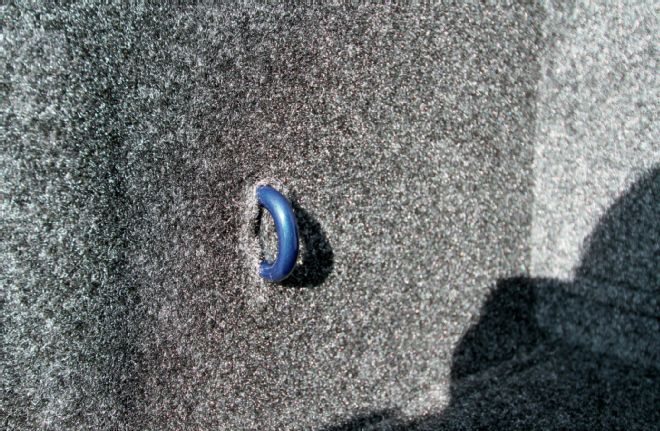
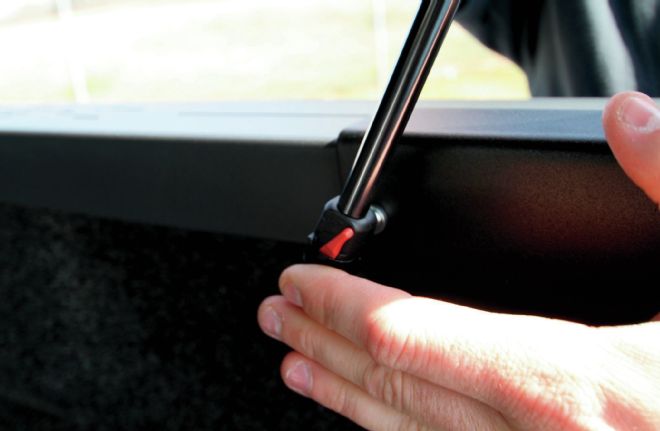
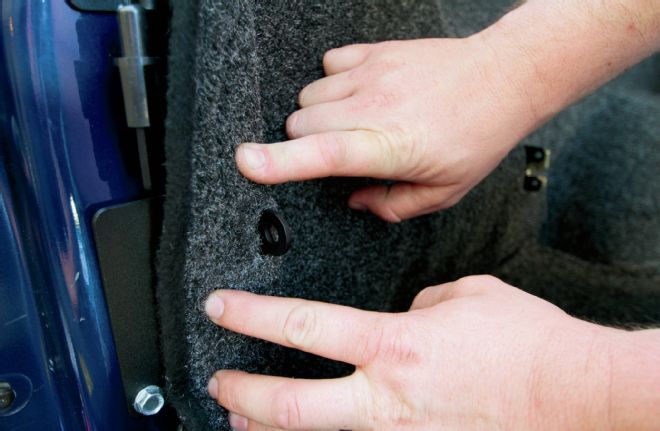
7. By pressing the sides of the BedRug under the lip of the bedrail on both sides, you can see where the factory tie-down hooks are. Using a knife, we cut a slit where the hooks are into the BedRug and pressed it flush to the side of the bed so the hooks would poke through.
| Bed Front Wall
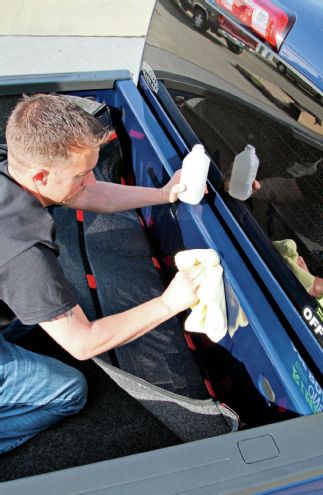
8. Using alcohol and a rag, we wiped down the front wall of the bed and the sides where the Velcro will be attached. This will ensure you have a clean surface for better adhesion of the tape.
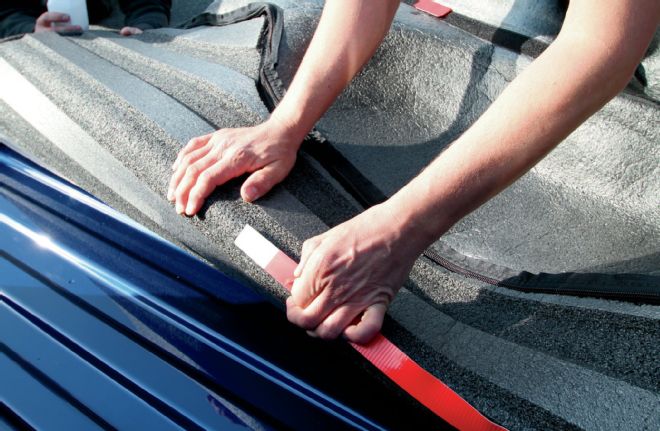
| Front Wall Backing Tape
9. With a helping hand, we peeled the backing tape from the front wall section of the BedRug, and starting with the bottom strip, pressed it against the bed to secure it. We moved our way to the top, ensuring that every piece is attached to the truck. Then, one side at a time, we worked our way from the front of the bed to the back.
| Floor Sides Bed
10. Once the floor and sides of the bed were attached, we removed the backing tape from the tailgate section and secured it to the tailgate, making sure it was even with the top of the tailgate. The finished install looks nice and took less than an hour.

| Tonneau
11. The tonneau came safely packed and wrapped to make sure the painted finish would still look as good when it arrived as it did when it left the plant.
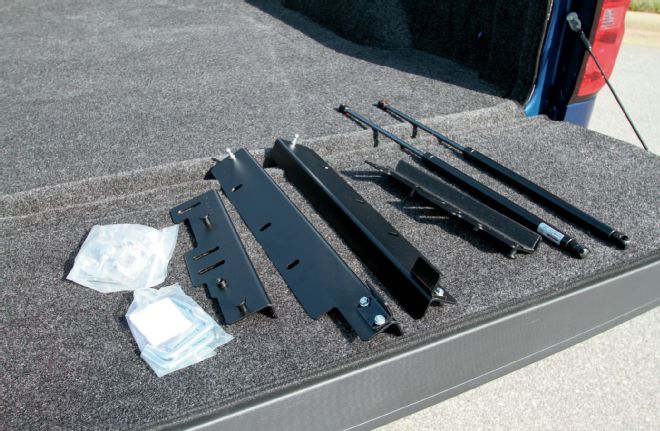
| Mounting Hardware
12. It came with all the required mounting hardware and the hooks to hang it on a wall when not in use.
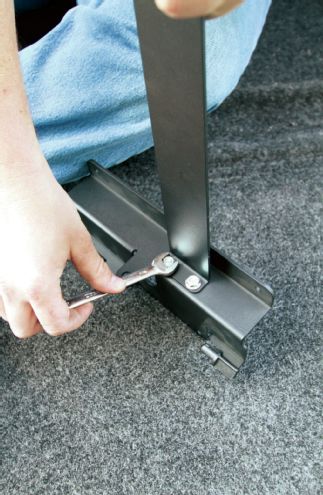
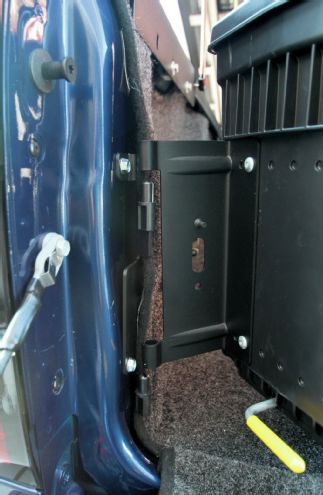
| Mounting Rear Bracket
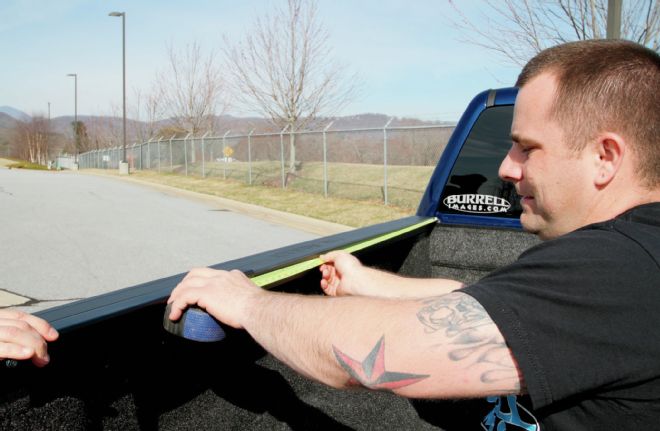
13. To mount the rear bracket, we measured 52⅜ inches from the back side of the bulkhead to the front edge of the bracket. This measurement applies to both the driver and passenger side. The front brackets are 16 inches from the bulkhead to the rear edge of the bracket. Not all truck beds are 100 percent square, so some adjustments may be necessary once everything is installed.
| Supplied Clamps
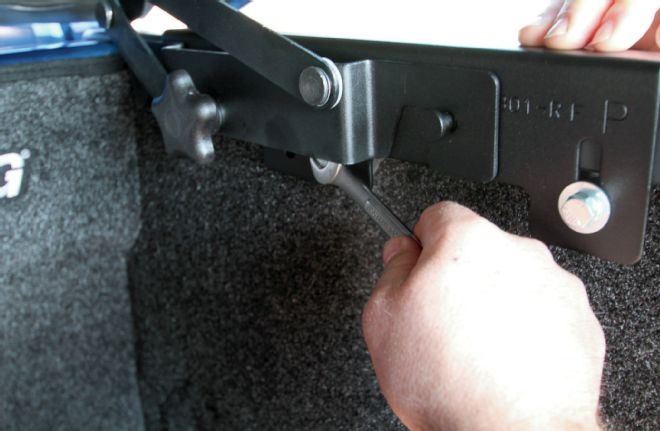
14. Once all the measurements were made and all four brackets are where they need to be, we installed two of the supplied clamps per bracket. These clamps secure the brackets to the inside of the bedrails. We didn’t over tighten the bolts at this time. There needs to be enough play to adjust the cover once it is installed.
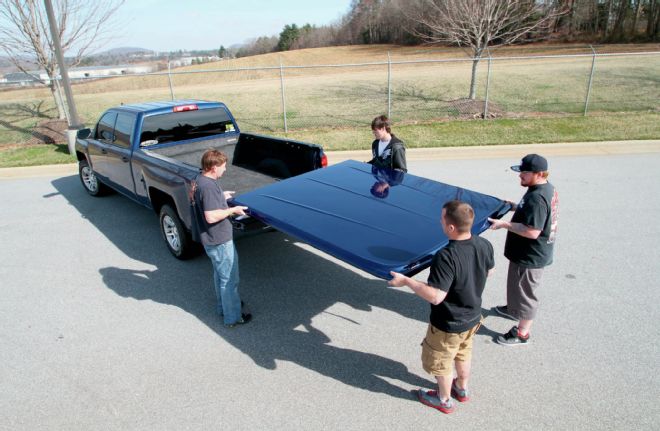
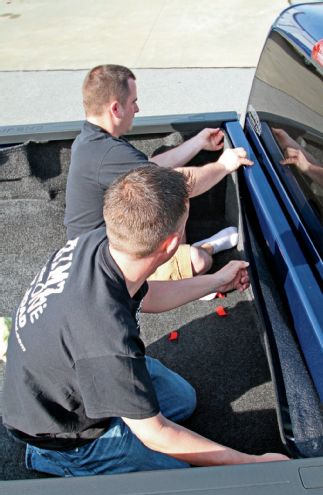
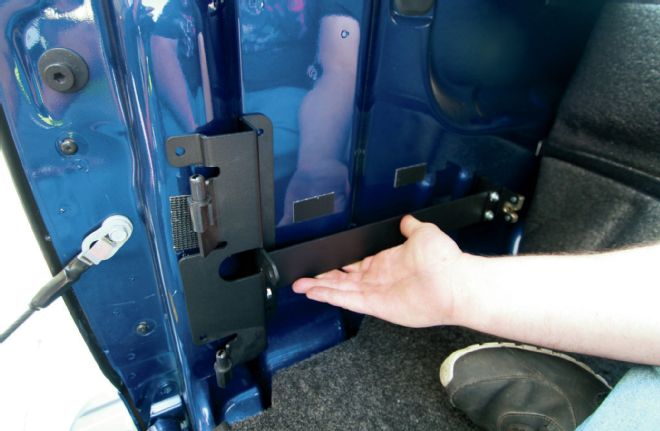
| Bedrail Brackets
15. With the help of some friends, we set the front edge of the bed cover into the bedrail brackets. The cover latched in and slid forward into the brackets.
| Rear Cover
16. Once the front of the cover is latched in place, we lifted the rear of the cover and screwed in the twist knobs on each side to tightly secure the front in place.
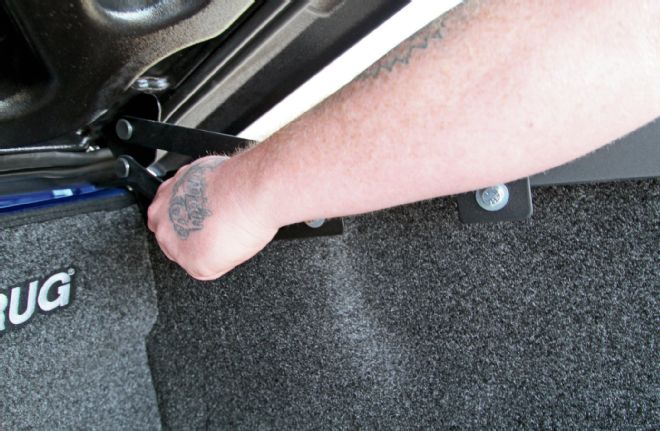
| Hydraulic Struts
17. We attached the hydraulic struts to the cover and to the rear brackets. They just snapped into place.
| Bolts Tightened
18. Some minor adjustment was needed to square up the cover, but once it was adjusted we tightened up all the bolts.
| Bed Cover
19. The cover perfectly matches the factory paint of our project truck and not only looks nice with our BedRug, but it also leaves the bed fully functional.
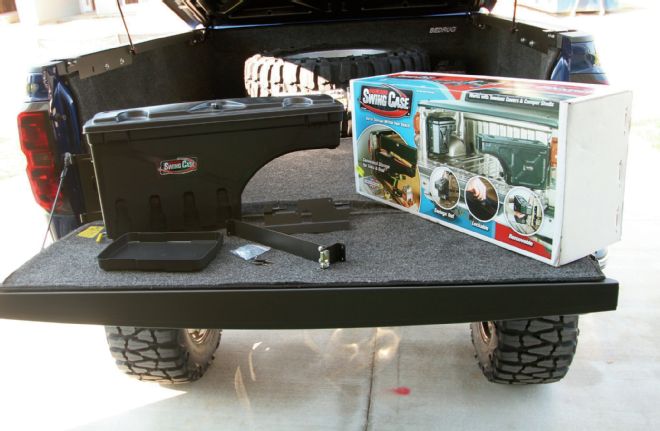
| Swing Case Kit
20. We installed the Swing Cases at a later date than the BedRug and UnderCover bed cover, but this install only took us about 20 to 30 minutes to complete.
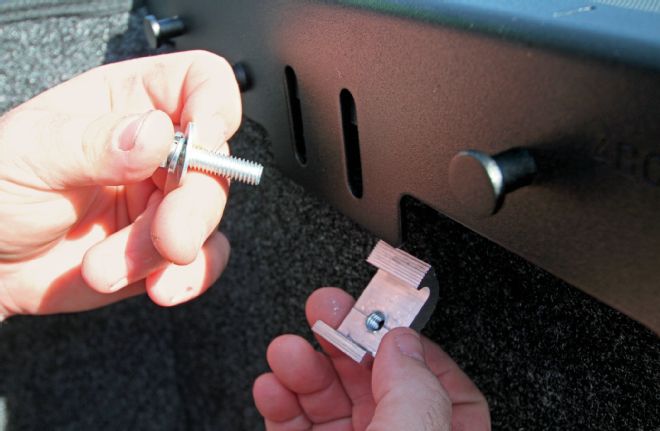
| Striker Bracket
21. First, we attached the striker bracket to the truck bracket using the two supplied assembly nuts.
| Bracket Bedside Aligned
22. Next, we aligned the bracket against the bedside and ensured it was pushed securely against the light well.
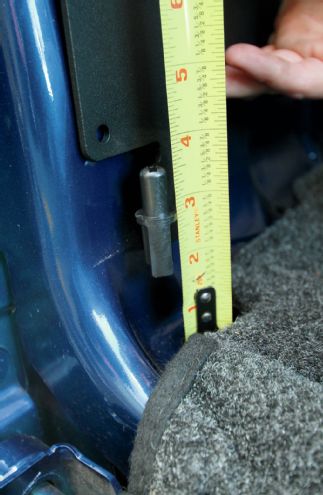
| Neasuring Tape
23. The bottom of the bracket needs to be 1.75 inches above the bed floor to allow proper fitment.
| Back Edge Bracket
24. After marking the four screw locations at the back edge of the bracket, we set the bracket back in place and installed the six screws.
| Utility Knife Latch Bracket
25. Using a utility knife, we cut a hole to allow for the latch bracket to stick through. You also have to cut a hole for the pad lock piece on the rear of the bracket. Then just push the BedRug over the latch bracket and the pad lock piece.
| Swing Case Bracket
26. Finally, we simply set the Swing Case onto the bracket and latched it into the latch bracket.
| Both Swing Cases
27. After the driver-side Swing Case was installed, we repeated the steps on the passenger side to be able to have more storage. With both sides now housing Swing Cases, there is still plenty of usable room in the bed. If there is ever any need for more space, the cases are easily removed. In just a couple hours we went from a steel box to a safe and secure place for storage!