Chevy Luv Junkyard Jewel, Part 7: Rust and Rocker Replacement

| chevy Luv Junkyard Jewel Part 7 rendering
With our LUV's frame back to official rolling chassis status, and with the bed bolted on to boot, we couldn't wait to get slicing on the cab. One of the things a lot of these old minis have in common is how the rockers on the cab hang way down compared to the rockers on the bed-simply unacceptable. To correct this wrong, we cut the offending rockers off the cab so that their profile matched that of the bed, and sit both rockers in question on the ground. In this case, we cut off something to the tune of just over 2 inches. We referenced the bodylines on the bed and cab to ensure that the two remained square to each other once the cutting was done. With the rockers out of the way, we traced out the framerails onto the bottom of the floor, and in an effort to retain as much interior space as possible, we opted not to raise the whole floor, rather just cut "channels" for the framerails to come through ever wonder where the term "channeling" came from? And with that, we sat the cab over the framerails for the very first time, and of course we did what all of you would-rolled it outside and hung a fender to have our first true peek at how this thing was going to sit.
Oftentimes when we work on our projects we end up dealing with unforeseen issues, things that stop you dead in your tracks or completely change the direction you had planned on going. Although most of the cab floor was solid, two areas that were affected from the years of sitting out in that field were the rockers and the front cab mounts-both of which required their fair share of attention before we could simply just move on with our bodydrop. As anyone who's had to deal with rust repair knows, you have to cut well past the visible rust areas before you are back to solid metal again, and the floor and rockers were no exception. Once cut out of the way, we transferred the pieces to suitable gauge sheetmetal to serve as our new inner rockers and floor. We left an extra ¾-inch of material around our floor patch piece, one side of which was bent to 90 degrees to allow for easy attachment to the inner rockers, and the remaining contour flanged to allow for better fitment. A series of holes were punched into the rocker piece and floorpan to allow for easy attachment with simple plug welding. Keep in mind, the larger your floor patch piece, the more you'll want to add some grooves with a bead roller-not only for good looks, but also for added strength, and to get rid of that annoying tin can popping noise that the flat sheetmetal floorpan will give you. Some heavier plate was used under the new floor patches to create the new front cab mounts, similar to how the factory mounts were built. With the floor cab mounts usable again, we turned our attention to the body mounts off the frame. The originals were used as a reference, and some new lower profile ones crafted from 2x3 tubing. Time and careful measurements were taken to center the cab over the frame as well as ensure proper height of the mounts before fully welding them into position.

| 1. With the cab safely flipped onto its back...
Next up, we cut the transmission tunnel, and fit the powertrain
UNDER the hood!
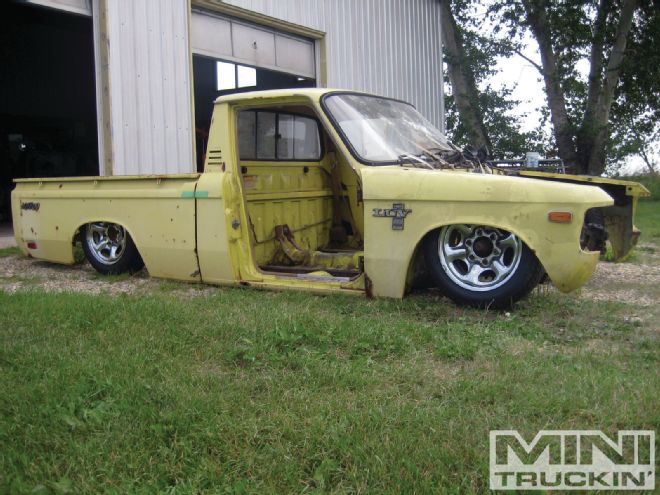
| 20. With the cab and box both bolted down to the frame, we hung a couple fenders and rolled the thing out side to enjoy the sunshine!


