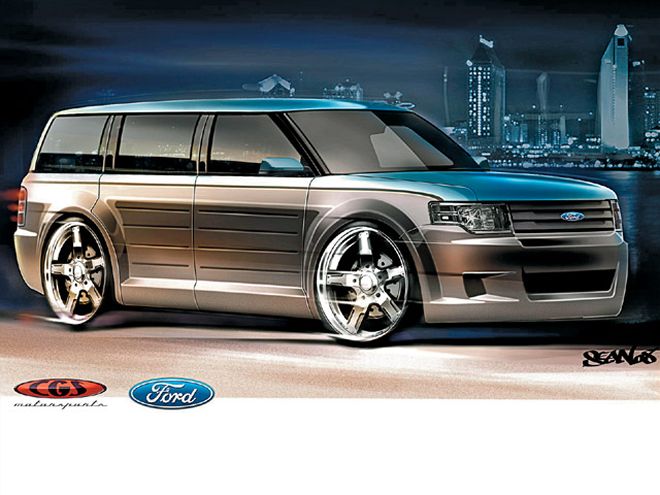
| 2009 Ford Flex rendering
In the last three issues, we've shown you how to completely transform Ford's latest crossover venture, the '09 Ford Flex. Inside the spacious cabin, the seats, dash, and video headrests were easily upgraded. Now it's time to show the amazing body and paint work that went into this project dubbed "ReFlex".
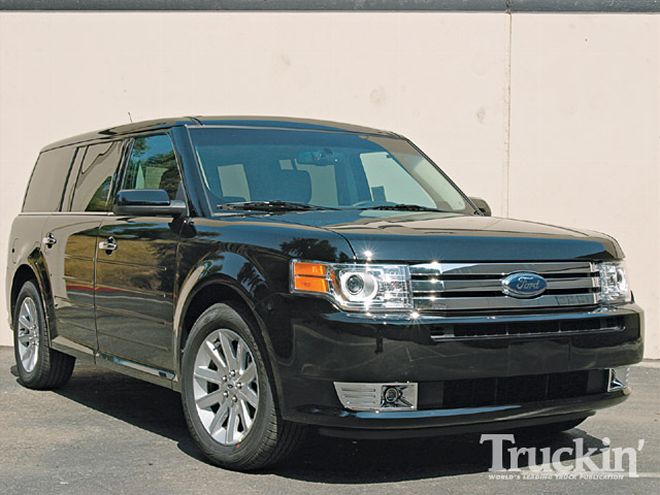
| The factory '09 Ford Flex rectangular shaped body with extended hood and three-bar horizontal grille would be modified by adding custom pieces from the front to back.
Casey and Ron Scranton at CGS Motorsports in Pomona, California, worked with rendering artist sensation, Sean Smith, of SS Designs in San Diego. Sean's task was to design a seamless and smooth, low-profile exterior of the Flex. When creating a custom exterior, the five most important factors of the equation are body, paint, wheels, tires, and stance. Sean used the horizontal body panel grooves to carry out the Flex theme. He then modified the factory stance by extending the body's lower extremities, creating a lowered illusion. Sean sketched a smoother, cleaner, leading edge that would be lowered four inches with a radiused chin and larger lower center opening with a pair of air ducts. The rear bumper was sectioned two inches with a center exhaust notch for the CGS 18-inch oval exhaust tip.
The factory front fascia was modified by cutting the bottom portion off and prepping it for some modifications. Styrene pieces were then rough-cut and applied with 3M adhesive. The rough-cut pieces were shaped and shaved before covering with modeling clay. Chavant modeling clay was then shaped and smoothed by using an arsenal of special sculpting tools. A pair of steel side skirts were cut and formed by Jerry Johns at JJ Metal Werks in Garden Grove, California. The formed side skirts were welded to the existing Flex rocker panels, linking the lowered front fascia to the lowered rear bumper, giving the illusion the top was chopped four inches. Each of the four door handles were removed and they were then shaved smooth.
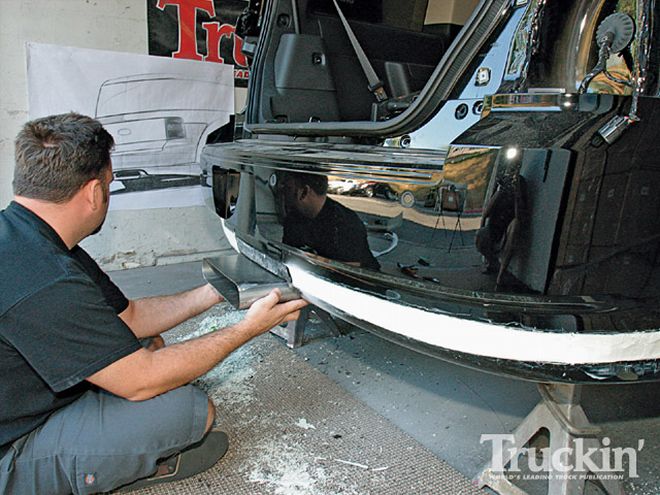
| Casey peered at the rear rendering as a reference to locate the exhaust tip notch.
The CGS "ReFlex" was delivered to the crew at Mocata Auto Sports in Bloomington, California, where the modified front fascia and rear bumper would be used as splash molds. After a day to cure, the splash molds were pulled from the front fascia and rear bumper. Mold release was applied to the mold's surface. Before the white gel coat was sprayed onto the molds, there were two hours of cure time. Next, resin saturated fiberglass cloth was applied and laminated to the mold surfaces with brushes and small rollers. After a day of cure time, the parts were pulled from the splash molds and shipped over to CGS.
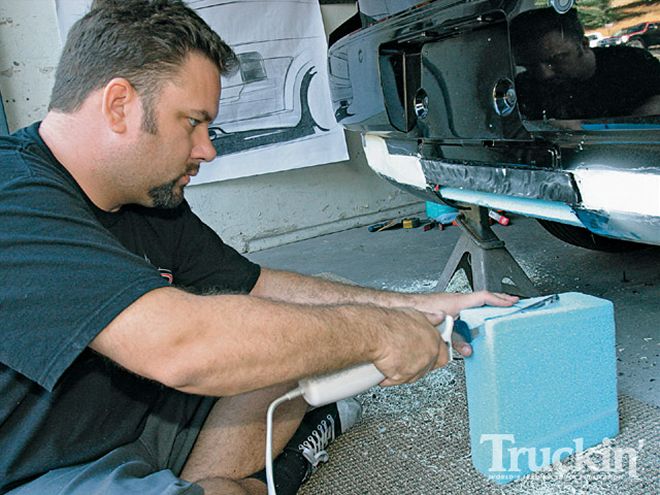
| Casey used a kitchen electric carving knife to cut through the styrene.
The "ReFlex" was rolled into the CGS paint booth. Casey and Ron began masking and prepping the body for its BASF Aruba Metallic Blue and Dolphin Metallic Gray two-tone paint scheme. This created a subtle and clean apperance. Casey laid down a simple, light gray horizontal stripe separating the two tones ending bluntly under the A-pillars. The blunt, light gray belt line was outlined by Lil' Louie using a medium gray pinstripe with a third light blue pinstripe piercing through the center of the light gray stripe. The stripes go from the edge of the amber front turn indicator, all the way around the back hatch, to the other turn indicator.
The "ReFlex" was then loaded into the Jim Glo trailer and towed to Las Vegas where it was debuted at the '08 SEMA Show.
From The Driver SeatAmajor SEMA project of this magnitude takes many hours and skill to complete. This extensive exterior makeover transformed the factory Ford Flex into a sportier CGS ReFlex. The modified lower front fascia contributes to the ReFlex's lowered, aggressive stance. By laying down the two-tone paint scheme, we obtained a more proportional ReFlex body. Check out the feature in next month's issue.
YOUR QUESTIONS ANSWERED Time Spent Working: Approximately 400 Hours
Degree of Difficulty: Advanced
Tools Used:Razor blades, electric carving knife, clay carving tools, styrene grading tools, MIG welder, electric grinder, pneumatic sander, 3/8-inch drive ratchet, with assorted 3/8-inch drive sockets, fiberglass splash mold tools, 3M HVLP paint spray gun, electric disc buffers
Parts List:*Paint: BASF*Basecoat: Aruba Blue Euro (779117KH)*Reducer: (352-45)*Basecoat: Dolphin Gray (LX72)*Reducer: (352-5)*Clear: Glasruit (DC98)*Reducer: Glasruit (UR70)*Hardener: Glasruit (DH100)*Paint Guns: 3M HVLP*Clay: Chavant Inc. brown modeling clay
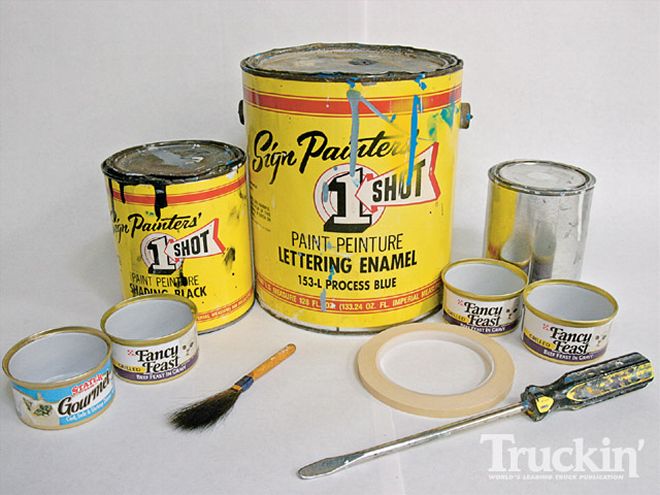
| 2009 Ford Flex lettering Enamel
The CGS "ReFlex" was loaded up into the Jim Glo trailer then delivered to pinstriper Lil' Louie, in San Bernardino, California. The essential paints and tools of a pinstriper include Sign Painters' 1 Shot Lettering Enamel shading black was the only paint that can be used to shade colors. It won't separate. Other paints and tools used were Process Blue, 153-L, and Medium Gray. Striping tape and Mack "blue wrap" precut dragger brush. Lil' Louie has used the same flat-blade screwdriver for the past 27 years. Notice the worn rounded blade corners. Cat food cans are the ideal size and easy to handle for pinstripers.


