Every truck owner uses his truck to haul something sooner or later, so making the best of the bed’s limited space is crucial. Making the truck bed as tough as possible, while keeping gear safe and out of the direct line of Mother Nature is also ideal. This is where the great minds at DiamondBack Truck Covers come into play, as they have developed the best possible solution for these problems when it comes to hauling ATVs.
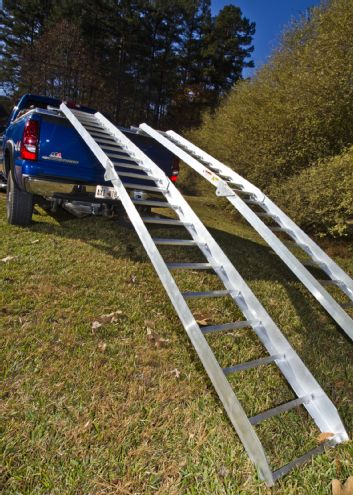
DiamondBack makes an HD ATV bedcover and, in our line of work, we just had to have it. Due to the shortbed on our tester 2004 Chevrolet Silverado 2500HD truck, we opted for the rear loader. Longer beds can take advantage of the side load option and haul up to two ATVs or even a small side-by-side. This setup makes taking that weekend run to a favorite trail easier than ever, in that we now have a heavy-duty hauling platform that requires no trailer. Having the eight tie-down points on the bedcover widens the versatility that much more. The ability to haul all off-road gear in the bed (under the bedcover) instead of inside the cab makes room for more friends to come along. It only took about an hour to install the cover using common handtools. Here are some of the key elements in the process as well as features of the new DiamondBack HD cover.
| DiamondBack HD ATV Bedcover Install 02
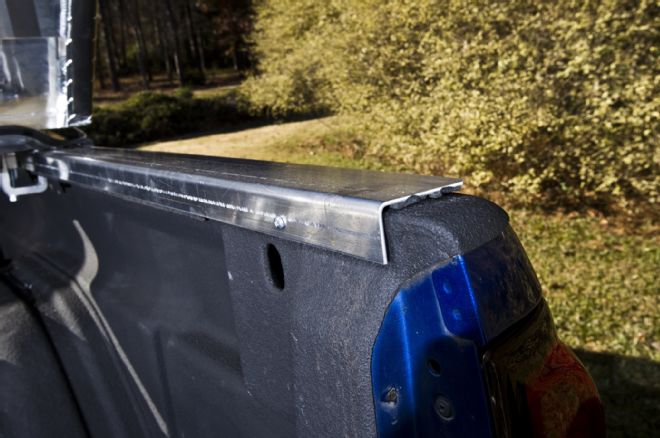
1. The first thing we had instructions to do was to attach these steel bedrail reinforcement pieces to the bed. The steel adds strength to the bedsides and provides a smooth platform for the front, center, and rear panels to lie on. After a thin weatherstrip is applied to the bottom of the bedrail protectors, they simply screw into the inner lip of the bed.
| DiamondBack HD ATV Bedcover Install 03
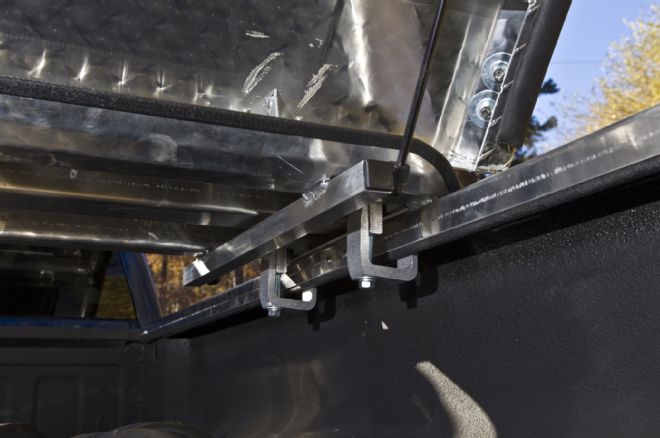
2. Moving to the center of the bed, we laid the middle section in place. This is what the front and rear panels actually hinge on and also what keeps the entire cover in place during travels. Install the clamps, lightly securing them, but do not tighten them just yet. Fit the front and rear panels before tightening the center panel, to ensure the cover is centered on the bed, both side to side and front to rear.
| DiamondBack HD ATV Bedcover Install 04
| DiamondBack HD ATV Bedcover Install 05
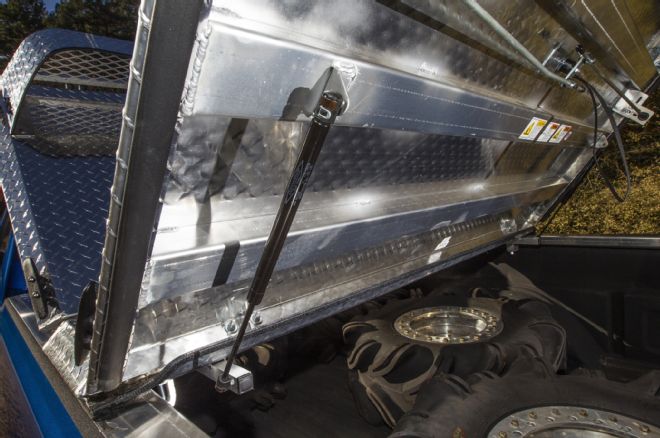
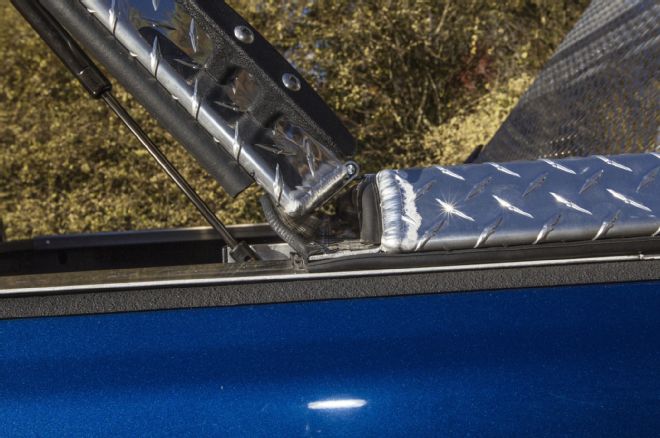
3. Once the bedcover is square on the bed, tighten the middle section of the cover and move on to the hydraulic shocks that will help lift the front and rear panels when access is needed to the contents of the bed. The guys at DiamondBack provided two hydraulic shocks per panel to make opening the covers very easy. These mount to preinstalled pins on the center cover and individual panels.
| DiamondBack HD ATV Bedcover Install 06
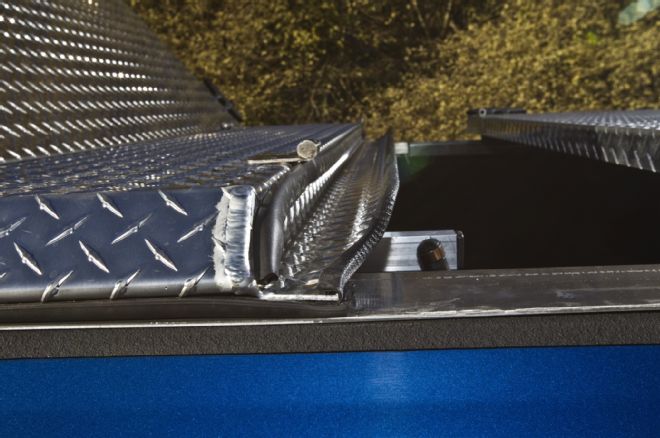
4. We have gotten the bedcover square and locked down and are ready to adjust the deadbolt-style locking mechanisms that not only hold the big 0.100-inch 3003 alloy aluminum diamond-plate panels down but also allow the panels to lock to prevent access to the bed’s contents. A small wrench was used to adjust the rods until they fit snugly under the inner lip of the bed when the covers are closed and locked.

| DiamondBack HD ATV Bedcover Install 07
| DiamondBack HD ATV Bedcover Install 08
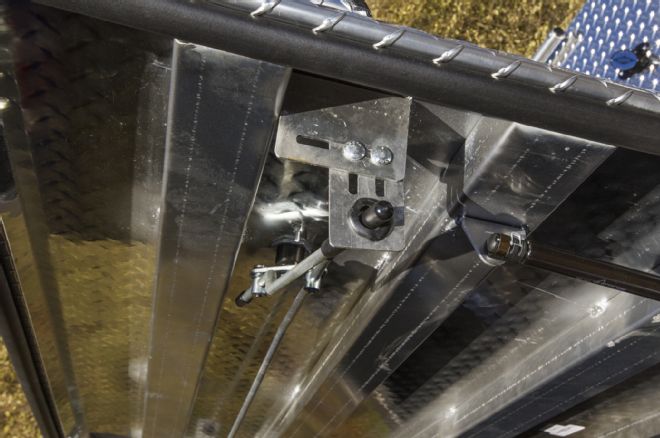
5. Since our cover is made to haul an ATV or small SXS on top, the included rear load adapter bars had to be installed in order to use the massive folding ramps to load the ATV. These are also very simple to install and only require a hand drill along with a couple of wrenches. Position the adapter bars with the outer edge of the rear panel and mark holes for the two carriage bolts. These little bars not only give the ramps something to hold onto, but they also keep the ramps from slipping out from under the off-road machine when riding up onto the cover.
| DiamondBack HD ATV Bedcover Install 09
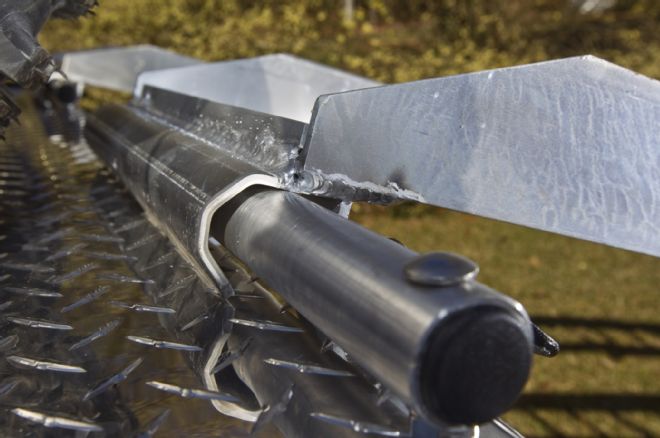
6. The ramps that were included with the HD ATV bedcover are built really tough. The lead end of the ramp has a nice lip that curves over the top of the rear load adapter bars for security, and super heavy-duty hinges to prevent the ramps from folding under the weight. These ramps also provide a longer slope when loading an ATV. The first trip up the ramps can be intimidating!
| DiamondBack HD ATV Bedcover Install 12
7. With seven structural support members and up to 1,600 pounds of distributed load capacity, the DiamondBack HD truck bedcover is heavy duty and really well thought out. The center panel has a channel to allow rain water to run off the sides of the bed instead of down into it. There is also a weather seal to add just a little more protection should the weather turn really ugly. Seals along the individual panels provide additional protection from the elements.
| DiamondBack HD ATV Bedcover Install 13
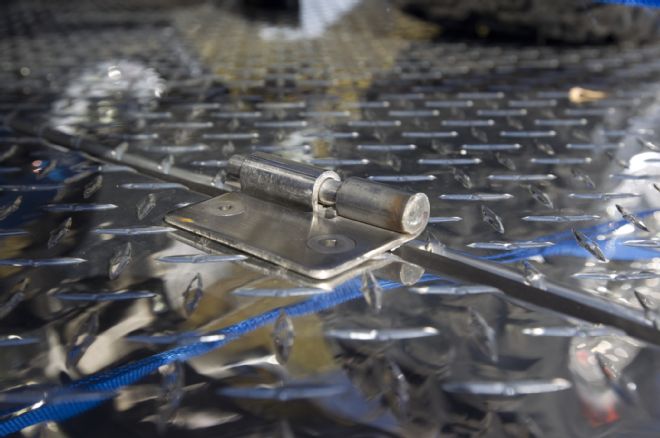
8. The hinges on the HD cover are made of thick stainless steel. Removing the front or rear panel is a snap. Remove the hydraulic shocks from the centersection posts first. Then lift the panel 90 degrees from the middle section and slide left or right to remove the panel.
| DiamondBack HD ATV Bedcover Install 14
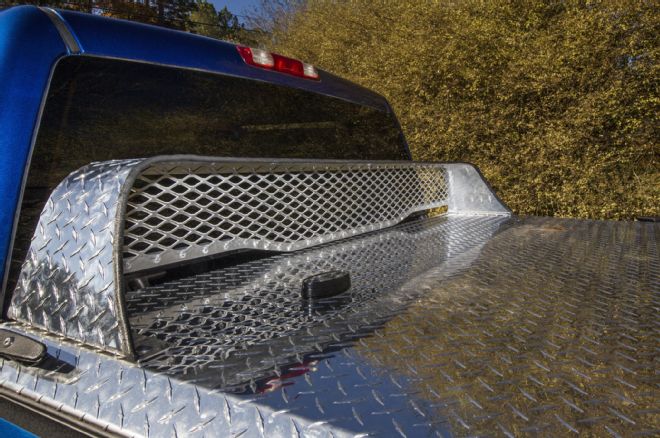
9. One last feature we opted for from DiamondBack was the low-profile cab guard. This keeps the machine from running into the back glass of a truck when loading an ATV. This piece is also made from diamond-plate aluminum and square aluminum tubing. Simply line up the low-profile cab guard with the forward-most flat edge of the front panel and then even out the protector from side to side. Mark the location for the bolts using the predrilled holes in the cab protector. Then drill the 5⁄16-inch holes and install the bolts, and then add rubber washers and nuts to the bolts to finish the project. The rubber washers help seal the holes to further protect the bed’s contents from water.
| DiamondBack HD ATV Bedcover Install 15
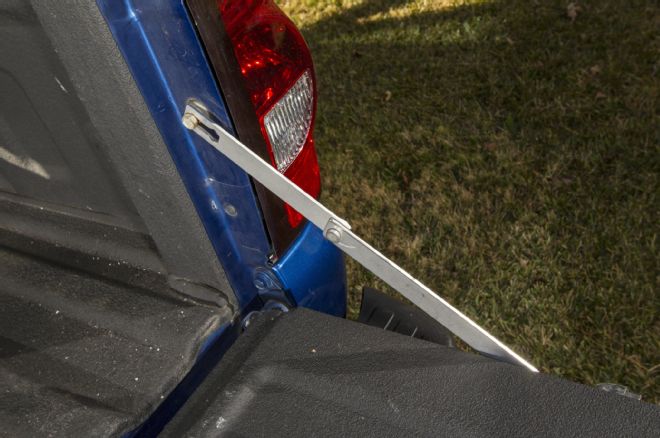
10. Our bed makeover would not be complete without one more small detail. Our friends at Merchant Automotive in Zeeland, Michigan, sent a pair of their new tailgate hinges. These little gems replace the steel cables that tend to break under heavy loads. These hinges install in a matter of about 15 minutes and add just a little more strength to the truck’s hauling capabilities.
DiamondBack History
DiamondBack Truck Covers was the result of self-proclaimed “garage entrepreneurs.” While attending Penn State University, these engineering entrepreneurship class attendees had to complete a project that arose from the needs of many truck owners and grew into an American company. Built in the small town of Philipsburg, Pennsylvania, population 3,056 as of last count, truck covers from DiamondBack are sought after by many off-road enthusiasts. These guys make a host of other items, including UTV accessories, long aluminum folding ramps, and decorative diamond-plate trims and furnishings.


