Vehicles in the United States all use a double flare brake line. The double flared line sits against a brake component (either the master cylinder inlet or outlet fittings, or the brake hoses at the slave cylinder). The flare refers to the end of the brake line tubing which is opened, or flared, to a 45-degree angle. The flare is then folded over onto itself, creating a secure, double flare. Making double flare brake lines is extremely challenging. While it is possible to do, most people ultimately fail in successfully making a stable double flare. This is due to the fact that making a double flare requires precision. If the flare is not perfect, the line will eventually suffer a catastrophic failure of the braking system, which could cause serious injury or death to everyone in the vehicle. If you're going to attempt making a double flare, you'll need specialized equipment and a lot of patience.
Place a tube nut over the end of the steel brake line so that the threaded end is facing the end of the brake line you are going to be working on.
Make sure the ends of your brake line are free of any burrs and are true and level. You may need to use a tube cutter and a metal file to achieve this.
Place the end of the brake line into the line clamp, so that the brake line sticks out of the top of the clamp.
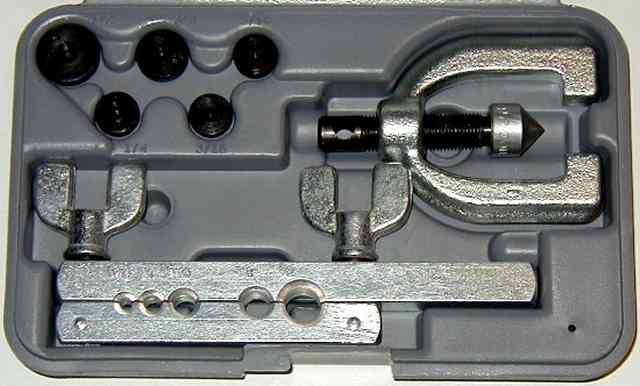
Set the brake line anvil used to make double flares on the face of the clamp. The anvil has two sides. One side is flat, and the other side is raised and fits into the center of the tubing. Set the flat side of the anvil against the clamp next to the brake line.
Adjust the exposed length of the brake line. There is a line on the center of the anvil that indicates how far the end of the brake line needs to be exposed. Adjust the end of the line until it matches up with the line on the anvil.
Tighten the anvil down. This is important. The brake line must not move once you tighten it down.
Place the raised end of the anvil into the center of the brake line.
Place the flaring tool over the anvil and clamp. The anvil has a large screw with a 45-degree angled bit at the end of it.
Tighten the flaring tool so that the end of the line bubbles out. Tighten it until the anvil sits flush against the clamp. Then remove the flaring tool and anvil. You will notice that the line has formed a bubble. If the line has moved at all, you must re-cut the line and start over.
Fit the 45-degree flaring end of the tool against the center of the tubing and tighten the flaring tool once more. As you do this, the bobble will fold over onto itself, forming a 45-degree double flare. The flare must be perfectly true and square, and the perfectly centered for it to hold in your vehicle's braking system.